
Dodge Journey: Standard procedure
BASE BRAKE BLEEDING
NOTE: This bleeding procedure is only for the vehicle's base brakes hydraulic system. For bleeding the antilock brakes hydraulic system. CAUTION: Before removing the master cylinder reservoir cap, thoroughly clean the cap and master cylinder fluid reservoir to prevent dirt and other foreign matter from dropping into the master cylinder fluid reservoir.
NOTE: The following wheel sequence should be used when bleeding the brake hydraulic system. The use of this wheel sequence will ensure adequate removal of all trapped air from the brake hydraulic system.
- Left Rear Wheel
- Right Front Wheel
- Right Rear Wheel
- Left Front Wheel
NOTE: When bleeding the brake system, some air may be trapped in the brake lines far upstream, as much as ten feet from the bleeder screw. Therefore, it is essential to have a fast flow of a large volume of brake fluid when bleeding the brakes to ensure all the air gets out.
Pressure bleeding the brakes is recommended, although the brakes may be manually bled or pressure bled.
Refer to the appropriate following procedure.
PRESSURE BLEEDING PROCEDURE
Follow the pressure bleeder manufacturer's instructions for use of the pressure bleeding equipment.
1. Install Master Cylinder Pressure Bleed Cap, Special Tool 6921, or equivalent on the master cylinder fluid reservoir. Attach the fluid hose from the pressure bleeder to the fitting on Special Tool 6921.
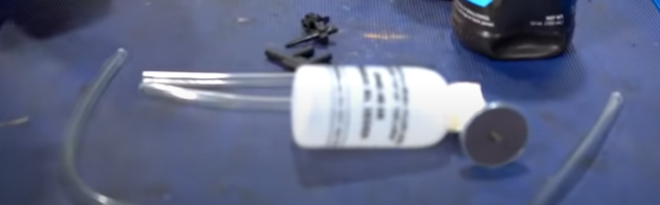
2. Attach a clear plastic hose (1) to the bleeder screw and feed the hose into a clear jar (2) containing enough fresh brake fluid to submerge the end of the hose.
3. Open the bleeder screw at least one full turn or more to obtain a steady stream of brake fluid.
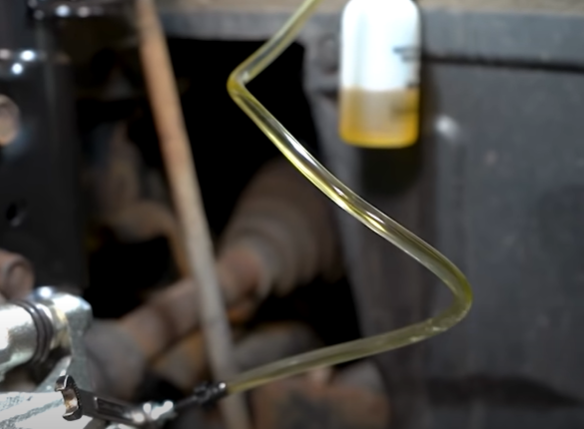
4. After approximately 120-240 ml (4-8 ounces) of fluid have been bled through the brake circuit and an air-free flow is maintained in the clear plastic hose and jar, close the bleeder screw.
5. Repeat this procedure at all the remaining bleeder screws.
6. Check and adjust brake fluid level to the FULL mark on the reservoir.
7. Check brake pedal travel and feel. If pedal travel is excessive or if the pedal feels excessively spongy, some air may still be trapped in the system. Re-bleed the brakes as necessary including the IPB Caliper Brake Bleeding Procedure on the rear calipers as listed below.
8. Test drive the vehicle to verify the brakes are operating properly and pedal feel is correct.
MANUAL BLEEDING PROCEDURE
NOTE: To bleed the brakes manually, the aid of a helper will be required.
1. Attach a clear plastic hose (1) to the bleeder screw and feed the hose into a clear jar (2) containing enough fresh brake fluid to submerge the end of the hose.
2. Have a helper pump the brake pedal three or four times and hold it in the down position.
3. With the pedal in the down position, open the bleeder screw at least one full turn.
4. Once the brake pedal has dropped, close the bleeder screw. After the bleeder screw is closed, release the brake pedal.
5. Repeat the above steps until all trapped air is removed from that wheel circuit (usually four or five times).
6. Bleed the remaining wheel circuits in the same manner until all air is removed from the brake system.
Monitor the fluid level in the master cylinder reservoir to make sure it does not go dry.
7. Check and adjust brake fluid level to the FULL mark.
8. Check brake pedal travel and feel. If pedal travel is excessive or if the pedal feels excessively spongy, some air may still be trapped in the system. Re-bleed the brakes as necessary including the IPB Caliper Brake Bleeding Procedure on the rear calipers as listed below.
9. Test drive the vehicle to verify the brakes are operating properly and pedal feel is correct.
IPB CALIPER BRAKE BLEEDING PROCEDURE
NOTE: The following procedure is normally only necessary if a rear brake caliper has been removed and installed, or replaced.
Perform the following procedure on each rear brake caliper as necessary.
1. Raise and support vehicle.
2. Remove the wheel mounting nuts (3), then the tire and wheel assembly (1).
3. Remove the brake caliper lower guide pin bolt (1).
4. Swing the caliper assembly upward, pivoting off the upper guide pin, until clear of the adapter bracket.
5. Remove the outboard pad (5) from the adapter bracket.
6. Return the caliper back down over the adapter bracket into mounted position and install the lower guide pin bolt finger tight.
7. Slowly pump the brake pedal until the caliper fingers touch the outboard surface of the brake rotor.
Release the pedal.
8. Remove the brake caliper lower guide pin bolt.
9. Swing the caliper assembly upward, pivoting off the upper guide pin, until clear of the adapter bracket.
10. Reinstall the outboard pad in the adapter bracket.
11. Open the caliper bleeder screw at least one full turn.
12. Seat (bottom) the caliper piston in the bore as follows:
- Assemble a 3/8 in. drive ratchet handle and an extension (3).
- Insert the extension through Special Tool 8807-1 (2).
- Place Special Tool 8807-2 (1) on the end of the extension.
- Insert lugs on Special Tool 8807-2 into notches in face of caliper piston (5).
- Thread the screw drive on 8807-1 down until it contacts the top of 8807-2 which is against the caliper piston. Do not over tighten the screw-drive. Damage to the piston can occur.
- Turn 8807-2 with the ratchet, rotating the piston in a clockwise direction until fully seated (bottomed) in the bore. It may be necessary to turn 8807-1 with 8807-2 to start the process of piston retraction.
13. Close the bleeder screw.
14. Return the caliper back down over the adapter bracket into mounted position and install the lower guide pin bolt finger tight.
15. Have a helper pump the brake pedal three or four times and hold it in the down position.
16. With the pedal in the down position, open the bleeder screw at least one full turn and let out fluid and air, if any.
17. Once the brake pedal has dropped, close the bleeder screw. Once the bleeder screw is closed, release the brake pedal.
18. Repeat the previous three steps until all trapped air is removed.
19. Tighten the guide pin bolt to 35 N.m (26 ft. lbs.).
20. Repeat the above procedure on the opposite rear brake caliper as necessary.
21. Check brake pedal travel and feel. If pedal travel is still excessive or if the pedal feels excessively spongy, repeat the entire procedure as necessary.
22. Install the tire and wheel assembly. Install and tighten wheel mounting nuts to 135 N.m (100 ft. lbs.).
23. Lower the vehicle.
24. Test drive the vehicle to verify the brakes are operating properly and pedal feel is correct.
SPECIFICATIONS
BRAKE FASTENER TORQUE

SPECIAL TOOLS
Diagnosis and Testing
Diagnosis and testing COMMON PROBLEM CAUSES The majority of transaxle malfunctions are a result of: Insufficient lubrication Incorrect lubricant Misassembled or damaged internal components Improper operation ...
Removal WARNING: Refer to the applicable warnings and cautions for this system before performing the following operation. Failure to follow the warnings and cautions may result in possible se ...
Insulator, engine mount, left Removal Fig. 228: Belly Pan 1. Disconnect and isolate the negative battery cable. 2. Remove throttle body air inlet hose and air cleaner housing assembly. 3. Remove the belly pan (2). ...
Dodge Journey Owners Manual
- Things to know before starting your vehicle
- Understanding the features of your vehicle
- Understanding your instrument panel
- Starting and operating
- What to do in emergencies
- Maintaining your vehicle
- Maintenance schedules
- If you need consumer assistance
Dodge Journey Service Manual
- Accessories and Equipment
- Differential and Driveline
- Heating & Air Conditioning
- Front Suspension
- Transmission
Help us help you
Add your location so we can help connect you with local events and ticket offerings!

Bleeding Out
How to purge the air out of braking systems..
When a routine brake job is performed (pads and/or shoes, and maybe the rotors/drums, are replaced), the brake system should be bled to remove any residual air in the brake lines. In most cases, very little, if any, air will be present. That likely means that the hydraulic system is not opened to allow air to enter into it.
When a brake system repair requires that the hydraulic system be opened, air will enter the system. This air must be purged. Examples of such repairs include replacing the caliper and/or wheel cylinder, installing a new master system and replacing the ABS accumulator. Failure to purge, or bleed, this air from the hydraulic system can result in a soft, spongy brake pedal feel and reduced braking performance.
ABS Braking Basics
Under normal braking conditions (dry roads, normal speeds), the ABS (antilock brake system) functions the same as a standard base brake system with a diagonally split master cylinder and conventional vacuum assist (also known as power brakes). The brake pedal is pushed and the hydraulic pressure is applied equally at each wheel to stop the vehicle.
ABS mode is activated when the locking tendency for one or more wheels is detected during application of the brakes (meaning one or more wheels will lock when braking on ice or snow). During ABS braking, the hydraulic pressure is not the same; rather, it is regulated to prevent any wheel from locking. The Hydraulic Control Unit (HCU) controls the flow of brake fluid using a series of valves and accumulators. The pressure is regulated by the Integrated Control Unit (ICU). (The HCU is commonly known as the accumulator and is part of the ICU.)
The system can build and release hydraulic pressure at each wheel, depending on the signals generated by the Wheel Speed Sensor (WSS) at each wheel and received at the Antilock Brake Module (ABM). In the days before ABS, this buildup and release of hydraulic pressure was accomplished by the driver pumping the brake pedal pump furiously and repeatedly. The ABS is doing the same thing (pumping the brake pedal), except it is being done much faster than humanly possible.
In a nutshell, that is how the ABS works. And, as is the case with a base brake system (no ABS), air in the HCU will prevent proper, and safe, braking performance. It should be noted, though, when the HCU is replaced, the entire brake system must be bled because the brake system has now been opened and air has been allowed in.
Bleeding the ABS
Brake systems with ABS must be bled as two independent braking systems. The non-ABS portion of the brake system (base system) with ABS should be bled the same way as any non-ABS braking system. The ABS portion of the brake system must be bled separately.
NOTE: During the brake bleeding procedure, be sure that the brake fluid level remains close to the FULL level in the master cylinder fluid reservoir; check the fluid level periodically during the bleeding procedure; add Mopar ® DOT 3 brake fluid as required.
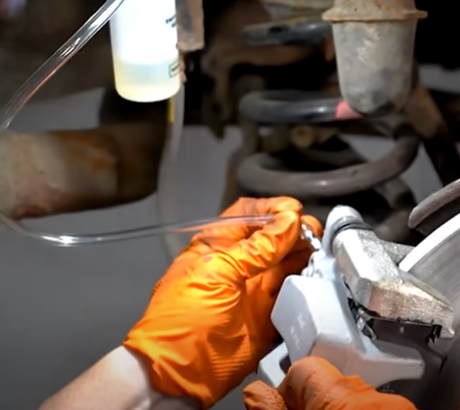
When bleeding the ABS, the following sequence of steps must be followed to ensure complete and adequate bleeding. First, make sure all hydraulic fluid lines are installed and properly torqued. Then, connect the scan tool to the diagnostics (OBDII) connector. Check to be sure there are no stored fault codes for the ABM. Next, attach a clear tube (1) to the bleeder screw on the first wheel to be bled. Submerge the end of the tube in a clear container (2) filled with clean brake fluid, as shown in Figure 1 .
Figure 1 – Tube connected to the bleed screw
Bleed the base brake system. Pressure bleeding is recommended to ensure all air has been purged from the system. Manual bleeding can also be utilized, but additional time will be required. The brakes should be bled in the following sequence:

- Left rear wheel
- Right front wheel
- Right rear wheel
- Left front wheel
If pressure builds when bleeding the base system, attach the fluid hose from the pressure bleeder (2) to the special cap (1) on the master cylinder (3) (see Figure 2 ). Open the bleeder screw at least one full turn to obtain a steady stream of brake fluid. After approximately 4-8 ounces of brake fluid has been bled, close the bleeder screw.
NOTE: Be sure the flow of brake fluid is free of air before closing the bleed screw.
Figure 2 – Pressure bleeder

Check and adjust the brake fluid level to the FULL mark on the reservoir before proceeding to bleed the next wheel. Bleed all four wheels, then check the feel of the brake pedal. It should be solid. If the feel is spongy or soft, air is still present.
If the brakes are being bled manually, have a helper pump the brake pedal three or four times, then hold down the brake pedal. Open the bleeder screw. When the brake pedal drops, close the bleeder screw. Release the brake pedal. Repeat this step until all the air is removed from that wheel circuit. Check and adjust the brake fluid level. Bleed the remaining three wheels in the same manner. Check the feel of the brake pedal. It should be solid. If the feel is spongy or soft, air is still present.
After bleeding the base brake system, bleed the ABS portion of the brake system. For discussion purposes, the specific vehicle being referenced is a 2012 minivan. Check the service manual for the vehicle being repaired for specific scan tool displays. Using the scan tool, select ECU VIEW, then select ABS MISCELLANEOUS FUNCTIONS to access the bleeding procedures. Follow the instructions displayed on the scan tool. When finished bleeding the ABS system, disconnect the scan tool.
NOTE: The ABS section of the brake system cannot be bled without the use of the scan tool; there are no manual procedures for bleeding the HCU.
With the ABS bleeding completed, bleed the base brake system a second time using the same procedures that were outlined for bleeding the base brake system the first time. Once again, check the fluid level in the master cylinder and be sure that it is at the FULL level.
To complete the brake bleeding procedures, test drive the vehicle to check the brake performance. The brakes should operate properly and the brake pedal should feel firm, not soft or spongy. If some sponginess is detected, repeat the bleeding procedure.

Dodge Workshop Service and Repair Manuals
Journey awd v6-3.5l (2009), brakes and traction control brake bleeding / system information / service and repair / base brake bleeding page 5199.

Brake Bleeding: Service and Repair Antilock Brake System Bleeding
ANTILOCK BRAKE SYSTEM BLEEDING
The base brake's hydraulic system must be bled anytime air enters the hydraulic system. The ABS must always be bled anytime it is suspected that the HCU has ingested air.
Brake systems with ABS must be bled as two independent braking systems. The non-ABS portion of the brake system with ABS is to be bled the same as any non-ABS system.
The ABS portion of the brake system must be bled separately. Use the following procedure to properly bleed the brake hydraulic system including the ABS.
NOTE: During the brake bleeding procedure, be sure the brake fluid level remains close to the FULL level in the master cylinder fluid
reservoir. Check the fluid level periodically during the bleeding procedure and add Mopar(R) DOT 3 brake fluid as required.
When bleeding the ABS system, the following bleeding sequence must be followed to insure complete and adequate bleeding.
1. Make sure all hydraulic fluid lines are installed and properly torqued. 2. Connect the scan tool to the diagnostics connector. The diagnostic connector is located under the lower steering column cover to the left of the
steering column.
3. Using the scan tool, check to make sure the ABM does not have any fault codes stored. If it does, clear them.
WARNING: When bleeding the brake system wear safety glasses. A clear bleed tube (1) must be attached to the bleeder screws and submerged
in a clear container filled part way with clean brake fluid (2). Direct the flow of brake fluid away from yourself and the painted surfaces of the vehicle. Brake fluid at high pressure may come out of the bleeder screws when opened.
NOTE: Pressure bleeding is recommended to bleed the base brake system to ensure all air is removed from system. Manual bleeding may also
be used, but additional time is needed to remove all air from system.
4. Bleed the base brake system. See: 5. Using the scan tool, select ECU VIEW, followed by ABS MISCELLANEOUS FUNCTIONS to access bleeding. Follow the instructions
displayed. When finished, disconnect the scan tool and proceed.
6. Bleed the base brake system a second time. Check brake fluid level in the reservoir periodically to prevent emptying, causing air to enter the
hydraulic system.
7. Fill the master cylinder fluid reservoir to the FULL level. 8. Test drive the vehicle to be sure the brakes are operating correctly and that the brake pedal does not feel spongy.
What Is the Correct Order to Bleed Brakes? How to Bleed Brakes
Driving with air in the brake lines can cause a spongy brake pedal or a brake pedal that continues to sink to the floor with the vehicle stopped. If you want to know the correct order to bleed the brakes in your car, how to bleed the brakes correctly by yourself or with an assistant, or want to know more about the process of bleeding your brakes , this guide and video has tips from one of our expert mechanics on the right way to bleed your brakes, when you should, and why it’s necessary.
Do I Need to Bleed My Brakes?

Air will reduce pressure in the braking system by causing the brake fluid to reach its boiling point faster and overheat, reducing your ability to brake and making it unsafe to drive. Pressure will keep the system at a moderate temperature and is necessary for the braking system to work, so you don’t want air in the braking system.
If I Only Replace the Front Brakes, Do I Need to Bleed the Rear?
We recommend bleeding the rear, even if you’ve only replaced the front brakes. Leaving old fluid in the braking system means there will be a difference in temperature and boiling point for the fluid traveling to the rear and front. The old brake fluid will break down, so for better performance, we recommend taking care of the entire system at once.
When Should I Bleed My Brakes?
Bleed your brakes every 50,000 miles or sooner if you frequently drive.
You should bleed your brakes if the fluid has not been changed for over 50,000 miles. If you drive the vehicle often and it makes a lot of frequent stops, you might want to flush the brake fluid before this number.
Bleed the Brakes When You Replace Brake Parts
You also want to bleed the brakes if the brake fluid is old, contaminated, or leaking, or if you’re replacing a part of the braking system, like the master cylinder , brake lines , brake caliper , or brake pads and rotor . Any incident where air may have entered the system is a time where you want to bleed the brakes.
Bleed the Brakes If You Notice a Spongy or Squishy Brake Pedal
If the brake pedal sinks to the floor or doesn’t stay firm with the vehicle at a stop, there might be air in the system that’s affecting your vehicle’s ability to brake.
What Is the Correct Order to Bleed Brakes?

The Correct Order to Bleed Your Brakes Depends on Your Vehicle, But Generally from the Rear to the Front
The correct order to bleed the brakes on your car varies depending on the brake system. There are different ways to bleed brake systems and it’s not as easy as it seems. For example, if you’re working on a Corvette where the caliper has 6 pistons and 2 bleeder screws on each caliper, you’ll have to do the inner and outer parts, then go to front, then the rear, and then the front again. Following a different process than the one that works with your braking system could cause problems like overheating or smoking brakes .
Most cars, however, have a system where the master cylinder is at the front driver side under the hood, and where one set of brake lines connect to the front wheels and one set connects to the rear wheels. The process usually involves bleeding from the brake screw on the brake caliper by beginning at the left rear wheel, then bleeding the right rear wheel, then the left front wheel, and then the right front wheel.
You want to go to the shortest path of pressure last, so you want to start at the line that’s furthest from the master cylinder. This is because as the air is pushed out from the furthest end, the system will compensate on the other side, which is the shortest distance and the last to be bled.
To find out what order to bleed your brakes in, find the master cylinder and follow the brake lines. Follow the brake lines and if you notice two lines directed to the rear, which is common, there is one line for each side, and you’ll need to follow the common process of starting at the RR, then LR, then RF, and then LF to bleed your brakes. You can follow the brake lines directly on your car or find a diagram online.

The brake lines may be coated or open to the elements and prone to rust depending on the year, make, and model.
If you see a junction and decide to replace part of the brake line with a new union without replacing the rest of the lines, you may not be able to and we do not recommend it. It is illegal to do this in some states, you can fail a state inspection and it’s also dangerous. We recommend replacing the entire brake line.
If you’re planning to install new brake lines, aftermarket brake lines are easier to bend and install. Just keep them away from moving parts and fasten them down. You don’t want the lines vibrating or rubbing against metal.
Read more about brake lines
If you’re replacing the brake caliper, make sure it has copper washers. If it doesn’t, we recommend buying copper washers. Grooves on top of banjo bolts keep the washers from moving when bleeding since it’s under a lot of pressure and you don’t want it to move, but these grooves also make the washers unusable as they will warp the old washer, it won’t sit right, and this will cause brake fluid to seep out.
How to Bleed Your Brakes
Steps on how to bleed your brakes
To check the brakes, loosen the lug nuts with the tire on the ground, raise the vehicle and secure it on a jack stand , and then remove the tire.
Find out the correct order to bleed your brakes. As mentioned, if you have two brake lines going to rear, there will be one line directed to each tire. This means you’ll be starting at the right rear tire, or the tire at the rear on the passenger side, which is the brake line farthest from the master cylinder. Remove the boot from the bleeder screw and grab an 8 mm or 5/16″ wrench to loosen the screw.
Slowly press the brake pedal to the floor, and then retract it at a steady pace. Repeat this 3 times. Any air should remove from the lines and be replaced with brake fluid.
Go to next wheel, which in this case is the right rear wheel. Before working on the next wheel, check the brake fluid level in the brake master cylinder . Top off the cylinder if needed, and check it before moving to the next wheel. If you do need to add fluid, remember to put the cover back on the brake master cylinder.
After you’ve bled the brakes, with the vehicle off press the brake pedal, which should feel very firm. Start up the vehicle, which will test brake booster. The brake pedal should sink normally with the car started.
Clean the brake caliper with brake parts cleaner to remove any brake fluid that might’ve leaked.
Be sure to torque the wheels to specification before road testing the brakes. During the test, feel where the pedal holds, sit for a few minutes and make sure it’s not sinking or slowly moving down to the floor. If it is, there is still air in the system. Find a safe area and simulate a panic stop to see how well the brakes work.

Now That You’ve Learned the Correct Order to Bleed Your Brakes, Watch More DIY Tips
Our how-to videos will empower you to do your own car repairs. You’ll learn how to diagnose and replace parts by following the steps and tips from our expert mechanics.
Read More Tips Beyond How to Bleed the Brakes
- Bad Lower Ball Joint Symptoms? How to Check Front Lower Ball Joints with a Dial Indicator
- Car Door Rattles? How to Check for a Loose Window
- Top 10 Videos of 2021
- Common 4.0 Liter Jeep Engine Problems on the 1984 to 2001 Cherokee
Shop Parts and Tools
- Brakes & Wheel Bearing
- Steering & Suspension
- Headlights & Lighting
- Heating & Cooling
- Fuel & Emissions

One thought to “What Is the Correct Order to Bleed Brakes? How to Bleed Brakes”
Good information! “Wheel farthest from the master and work toward the master cylinder.
Leave a Reply Cancel reply
Your email address will not be published. Required fields are marked *
Save my name, email, and website in this browser for the next time I comment.
- Remember me Not recommended on shared computers
Forgot your password?
- Brake, Chassis & Suspension
Manual Brake Bleeding Question

By Journey_SeXT July 14, 2013 in Brake, Chassis & Suspension
- Reply to this topic
- Start new topic
Recommended Posts
Journey_sext.
I was hoping that someone in this forum can help me with this question. I would like to at some point manually bleed the brakes on my 2011 DJ but the only thing that holds me back from doing this job is in the Chilton Manual for 2009 Journey (no manuals for other years after available) there is ABS bleeding which requires the use of a scan tool. They do however have a manual bleeding procedure which is the same as any other vehicle but I am not sure if this is okay to do with the ABS system. I don't want to do the bleeding to find out I have a soft pedal because of air in the ABS system. I am really trying to avoid it being towed to the dealer for them to use the scan tool to complete the job......very embarrassing if that were to happen.
My question is......has anyone manually bled the brakes on their Journey yet? If so, could you please share your experience as I won't start this job if it requires the use of a scan tool.
Link to comment
Share on other sites.

Haven't done my Journey yet, but, have done plenty of jobs on other MOPARs with the ABS system. Unless you dismantle, for repair, the ABS system, there is no need to bleed it unless you've used it a lot (not likely for most of us) and you have a boatload of air in the fluid (also not likely). Just ignore the ABS bleeding and do the "normal" manual brake bleeding as there is a very small likelihoood of you having introduced any air into its system. The ABS system only cycles brake fluid when it is used and usually doesn't take up air unless you've run the brake system virtually dry or you've dismantled for an ABS system type repair.
No need for the scan tool if you use the bleeders on the calipers and a suction device or the "pedal pushing" system.

Join the conversation
You can post now and register later. If you have an account, sign in now to post with your account. Note: Your post will require moderator approval before it will be visible.

× Pasted as rich text. Paste as plain text instead
Only 75 emoji are allowed.
× Your link has been automatically embedded. Display as a link instead
× Your previous content has been restored. Clear editor
× You cannot paste images directly. Upload or insert images from URL.
- Insert image from URL
- Submit Reply
- Existing user? Sign In
More Forum Apps
- Online Users
- Leaderboard
|| Forum Activity ||
- All Activity
- Create New...
Brake Bleeding Sequence: (The Right Order, Tools, Risks & More)

You may find yourself pondering, perhaps even searching for “Brake Bleeding Sequence”, haven’t you? Well, search no more. This article aims to offer a detailed guide on the correct procedures for brake bleeding, saving you from potential mistakes.
So, what can you expect from the brake bleeding sequence? This article will walk you through the step-by-step process, explaining the importance of the correct sequence to ensure effective bleeding. It highlights the critical points to watch out for, helping you avoid common errors that could compromise your braking system’s performance.
Why read this article? Having a thorough understanding of the brake bleeding sequence is crucial to maintaining the safety and performance of your vehicle.
Table of Contents
What is Brake Bleeding and Why it is Necessary
Brake bleeding is the process of removing air bubbles from the brake fluid in a vehicle’s brake system. It’s essential to ensure optimal brake performance and prevent potential brake failure.
- Definition and Importance of Brake Bleeding
How Air Enters the Brake System
Dangers of air in the brake system, benefits of regular brake bleeding, definition and importance.
Brake bleeding is a maintenance procedure that involves removing air from the brake lines of a vehicle. The brake system operates based on hydraulic pressure. When you press the brake pedal, it pushes brake fluid through the lines, creating pressure that activates the brake pads or shoes.
If air gets trapped in these lines, it can compress, unlike the brake fluid, leading to decreased hydraulic pressure. This can result in a spongy brake pedal feel and reduced braking efficiency.
- Key Point: Brake bleeding ensures that the brake system is free from air bubbles, maintaining the integrity of the hydraulic pressure.
Air can find its way into the brake system in several ways. One common method is during brake fluid replacement or when parts of the brake system are serviced or replaced. If not done correctly, air can get trapped.
Additionally, over time, the brake fluid can absorb moisture from the environment, leading to a decrease in its boiling point. When the fluid boils, especially under hard braking conditions, it can create air bubbles.
- Key Point: Regular maintenance and careful servicing are crucial to prevent air from entering the brake system.
Air bubbles in the brake lines can lead to a range of issues. The most noticeable is a spongy or soft brake pedal. In severe cases, the brake pedal might go all the way to the floor before any significant braking action occurs.
This can drastically increase stopping distances, posing a significant safety risk. Furthermore, the presence of air can lead to corrosion within the brake lines, as air can carry moisture, which is detrimental to the brake system’s components.
- Key Point: Air in the brake system not only affects performance but can also lead to component damage and increased safety risks.
Regular brake bleeding ensures that your vehicle’s brake system remains in optimal condition. It ensures a consistent brake pedal feel, maximizes stopping power, and reduces the risk of brake failure.
Furthermore, by regularly checking and bleeding the brakes, you can also identify potential issues like leaks or worn-out components before they become major problems.
- Key Point: Regular brake bleeding is a preventive measure that ensures optimal braking performance and extends the lifespan of the brake system components.
Brake Bleeding Sequence: An In-Depth Look
The brake bleeding sequence is a crucial process in ensuring optimal brake system performance. Following the correct order is essential to remove all air bubbles from the brake lines and prevent potential brake failure.
Importance of the Brake Bleeding Sequence
The correct order for bleeding brakes, common mistakes and how to avoid them, tools and equipment needed, safety precautions.
Brake systems operate based on hydraulic pressure. When air enters the brake lines, it can compress, unlike brake fluid, leading to decreased hydraulic pressure. This can result in a spongy brake pedal feel, reduced braking efficiency, and even brake failure in extreme cases.
Ensuring that the brake bleeding sequence is correctly followed is crucial to maintain the integrity of the brake system and ensure safe vehicle operation.
- Key Point: The brake bleeding sequence is vital for maintaining optimal brake system performance and ensuring vehicle safety.
The correct order for bleeding brakes typically depends on the vehicle’s design, but a general rule of thumb is to start with the brake furthest from the master cylinder and work your way closer. For most vehicles with a left-hand drive:
- Right Rear Brake
- Left Rear Brake
- Right Front Brake
- Left Front Brake
For vehicles with right-hand drive, the sequence may be reversed. Always refer to the vehicle’s service manual for specific instructions. It’s essential to ensure that the master cylinder doesn’t run dry during the process. Always top it up with the correct brake fluid as specified in the vehicle’s manual.
- Key Point: Always start bleeding from the brake furthest from the master cylinder, ensuring the master cylinder doesn’t run dry during the process.
Several common mistakes can occur during the brake bleeding process:
- Allowing the Master Cylinder to Run Dry: This can introduce more air into the system. Always monitor the fluid level and top up as necessary.
- Not Using the Correct Brake Fluid: Different vehicles require different types of brake fluid. Using the wrong type can damage the brake system.
- Not Following the Correct Sequence: As mentioned, always start with the brake furthest from the master cylinder.
- Not Securing the Bleed Screw: After bleeding each brake, ensure the bleed screw is securely tightened to prevent air from re-entering the system.
- Key Point: Avoid common mistakes by regularly checking the master cylinder fluid level, using the correct brake fluid, following the right sequence, and ensuring all bleed screws are securely tightened.
To bleed brakes effectively, you’ll need:
- A Brake Bleeder Kit: This typically includes a container and hoses to catch the old brake fluid.
- Correct Brake Fluid: Always use the type specified in the vehicle’s manual.
- Wrench: For opening and closing the bleed screws.
- Clear Tubing: To see the air bubbles as they exit the system.
- A Helper: Someone to press the brake pedal as you open and close the bleed screws can make the process smoother.
- Key Point: Having the right tools and equipment, including a brake bleeder kit, the correct brake fluid, a wrench, clear tubing, and a helper, can make the brake bleeding process efficient and effective.
Brake fluid is corrosive and can damage vehicle paint and other surfaces. Always wear gloves and safety glasses when working with brake fluid. If it comes into contact with any surface, clean it immediately with water.
Work in a well-ventilated area and avoid inhaling brake fluid fumes. Lastly, always dispose of old brake fluid at a hazardous waste facility or recycling center.
- Key Point: Safety is paramount when working with brake fluid. Wear protective equipment, work in a well-ventilated area, and dispose of old fluid properly.
Can You Bleed Brakes Out of Order?
While it’s technically possible to bleed brakes out of the recommended order, doing so can lead to inefficient air removal and compromised brake performance.
The Logic Behind the Recommended Order
Risks of bleeding out of order, potential scenarios for deviating, best practices.
The primary reason for the recommended brake bleeding sequence is to ensure the most efficient removal of air from the brake lines.
Starting with the brake furthest from the master cylinder ensures that air travels the shortest possible distance to exit the system. This minimizes the chances of air getting trapped in the lines.
- Key Point: The recommended brake bleeding sequence is designed for the most efficient removal of air from the system.
Bleeding brakes out of order can lead to air pockets remaining in the brake lines. These pockets can compromise the hydraulic pressure of the brake system, leading to a spongy brake pedal feel and reduced braking efficiency. In some cases, it might even necessitate re-bleeding the brakes.
- Key Point: Bleeding brakes out of order can trap air in the system, compromising brake performance.
While it’s generally best to follow the recommended sequence, there might be specific scenarios where deviating is considered. For instance, if only one brake line has been repaired or replaced, it might be bled individually. However, even in such cases, it’s crucial to monitor brake performance closely.
- Key Point: There are limited scenarios where deviating from the sequence might be considered, but caution is advised.
Regardless of the order, always ensure that the master cylinder doesn’t run dry during the bleeding process. Use the correct brake fluid, and ensure all bleed screws are securely tightened after the process. If in doubt, always refer to the vehicle’s service manual or consult a professional.
- Key Point: Always prioritize the integrity of the brake system, using the correct fluid and tools, and following best practices.
Can You Bleed All 4 Brakes at Once?
Bleeding all four brakes simultaneously is not standard practice and can lead to inefficiencies and potential errors in the bleeding process.
The Traditional Bleeding Process
Challenges with simultaneous bleeding, potential benefits, safety and efficiency concerns.
Traditionally, brakes are bled one at a time, starting with the brake furthest from the master cylinder. This methodical approach ensures that air is effectively removed from each brake line, minimizing the risk of air pockets and ensuring optimal brake performance.
- Key Point: The traditional method of bleeding breaks one at a time is proven and effective.
Bleeding all brakes at once can introduce several challenges. It requires multiple helpers, and synchronized actions, and can increase the risk of the master cylinder running dry. Additionally, it’s harder to identify which brake line might still have air trapped in it.
- Key Point: Simultaneous bleeding introduces complexities and increases the risk of errors.
While not standard, some believe simultaneous bleeding can save time, especially in a professional setting with experienced technicians and specialized equipment. However, the potential time savings must be weighed against the risks.
- Key Point: While there might be potential time savings, the risks often outweigh the benefits.
Brake performance is critical for vehicle safety. Any method that could compromise the integrity of the brake system should be approached with caution. If considering simultaneous bleeding, it’s essential to have the right equipment and experienced technicians.
- Key Point: Safety should always be the top priority when working on brake systems.
How Often Should Brakes Be Bled?
Brakes should be bled whenever the brake fluid is contaminated or after certain maintenance tasks. As a general guideline, every 2-3 years is a common recommendation.
Reasons for Bleeding Brakes
Brake fluid lifespan, signs of contaminated brake fluid, maintenance and service intervals.
Brakes might need bleeding for several reasons, including air entering the brake lines, moisture contamination, or after repairs involving the brake lines. Regular maintenance can also necessitate brake bleeding to ensure optimal performance.
- Key Point: Brake bleeding can be required for various reasons, including maintenance, repairs, or contamination.
Brake fluid is hygroscopic, meaning it absorbs moisture over time. As moisture content increases, the fluid’s boiling point decreases, compromising performance. Most manufacturers recommend replacing brake fluid every 2-3 years, though this can vary based on driving conditions and vehicle specifics.
- Key Point: Brake fluid typically needs replacement every 2-3 years due to its hygroscopic nature.
Contaminated brake fluid can lead to reduced braking efficiency. Signs include a spongy brake pedal, reduced brake performance, or discolored brake fluid. Regularly checking the brake fluid can help identify contamination early.
- Key Point: Monitor for signs of contamination, such as a spongy pedal or discolored fluid, to determine when bleeding is necessary.
Always refer to the vehicle’s service manual for specific maintenance intervals. While 2-3 years is a general guideline, some vehicles might have different recommendations based on their design and usage.
- Key Point: Always consult the vehicle’s service manual for specific brake bleeding intervals.
What Are the Signs That Brakes Need to Be Bled?
Brakes might need bleeding if there are signs of air or moisture in the brake lines, leading to compromised performance.
Spongy Brake Pedal
Reduced braking efficiency, discolored brake fluid, noise when braking.
One of the most common signs that brakes need bleeding is a spongy or soft brake pedal. This indicates that air has entered the brake lines, reducing the hydraulic pressure and compromising performance.
- Key Point: A spongy brake pedal often indicates air in the brake lines.
If the vehicle takes longer to stop or the brakes don’t feel as responsive, it might indicate that the brake fluid is contaminated. Moisture in the brake fluid can reduce its boiling point, leading to vapor lock and reduced braking efficiency.
- Key Point: Reduced braking efficiency can be a sign of moisture-contaminated brake fluid, necessitating bleeding.
Brake fluid should be clear to amber in color. Over time, as it absorbs moisture and contaminants, it can turn dark or murky. Discolored brake fluid is a clear indication that the system needs bleeding and the fluid should be replaced.
- Key Point: Dark or murky brake fluid is a sign of contamination and indicates the need for bleeding.
While noises during braking can be attributed to various issues, a hissing or air-like sound can indicate air in the brake lines. This sound, especially if accompanied by a spongy brake pedal, suggests that the brakes need bleeding.
- Key Point: A hissing sound during braking, combined with other symptoms, can indicate the presence of air in the brake lines.
Brake Bleeding Order: Not As Straight Forward As It Used To Be >> Check out the video below:
Related Articles
Read More >> 12 Clever Tricks To Bleeding Brakes Like A Pro!
Read More >> How Long Does It Take To Change Brake Fluid? Exact time!
Read More >> Temporary Fix For Stuck Brake Caliper. Step-by-Step Guide!
Read more >> 12 Clever Tricks To Bleed Your Brakes Like A Pro!
Read more >> Bleeding Brakes? These 12 Mistakes Cost You Money and Safety
Read more >> Temporary Fix For Stuck Brake Caliper. Step-by-Step Guide!
Read more >> Water In Brake Fluid? 15 Most Common Symptoms!
Read more >> 10 Best Methods For Temporary Fix Grinding Brakes!
Read more >> How Long Does It Take For Brake Fluid To Circulate?
Understanding the brake bleeding sequence and its application is crucial for anyone who wishes to maintain their vehicle’s braking system.
Whether you’re a DIY enthusiast or prefer professional service, knowing the brake bleeding process, including common mistakes to avoid, can help ensure optimal brake performance and safety.
While the task may seem daunting initially, this guide provides you with a comprehensive approach to understanding and executing brake bleeding effectively.
Reference Source:
https://haynes.com/en-gb/
https://www.reddit.com/r/MechanicAdvice/
https://www.reddit.com/r/Cartalk/
John is an automotive technician, technical writer. He has held a lifelong passion for vehicles.
Recent Posts
Tricks To Bleeding Brakes (12 Clever Tricks Like A Pro!)
Ever found yourself scouring the internet, searching for 'Tricks To Bleeding Brakes'? You're not alone. Many vehicle owners want to master this necessary skill for car maintenance, and you've come to...
Common Mistakes When Bleeding Brakes? (12 Mistakes To Avoid)
You may ask yourself, perhaps even searching for "Common Mistakes When Bleeding Brakes?", haven't you? Well, search no more. This article is geared towards shedding light on this very subject,...

- Forum Listing
- Marketplace
- Advanced Search
- Dodge Truck, SUV and Van Forums
- Dodge Dakota 2nd Gen (97 - 04) Forums
- 2G Dodge Dakota - Tire/Wheel/Susp Talk
Brake Bleeding procedure question...
- Add to quote
Hi everyone, I just registered to this site to look for some answers and perhaps to learn more about my truck. I have a 2003 Dakota SXT and I did a complete tune up this weekend just to keep running smooth. Well by the time I got to my brakes one of my calipers (front psgr side) the push rods were cracked and shattered into pieces when I pulled it off. I found one in Pep Boys and got it back together and bleed my whole system. Now I understand that if solid fluid comes out with no bubbles it should be good to go. I did it for all four wheels and my brake pedal still goes all the way down. I read a few threads related to my situation and tried their procedures but still have the same results. Today, talking to a few of my friends they told me that I because I have an ABS brake system that I should have taken the fuse for the ABS system off before bleeding the brakes. Non of the threads say anything about a fuse needing to be taken out. I have been trying over and over to bleed my brakes and still have the same results. I want to know if there is a special step that missed. Any information that can help me get my truck back on the road will be greatly appreciated. Sorry for the long post but I'm getting desperate and don't want to take to the dealership if I can do it myself.
goes to the floor when the truck is running? try it when its not running. with a few pumps does the pedal firm up? if not check for a leak somewhere. If the pedal is hard and drops to the floor once you start the truck my guess would be it is the master cylinder. did you take the cap off when you pressed the calipers as you started the job?
Yep, it goes to the floor only when running. Once is off is hard again. And no to question number 2. I didn't open the reservoir cap until it was time bleed the system. Is it normal to hear a hissing sound when you press the brakes down? I'm thinking is a vacuum sound...? If is the the master cylinder, is it salvageable? or should I need to buy a new one? Any info is appreciated.

you should be able to rebuild the master cylinder relatively easy but you nee to watch for tolerances. the hissing sound may be from a bypass in the master cylinder. other than that I'm no help to ya
www.rockauto.com has MC for as low as 61 bucks, why bother rebuilding, just replace it.
Did your brakes have this trouble before you "fixed" them? If not, it's something you did. Seems dak have quite a few brake problems. I'm still dealing with a front caliper problem myself. Good Luck
No, I didn't have this problem before. However, I've learned that you need patience because it took a lot of brake fluid and plenty of bleeding over and over to get all the air out. I assumed that since I left the line without being plugged that a lot of air went in. Although I have brakes again, they are a little spongy. I will be doing another bleeding tomorrow and see how it goes...
I seriously can not tell you how many times I buy new parts and think they are perfect to find out they are messed up too

brakes Sounds like you have a defective master cylinder.But check ALL the lines for leakes all over if the pedal bottoms out!Then go to auto zone and let them pull up the brake diagram and ask for help! they are happy to help and will even hook you up to a computer for free to find problems!!Stay away from pep boys!I worked at a chevy dealership next to a pep boys and we got all their falures to FIX!!!!!!!!!!!!!!!!!!! Mylestone
a better fix Buy a reverse bleed one man system(phoenix systems)for the most complete bleed!Not cheep$$$$$$$$$$$$But the BEST AND COMPLETE BLEED! Good luck Mylestone

Back-bleeding is the best way to do it! Feeds new fluid from the caliper to the reservoir. Start at the caliper furthest away from the mastercylinder. Forces all of the air back up rather than down (Which is does not like). Ya not cheap but well worth the money once you have tried it.
Thanks. The truck is back on the road and although it feels very little spongy, I will feel more confortable if I knew that all air is out. But right now I can't tell with the exception of what I mentioned earlier. I will definitely look into it. Do you guys know of any stores that might sell it (i.e. NAPA, Advance Auto, etc)?
May be a dumb question but do you bleed the brakes with the truck on or off? Haynes said off and a video it was off too but the way you guys talk make it sound like it needs to be on... Thanks!
Always Do the brake bleeding with engine off.Most important thing spray nipples with penetrating fluid to loosen them not snap the bleeders off!They strip the nut head easily too!Be careful or you will have to replace calipers or cylinders myles
Hello Phoenix systems sells a reverse bleeder that works unbelievably!! I bought one that is a pistol type that with a special brake nipple connector that pumps the fluid into the bleed nipple at the caliper and then pumps the new brake fluid backwards to the master cylinder eliminating air bubbles in the whole brake system!! And it WORKS!!!!Air tends to rise not go down! But not cheaply they start at $70 but are worth there weight in gold when you hit the brakes and they don't feel spongy and really stop you!! They also bleed engine hydraulic clutches when all other bleeders fail .So step up to the plate and hit a home run with Phoenix systems reverse brake bleeder!!! It saved my 1997 B2500 Van after I replaced all the calipers,master cylinder,lines and Pistons in the back brake assembly!!Plus it gets Great reviews and I also highly recommend it as it saved me tons of trying to get air out of my abs brake System!!!!!!!!!!!!!!! Good luck you won't be disappointed!! Myles

Old post but maybe helpfull to somebody Here's what my 02 shop manual says about bleedind ABS brake system. STANDARD PROCEDURE - BLEEDING ABS BRAKE SYSTEM ABS system bleeding requires conventional bleeding methods plus use of the DRB scan tool. The procedure involves performing a base brake bleeding, followed by use of the scan tool to cycle and bleed the HCU pump and solenoids. A second base brake bleeding procedure is then required to remove any air remaining in the system. (1) Perform base brake bleeding. (Refer to 5 - BRAKES - STANDARD PROCEDURE). (2) Connect scan tool to the Data Link Connector. (3) Select ANTILOCK BRAKES, followed by MISCELLANEOUS, then BLEED BRAKES. Follow the instructions displayed. When scan tool displays TEST COMPLETE, disconnect scan tool and proceed. (4) Perform base brake bleeding a second time. (Refer to 5 - BRAKES - STANDARD PROCEDURE). (5) Top off master cylinder fluid level and verify proper brake operation before moving vehicle
Hello What is a dbr scanner and where do I buy,rent or borrow one.I have had issues with my abs for over a year.I have replaced everything except the brake Booster.The electronic brake module too but I have always had a abs light so this scan might bring my abs pump assembly back to life again??? Super!! E-mail me with the info PLEASE [email protected]
- ?
- 291.5K members
Top Contributors this Month


- Forum Listing
- Marketplace
- Advanced Search
- General, Performance, and Technical
- General Challenger Discussion
- How-To, DIY and Tips & Tricks
HELP!!! Brake Bleeding

- Add to quote
I just replaced my rotors and brake lines. I'm trying to bleed the brakes but it is just not happening. No matter what I try I can't seem to get any flow. I'm still working on the right rear caliper. My clear tube does not have any fluid in it except a small bit. no flow at all. Any suggestions?

- Right rear wheel
- Left rear wheel
- Right front wheel
- Left front wheel
Thanks speedy. I have that tho. I have bled the drivers/left side of the car. The passenger/right side has no flow at all. I do not know what to do.

Did you ever figure out the problem? I am experiencing the same problem on my 2013 dodge charger pursuit after upgrading to BR9 police brakes

I powder coated mine and capped them and still got air in. When the computer goes through its cycle you will know it purges the abs pump and you have to have someone push on the pedal and crack certain brake bleeders. Took me a while to get the air out Sent from my iPhone using Tapatalk

the better way is with a pressure bleeder - I did another Challenger with a vacuum bleeder and it was awful to do it that way. I've just purchased a pressure bleeder and scan tool - so when the next service interval comes up > I can do my own going forward. (I change out fluid and bleed brakes every two years) I also purchased an electronic tester that detects moisture content in the fluid. Once you're @ 2%, its time to change the fluid - boiling point is reduced and moisture in the fluid will corrode brake system parts.
Can you send me a link to a good pressure bleeder? Pressure bleeder means hooking it up at the reservoir and basically pushing from the top right? as opposed to the vaccum that pulls from the bleeder?

I use a Motive Power Bleeder as well and it makes it so simple to do by yourself! I use it frequently doing a full flush at least twice a year and bleeds before/after any road course track days. Normal drivers would probably be fine sticking to the factory interval. Anyhow, having a helper seems to be the cheapest way to go about this since it seems it was already proven effective at getting the fluid flowing out. Keep it flowing until there's no more air bubbles and it looks like the fresh fluid you put in the reservoir! I'm not sure on the exact criteria of when to do a forced ABS bleed, but if you think there's a chance air reached the ABS unit it seems prudent. Especially if the fronts were serviced since they shorter hardlines to the ABS pump. If I left a valve or line open for over an hour, I'd certainly err on the side of caution and do an automated ABS bleed. I used an OBDLink MX device and the AlfaOBD app to complete this task.
I bought a OBD-II scan tool (found info on which models in other CT posts) so I'll be able to cycle the ABS system as well as troubleshoot anyone else's car if they have bad ABS sensors, which seem to crop up from time to time. years back - I bought a more basic OBD-II scanner as the versions for ABS and SRS systems cost quite a bit more then. Now it was time to update once I had better information on what models would work for my needs.
Hey I just wanted to update everyone and say thanks for the help as I finished it last week and it seems all good now. I bleed the brakes the old fashion way, having my buddy pump the brakes and that worked perfectly. I also used the tablet code reader to cycle the abs a few times and got a few more air bubbles out. Everything works well and if I had to do it all again I could easily get it done in under a day. Thanks for all the help !

Here is a another answer to this problem, I have a 2014 Dodge Challenger 5.7 I did a Br9 upgrade and I was having this same problem I could not get a full peddle and I thought what every body else thought it was air in the lines I did everything from pressure bleeding to bleeding with vaccum and nothing worked . I got mad and took it to our Dodge garage and they called me later and told me that the brake pads were uneven causing the soft peddle and of course these pads were brand new powerstop extreme pads right out of the box well I thought he was full of BS . I had them put new factory pads on it and bingo full peddle who would have thought so if your wits end check you pads make sure they are even in thickness.
- ?
- 95.5K members
Top Contributors this Month


- Forum Listing
- Marketplace
- Advanced Search
- Dodge Charger Discussion
- Wheels/Tires/Brakes/Suspension
brake bleeding sequence
- Add to quote
i have a 06 dodge charger RT 5.7L hemi I going to replace the rear calipers and I was wondering what’s the brake bleeding sequence? Can someone let me know thank you

- Left rear wheel.
- Right front wheel.
- Right rear wheel.
- Left front wheel.
Edit, Base is the master cyl, calipers, and lines, ABS is the pump done via a scan tool. There are various on the market. Service manual prefers the pressure bleeder method for the Base. I have done the scan tool for ABS bleed. Its pumped out through the right front caliper.

Not to be pedantic, but you don’t have to bleed the system if you don’t allow any air to enter it, and air won’t enter the system if the brake pedal is not depressed and released while the system is open. In other words, it’s easily possible to replace the rear calipers and not have to bleed all 4 corners. Plug up the brake line while the caliper is off, and once you get the replacement caliper on, bleed that corner to fill up caliper. Do the same for the other side, and you’re done.
- ?
- 105.8K members
Top Contributors this Month


- Forum Listing
- Marketplace
- Advanced Search
- Dodge Challenger Forum - Help Zone
- Dodge Challenger Knowledge Base
- Request Forum
Looking for Brake Bleeding Instructions

- Add to quote
Looking for Brake Bleeding Instructions for 2010 RT/Auto Thanks

ANTILOCK BRAKE SYSTEM BLEEDING The base brake's hydraulic system must be bled anytime air enters the hydraulic system. The ABS must always be bled anytime it is suspected that the HCU has ingested air. Brake systems with ABS must be bled as two independent braking systems. The non-ABS portion of the brake system with ABS is to be bled the same as any non-ABS system. The ABS portion of the brake system must be bled separately. Use the following procedure to properly bleed the brake hydraulic system including the ABS. NOTE: During the brake bleeding procedure, be sure the brake fluid level remains close to the FULL level in the master cylinder fluid reservoir. Check the fluid level periodically during the bleeding procedure and add Mopar® DOT 3 brake fluid as required. BLEEDING When bleeding the ABS system, the following bleeding sequence must be followed to insure complete and adequate bleeding. 1.Make sure all hydraulic fluid lines are installed and properly torqued. 2.Connect the scan tool to the diagnostics connector. The diagnostic connector is located under the lower steering column cover to the left of the steering column. 3.Using the scan tool, check to make sure the ABM does not have any fault codes stored. If it does, clear them. WARNING: When bleeding the brake system wear safety glasses. A clear bleed tube (1) must be attached to the bleeder screws and submerged in a clear container filled part way with clean brake fluid (2). Direct the flow of brake fluid away from yourself and the painted surfaces of the vehicle. Brake fluid at high pressure may come out of the bleeder screws when opened. NOTE: Pressure bleeding is recommended to bleed the base brake system to ensure all air is removed from system. Manual bleeding may also be used, but additional time is needed to remove all air from system. 4.Bleed the base brake system. (Refer to 05 - Brakes - Standard Procedure) 5.Using the scan tool, select ECU VIEW, followed by ABS MISCELLANEOUS FUNCTIONS to access bleeding. Follow the instructions displayed. When finished, disconnect the scan tool and proceed. 6.Bleed the base brake system a second time. Check brake fluid level in the reservoir periodically to prevent emptying, causing air to enter the hydraulic system. 7.Fill the master cylinder fluid reservoir (1) to the MAX level. 8.Test drive the vehicle to be sure the brakes are operating correctly and that the brake pedal does not feel spongy.

Great job on the instructions Tom!!!I want to have my calipers powdered coated and knew i would have to bleed them.Now if i do them i will bring them in to have them blead, i was worried about the abs system?

So u have to use the Starscan tool to bleed your brakes. U cant do it at home.

I did mine at home. I didn't need to use the Predator to clear any codes either ....... nothing showed on the EVIC, and I had to bleed about a cup of air out of my brakes. Pedal is firm, no issues with the ABS, and no codes. I love it when a plan comes together.
- ?
- 40.7K members
Top Contributors this Month

IMAGES
VIDEO
COMMENTS
Attach a clear plastic hose (1) to the bleeder screw and feed the hose into a clear jar (2) containing enough fresh brake fluid to submerge the end of the hose. 2. Have a helper pump the brake pedal three or four times and hold it in the down position. 3. With the pedal in the down position, open the bleeder screw at least one full turn.
Official Dodge Support. Posted December 4, 2013. On 12/4/2013 at 1:19 AM, Journey_SeXT said: If your Journey has never had a brake job done you shouldn't have air in your brake lines....you may also want to consider having the dealership check it out as you are under warranty. Could be a faulty master cylinder.
The owners manual says to bleed the brakes in the order of - Master cylinder - Combination Valve - rear abs valve - left rear - right rear - (then the fronts) We looked at the rear antilock valve under the hood and there doesn't seem to be any bleed port on it, so we're a bit confused as to what to do in regards to what the owner's manual says.
NOTE: The following wheel sequence should be used when bleeding the brake hydraulic system. The use of this wheel sequence will ensure. adequate removal of all trapped air from the brake hydraulic system.-Left Rear Wheel-Right Front Wheel-Right Rear Wheel-Left Front Wheel
NOTE: During the brake bleeding procedure, be sure that the brake fluid level remains close to the FULL level in the master cylinder fluid reservoir; check the fluid level periodically during the bleeding procedure; add Mopar ® DOT 3 brake fluid as required. When bleeding the ABS, the following sequence of steps must be followed to ensure ...
NOTE: During the brake bleeding procedure, be sure the brake fluid level remains close to the FULL level in the master cylinder fluid. reservoir. Check the fluid level periodically during the bleeding procedure and add Mopar(R) DOT 3 brake fluid as required. BLEEDING. When bleeding the ABS system, the following bleeding sequence must be ...
Loosen the Bleeder Screw and Inspect the Fluid. Open the bleeder screw 1 full to 1 ½ turn. Fluid will come out, and if there is air you will see air bubbles in the fluid. Slowly Press the Brake Pedal to the Floor 3 Times. Slowly press the brake pedal to the floor, and then retract it at a steady pace.
#innova #serviceABS bleeding service - This function is used to bleed the air in the brake lines. It performs a step-by-step procedure for the ABS system.
Unless you dismantle, for repair, the ABS system, there is no need to bleed it unless you've used it a lot (not likely for most of us) and you have a boatload of air in the fluid (also not likely). Just ignore the ABS bleeding and do the "normal" manual brake bleeding as there is a very small likelihoood of you having introduced any air into ...
It needs to be safely on solid footing while up in the air; the process of bleeding brakes will have you climbing partially under the car at times. Remove all four wheels. STEP 3: Locate each of ...
149 posts · Joined 2015. #4 · Aug 4, 2015. May I make a correction here , it should be in this order right rear, left rear, right front, left front. you may or may not find the bleed order in a manual. However you always bleed the brake cylinder or caliper the furthest from the master cylinder and work your way to the shortest.
When this how to i use a 2010 Dodge Journey where are just replaced a rear caliper that needs to be bled out all over, however there's no one around to assis...
Knowing how to bleed brakes (flush brakes) is essential to most brake repairs. We'll demonstrate how to properly bleed brakes by yourself. It's possible for ...
The correct order for bleeding brakes typically depends on the vehicle's design, but a general rule of thumb is to start with the brake furthest from the master cylinder and work your way closer. For most vehicles with a left-hand drive: Right Rear Brake. Left Rear Brake. Right Front Brake. Left Front Brake.
18. The sequence matters. If you have a lot of air right after your master cylinder for whatever reason, that air can travel to any point in the system. At some point, the hydraulic line attached to the master cylinder will branch to each of the four wheels. As you pump the brakes, the air will propagate down the hydraulic line, and randomly go ...
04/25/2024. To bleed brakes effectively, start by preparing your vehicle on a level surface. Check brake fluid levels and tools. Locate the bleeder screw on the farthest wheel caliper, using a box-end wrench. Attach clear tubing to the screw for controlled fluid release. Slowly loosen the screw with a helper pressing the brake pedal to expel air.
The procedure. involves performing a base brake bleeding, followed by use of the scan tool to cycle and bleed the. HCU pump and solenoids. A second base brake bleeding. procedure is then required to remove any air. remaining in the system. (1) Perform base brake bleeding. (Refer to 5 -.
The procedure for bleeding brakes used to be "start with the wheel furthest from the master cylinder and work your way to the closest wheel", but brake syste...
2.Remove rubber duct caps from all 4 bleeder screws.3.Attach a clear hose (1) to the bleeder screw at one wheel and feed the other end of the hose into a clear jar (2) containing fresh brake fluid.4.Have an assistant pump the brake pedal three or four times and hold it down before the bleeder screw is opened.
NOTE: To bleed the base brake system manually, an assistants help is required. NOTE: To ensure all air is bled from the ICU or junction block in a timely manner, it is recommended to raise the rear of the vehicle approximately 5° higher than the front or approximately 10-12 inches as measured at the rear bumper (1). 1.Raise and support vehicle ...
How to fix the brakes on a dodge journey..
Follow the instructions displayed. When finished, disconnect the scan tool and proceed. 6.Bleed the base brake system a second time. Check brake fluid level in the reservoir periodically to prevent emptying, causing air to enter the hydraulic system. 7.Fill the master cylinder fluid reservoir (1) to the MAX level.