Existing customer? Sign in

6 Best Angular Product Tour Libraries For User Onboarding
If you want to build onboarding tours for Angular applications, here are six open-source libraries you should check out. And if you want to try a no-code solution to save time and resources, we’ve got you covered, too.
If you’re using Angular to develop your web applications, you’re already familiar with its robust features and ease of use. Developed and maintained by Google, Angular is known for its ability to create Single Page Applications (SPAs), which helps you offer a seamless user experience and faster loading times.
Additionally, Angular has a large and active community of developers, which means that there is a wealth of resources and support available to you. This community-driven support also ensures that Angular is continuously updated with new features and security patches, making it a reliable and secure framework for building web apps.
And if you’re looking to build product tours on Angular, you’re in luck. It offers a wide range of tools and features that make it easier to build user onboarding tours. For example, you can use Angular's built-in support for animations and dynamic components to create engaging and interactive tours that guide users through your key features.
The best place to start with building your own Angular product tours is to find an open-source library that gives you all the tools you need to get started.
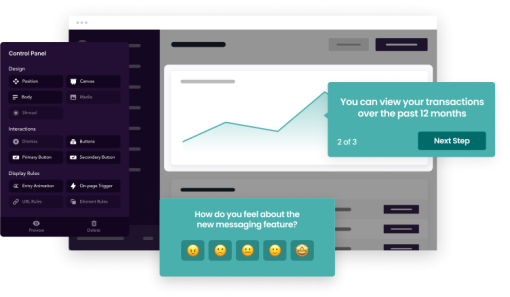
Can't code? No time? Try our no-code tool instead.
Quickly create sophisticated onboarding flows, all without any code involved.
6 Best Angular onboarding tour libraries
Building effective onboarding tours doesn’t have to be time-consuming when you use the right user onboarding tools . For Angular applications, several open-source libraries can help you streamline the process. Here are six libraries worth checking out for building your Angular product tour.
We’ve picked them out based on their ease of use as well as their reliability and how they are being looked after by the team that made them. For instance, we’ve omitted libraries that are not being maintained anymore.
1. Angular Intro.js
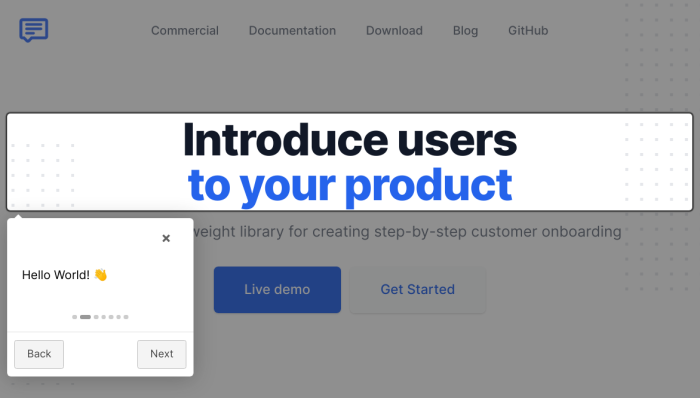
Good old Intro.js. We’ve talked about it in our previous articles on JavaScript tours , React tours , and Vue.js tours . Of course, Intro.js also works with Angular.
Intro.js is a well-known library for creating step-by-step introductions and guided tours on web applications. There are other features such as various customization options, controlling the order of the steps, as well as tooltips and highlighting elements.
It is used by major companies like Amazon and SAP, so it is quite reliable and trusted. Unlike various other open-source libraries, Intro.js has a commercial license that starts at a one-time purchase of $9.99.
If you decide to get Intro.js, make sure to get the Angular wrapper , which allows Intro.js to work inside an Angular app.
2. Angular Shepherd
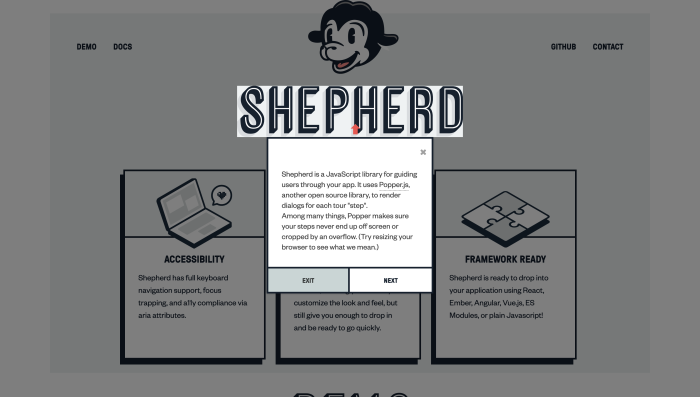
Shepherd is another onboarding library that pretty much works for all JavaScript-based frameworks. Angular as well.
Like Intro.js, Shepherd allows you to define a sequence of steps that guide users through your application's interface, highlighting key elements and providing descriptive tooltips. The library provides a flexible API for customizing the behavior, appearance, and position of each step, as well as the ability to add event handlers for user interactions.
Shepherd provides a wrapper for Angular so you can get started with it on your Angular product right away.
To use Angular Shepherd, you need to install and import the angular-shepherd package in your Angular application. You can then define the steps of the tour using the ShepherdService, and customize each step's content, position, and styling using HTML and CSS.
3. Angular UI Tour
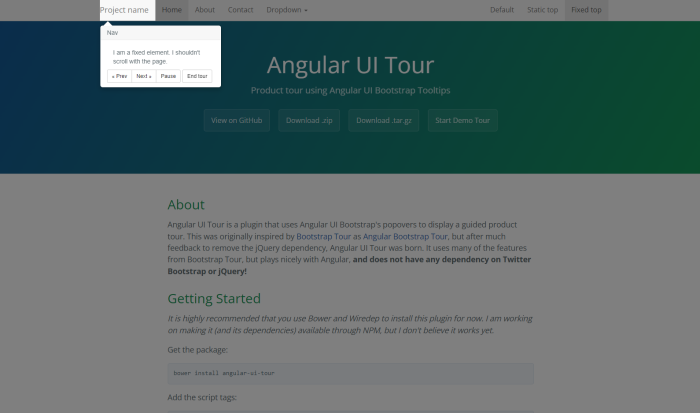
Angular UI Tour is a plugin that uses popovers from Angular UI Bootstrap to display a guided tour. It was originally created as Angular Bootstrap Tour , inspired by Bootstrap Tour , but then they tweaked it so that it doesn’t have any dependency on Twitter Bootstrap or JQuery.
Angular UI Tour gives you the ability to create tours with multiple steps that can be customized with HTML and CSS. Each step can include a title, a description, and a template with custom content. You can also highlight elements on the page and add tooltips or popovers to provide additional information.
Angular UI Tour also supports multiple positioning options, such as left, right, top, and bottom, and allows you to control the size and position of the highlighted elements. Additionally, you can add event handlers to respond to user interactions, such as clicking or hovering on an element.
To use Angular UI Tour, you need to install and import the angular-ui-tour package and add the ui-tour directive to your Angular app. You can then define the steps of the tour using a configuration object and start the tour by calling the start() method.
4. Ngx UI Tour
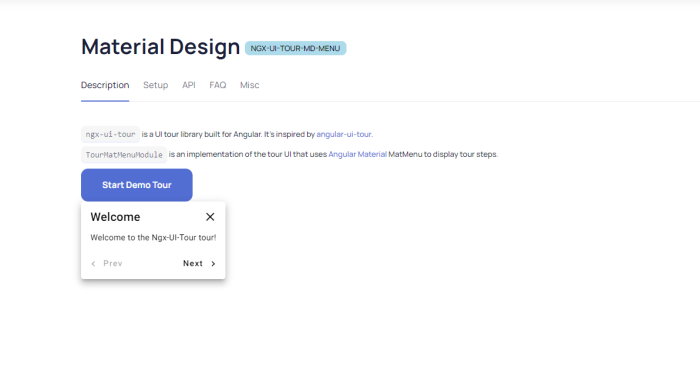
Inspired by Angular UI Tour, Ngx UI Tour is a product tour library that uses Angular Material MatMenu to display tours. So before you use this, you’ll have to make sure Angular Material is installed properly. Originally, this was Ngx Tour , but that library is not being maintained and it has been replaced by Ngx UI Tour.
It allows you to create customizable steps that guide users through your application's interface and provides various features such as tooltips, popovers, and highlight elements.
With Ngx Tour, you can define each step of the tour using an HTML template, add event handlers to respond to user interactions, and customize the content, placement, and styling of tooltips and popovers. Ngx Tour also supports multiple positioning options, such as top, bottom, left, and right, and provides flexibility to adjust the step's size and position.
It’s also super well-maintained. Since 2021, it has had releases with new features and fixes like clockwork, right up to 2023. Considering that Angular UI Tour’s last release was in 2017, this might be a better option.
To use Ngx Tour, you need to install and import the ngx-tour-core package and the specific ngx-tour-ngx-bootstrap or ngx-tour-md-menu package for the styling library of your choice. You can then add tour steps to your Angular app using the TourService and TourStep classes, and customize their appearance and behavior using CSS.
5. Angular Popper
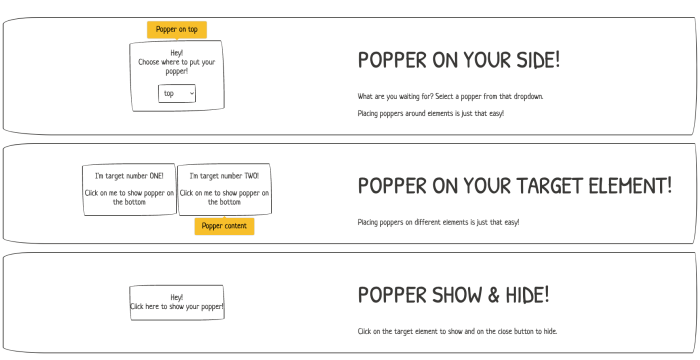
Angular Popper is a library that simplifies creating onboarding tours in Angular applications. It is built on top of Popper.js , which is a lightweight tooltip and popover library itself.
As such, its focus is on creating tooltips. You can position them, arrange them in order, point them to certain elements. If all you need are great tooltips to give in-app guidance, Angular Popper may be the best fit for you.
To use it, you need to install and import the NgxPopperModule and use the ngx-popper directive with a configuration object to create tooltips. You can define the content of each step using Angular components, choose from various placement options, and customize the styling of the popovers using CSS.
6. Angular Joyride
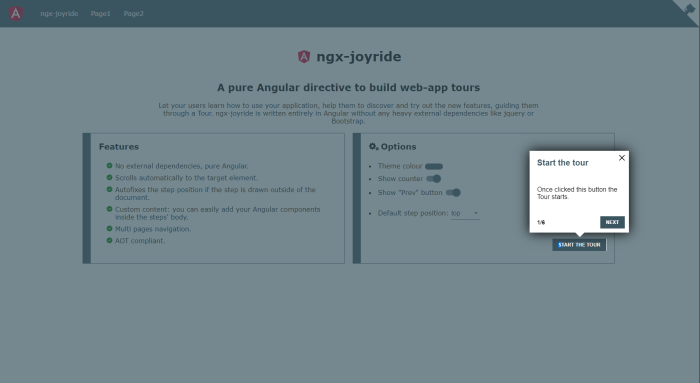
Angular Joyride is a product tour library built entirely in Angular with no external dependencies. As with other Angular-based libraries, you can take advantage of the various UI components offered by Angular when creating your tours.
Aside from the usual ability to create tour steps and style them, you can use custom HTML content, pass parameters to your templates, set up multi pages navigation, and do everything you need to easily guide users through your site.
It’s also fairly well maintained. New releases are not as frequent as NgX UI Tour, but the last release was in January 2022. Still fairly recent when compared to some other libraries on this list.
To use Angular Joyride, install and import the ngx-joyride package and add the joyride directive to your Angular app. You can then define the steps of the tour using a configuration object and start the tour by calling the startTour() method.
Don’t have the time or resources to build? Use a no-code onboarding software instead
Open-source libraries are great when you are looking to make user onboarding a DIY project for your in-house team.
But if you think about the opportunity cost, knowing that building takes time and resources away from other mission-critical tasks you should be doing, consider using a product adoption platform as a no-code solution for onboarding.
In this case, Chameleon could be the right fit for your needs. You can use it to create customizable, on-brand Tours, Tooltips, Microsurveys, and Launchers. Try it for free and get into the sandbox environment to play with it, or book a personalized demo with our product experts.
👉 Check out this interactive demo on building an onboarding Launcher in Chameleon.
Build onboarding for your Angular app fast & easy
Save dev time and quickly deploy product tours for your Angular app with our no-code suite of tools
You might also be interested in...
User Onboarding That Doesn't Suck: Lessons From the Onboarding Olympics
User Onboarding Metrics, KPIs, and Benchmarks: A Comprehensive Guide
User onboarding still isn't good enough, but here's how it's changing, boost product adoption and reduce churn.
Get started free in our sandbox or book a personalized call with our product experts
Angular ng-template, ng-container and ngTemplateOutlet - The Complete Guide To Angular Templates
Angular University
High-Quality Angular Courses
More posts by Angular University.
In this post, we are going to dive into some of the more advanced features of Angular Core!
You have probably already come across with the ng-template Angular core directive, such as for example while using ngIf /else, or ngSwitch .
The ng-template directive and the related ngTemplateOutlet directive are very powerful Angular features that support a wide variety of advanced use cases.
These directives are frequently used with ng-container, and because these directives are designed to be used together, it will help if we learn them all in one go, as we will have more context around each directive.
Let's then see some of the more advanced use cases that these directives enable. Note: All the code for this post can be found in this Github repository .
Table Of Contents
In this post, we will be going over the following topics:
Introduction to the ng-template directive
- Template Input Variables
- The ng-template directive use with ngIf
- ngIf de-suggared syntax and ng-template
- ng-template template references and the TemplateRef injectable
Configurable Components with Template Partial @Inputs
- The ng-container directive, when to use it?
- Dynamic Template with the ngTemplateOutlet custom directive
- Template outlet @Input Properties
- Final Combined Example
Summary and Conclusions
Like the name indicates, the ng-template directive represents an Angular template: this means that the content of this tag will contain part of a template, that can be then be composed together with other templates in order to form the final component template.
Angular is already using ng-template under the hood in many of the structural directives that we use all the time: ngIf , ngFor and ngSwitch .
Let's get started learning ng-template with an example. Here we are defining two tab buttons of a tab component (more on this later):
The first thing that you will notice about ng-template
If you try the example above, you might be surprised to find out that this example does not render anything to the screen!
This is normal and it's the expected behavior. This is because with the ng-template tag we are simply defining a template, but we are not using it yet.
Let's then find an example where we can render an output, using some of the most commonly used Angular directives.
The ng-template directive and ngIf
You probably came across ng-template for the first time while implementing an if/else scenario such as for example this one:
This is a very common use of the ngIf/else functionality: we display an alternative loading template while waiting for the data to arrive from the backend.
As we can see, the else clause is pointing to a template, which has the name loading . The name was assigned to it via a template reference, using the #loading syntax.
But besides that else template, the use of ngIf also creates a second implicit ng-template! Let's have a look at what is happening under the hood:
This is what happens internally as Angular desugars the more concise *ngIf structural directive syntax. Let's break down what happened during the desugaring:
- the element onto which the structural directive ngIf was applied has been moved into an ng-template
- The expression of *ngIf has been split up and applied to two separate directives, using the [ngIf] and [ngIfElse] template input variable syntax
And this is just one example, of a particular case with ngIf. But with ngFor and ngSwitch a similar process also occurs.
These directives are all very commonly used, so this means these templates are present everywhere in Angular, either implicitly or explicitly.
But based on this example, one question might come to mind:
How does this work if there are multiple structural directives applied to the same element?
Multiple Structural Directives
Let's see what happens if for example we try to use ngIf and ngFor in the same element:
This would not work! Instead, we would get the following error message:
This means that its not possible to apply two structural directives to the same element. In order to do so, we would have to do something similar to this:
In this example, we have moved the ngIf directive to an outer wrapping div, but in order for this to work we have to create that extra div element.
This solution would already work, but is there a way to apply a structural directive to a section of the page without having to create an extra element?
Yes and that is exactly what the ng-container structural directive allows us to do!
The ng-container directive
In order to avoid having to create that extra div, we can instead use ng-container directive:
As we can see, the ng-container directive provides us with an element that we can attach a structural directive to a section of the page, without having to create an extra element just for that.
There is another major use case for the ng-container directive: it can also provide a placeholder for injecting a template dynamically into the page.
Dynamic Template Creation with the ngTemplateOutlet directive
Being able to create template references and point them to other directives such as ngIf is just the beginning.
We can also take the template itself and instantiate it anywhere on the page, using the ngTemplateOutlet directive:
We can see here how ng-container helps with this use case: we are using it to instantiate on the page the loading template that we defined above.
We are refering to the loading template via its template reference #loading , and we are using the ngTemplateOutlet structural directive to instantiate the template.
We could add as many ngTemplateOutlet tags to the page as we would like, and instantiate a number of different templates. The value passed to this directive can be any expression that evaluates into a template reference, more on this later.
Now that we know how to instantiate templates, let's talk about what is accessible or not by the template.
Template Context
One key question about templates is, what is visible inside them?
Does the template have its own separate variable scope, what variables can the template see?
Inside the ng-template tag body, we have access to the same context variables that are visible in the outer template, such as for example the variable lessons .
And this is because all ng-template instances have access also to the same context on which they are embedded.
But each template can also define its own set of input variables! Actually, each template has associated a context object containing all the template-specific input variables.
Let's have a look at an example:
Here is the breakdown of this example:
- this template, unlike the previous templates also has one input variable (it could also have several)
- the input variable is called lessonsCounter , and it's defined via a ng-template property using the prefix let-
- The variable lessonsCounter is visible inside the ng-template body, but not outside
- the content of this variable is determined by the expression that its assigned to the property let-lessonsCounter
- That expression is evaluated against a context object, passed to ngTemplateOutlet together with the template to instantiate
- This context object must then have a property named estimate , for any value to be displayed inside the template
- the context object is passed to ngTemplateOutlet via the context property, that can receive any expression that evaluates to an object
Given the example above, this is what would get rendered to the screen:
This gives us a good overview of how to define and instantiate our own templates.
Another thing that we can also do is interact with a template programmatically at the level of the component itself: let's see how we can do that.
Template References
The same way that we can refer to the loading template using a template reference, we can also have a template injected directly into our component using the ViewChild decorator:
As we can see, the template can be injected just like any other DOM element or component, by providing the template reference name defaultTabButtons to the ViewChild decorator.
This means that templates are accessible also at the level of the component class, and we can do things such as for example pass them to child components!
An example of why we would want to do that is to create a more customizable component, where can pass to it not only a configuration parameter or configuration object: we can also pass a template as an input parameter .
Let's take for example a tab container, where we would like to give the user of the component the possibility of configuring the look and feel of the tab buttons.
Here is how that would look like, we would start by defining the custom template for the buttons in the parent component:
And then on the tab container component, we could define an input property which is also a template named headerTemplate :
A couple of things are going on here, in this final combined example. Let's break this down:
- there is a default template defined for the tab buttons, called defaultTabButtons
- This template will be used only if the input property headerTemplate remains undefined
- If the property is defined, then the custom input template passed via headerTemplate will be used to display the buttons instead
- the headers template is instantiated inside a ng-container placeholder, using the ngTemplateOutlet property
- the decision of which template to use (default or custom) is taken using a ternary expression, but if that logic was complex we could also delegate this to a controller method
The end result of this design is that the tab container will display a default look and feel for the tab buttons if no custom template is provided, but it will use the custom template if its available.
The core directives ng-container, ng-template and ngTemplateOutlet all combine together to allow us to create highly dynamical and customizable components.
We can even change completely the look and feel of a component based on input templates , and we can define a template and instantiate on multiple places of the application.
And this is just one possible way that these features can be combined!
I hope that this post helped to get familiar with some of the more advanced features of Angular core, if you have some questions please let me know in the comments below and I will get back to you.
And if you would like to know about more advanced Angular Core features, we recommend checking the Angular Core Deep Dive course, where Angular Templates are covered in much more detail.
To get notified when more posts like this come out, I invite you to subscribe to our newsletter:
If you are just getting started learning Angular, have a look at the Angular for Beginners Course :
Other posts on Angular
Have also a look also at other popular posts that you might find interesting:
- Getting Started With Angular - Development Environment Best Practices With Yarn, the Angular CLI, Setup an IDE
- Why a Single Page Application, What are the Benefits ? What is a SPA ?
- Angular Smart Components vs Presentation Components: What's the Difference, When to Use Each and Why?
- Angular Router - How To Build a Navigation Menu with Bootstrap 4 and Nested Routes
- Angular Router - Extended Guided Tour, Avoid Common Pitfalls
- Angular Components - The Fundamentals
- How to build Angular apps using Observable Data Services - Pitfalls to avoid
- Introduction to Angular Forms - Template Driven vs Model Driven
- Angular ngFor - Learn all Features including trackBy, why is it not only for Arrays ?
- Angular Universal In Practice - How to build SEO Friendly Single Page Apps with Angular
- How does Angular Change Detection Really Work ?
Find Ngx Guided Tour Examples and Templates
Use this online ngx-guided-tour playground to view and fork ngx-guided-tour example apps and templates on codesandbox. click any example below to run it instantly or find templates that can be used as a pre-built solution.


- Easy to use
- Responsive to window resizes
- Supports multiple tours
- Smoothly scrolls to each step
- Control the placement for each tour tip
- Internet Explorer 10+
Navigation Menu
Search code, repositories, users, issues, pull requests..., provide feedback.
We read every piece of feedback, and take your input very seriously.
Saved searches
Use saved searches to filter your results more quickly.
To see all available qualifiers, see our documentation .
- Notifications You must be signed in to change notification settings
Easy guided tours for Angular apps

code-orange/telemachy
Folders and files, repository files navigation.
Easy guided tours for Angular apps.
Table of contents
Installation, persistency, restarting a tour, telemachyservice, tourpersistency, youtubetourstep, htmltourstep, elementtourstep, getting started.
Import TelemachyModule in your root module (make sure the RouterModule is loaded, Telemachy uses it to automatically start the tour for any compontent that a user navigates to):
Finally, add the <telemachy-tour> component to your root app component (or one that is always loaded when you want to display a tour):
In its easiest form, you can use Telemachy just by implementing the HasGuidedTour interface:
By implementing the optional tourAutoStart() method (and having it return true ), Telemachy will automatically start this component's tour whenever it becomes active through the angular router. You can also explicitly say it should be started by calling TelemachyService.startTour(this) . In both cases, Telemachy will only show the tour if the persistency layer says the user should see it.
By default, Telemachy will always show a user the tour on each visit. If you want to save if a user has already seen a tour, you should provide an alternate implementation for the TourPersistency service.
Telemachy comes with an alternate implementation that uses localstorage to save this state. This implementation depends on phenomnomnominal/angular-2-local-storage . You can use this as follows:
We recommend you replace the TourPersistency service with an implementation that saves the user's state in a remote system, for instance through a REST API.
You can restart the tour for a currently visible component by calling TelemachyService.restartTour() . To check if there is a currently visible component that has a tour, use TelemachyService.canRestart() .
If async is true , the ElementTourStep will attempt to find the element on the page after it has been initialized. If the element isn't available by the time the step should be rendered, the step will be skipped.
Event Listeners
It is possible to add event listeners that are fired add the start of the tour or at the end of the tour when the finished/skipped button is clicked. Possible types: start or end
Contributors 6
- TypeScript 79.0%
Guide your users through a tour of your app
01. how to include, 02. example, brands that use shepherd.
This website requires JavaScript.
ngx-ui-tour-core
- 1 Dependency
- 7 Dependents
- 39 Versions

UI tour library for Angular
Angular Material, Ionic, Taiga UI, Ng Bootstrap and Ngx Bootstrap UIs are supported.
ngx-ui-tour is a fork of Isaac Mann's ngx-tour . The project had to be forked since the original is no longer maintained.
Table of contents
Demo and documentation, compatibility, installation and usage, tourservice, step configuration, event observables, custom template, styling active tour anchor.
- Targeting Third Party Elements
Demo and documentation can be found at hakimio.github.io/ngx-ui-tour
Material Design and Ngx Bootstrap tour UIs
Ng bootstrap tour ui, ionic tour ui, taiga ui tour ui.
- Material Design UI
- NG Bootstrap UI
- Ngx Bootstrap UI
- Taiga UI Dropdown UI
- Taiga UI Hint UI
- JavaScript Console UI
Documentation page
Targeting third party elements
- product-tour
- onboarding-tour
Package Sidebar
npm i ngx-ui-tour-core
Git github.com/hakimio/ngx-ui-tour
github.com/hakimio/ngx-ui-tour#readme
Downloads Weekly Downloads
Unpacked size, total files, last publish.
2 months ago
Collaborators
Learn Angular from Scratch – A Comprehensive Guide for Beginners
Angular is one of the most popular open-source front-end web development frameworks used by developers today. Created by Google, Angular helps build dynamic single-page applications using TypeScript and innovative features like data binding, components, dependency injection, and more.
This comprehensive 3200+ word guide will teach you Angular concepts from the ground up, even if you have no prior front-end frameworks experience. By the end, you’ll have the core building blocks to start building fast, scalable Angular applications.
Angular Overview
Before we dive into code, let’s understand what Angular is at a high level:
Angular is a TypeScript-based framework for building web, mobile and desktop applications.
TypeScript extends JavaScript by adding features like static typing, classes, interfaces and more to improve developer productivity. This means your existing JS knowledge transfers nicely to Angular.
Some key defining aspects of Angular include:
- Component-based: UI built by composing different reusable building blocks called components
- Declarative: Define logic using declarations instead of explicit imperative code
- Client-side rendering: Templates get rendered to dynamic UI in the browser
- Cross-platform: Write once to run web, mobile web, native mobile and desktop apps
- SPE framework: All the tooling for a Single Page Application with routing, HTTP etc. built-in
Additionally, Angular also handles most of the complex tasks like:
- Dependency injection
- Change detection
- Server communication
So you can focus on building your app without reinventing low-level plumbing.
Let’s understand components, the main building blocks of Angular apps better.
Understanding Angular Components

Components are the fundamental UI building blocks in Angular apps.
Every Angular app contains a tree of Angular components.
What makes up a component?
- Template: Defines the UI layout in HTML
- Class : Contains the component logic in TypeScript/JavaScript
- Metadata: Extra data like selector, styles etc.
This template + class together determine what the component renders.
A simplified version looks like:
Components provide the following advantages:
- Encapsulation : Bundle code with its own logic, styles, tests etc. behind a well-defined interface
- Reusability : Easily reuse components across apps
- Separation of Concerns : Template focuses just on the view, class handles logic
- Modularity : Assemble UIs like lego blocks by composing components
This component architecture maximizes reusability, encapsulation and reasonability at scale.
Now that you understand components better, let’s look at how data flows between them.
Communication between Components
Components rarely work in isolation. For components to coordinate:

- Parent → Child : Parent sends data to child component inputs
- Child → Parent : Child sends data to parent via outputs (events)
This one-way data flow keeps components decoupled.
Let‘s understand inputs and outputs more.
Passing Data using @Input()
The @Input() decorator allows data to be passed from the parent component to the @Input property decorated in the child component.
Parent.component.ts
Parent.component.html
Child.component.ts
- @Input() decorator in child enables property binding from parent’s template
- Parent’s post data now available in child component
This allows parent to flow data downwards into its children efficiently.
Propagating Data using @Output()
The Output() decorator and EventEmitter notify the parent component of changes via callback events whenever the @Output emits data.
- postCreated output emits event when post added
- Parent binds to event using statement like (postCreated)="onPostAdded()"
- Callback onPostAdded() handles emitted data in $event
This enables communication from child to parent components.
How Dependency Injection Works

Dependency injection (DI) is a design pattern used extensively in Angular apps.
It provides dependent services to components via the constructor instead of hardcoding to create the services inside components.
This leads to loose coupling between code components. Benefits include:
- Promotes separation of concerns
- Simplifies mocking dependencies for testing
- Allows easy swapping of implementations
Let‘s say ComponentA depends on ServiceX to fetch data from the server.
Without DI, ComponentA would directly instantiate ServiceX itself:
This creates tight coupling between components and services.
With DI, services are injected into the constructor instead:
And provided from a global registry at runtime:
Now ComponentA doesn‘t worry about creating services anymore — Angular handles it!
This keeps components decoupled, reusable and easier to test.
Angular Forms
Forms allow users to submit input data. Angular provides two form design approaches:
1. Template-driven Forms
Defined fully in the template using directives like ngModel :
- Good for simple forms
- Quick to code
- Light on explicit code
- State managed under the hood by directives
- Harder to test
- More limited control than reactive forms
2. Reactive Forms
Created explicitly in component code using the FormGroup , FormControl and validation functions.
- More predictability
- Immutable data model
- Synchronous access to values and validation
- Better tools for testing
- More control
- Complex forms harder to visualize
Reactive forms provide greater control and testability support for complex use cases.
Why Consider Angular As Your Framework
Why should you consider Angular as your front-end framework versus alternatives like React, Vue and Svelte?
Here’s how Angular compares on some key criteria:
Adoption and Community
Angular has continued rapid growth according to 2021 StackOverflow trends:

With over 1.7 million users as of 2022, Angular has a strong community producing abundant learning resources like tutorials, guides and tools.
Leading companies like Google, Autodesk, Forbes use Angular in production indicating strong industry adoption.
As a batteries included framework, Angular offers built-in capabilities like:
- State management with RxJS
- Forms handling
- Testing utilities
- Server communication support
React offers a thinner abstraction layer with more coding flexibility.
If looking for a middle ground between flexibility and features, Vue or Svelte may be good options to evaluate.
Performance
Angular takes care of optimizing change detection using techniques like immutable data checks.
Features like ahead of time compilation, lazy loading, service workers etc. optimize bundle sizes for production.
Benchmarks show Angular achieving 60 FPS target comparable with other modern SPA frameworks:

Tooling and Documentation
The CLI tool generates boilerplate code so developers can focus on building features over configuration.
Detailed documentation, structured framework APIs and TypeScript integration lead to great tooling support in code editors.
Overall as this analysis shows, Angular delivers a compelling solution balancing developer productivity with modern application requirements like speed, scalability and capability richness.
This covered core building blocks like components, directives, services, forms etc. to get started with Angular fast.
For the full in-depth advanced guide on performance, testing, animation, enterprise features and best practices, check out dedicated tutorials or courses after finishing this crash course.
I hope you enjoyed this introduction to Angular. The possibilities are endless when you begin building user interfaces powered by Angular!
Dr. Alex Mitchell is a dedicated coding instructor with a deep passion for teaching and a wealth of experience in computer science education. As a university professor, Dr. Mitchell has played a pivotal role in shaping the coding skills of countless students, helping them navigate the intricate world of programming languages and software development.
Beyond the classroom, Dr. Mitchell is an active contributor to the freeCodeCamp community, where he regularly shares his expertise through tutorials, code examples, and practical insights. His teaching repertoire includes a wide range of languages and frameworks, such as Python, JavaScript, Next.js, and React, which he presents in an accessible and engaging manner.
Dr. Mitchell’s approach to teaching blends academic rigor with real-world applications, ensuring that his students not only understand the theory but also how to apply it effectively. His commitment to education and his ability to simplify complex topics have made him a respected figure in both the university and online learning communities.
Similar Posts
The Code Execution Cannot Proceed Because msvcp140.dll Was Not Found – How to Fix on a Windows 10 PC
As a software developer and IT professional, I‘ve seen the "msvcp140.dll missing" error disrupt many apps…
Python Function Examples – How to Declare and Invoke with Parameters
Functions are one of the core building blocks in Python. They allow you to encapsulate reusable…
End-to-End Encryption: Is Your Private Data Truly Safe from Big Tech?
As online privacy concerns mount regarding Big Tech companies like Facebook and Google, many users have…
Blockchain for Beginners: A Developer’s Guide to Coding dApps
Welcome to this comprehensive tutorial on blockchain for software engineers! By the end, you will gain…
How to set up JHipster microservices with Istio service mesh on Kubernetes
Microservices and Kubernetes have exploded in popularity for building and deploying cloud-native applications. However, one major…
How I Built an App with Vulcan.js in Four Days
Photo by Caspar Camille Rubin on Unsplash As a full-stack developer with over 5 years of…

IMAGES
VIDEO
COMMENTS
Guided tour for your Angular applications.. Latest version: 2.0.1, last published: 2 years ago. Start using ngx-guided-tour in your project by running `npm i ngx-guided-tour`. There are no other projects in the npm registry using ngx-guided-tour.
Angular UI Tour is a plugin that uses popovers from Angular UI Bootstrap to display a guided tour. It was originally created as Angular Bootstrap Tour, inspired by Bootstrap Tour, but then they tweaked it so that it doesn't have any dependency on Twitter Bootstrap or JQuery.. Angular UI Tour gives you the ability to create tours with multiple steps that can be customized with HTML and CSS.
Steps for creating an ngx-guided-tour : Create an Angular project and install the npm module for guided tour component: npm install ngx-guided-tour --save. Import modules to app.module.ts as given ...
Guided tour component using SASS and typescript. Allows you to use selectors to step your user through workflows and introduce them to your application. Customiziable theme and many features.
7. It's very hard to find something good looking related to guided tour, onboarding, etc. for Angular. Most of the libraries are ugly, abandoned, or built only for desktop-driven tours. For mobile, there isn't any library to support it properly. Most users search for 'material design tour onboarding', as we can see it in Android libraries, but ...
5- Angular UI Tour. Angular UI Tour is a simple onboarding tour plugin for Angular apps, inspired by Bootstrap Tour. It uses Angular UI Bootstrap's popovers as tour steps, and the tours are responsive and easily customizable. The devs have prepared great documentation and have decent guidelines on setting up the library. Here's their demo ...
The filter the overlay uses on the background. --ngx-tour-guide__overlay-background-color. rgba (255, 255, 255, 0.15) The color of the overlay. These classes can be used to directly style the corresponding element. selector. description. .tour-guide-container. targets the container of the skip button (if used) as well as every stop message.
Support of Single Page Applications build with Angular, Vue.js, React, etc. Extendable using out-of-the-box and third-party plugins; Dynamic placeholders in the tour definition; ... Create interactive guided product tours in minutes with the most non-technical friendly, lightweight and extendable library. ...
ngx-guided-tour Demo. Guided tour is a great way to introduce your users to new features or remind them how to use exisiting features. Hover your mouse over the orb above to start the tour. Orbs are optional, If not set or set to false the tour will just start. Restart Tour. Click restart to start the tour again. There are multiple features to ...
In Angular, there are many libraries available for creating product tours, but I can confidently say that Angular Shepherd is one of the most practical and straightforward options. It boasts decent…
This is a product tour library built with Angular (2+). It's inspired by angular-ui-tour. TourMatMenuModule is an implementation of the tour ui that uses Angular Material MatMenu to display tour steps. Installation. npm install ngx-tour-core ngx-tour-md-menu @angular/animations @angular/cdk @angular/http @angular/material;
An Angular Tour (Joyride) library built entirely in Angular, without using any heavy external dependencies like Bootstrap or JQuery. From now on you can easily guide your users through your site showing them all the sections and features.. Latest version: 2.5.0, last published: 2 years ago. Start using ngx-joyride in your project by running `npm i ngx-joyride`.
Angular ng-template, ng-container and ngTemplateOutlet - The Complete Guide To Angular Templates. In this post, we are going to dive into some of the more advanced features of Angular Core! You have probably already come across with the ng-template Angular core directive, such as for example while using ngIf /else, or ngSwitch. The ng-template ...
Find Ngx Guided Tour Examples and Templates. Use this online ngx-guided-tour playground to view and fork ngx-guided-tour example apps and templates on CodeSandbox. Click any example below to run it instantly or find templates that can be used as a pre-built solution! ngx-guided-tour-experiment. demo.
You can also add callbacks to the <tour>: <tour step="currentStep" post-tour="tourComplete()" post-step="stepComplete()"> It is very easy to add a cookie module that remembers what step a user was on. With the angular-cookie module, this is all you need to integrate cookies:
This Tour of Heroes tutorial provides an introduction to the fundamentals of Angular and shows you how to:. Set up your local Angular development environment. Use the Angular CLI to develop an application.; The Tour of Heroes application that you build helps a staffing agency manage its stable of heroes. The application has many of the features that you'd expect to find in any data-driven ...
angular-ui-tour. About. Angular UI Tour is a plugin that uses Angular UI Bootstrap's popovers to display a guided product tour. This was originally inspired by Bootstrap Tour as Angular Bootstrap Tour, but after much feedback to remove the jQuery dependency, Angular UI Tour was born.It uses many of the features from Bootstrap Tour, but plays nicely with Angular, and does not have any ...
By implementing the optional tourAutoStart() method (and having it return true), Telemachy will automatically start this component's tour whenever it becomes active through the angular router. You can also explicitly say it should be started by calling TelemachyService.startTour(this). In both cases, Telemachy will only show the tour if the ...
Tutorial: Usage - Documentation
An Angular Tour (Joyride) library built entirely in Angular, without using any heavy external dependencies like Bootstrap or JQuery. ... react-native-stepper-tour is a lightweight and flexible React Native package designed to create guided tours within your app. This package allows you to guide users step by step through key features or ...
Angular is a platform for building mobile and desktop web applications. Join the community of millions of developers who build compelling user interfaces with Angular.
UI tour library for Angular 12+. Latest version: 12.0.2, last published: a month ago. Start using ngx-ui-tour-core in your project by running `npm i ngx-ui-tour-core`. There are 7 other projects in the npm registry using ngx-ui-tour-core.
Starter project for Angular apps that exports to the Angular CLI. Starter project for Angular apps that exports to the Angular CLI ... ngx-guided-tour-poc.stackblitz.io. Open Preview in new tab. Close Preview. Console. Clear on reload. Add to . Popular; Frontend; Backend; Fullstack; Docs, Blogs & Slides; Creative; Mobile & VR; Vanilla;
Angular Example - Getting Started. Allowing access to your localhost resources can lead to security issues such as unwanted request access or data leaks through your localhost.
With over 1.7 million users as of 2022, Angular has a strong community producing abundant learning resources like tutorials, guides and tools. Leading companies like Google, Autodesk, Forbes use Angular in production indicating strong industry adoption. Features. As a batteries included framework, Angular offers built-in capabilities like: