

RV Low Point Drain Valve: Everything You Need To Know
Your RV low point drain valve serves the key purpose of allowing your RV’s water lines to drain completely, as it’s located at the lowest point of your RV .
Despite it being a relatively simple mechanism, RV low point drain valves generate a lot of questions from RV owners, including how to open low point drains on an RV, how to close a low point drain, and where to locate RV low point drain valve.
We’ll cover all those and more in today’s guide.
What Are Low Point Drains On RVs?
An RV low point drain valve is a valve (usually one for each hot and cold water) located at or near the lowest point of your RV that allow the water lines to be completely drained for safe RV storage and winterization.
Water pools at the lowest point and can freeze, causing damage to your lines if they’re not emptied, so an RV low point drain valve enables your potable water lines to be fully emptied for RV storage, RV winterization, or even cleaning of the water lines.
Your RV drain system is meant to drain the water lines or pipes only, not your tanks.
Where Is My RV Low Point Drain Valve Located?
So many campers ask us: “How do I find my RV low point drain valve?”.
The answer is: that depends.
Typically you’ll find travel trailer drain valves, motorhome drain valves, camper drain valves, and RV drain valves on the underside of your rig.
Follow these steps to find your RV low point drain valve:
Look for the plastic (pex) lines hanging down, which may or may not have a cap or valve on them.

One of these lines will be the freshwater tank drain line, and the other will be the entire water system’s low point drain valve.
Another way to find your RV low point water drain valve is to look for your main fresh water tank – the lines should be around or below it.
If you still can’t locate it, start at your fresh water fill valve, follow the line under the rig and you’ll see two lines hanging down: one with a valve on it, the other without.

The valved line is your freshwater tank drain and the other is your overflow/vent line.
You will likely also have two more lines sticking down elsewhere under your RV, many are located near the steps or near the axles – these are your low point drains.
Most are red and blue, but some are white. They should both have valves on them.

Here’s a good video of someone modifying their travel trailer low point drain valves, but it also does a good job of showing you where the low point drain valve(s) may be located:
How To Open Your RV Low Point Water Drain Valve
This varies by the make and model of your RV, travel trailer, motorhome, or camper, but many low point drain valves can be opened and closed easily by hand.

Sometimes your RV drain will come with a screw-on cap that you may need to loosen with a wrench or pliers.

You should open your faucets and run your outdoor shower when opening your low point drain valve to allow the air pressure to work in your favor in getting as much water as possible out of your lines so you can safely store or winterize your RV.
Typically your RV water pump and RV toilet will not fully drain, so it’s important to use RV antifreeze in your RV’s water lines to protect these pieces of your system against damage caused by freezing water.
How To Close Your RV Low Point Drain Valve

Just like opening your low point drain, you can close it by reversing the hand-operated valve or screwing the cap back on after water stops coming out of the lines.
Make sure all of your RV low point drain valves are fully closed before storing your RV, being sure to tighten any caps if you have a capped-end line.
What To Do If Your Low Point Drain Valve Is Leaking

If you’ve got an RV fresh water tank drain valve leaking it’s going to cause some headaches because it can cause a loss of water pressure, causing a situation where your RV water pump keeps running or may affect the operation of your RV’s plumbing fixtures.
Once you locate the RV drain, try tightening the valves or the RV water line drain caps depending on which closure your lines have.
If your low point drain lines use caps, also check the gasket or O-ring inside the cap (if applicable) to make sure it doesn’t need replacement, and you can also consider using plumber’s tape on the cap ends and plumber’s grease on the O-rings to help you get a tight seal and stop the RV low point drain valve leak.
Also note that if you don’t have a water pressure reducer in your system, sometimes the city water pressure can be high enough to make your low point drain valve leak, so try detaching from any external water source to see if that first clears up your problem.
If those don’t work, it’s time to move on to how to replace an RV low point drain valve.
RV Low Point Drain Valve Replacement

Occasionally your travel trailer drain valves will fail and need replacement.
Fortunately, most RV low point drain valves are made from pex and are very easy to repair or modify.
Here’s how to replace an RV low point drain valve:
- Step 1 : Open your RV low point drain valve(s) and allow all water to be drained. These lines are going to be open for this repair anyway, so you might as well get this step over with first.
- Step 2 : Identify the camper low point drain valve that needs to be replaced (whether one or both).
- Step 3 : Cut the valves off just above the existing crimp.
- Step 4 : Use a crimping tool to crimp two new shutoffs on the lines. You can use pretty much whatever you like here, but many RVers swear by Sharkbite ball valves . Others have used a threaded end that you can cap off, or something else that you prefer. Whatever you choose, make sure it’s easy to operate and closes tightly.
- Step 5 : Fill some water back in your lines and test your new RV low point drain valve to make sure they work as intended.
Here’s a great example of how to replace an RV low point drain valve:
RV Low Point Drain Valve Mods
Plenty of RVers have added valves to their low point drain lines where there were none before or have made changes so they don’t have to get under the rig to open these valves.
Change Your Low Point Drain Caps To Valves
Here’s a video showing how easy it is to change over your RV water line drain cap to a valve-style closure:
Add Levers To Your System
Assuming you have the setup that allows this, you can add a lever system higher up in your low point drain lines so you don’t have to get under the rig to open the lines each time.
These levers are shown installed on a Fleetwood RV low point drain valve.
Swap Out Your Low Point Drain Hardware For Something Totally Different
The nice thing about working with pex plumbing commonly found on RV low point drains is that it’s very easy to work with, even for those with very little or no plumbing experience.
Here’s a mod someone made for a more heavy-duty low point drain shutoff:

Extend Your RV Low Point Drain Valve Lines
You can extend your lines to where they’re easier to reach so you’re not constantly crawling under your RV.
Make sure that your extension lines still slope downward to ensure proper drainage:

Camper Low Point Drain
The low point drain on your camper should be similar (if not identical) to the ones found on RVs that we covered in this guide, and all advice given here applies the same to your camper low point drain.

Travel Trailer Low Point Drain
Your travel trailer drain valves have the same function, operation, and location as RV drain valves, so you can use all the information in this guide on your travel trailer.

Motorhome Drain Valve
All of the information contained in this guide will apply the same exact way to your motorhome drain valve including how to find it, how to operate it, and how to fix a motorhome drain valve leak or perform a replacement.

Jayco Fresh Water Tank Drain Valve
Most Jayco low point drain valves are located inside a cabinet or behind a removable plastic panel on the inside of your Jayco RV.
Look for a pull-up and push-down mechanism to operate your drain valve.
If your Jayco RV is equipped with a thermal package, the low point drain valve is located between the bottom of the rig and the interior floor, helping to insulate it.
Coachmen Freelander Low Point Drain
Coachmen Freelander low point drain valves are sometimes located in the back wall of the master bedroom and may be behind a removable panel.
Other times they are located beneath the rig like most RV low point drain valves.
The Coachmen Freelander 260DS has the low point drain valves behind a panel in the large rear cargo bay behind a black removable panel.
The Coachmen Freelander QBE low point drains are located in the bed platform under the wood piece the mattress rests on.
The Coachmen Freelander 21QB has their tank drain line and low point drain lines located under the drawer beneath the oven.
Other times they may be located below a panel beneath the refrigerator, which can be accessed by removing 4 screws.
As you can see, RV low point drain lines vary wildly by make and model!
Winnebago Water Drain Valve
Winnebago water drain valve locations vary by model – some may even be under the bed near the water pump and will be lever operated.
Other times, the Winnebago low point drain valve might be next to your storage bins on the RV’s passenger side.
For more information, consult your Winnebago owner’s manual or give your local Winnebago dealer a call and they’ll help you find the location of your low point drains.
Airstream Low Point Drain Valve
Finding your Airstream low point drain valve can be quite a challenge because not all Airstream models are equipped with them!
If you cannot locate them or have confirmed you don’t have low point drains on your Airstream model, you can clear the water by blowing compressed air through them.
If your Airstream does have a low point water valve, you’ll need to first empty and flush your hot water tank, then proceed with our instructions above on how to open your water drain valves.
Wrapping Up Our RV Low Point Drain Valve Guide
We hope you learned everything you need to know about RV drains in this walkthrough.
Ultimately, the low point drains on your rig are simple mechanisms that, once located, are pretty easy to operate and are critical when storing or winterizing your RV.
Where were yours located, and what make/model/year of RV do you have?
Let us know in the comments below.
While you’re here, check out our other helpful RV repair guides:
- How to perform RV toilet foot pedal repair
- Our guide to RV roof reseal cost
- What to do if your RV heater is blowing cold air
- How to fix an RV microwave not working
- Our guide to motorhome fuel pump replacement
- How to replace RV window glazing bead
- How to fix an RV toilet not holding water
- How to fix a sagging RV slide out
- Preparing for an RV one night freeze
Leave a Comment Cancel reply
Save my name, email, and website in this browser for the next time I comment.
Terms and Conditions
RV Freshwater Systems
Last updated on: June 17, 2022
Guide to RV Low Point Drain Valves + Their Location on 4 Camper Brands
by Chris Coleman
www.rvtalk.net is reader supported. When you buy through links on our site, we may earn an affiliate commission.
Considering the size of most RVs, the water systems within them are quite impressive. The ability to take warm showers, use the toilet, and wash the dishes – all in a compact space – comes with an intricate design of water lines that carry water to, and away from your RV. Since this system is so intricate, it also requires a fair amount of maintenance to ensure the water pipes will continue to function properly.
The low point drain valve on your travel trailer is an integral component in the maintenance of your RV. Knowing where it’s located, as well as when and how to use it, is key to the longevity and liveability of your rig.
Let’s dive into what an RV low point drain valve is, how to use it, and where you can find it on some of the current market’s most popular camper brands.
What is an RV Low Point Drain Valve?
Why should you drain your rv water lines, winterizing your rv drain lines, forest river rv low point drain valve , jayco low point drain valve, airstream low point drain valve, winnebago low point drain valve, how to extend your low point drain lines, how to open low point drains on an rv, closing rv low point drains, how to drain your rv fresh water tank, how do you drain your rv water heater.

An RV low point drain valve is a pair of small, indiscriminate drain tubes located underneath your RV at its hypothetical “lowest point.” The primary purpose of this low-point water valve is to give the RV owner the ability to completely drain their lines.
Depending on the size of your rig, you may have multiple low-point drain valves, and they may be marked in different colors. Reading your owner’s manual is the best method of determining where your low point drains are located, as well as how many there are.
Draining your RV water lines serves multiple purposes. One of the main reasons is to prevent the buildup of gunk and stale water within your water lines. Letting water sit in low points for too long will eventually lead to unpleasant odors that seep up your water lines into the cabin of your travel trailer. By doing a frequent flush of your water system, you’ll keep the tubes clean and odor-free.
While frequent drainage is recommended to keep the overall health of your RV in good shape, the most crucial reason is for winterization purposes. If you plan on letting your RV sit over the winter, or you just plan on camping in colder climates, you must take preventative action to prevent your pipes from freezing.
Emptying your water tanks is simply not enough. RVs are designed so that water flows by gravity to the lowest points. Even if your freshwater tanks, grey, and black tanks are empty, there is still guaranteed to be some water left in the pipes. By opening your low point drains, you ensure that every little bit of water is removed from the system.

As mentioned, opening your low point drain valves is primarily used for winterization. If stale water is left in your RV’s water system over the winter, it can very easily crack the pipes, leading to expensive repairs when you return in the spring.
When winterizing, simply opening your drain valves and letting the water flow is not enough. You’ll either need to push all of the water out with air compression or dump a sufficient amount of antifreeze throughout your system. In an ideal situation, the low point drain on your RV would truly empty all of the water, but travel trailers are not often engineered in the most comprehensive way. By pushing air through to flush out the tubes, and by adding antifreeze, you’ll be positive that your water system will stay intact throughout the winter.
Another great method for emptying all of the water is to first open your low point drain valves, then go throughout the camper and turn on every faucet and flush every toilet. This creates a siphon of sorts, allowing the maximum amount of water to drain from the low points as efficiently as possible.
Where are the Low Point Drain Valves Located?

The location of your RV low point drain valve depends on a variety of factors. Not each camper is made the same, and it’s important to understand that your drain valve will likely be in a different location than your neighbors.
Low point drain valves are often fairly easy to spot by inspecting underneath your travel trailer. They are almost always plastic (PEX) tubes that hang from the undercarriage. They’re usually located near or underneath your fresh water tank and will be color-coded as blue, red, or grey/white. Blue valves correspond to your freshwater lines, red to your hot, and grey/white for your freshwater tanks.
Keep in mind this is just a generalized guide. Let’s dive into some specific travel trailer brands for a more accurate drain valve location.
Most Forest River RVs have one setup of low-point drain valves, marked by a blue and red tube. These have twist valves attached already, and the operation is extremely simple – just twist valves counterclockwise and let the water flow out.
To drain the fresh water tank on a Forest River, you must unscrew the cap attached to a white hose that is located underneath the fresh water tank.
A Jayco RV low point drain system is a little more unique than other rigs. In some models, there is a removable panel on the interior floor (normally near the fresh water tank) that houses two T-valves. To drain the low points of the camper, simply pull up on these two valves (normally blue and red) to begin drainage.
If your Airstream has an internally mounted fresh water tank, the drain valve may be located inside of the cabin, underneath a panel just like the Jayco’s.
If you own an externally mounted fresh water tank underneath the travel trailer, there will be two metal pipes with a plastic valve. These are not always color-coded like on other systems, but the operation is much the same. Turn the level 90 degrees until it’s in line with the main tubing to drain, and turn the level perpendicular when you’d like to close it.
The location of the drain valve on your Winnebago RV may differ based on the model. Two popular locations are below the water pump , as well as underneath the last storage bin on the passenger side. Always consult your owner’s manual to determine the exact location of your low-point drain valves.

Low Point drain valves are not always placed in the easiest to access locations. Luckily, these drains are almost always connected to a malleable PEX line, making alterations incredibly simple. The process of extending your drain lines is as follows:
- Using a pair of PEX line cutters, snip off the tubing just above the drain valve.
- Attach a 1/2” 90-degree elbow joint overtop of the existing tubing. Crimp down with your PEX crimping tool.
- Add your desired line length to the opposite end of the elbow joint, being sure to crimp down.
- Add a 1/2’’ drain ball valve to the end of this tubing; crimp down.
- Finally, attach the excess tubing to your RV’s frame with zip ties or a similar fastening device.

Opening your low point drains on your RV is a very simple process and normally requires zero tools. Each manufacturer makes their valves a little different while utilizing the same concepts.
Normally, there is a plastic valve that must be aligned parallel with the drainage tube to let water flow. These may be a generic black or white valve, but in some systems, they are a rubber-coated metal valve. In rare situations, your low point drains may not have plastic valves and will require an adjustable metal wrench to open.
Closing your RV drain valve is just as simple as opening it – simply reverse the process. Valves are normally placed perpendicular to the drainage tubing to close, as this turns a ball inside the valve to block the water flow.

Draining an RV fresh water tank is very similar to draining the low point valves, and it is often located in a similar spot. First, locate your RV fresh water tank, and search for a grey or white valve/tube connected to the tank. Unlike the low point drains, this will not be color-coded, and there is normally only one drain valve available.
Open this drain valve, as well as your low point drains, and turn on all faucets in the RV. Additionally, be sure to continuously flush your toilet until water no longer fills up in the bowl. When you see no more dripping, you’ll know your tank is empty.
Note: Never run your water pump when the fresh water tank is dry, as this can severely damage its operation.

Draining an RV hot water tank is just as easy as the fresh water. The first step in doing so is to turn your water heater to “bypass”. This will ensure that water doesn’t stay trapped within the tank, allowing the water to flow through instead.
Open all of your low point valves (particularly the red one), turn on all faucets and shower heads , and let the water drain out. You may want to attach an air compressor to the city water line to ensure maximum drainage.

Maintaining your RV’s water system is imperative to keeping it operating at full capacity. If living in your RV full time , most experts recommend flushing and fully draining your system around four times a year. If you’re letting your RV sit in storage all winter, it is even more important to do a thorough drain, in combination with anti-freeze, to prevent any pipes from bursting.
Using your low-point drain valve is the surest method of completely emptying your RV’s water lines. Extremely easy to locate, these drains are quickly accessible and require very little knowledge, skillset, or tools. If you’re ever in doubt, always consult your owner’s manual for the most up-to-date information.
With this guide, you have everything you need to know to keep your RV water system healthy!

About Chris Coleman
Chris Coleman is an interesting travel blogger and outdoor photographer with a great sense of humor. He owns an RV Accessories shop in New York City so he has the knowledge necessary to provide thorough reviews and give advice on how to choose the right products for RV travel. He puts all that RV knowledge and experience to good use in his sharing posts. Besides product buying guides/reviews, Chris also writes informative articles, how-to articles and RV camping guides in his own interesting viewpoint. Chris’s blog is one of the most reliable information sources for RV campers no matter if you're an expert or a determined beginner.
Related Articles in this Category
The 5 best rv hose heaters in 2022 to keep you water flowing (plus other options and diy tips), where to fill rv fresh water tank: 6 places to get it free, rv plumbing system basics: how does it work, rv water heater basics: use and maintenance, how to sanitize rv water tank, how to keep rv pipes from freezing while camping, the 10 best rv water softeners of 2022, rv water pump not working: the troubleshooting guide, how to convert rv water heater to tankless: easy steps to follow, the 15 best rv water filters for the money in 2022, the 15 best rv water hoses to buy in 2022, the 12 best rv water pressure regulators to buy in 2022, how to prime rv water pump: fix water pressure less than 1 hour, how long to keep fresh water in rv tank, the 15 best rv tankless water heaters (review) in 2022, the 15 best rv water pumps for the money in 2022, the 15 best rv shower heads to buy in 2022, leave a comment cancel reply.
Save my name, email, and website in this browser for the next time I comment.
- You are here:
- Home »
- Blog »
- » RV Water Tank Drain Valve: How to Drain RV Fresh Water Tank

RV Water Tank Drain Valve: How to Drain RV Fresh Water Tank
- July 12, 2021 /
- By James V.
RVs tend to provide their owners with a lot of freedom. You can go just about anywhere you want, when you want. However, RVs don't get you freedom from responsibilities. That means you'll always have something to do even when you RV full time.
The first step is to locate where your freshwater tank is located. After you find that, you have to look for the drain valve. This may or may not be labeled so be careful or you might miss it. Then you have to open the valve and give it either a 90 or 360-degree turn after hooking up the hose.
To learn more about how to drain your freshwater tank, just continue to read our article. it gives you needed information as some people are new to RVing and their owner’s manuals are not very informative. Nor are the dealer’s they bought their RV from.
How to Drain RV Fresh Water Tank

When it comes to RVs manufacturers like to play hide and seek. They hide different parts and the owner has to seek them out. Sometimes the game is easy and other times it is not so much fun.
Freshwater tanks are part of the former. They only have 2 locations where they can be put. Either there are inside beneath the couch or other piece of furniture or they are underneath your RV.
The inside location provides better insulation but that doesn’t make draining them any easier. After finding the location of your fresh water tank, you need to search for the drain valve. This search adds to your fun.
If your freshwater tank is located inside your RV, you might have a little more difficulty in finding the drain valve than if it were located underneath the RV. Generally, the drain valve is at the bottom corner or the lowest point of the tank. Sometimes they are located on the side of the fresh water tank.
Watch out that you select the right part as there are different hoses hooked up to the fresh water tank. The valve should be white and have a turn handle. After you find that, just open it up. There may be a ‘vent plug’ you will need to open as well in order to let some air pressure in to help drain the water.
Since this is fresh water you are draining, you can dump it anywhere. Finally, you can sanitize the tank with a little bleach and a good rinse. This doesn't have to be done every time but regularly.
RV Fresh Water Drain Valve Location

Common sense will tell you that the drain valve should be at the bottom of the tank and the lowest point the tank has. That way gravity is all that is needed to let the water drain out. The problem with this common-sense thinking is that it may not take into account the many different places that low points can be found.
Generally, the drain valve is found in the bottom corner of the freshwater tank but RV manufacturers being who they are, will also place that valve along the side of the fresh water tank and possibly one end.
It is possible that your owner’s manual or dealer may not tell you the exact location of the valve. make sure to ask so you have expert advice and can find it the next time when you need to drain it.
You should drain it regularly as the water inside the tank may only last a couple of weeks. That is if you get your water from a reliable and chlorinated, filtered source. Any other source and you may have to drain more frequently to keep the water fresh.
RV Water Tank Drain Valve on Jayco

On Jayco models, not only do you have to seek the drain valve, it may be very difficult to see. But it is there amidst all the other parts. The problem is that some models have it on the driver’s side and other models have it on the passenger side of the RV.
In some models, the valve is located behind a carpeted wood panel behind the overflow hoses and the propane door. Once you get to that location, you have to reach your hand up and feel for the valve. After getting your hand on it, you open it up and move out of the way.
On the driver’s side, you may have to look for a white 90-degree valve and turn that. It is about halfway back and near the freshwater tank. In some images, we noticed that there is a little white box the white valve is attached to. That would be it.
Jayco is known for putting different important parts in weird locations and one owner said you need a double-jointed arm to access the freshwater tank’s drain valve.
Where Can I Drain My RV Fresh Water Tank?

The fresh water tank is going to be one of the easiest tanks to drain. There are no real regulations that we found governing where to drain your freshwater. Since there are no bacteria, germs, shampoos, soaps, and other items in your freshwater tank, you can drain it just about anywhere you are at.
You do not even have to hook up a drain hose to direct the water to go into one specific spot. Just open the valve and let her rip. When you go to rinse your fresh water tank, you may not have the same freedom though.
If you use bleach to kill any possible germs that may come to the freshwater tank, you may have to find a safe spot to empty the tank. Or you may have to drain it into a portable container to make sure the bleach does not damage the ground.
After putting bleach inside and letting it swirl around for a while, you need to open the valve and drain again. Then you should rinse about three times to make sure all the bleach has been removed. These instructions go for any cleanser you use to sanitize your fresh water tank.
RV Fresh Water Drain Valve Leaking

This problem has several sources to it. If you are drinking water with a few minerals in it, the mineral deposits can ruin the seal and keep the valve from closing for you. That leaves just enough of an opening for water to escape.
To fix this issue, you would have to take the valve assembly apart and give it a thorough cleaning. It is not a tough job but it can be an annoying one. Or, there is a problem with the seals hardening up on you.
Some people say using a food-grade lubricant or plumbers grease will soften those seals so that they get back to the right consistency. Again, you would have to disassemble the valve and do the lubrication application right.
Or there could be something wrong with the knife valve cable. The manual operation may solve the problem temporarily but you would have to fix the cable eventually. Also, if the problem persists, you should bring the valve assembly out from underneath the RV and into the sunlight.
The extra light will help you see the tiny debris that can block the proper closing of the valves. You never know where those tiny bits of debris come from and it may be a smart move to add a filter on the intake side of the fresh water tank to minimize that from happening.
Draining Fresh Water Tank on a Forest River RV

This is an easy task to do if you can find the fresh water drain valve. Some people do not get training from their dealers and do not know where these parts are. Sometimes owner’s manuals are no help even with Forest River models.
On many of the RVs that Forest River makes, the low point valve should be the drain valve. There is a little white box-looking object underneath your RV. That box should also have a white-colored valve attached to it.
The box and the valve should not be hard to spot as dark-colored parts are surrounding this point. On the valve, there should be a little turn handle at the top. Just turn it as far as it goes to open it and the water should pour out.
What can confuse people is that the fresh water tank is sometimes located at the front of a Forest River travel trailer while the drain valve is located at the rear near the city water connection.
Some Water Tank Tips
In case you do not know, the term ‘potable water’ refers to water that you can drink. If you see government or campground designs that say non-potable water, do not use it to fill your fresh water tank.
That is just to clear up anyone’s confusion. Here are some good tips to follow to help keep your water tanks fresh:
- 1 . The potable water hose should only be used for potable water. Nothing else. It is not for draining your gray water tank.
- 2. Sanitize your fresh water tank regularly- the amount of bleach you use should be about 1 cup for every 15 gallons of water you put in your tank. However, be forewarned as different RV owners use and recommend different amounts of both ingredients.
To fully sanitize your fresh water system you will have to run the bleach and water mixture through your water lines up to the faucet. Then let them soak for a few hours before draining and rinsing.
- 3. Stinky sink solution - you can pour about 1/2 of a can of orange soda down the sink drain to rid yourself of the foul odor that has been gathering in the drain hose. The carbonation will help remove the build-up while the orange scent should cover the odor.
- 4. Use filters - not only for the intake line for your fresh water tank but also for your gray water tank. Letting food particles get into the gray water tank will add to the odors you smell if you haven’t drained the gray water tank.
A filter on the fresh water intake system will help protect your seals and drain valve from damage.
- 5. Baking soda cuts odors - not for your fresh water tank, but for your gray water one. Put about a spoonful or two into your sink and wash it down into your gray water tank. This will help cut odors.
- 6. Chemicals help - more for your black water tank and many people already do this. They find special RV black water tank chemicals to flush down through the system to help stop those foul odors from rising to your RV’s interior.
You will find them anywhere RV supplies and accessories are sold. If they are in stock.
- 7. Close the black water tank valve - this is to be done even if you are hooked up to a sewer system. If you leave the valve open, all the water will run out. However, the waste is left behind. Cleaning this mess is not a fun job.
- 8. Agitate your tanks - if you feel the tanks are not clean and there is still an odor, fill your tanks part way, add some cleanser and drive your RV. Let the motion do the cleaning for you.
Some Final Words
If you like playing kids’ games then you may want to buy an RV. The makers of these vehicles get very creative when it comes to locating parts. The fresh water drain is no exception.
Related Posts
ShowerMiser RV Water Saving System (Install and Use Guide)
Finding Replacement RV Low Point Drain Caps (What Size?)
RV Water Manifold Guide: What Is, Parts, Advantages
Leave a Comment:
How to Drain an RV Fresh Water Tank Step-by-Step
Read this page without ads! Go Ad-Free
Draining your RV fresh water tank is a relatively simple process. But there are some crucial steps to take to do it correctly, which we outline below.
Before we begin, you’ll first need to locate your fresh water tank drain valve and the low point drain valves (if you don’t know where they are already). They are typically located underneath your RV below or near the freshwater holding tank, but this will vary.
If you can’t find your drain valve, check your RV’s owner’s manual for the location. See below for links to the owner’s manuals for a few of the most popular RV and 5th wheel manufacturers.
How to Dump a Fresh Water Tank & Lines Step-by-Step
- Turn off the hot water heater before you drain the fresh water system.
- Wait for water in both the fresh water system and the heater holding tank to cool down to room temperature.
- Open all of the faucets, including the outside shower, if you have one.
- If applicable, set the RV water heater to the bypass position to prevent water from entering the heater tank.
- Open the fresh water tank dump valve and let the water drain out.
- Open the low-point drain plug or valve. There should be one for both the hot and cold water lines.
- Flush the toilet until water stops flowing.
- Turn the fresh water pump on as needed, removing any remaining water from the freshwater lines.
- Remove the water heater drain plug and allow the water to completely run out. Check out our guide on how to drain an RV water heater for some important tips!
Important : These are general instructions for draining your fresh water system. Please consult your owner’s manual for instructions specific to your camper model.
Where Is the Fresh Water Tank Drain?
Typically, the fresh water tank drain location is located on the underbelly of your RV, right underneath your freshwater tank, and will be attached to a pipe or hose. However, this will vary by manufacturer and model.
You should check your RV’s owner’s manual for the exact location of your drain valve. If you can’t find your owner’s manual, you may have to reach out to the manufacturer to get a copy. Below are links to the owner manuals for a few of the most popular RV manufacturers:
- Jayco Owner Manuals
- Forest River Owner Manuals
- Grand Design Owner Manuals
- Keystone Owner Manuals
- Winnebago Owner Manuals
- Thor Owner Manuals
- Airstream Owner Manuals
Tip : The information to drain your fresh water tank is usually in the plumbing system section of the manual.
Should I Leave Water in My RV Fresh Water Tank?
If you plan on winterizing or storing your RV for an extended period of time, you should drain your fresh water tank.
Tip : Generally speaking, you should only keep fresh water in your RV tank for about two weeks. However, many factors can affect how long your potable water will remain fresh. Check out our in-depth guide on how long to keep fresh water in your RV tank for some important information and best practices.
Why? Eventually, the water in your freshwater tank will become contaminated and unhealthy to cook with or drink.
Even when traveling, it’s wise to drain both the fresh water tank and the waste tanks beforehand (or keep the tanks nearly empty). Traveling with full tanks will add weight to your motorhome, causing wear and tear and increasing fuel consumption.
30 gallons of water in your fresh water tank will add 250 pounds of extra weight to your recreational vehicle!
You can always fill the RV water tank with fresh water when you reach your destination.
Leave a Comment Cancel reply
We highly encourage discussion on our posts and in our RV Community Forums . The most helpful comments are those that you can learn from or that help others out. Please refrain from insults, complaints, or promotional material. See our community guidelines for more information.
Save my name and email for the next time I comment.
Notify me of follow-up comments via e-mail.

How To Replace Rv Fresh Water Tank Drain Valve
A fresh water drain valve replacement is an essential maintenance task that can guarantee the efficient operation of your RV’s plumbing system and guard against leaks and damage from standing water. The process is fairly simple, so most RV owners with basic plumbing knowledge can finish it. Our guide will walk you through the procedure for how to replace RV fresh water tank drain valve, which involves shutting off the water supply, emptying the fresh water tank, removing the old valve, replacing it, reconnecting the water supply, and testing the new valve. It won’t take long to replace the fresh water drain valve on your RV if you have the correct equipment and some basic knowledge.
What Is Rv Fresh Water Tank Drain Valve
An RV’s fresh water tank may be drained via a valve that is found close to the vehicle’s bottom. The kitchen sink, shower, and toilet are just a few systems used by the RV’s fresh water tank to store and feed. While the tank has to be cleaned or when the RV is being winterized, the drain valve is utilized to empty it. The valve is often turned counterclockwise to open, and it may be found next to the water heater or pump. It is important to note that the location and usage of the drain valve may vary depending on the make and model of the RV. There are various reasons why you may need to repair an RV fresh water drain valve:
If the valve leaks, it will need to be replaced to avoid further damage to the RV.
Over time, the valve may get worn or rusted, making it harder to turn or resulting in leaks. To ensure proper operation, it is advised to replace the valve.
To ensure compatibility, you may need to replace the valve if you are replacing parts in your RV’s water system.
If the valve is damaged, it will need to be changed to guarantee that it performs correctly.
Difficulty to operate:
If you find it hard to use the valve, it could be time to replace the valve.
Steps To Replace Rv Fresh Water Tank Drain Valve
To replace an RV fresh water tank drain valve, you will need to follow these steps:
Step 1: Locate the valve
The freshwater drain valve is usually located near the bottom of the RV, often near the water pump or water heater. This is because the valve is used to drain the fresh water tank, which is typically located near these other components. However, it is important to note that the location of the valve may vary depending on the make and model of the RV.
Step 2: Switch off the water supply
Before you begin, make sure you turn off the water supply to the RV to prevent any leaks. To do this, you can shut off the RV’s main water supply valve or close the RV’s water supply valve.
Step 3: Drain the fresh water tank:
Open the freshwater flow valve to let the water in the tank drain out. Draining the water tank will also help you see if there are any other leaks or issues in the RV’s water system.
Step 4: Remove the old valve
Use a wrench to remove the old valve from the RV. Be cautious not to harm any of the surrounding pipes or fittings. When removing the valve, it’s vital to pay attention to the orientation of the valve and how it is attached to the plumbing, as you will want to install the new valve in the same way. Once the old valve is removed, have a look at the threads; if they are broken or rusted, you may want to replace the pipe as well.
It is also crucial to make sure that you have the right size wrench for the valve you are replacing to avoid stripping the threads or injuring the valve.
Step 5: Install the replacement valve
The replacement valve must then be installed after the old valve has been removed. The replacement valve should be installed in the exact same location and direction as the original valve, using the appropriate fittings and hardware.
Make sure that the new valve is put in the appropriate direction and that the threads match the old pipes or fittings. With care to avoid damaging the valve or the nearby pipes, tighten the valve with the wrench.
It is crucial to use the right kind and size of fittings and hardware when installing the new valve to guarantee a tight and secure fit. Also, be sure to use Teflon tape or pipe thread sealant on the threads of the valve and the pipes to avoid leaks.
Step 6: Turn the water supply back on
After the replacement valve is fitted, turn the water supply back on to the RV and check for leaks. To turn the water supply back on, you either open the main water supply valve to the RV or open the valve on the RV’s water supply line. If your RV has a water pump, turn on the main power supply to the water pump as well.
Once the water supply is switched on, you may check for leaks in the system. Inspect the new valve and all the fittings and connections for any signs of leaks. Also, inspect the surrounding area for any water on the floor or any puddles.
If there are no leaks, you may fill the fresh water tank and test all the faucets and appliances in the RV to confirm that the water is flowing properly.
Step 7: test the valve:
Finally, it is important to test the new valve to ensure that it is operating correctly. After turning the water supply back on and checking for leaks, you should open and close the valve to verify that it is functioning properly.
If the valve is leaking or not working properly, it must be fixed right away to prevent further harm to the water system of the RV. It is also a good idea to replace the valve during routine maintenance or while updating the RV’s water system.
In conclusion, replacing an RV fresh water drain valve is a relatively simple process that can be done by most RV owners with some basic plumbing skills. If you are unsure about replacing the valve, it is typically best to consult the manufacturer’s instruction manual or a professional. It is very important to understand that the specific procedures may change depending on the type of valve you are installing and the make and model of your RV. If you have any questions about a particular step of the procedure, it is usually best to consult the manufacturer’s instruction manual or a professional. You can help ensure that the valve is functioning properly and avoid any water leaks and damage to your RV by routinely inspecting the valve and testing it under various water pressure scenarios.

RV Vs Van Life! An Exciting Comparison

A Full-Time RV Living: What to Consider
Leave a comment cancel reply.
Your email address will not be published. Required fields are marked *
Save my name, email, and website in this browser for the next time I comment.

LATEST POSTS

Cost of Building an RV Park: Unveiling the Investment

Best RV for Full-Time Family Living: The Ultimate Guide

RV Garage Cost – Factors Affecting Prices & Tips to Save
Popular posts.

Is it Safe to Live in a Camper in the Winter?

How To Make RV Leveling Ramps?

How to Unclog Your RV Kitchen Sink: A Comprehensive Guide
Copyright © 2023 everythingaboutrv.com

- [ February 29, 2024 ] Plumbing Vent Replacement Tips Repairs & Maintenance
- [ February 14, 2024 ] Elevate Your RV Suspension To The Next Level RV Undercarriage & Frames
- [ February 10, 2024 ] Maintenance Tips for Outdoors RV Uncategorized
- [ February 10, 2024 ] Hidden Threat: Water Damage to RV Flooring RV Repairs & Maintenance
- [ February 10, 2024 ] Shrinkage in RV Window Glass Seals RV Repairs & Maintenance
- [ February 10, 2024 ] Checking Your RV Axle Dust Caps RV Undercarriage & Frames
- [ February 10, 2024 ] Replacing Your RV Entry Door Hold Back RV Repairs & Maintenance
- [ February 10, 2024 ] Dealing with Water Intrusion Behind RV Decals RV Repairs & Maintenance
- [ February 10, 2024 ] Step-by-Step Guide to Applying Geocel RV Sealant to Your RV Exterior Body RV Repairs & Maintenance
- [ February 5, 2024 ] RV Roof Reseal Repairs & Maintenance
RV Drain valve lubricant explained: What it’s used for and why

Let me introduce you to the RV product of the week. Has anyone ever talked to you about adding a RV drain valve lubricant by Thetford into your black or gray tank system? This is something you should be doing to protect your dump valves!
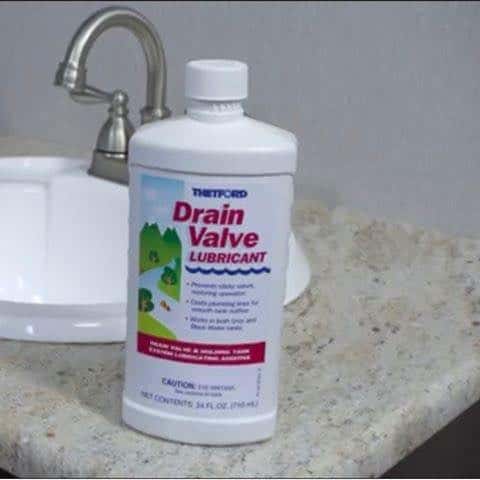
This is a water-soluble additive that lubricates holding tank systems and drain valves and coats plumbing lines for complete outflow of tank contents. It works in both your toilet and sink/shower waste holding tanks. It’s also non-staining.
Thetford’s Drain Valve Lubricant is specially formulated to lubricate all waste treatment systems. The 100% biodegradable liquid works with both black and gray water tanks, on RVs or boats.
Advertisement/Affiliate
It coats plumbing lines, preventing sticky valves and restoring the smooth operation of waste evacuation. This is especially recommended for those with cable dump valves, which are enclosed in the underbelly and harder to replace.
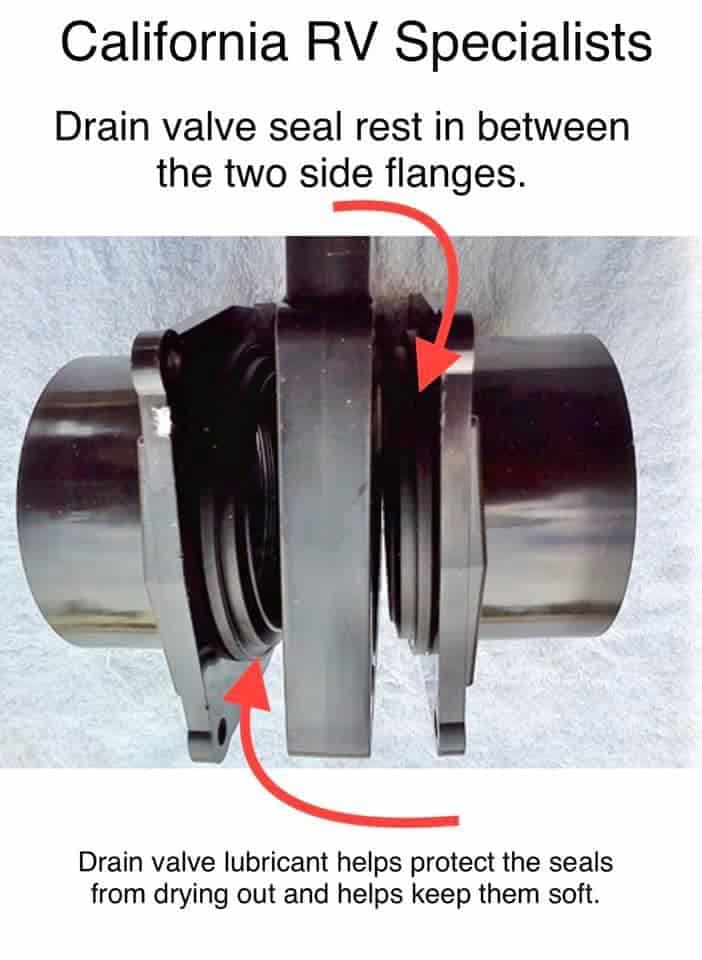
Key features:
- VERSATILITY: Thetford’s Drain Valve Lubricant is specially crafted to suit drain valves in RVs and boats.
- EFFICIENCY: Provides a protective coating to plumbing lines, ensuring a thorough and unobstructed flow of tank contents, preventing the adherence of debris to tanks and drain lines.
- EASE OF USE: Ensures smooth operation by preventing sticky valves, making the emptying process hassle-free.
- CONVENIENCE: Formulated to work effectively with both gray and black water tanks.
- ENVIRONMENTAL FRIENDLINESS: The Drain Valve Lubricant is entirely biodegradable and poses no harm to waste treatment systems.
Join me in this video as I explain more in detail about the product.
Diy product links:.
- Thetford RV Drain Valve Lubricant
- Thetford Toilet Seal Lube and Conditioner
- Thetford Grey Water Odor Control
- Thetford RV Level Gauge Cleaner
Make sure you check out our website, California RV Specialists , and their YouTube channel for more helpful information, and see our published articles on RVtravel.com and other social media pages.
- Drain Valve Lubricant
- Holding Tank Treatment
© 2015-2024 California RV Specialists All Rights Reserved
Drain Master Premium Gate Valve System
$ 243.67
Drain Master 3″ 12V-DC Premium Gate Valve System* w/LED Light. Featuring the Drain Master 303 Stainless Steel Gearing Made in Switzerland. Installing this on your 1.5 in gray water? You’ll need a PN 5205 Reducer Kit. Click here.
HOW TO TELL IF THIS IS THE CORRECT REPLACEMENT VALVE KIT
You can add a second switch to your valve. Click here to learn more.
Technical Data
Installation, testimonials.
An excellent solution for emptying your holding tanks. This 3″ 12 volt DC Gate Valve is installed on your gray water holding tank and/or your black water holding tank and then opens or closes with the simple push of a button from the LED operator switch mounted at your favorite location.
Kit includes:3″ electric gate valve, LED operator switch (NEW! now includes 5 amp inline fast blow fuse), set of 2 seals, Mate-N-Loc connectors on all electrical wires (wire and plug length combined approx 4″), LED Sensor (pre-mounted on back of gate as shown above), nuts, bolts, Dow 111 lubricant, 1/8″ Allen wrench (to operate manual override) and complete installation instructions.
– Dump your tanks with push button ease. – Add a second switch inside your RV. – System features L.E.D. open valve indicator. – Complete system is plug-and-play, making installation a 2-wire snap. – Gate opens/closes in 1 second flat.
LED indicator light integrated into the HD operator switch shows you at a glance when the valve is open or not fully closed.
Features a double-sided manual override, including an Allen wrench attached to the valve so it is at hand when the need arises.
Helps you solve your RV holding tank, RV tank, RV toilet, and RV sewer problems.
How to Use:
Full flow 3″ ABS gate valve adapts to 3″ ABS male or female bolt on specific flange fittings. Can be adapted to most pipe sizes with proper fittings and space requirements. Special seals required for sealing between valve and flanges.
A series of gears allow for a 50:1 gear reduction, developing the necessary torque.
A manual override is accessible from either side of the valve, easily accessible from the dome area.
To activate override, a 1/8” allen wrench is included. There are directional arrows for open/close. Gate is fully opened or closed with a turn and a half on the hex head.
LUBRICATION : Dow Corning 111 grease
DM02 Drain Master Product Sheet.pdf (includes measurements)
Installation Instructions – PDF Files will open in new window. DM28 Installation Instructions for Standard and Premium Valves DM35 Installation Instructions for Valve Reducer Kit 1.5 ” Pipe DM23 Manual Override with Allen Procedure DM50 Wiring Diagram for Standard and Premium Valves DM73 Troubleshooting Guide for Standard and Premium Valves DM26 Valve Cleaning Procedure
Note: If installation is going on 1.5” piping, you need to purchase a reducer kit sold separately Pt 5205 DM30-CR 1.5” Reducer Kit. If you need to get Adobe Reader for opening your pdf files, click here to download . Be sure to choose PC or Mac.
I live in my RV and have been using your electric waste valves for four years. I hope to never be without them again! Drain Master Electric Valves have changed my life. After proper installation, my RV has never leaked. Dumping black water is now as easy as flipping a switch from the comfort and warmth of the inside of my rig. I would highly recommend Drain Master Electric Valves to any serious RV’ er who would like to expand their enjoyment of camping.”
Happy Camping!
We have a Prowler 5th wheel. Draining the black water was a real problem, I had to crawl under the trailer to pull the drain control. Now, it’s a breeze, just push the switch and the black tank is drained. I fill the tank with a hose and drain until I see clear water flowing. We love the Drain Master.
Bob and Joan G. Florida
I would not live without a Drain Master since on my last RV, it was a wonderful thing. I live in a travel trailer now too and have one, and it is just the best invention. I tell everyone about it…..
Debbie H. Sierra Vista, Arizona
We love our Drain Master valves. They make emptying the tanks quick and easy.
Preston & Bev J.
We are really happy with our Drain Master valves. They make dumping much easier.
Ken & Nola S.
I have an Eagle and it takes 3 valves. They work really, really well. I am so pleased.
Joe & Barb M.
The Drain Master is a great mod to our 97′ Sea Breeze. It’s really convenient to just activate the switch and dump. I’ve coupled it with one of those piccolo pipe units that spray water in the tank while we dump. A couple of activations and we run clean and are finished! As I told National RV, the Drain Master would be a great addition to their RV’s.
I’ve got 2 of them – wouldn’t have anything else.
This is an unsolicited testimonial letter, to thank you for the outstanding service you provided on our RV during our visit to your plant last week.
We were having trouble with the electric dump valve on the black waste tank of our 2005 Phoenix Cruiser. The key Phoenix executives felt our problem would be best diagnosed and solved by you and your staff – if we were “up” for the 150-mile round trip to Hollister and return to our home on the San Francisco Peninsula.
The purpose of this letter is to tell you-and any interested party-that the trip was well worthwhile. You not only took care of the mechanical problem, you also provided snacks to tide us over until we could find a spot for lunch.
We arrived at your plant just before noon. In no more than 10 minutes you and one of your factory mechanics were –literally- on the ground, analyzing our problem. The two of you worked straight through the lunch hour, until you had replaced both the black and gray valves with your improved version of that part. It was an important replacement for us because of the improved design of you manual over-ride feature.
You not only replaced both valves which you had manufactured-you also reinstalled a section of the waste line itself, because you noticed it was improperly aligned.
Needless to say, we very much appreciate the way you stand behind your product, and want to thank you for the courtesy and efficiency demonstrated during our visit. We took off on a 5-day trip to the gold country the very next day and everything worked perfectly.
Thanks again.
Sincerely yours, Les K. San Mateo, CA
This Drain Master is fabulous! No more leaning down to pull a handle that is hard to move and sometimes breaks in the half open position, making the black waste tank useless. No more repairs on the handle and no more messy hookups.
John G. Mountain Home, ID
The greatest thing since sliced bread! No more getting on your knees to open those waste valves, simply push the button and its done. Your trips to the dump station are clean and simple with Drain Master!!
Nick All Seasons RV Michigan
Since putting Drain Master in stock, we’ve experienced great response. We chose Drain Master over other brands because we felt that their design was far superior to the other brands. Also, the service we’ve received has been outstanding!!”
Brett Parts Manager Michael Hohl RV Nevada
Drain Master will enable me to operate the holding tanks so easily, without bending, kneeling and strain. A bad back and knees made opening and closing the valve very difficult. My toughest job is now my easiest.
Thank you for the great product.
P.S. Your new sewer hose is the best ever!”
Duane Washington
Let us know what you think about Drain Master
You may also like…

28 ft Waste Master Sewer Hose Kit
Related products.
Wye Harness with plugs for 2nd switch option
IMAGES
VIDEO
COMMENTS
Step 2: Identify the camper low point drain valve that needs to be replaced (whether one or both). Step 3: Cut the valves off just above the existing crimp. Step 4: Use a crimping tool to crimp two new shutoffs on the lines. You can use pretty much whatever you like here, but many RVers swear by Sharkbite ball valves .
An RV low point drain valve is a pair of small, indiscriminate drain tubes located underneath your RV at its hypothetical "lowest point.". The primary purpose of this low-point water valve is to give the RV owner the ability to completely drain their lines. Depending on the size of your rig, you may have multiple low-point drain valves, and ...
Low point drains are designed to allow the water to drain completely from an RV's water system. The primary reason you'd want to drain the water from your RV's plumbing is to help avoid the risk of the lines freezing. As you might expect, low-point drains are situated at a low point in the plumbing. There are typically two or three low ...
Jayco Low Point Drain Valve. The Jayco model of RVs seem to have the pull-up and push down low pint water valve. This valve should be located inside your Jayco RV and be inside a cabinet. More specifically, it should be near your basement compartment behind a plastic panel that you will need to remove to get to it.
This video shows how I replaced the drain valve on my travel trailer's freshwater tank with something more durable than the original plastic valve.
The first step is to locate where your freshwater tank is located. After you find that, you have to look for the drain valve. This may or may not be labeled so be careful or you might miss it. Then you have to open the valve and give it either a 90 or 360-degree turn after hooking up the hose.
If the valve is working, you probably have solids blocking the drain line. If that's the case, I would use Thetford's Tank Blaster product. Keep in mind if it is the valve and you do this first, you will have at least 1/2 of the tank full of water that will need to be pumped out. I have heard of some RVers that have used drain cleaner but ...
They can also be easily removed by compressing the release collar. This particular fitting has a braced back for securing it into the wall. On the fresh water tank drain I used a standard 1/2-inch barbed hose connector with a 1/2-inch threaded male end attached to a standard garden hose valve. This is held in place by a hose clamp.
How to drain rv freshwater tank Jayco Greyhawk and drain the low point drains we also discuss draining the entire system and the locations of the valves for ...
Camco RV Drain Valve w Flange for 1/2" or 3/8" Diameter Drain Hose - Barb Thread - CAM22223. Our Price: $9.46. (102) In Stock. Add to Cart. This drain valve with flange lets you easily drain your RV's fresh-water tank. The valve has 1/2" and 3/8" diameter barb thread for use with vinyl tubing.
Open all of the faucets, including the outside shower, if you have one. If applicable, set the RV water heater to the bypass position to prevent water from entering the heater tank. Open the fresh water tank dump valve and let the water drain out. Open the low-point drain plug or valve. There should be one for both the hot and cold water lines.
Step 4: Remove the old valve. Use a wrench to remove the old valve from the RV. Be cautious not to harm any of the surrounding pipes or fittings. When removing the valve, it's vital to pay attention to the orientation of the valve and how it is attached to the plumbing, as you will want to install the new valve in the same way.
Buy Camco RV Water Tank Drain Valve | Features a Durable Plastic Construction, Comes with a Flange, and is Used with 3/4-Inch or 1/2-Inch Vinyl Tubing (22223): Sewer Hose Carriers & Fittings - Amazon.com FREE DELIVERY possible on eligible purchases
Ways to winterize. There are two ways to winterize: blowing all the water out with an air compressor or running RV antifreeze through the system. In either case, you will want to drain the water heater by removing the drain plug. If you have a Suburban water heater, it will have an anode rod. You will want to verify that it is not corroded and ...
RV Hot Water Heater Drain Valve, Brass 1/2" RV Water Heater Replacement Drain Valve with PTFE Tape, Wide Mouth, Easy Replace Drain Plug. $899. FREE delivery Thu, Jan 4 on $35 of items shipped by Amazon. Only 18 left in stock - order soon.
This drain valve lets you easily drain your RV's fresh-water tank. The valve has 1/2" and 3/8" diameter male NPT thread for use with vinyl tubing. Plastic construction is durable. Great Prices for the best rv fresh water from Camco. Camco RV Drain Valve for 1/2" or 3/8" Diameter Drain Hose - Male NPT Thread part number CAM22243 can be ordered online at etrailer.com or call 1-800-940-8924 for ...
Replace a broken valve or install a new drain so you can easily empty your RV's fresh-water tank when you return home. Barbed opening fits both 3/8" and 1/2" hoses. Great Prices for the best rv fresh water from Valterra. Valterra Universal Drain Valve for RVs - 3/8" and 1/2" Barbed - White part number A01-2025VP can be ordered online at etrailer.com or call 1-800-940-8924 for expert service.
About This Product. Dual Size Drain Valve - Dual size drain valves easily drain your RV fresh water tank. Durable plastic construction. Comes with 3/8 in. flange or 1/2 in. barb. Is graduated for use with 1/2 in. or 3/8 in. vinyl tubing. Easy to operate. Durable plastic construction. Fits 1/2 in. drains. Fits 3/4 in. drains.
Key features: VERSATILITY: Thetford's Drain Valve Lubricant is specially crafted to suit drain valves in RVs and boats. EFFICIENCY: Provides a protective coating to plumbing lines, ensuring a thorough and unobstructed flow of tank contents, preventing the adherence of debris to tanks and drain lines. EASE OF USE: Ensures smooth operation by preventing sticky valves, making the emptying ...
http://www.RVtravel.com Gary Bunzer, the RV Doctor, explains how to properly drain the fresh water holding tank of a recreational vehicle, whether a motorhom...
Camco RV Drain Valve w Flange for 1/2" or 3/8" Diameter Drain Hose - Barb Thread - CAM22223. Retail: $17.24. Our Price: $9.55. (101) In Stock. Add to Cart. This drain valve with flange lets you easily drain your RV's fresh-water tank. The valve has 1/2" and 3/8" diameter barb thread for use with vinyl tubing. Plastic construction is durable.
QUICTO 2pc RV Drain Valve Handle, RV Sewer Drain Valve Plastic Handle Replacement Camco Compatible - Fits 1 1/2" and 3" Gate Valves, Black. 5.0 out of 5 stars 1. Save 7%. $7.99 $ 7. 99. Typical: $8.59 $8.59. Lowest price in 30 days. FREE delivery Tue, Dec 5 on $35 of items shipped by Amazon.
An excellent solution for emptying your holding tanks. This 3″ 12 volt DC Gate Valve is installed on your gray water holding tank and/or your black water holding tank and then opens or closes with the simple push of a button from the LED operator switch mounted at your favorite location. Kit includes:3″ electric gate valve, LED operator ...