
- Trip Reports
- Areas & Ranges
- Huts & Campgrounds
- Logistical Centers
- Fact Sheets
- Custom Objects
- Plans & Partners
- Compass Basics: An Introduction to Orientation and Navigation

- Images (15)
- Comments (30)
- Introduction
The basics of compass usage are surprisingly simple and can be mastered quickly; and once learned they will certainly become an invaluable skill for any hiker, mountaineer, back country skier or suchlike outdoor enthusiast. However, if you are anything like most of us, chances are you have been packing a compass around for years, on your outdoor adventures, without fully utilizing it. It’s probably time to change that, isn’t it? Essentially a compass is nothing more than a magnetized needle, floating in a liquid, and responding to the Earth’s magnetic field consequently revealing directions. Over time compass markers have added features which make compasses work more harmoniously with maps and also more beneficially as stand alone tools. Today, compasses can be classified as one of four types, namely: fixed-dial (the type that you find on a key chain, or that come out of a gum ball machine) , floating dial (the needle is an integrated part of the degree dial) , cruiser (professional grade instrument used by foresters) , and orienteering. For hiking, mountaineering, back country skiing, canoeing, hunting or the like, the orienteering type is the most sensible being accurate to within 2 degrees, not requiring a separate protractor nor map orientation, and being highly affordable. Hence forth, this article focuses solely on the orienteering compass .
- Orienteering Compass Parts
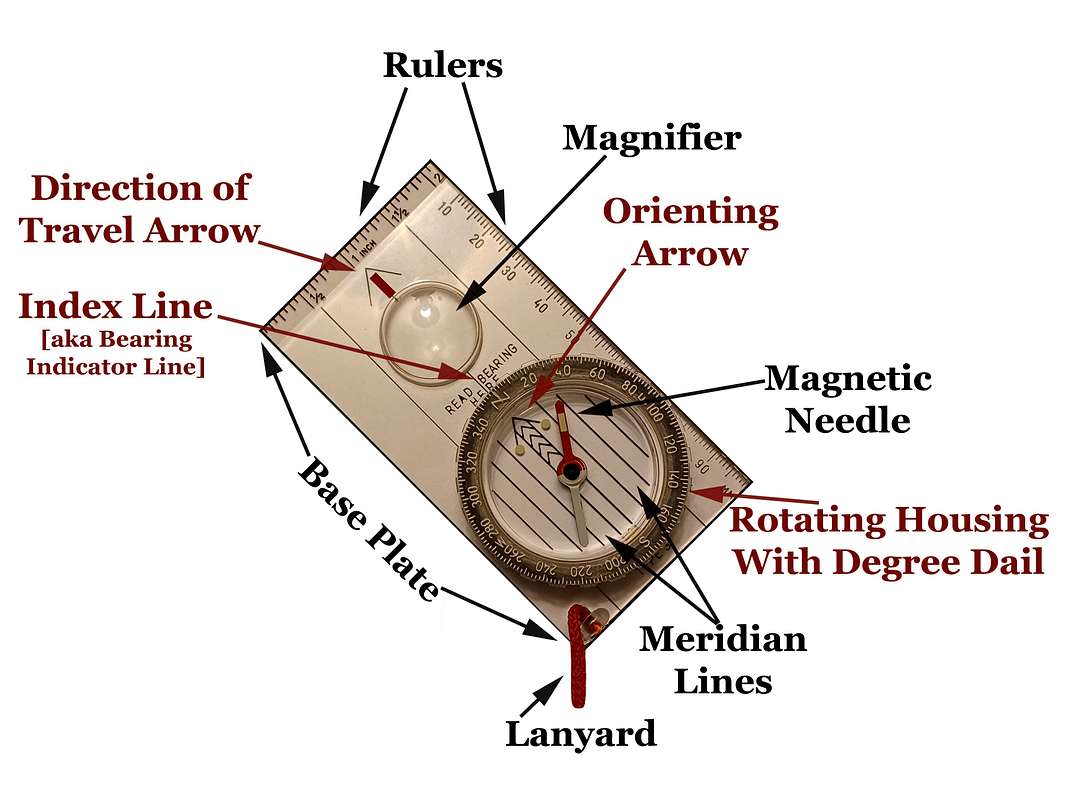
Let’s begin our introduction to compasses by taking a look at a standard, modern day, orienteering compass, and identifying its parts. As figure 1 shows an orienteering compass typically consists of three main parts: a magnetic needle, a revolving compass housing, and a transparent base plate. The magnetic needles north end is painted red and its south end white. The housing is marked with the four cardinal points of north, east, south, and west and further divided into 2 degree graduations indicating the full 360 degrees of a circle. The bottom of the rotating housing is marked with an orienting arrow, and meridian lines. The base plate is marked with a ruler (and/or USGS map scales), an index line (bearing reading line), as well as a direction of travel arrow.
- Directions and Degrees
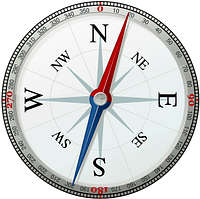
Before beginning to use a compass one should familiarize himself with basic directions and their degree readings. The four cardinal points are all 90 degrees apart, with East being at 90 degrees, South at 180 degrees, West at 270 degrees, and North at 360 degrees (or zero degrees). Identifying the degrees by 45 degree increments gives us the eight principal points of direction namely North (O or 360 degrees), North East (45 degrees), East (90 degrees), South East (135 degrees), South (180 degrees), South West (225 degrees), West (270 degrees), and North West (315 degrees). Memorizing the eight principal points can help one to instinctively associate directions and bearings, and help eliminate errors when taking bears (bearings are explained in the next section) . For example if you are told that a landmark is SE of your location, you know that is 135 degrees, or conversely if you know you need to go West but you calculate the bears as 90 degrees you will instinctively realize the bearing is wrong, as West is at 270 degrees (turn your compass around, you have committed the classic 180 degree error) . You may have heard directions given in terms like NNW or ESE, those types of directions are a result of distinguishing degrees in 22.5 degree increments resulting in the 16 traditional compass directions. Typically the eight principal points are sufficient to know. See figure 2.
One of the most important uses of a compass is taking, and following a bearing. A bearing is the direction from one spot to another, measured in degrees, from the reference line of north; in other words it’s one of the 360 degrees of the compass rose. To take a bearing hold the compass in front of you with the direction of travel arrow pointing at the object of interest. Hold the compass level and steady, and rotate the housing dial, until the orienting arrow lines up with the red end (north end) of the magnetic needle, all the while keeping the direction of travel arrow pointed at the object. Read the number indicated at the index line, and that is your bearing. Now to follow that bearing to the object, let’s consider an example. Say you want to travel to a large rock outcropping on the horizon, which is currently visible to you, but which may leave your field of vision when you walk into a dip, or when pending clouds come in or the sun sets. Let’s say your bearing on the outcropping measured 315 degrees (or NW). Assuming you still have the direction of travel arrow pointing at the rock outcropping, and have not changed the 315 degree bearing setting on the dial, walk forward keeping the magnetic needle over the orienting arrow (by rotating your body, and not the dial), and the straight line course (as pointed out by the direction of travel arrow), will lead you to the rock outcropping. En route, when the rock outcropping leaves you line of sight pick out an intermediate landmark along the bearing, so you don’t have to constantly look down at your compass. Walk to the intermediate landmark, and repeat with another landmark until you reach your destination. Once you arrive at the rock outcropping, what bearing do you use to return to where you came from? Actually you don’t need any other bearing besides the 315 degrees already set on your compass. To return, just point the direction of travel arrow at you, instead of forward, and then rotate your body until the orienting arrow lines up with the red end (north end) of the magnetic needle, and then walk straight ahead while keeping the magnetic needle over the orienteering arrow (just as you did in going to the rock outcropping). That is the easy way to backtrack, of course you could also calculate your back bearing by subtracting 180 from your forward bearing of 315, and set the 135 degree (SE) difference at the compasses index line and then use the same body rotating method mention earlier, only this time you’d have the direction of travel arrow pointing your way. Try this. Take your compass to an empty parking lot or field and mark a spot. While standing at the spot set your compass to any bearing between 0 and 120 degrees, pick a landmark along the direction of travel and take 15 steps toward it. Stop, add 120 degrees to your initial bearing, pick out a landmark along that bearing and walk another 15 steps toward it, stop and once again increase your bearing by 120, pick out a third landmark and again walk 15 steps. Notice you have arrived back at your original starting location. Let’s return to the example above where we took a 315 degree (or NW) bearing on a rock outcropping, and lets suppose that enroute to the outcropping we encounter an obstacle which we must go around thus forcing us to deviate from our straight line course. If you are lucky enough to be able to pick out a landmark that’s along the bearing, and also on the other side of the obstacle, you have nothing to worry about, just go around the obstacle and get back on course by reaching the landmark and aligning the red end of the magnetic needle over the orienteering arrow, and continue walking.
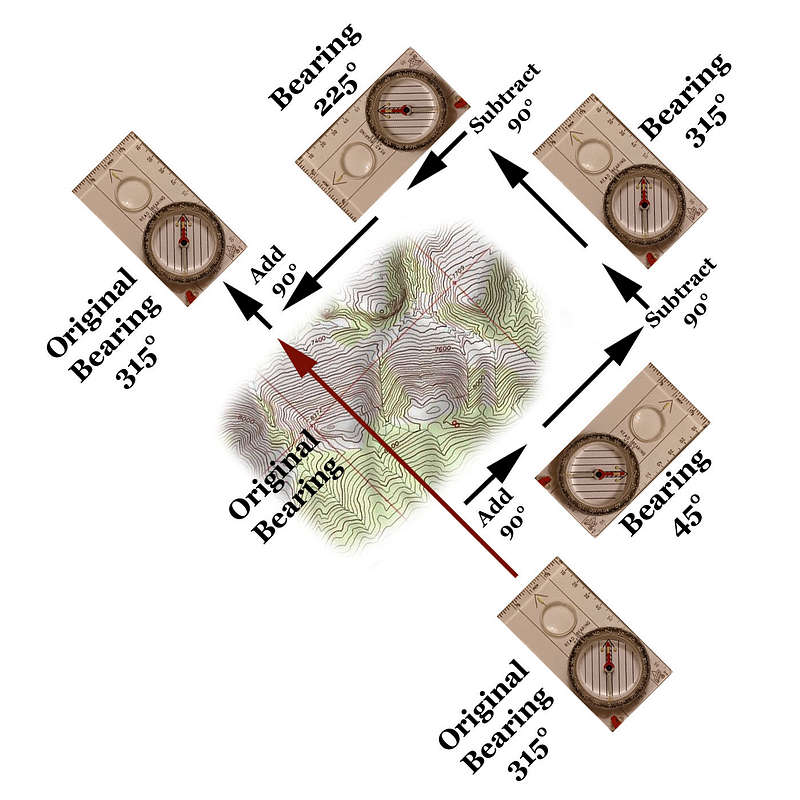
If you can’t see a landmark along your course, there are a couple of other methods you can use to get around the obstacle and get back on your original course. One method is to have a member of your party navigate the obstacle, and then treat him like a landmark. One he has cleared the obstacle talk him into position along your original bearing. Also have him take a back bearing on you to confirm he is in indeed back on course. He can do this by pointing the direction of travel arrow of his compass at himself and then turning his body so as to align the red end of the magnetic needle over the orienteering arrow, and he should notice that you are along the bearing, if not he needs to move left or right. If the obstacle is too large for the previously described method, or you are on a solo trip, you can use right-angles to maneuver the obstacle. To do this turn 90 degrees and walk across the front of the obstacle while counting your steps. To make a 90 degree turn without changing the bearing setting on your compass, simply turn your body until the red end (north end) of the magnetic needle points at the West marking (to turn right) or East (to turn left), as opposed to the normal North marking. Once you’re past the front of the obstacle turn 90 degrees again, by rotating your body until the red end of the magnetic needle is over the orienting arrow, and walk past the obstacle. Once past the obstacle, turn 90 degrees for a third time (by pointing the red end of the magnetic need at the opposite marking or your first 90 degree turn), and walk the same number of steps you counted to get past the front of the obstacle. Once the steps are up, turn your body to align the magnetic needle back over the orienteering arrow (thus turning 90 degrees for a fourth and final time), and you will be back on course. See figure 3.
Bearings can also be calculated from a topographic map, and then used in the field. Assume you know you are at landmark A in the field, and you want to travel to landmark B, but you can’t see it. If you have a topographic map and you can identify both landmarks on the map, you can use you compass with the map to get a bearing thus enabling you to travel accurately to landmark B. On the map align either the left or the right edge of the base plate through landmarks A and B with the direction of travel arrow pointing toward B. If the base plate edge isn’t long enough to reach both landmarks simply extend it with any straight edge (for example a piece of paper), or draw a straight line between the points and align the compass edge with the line. Without moving the base plate turn the compass housing until the orienteering arrow points to the top of the map (remember that north is at the top of the map). If you are lucky enough to have one of the maps north/south grid lines visible under the compass housing you can align the meridian lines on you compass with the maps north/south grid line as you turn the housing until the orienteering arrow points to the top of the map. Now, read the bearing at the compasses index line, and follow the bearing in the field! See Figure 4A-C. A word of caution, map bearings and field bearings can differ in the USA by as much as 30 degrees east and 20 degrees west. This difference and how to deal with it is explained in the next section below on declination. Figure 4A-C, has a map with magnetic north lines, rather than true meridian lines, and so declination is not a factor.
- Declination
A compass needle is influenced by the earth’s magnetic field which causes it to line up with magnetic north. Maps, on the other hand, are typically oriented to the North Pole (which is truth north). The difference between these two norths is called declination, and must be accounted for when using your compass in conjunction with a map. There are places where the two norths are the same, these places fall on the so-called agonic line, see figure 5 . In areas to the left of the agonic line the magnetic compass needle points a certain number of degrees to the east of true north, and on the other side of the line the magnetic needle points a certain number of degrees to the west of true north (in other words the magnetic needle points toward the agonic line). We say areas to the left of the line have east declination and those to the right have west declination. Figure 5 shows the 2005 declinations in the USA. Note, declination numbers change over time as magnetic poles shift. Thus said it’s important to know how old the declination information on your map is before heading out into the field. Current declinations can be had at the NGDC website . The website also tells you by how much declination is changing per year. Note that easterly declinations are changing by a west amount (minutes), and westerly declinations are changing by an east amount, thus over time magnetic north is approaching true north. If you know by how many minutes on average the declination of your area is changing per year you can use that to update an out of date map figure. For example if you have a map from 1960, and you learn that the declination is changing by 0° 7' W/year, multiple that number by the elapsed years, and divide the result by 60 to get the degree change in declination. For example, (2007-1960) * 7 = 329; since there are 60 minutes in a degree 329/60 = 5.48 degrees or about 5.5 degrees. So if declination on the 1960 map is 15 degrees east, the 2007 value is 15-5.5 or 9.5 degrees east.
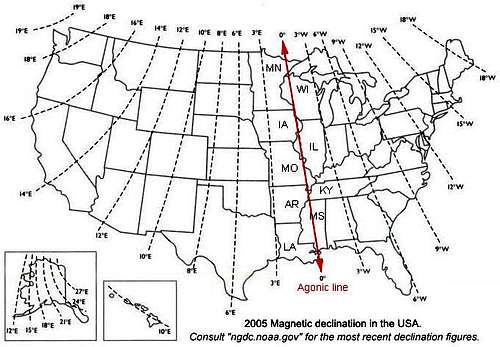
If you are simply taking and following bearings in the field, you can completely ignore declination. Likewise if you are only calculating and working with bearings on a map declination is unimportant. However, when you calculate map bearings from a map drawn to true north and then use the bearings in the field, you may be thrown completely off course if you don’t adjusting them for the declination of the area. Consider this, say you are in Rhode Island where the declination is 15 degrees west, and lets say your map bearing is 0 degrees (or directly north). You set your compass dial to zero, turn your body to align the magnetic needle over the orienteering arrow, and take off in the direction of the direction of travel arrow walking toward an intermediate landmark, without doing any bearing adjusts for declination . In doing so, for each 60 feet you travel, you will be 15 feet to the west of your course, thus after traveling one mile you will be one-quarter mile off course! Fortunately, it a simple matter of adding to or subtracting from a map bearing to compensate for declination. Also, modern compass are available which can be set to automatically adjust for declination if you don’t want to bother with the math, if so equipped consult your compass booklet to learn how to set it. Here is all you need to remember when converting a map bearing to a magnetic bearing for use in the field: If your declination is west (you are on the right side of the agonic line, see figure 5) , ADD the number of degrees of declination to your map bearings, and if your declination is east (you are on the left side of the agonic line, see figure 5) SUBTRACT the number of degrees of declination from your map bearing. Of course if you are plotting a field bearing on to a map do the opposite: that is ADD east declination to a magnetic (field) bearing and SUBTRACT west declination from a magnetic (field) bearing. Let’s say you are hiking in Utah where the declination is 13 degrees east. You take a bearing from you map and learn that your destination lays SE at 135 degrees. To use the bearing in the field you would subtract 13 (the declination) from 135 resulting in 122 and simply set your compass dial at 122 degrees and then follow that bearing to your destination. To get this clear in your mind, try this. Pretend your declination is 20 degrees east (your in Alaska). That means the needle on your compass is pointing 20 degrees east of true north. You need to travel due north (0 or 360 degrees), so set your compass to 360, hold it in front of you and turn your body until the magnetic needle aligns with the orienteering arrow. Think to yourself "my compass is pointing off by 20 degrees to the east, my right, so to go true north I really need to point my direction of travel arrow 20 degrees to my left" . So rotate you body counterclockwise until the magnetic needle lines up with the 20 degree marking on the compass housing dial. Now the direction of travel arrow is pointing to true north. Knowing where true north lies, now follow the declination adjustment rule by subtracting 20 east declination degrees from your 360 degree bearing and set your compass dial to 340 degrees. Again, turn your body until the magnetic needle aligns with the orienteering arrow, and notice the direction of travel arrow is now pointing to true north! So that is why you subtract east declination. To further cement this concept into your mind repeat this exercise, but use a pretend west declination instead. In field orienteering it’s all about getting the direction of travel arrow pointing in the correct direction. Some compasses have a declination scale marked within the housing. If you compass is so marked, you don’t need to adjust a map bearing before using it in the field, instead you just need to remember to align the magnetic needle with the declination marking rather than the orienteering arrow, and then follow the direction of travel arrow as usual. When you take a field bearing and want to plot it on a map, take it with the magnetic needle pointing to the declination figure rather than the orienting arrow, and then you can use the bearing on the map without adjustment. A map trick used to avoid converting a map bearing to a field bearing is to draw magnetic north lines on the map based off the diagram at the bottom center of all USGS maps. With magnetic north/south lines drawn you can then align the meridian lines of your compass dial with the hand draw lines and the bearings indicated at the index line are field ready bearings. Figure 4A-c above has magnetic north lines drawn on it, and thus no adjustment were needed to use the map bearing in the field. A compass trick used to avoid declination adjustments is to place a piece of scotch tape over the compass dial starting at the east declination and ending at the value of declination plus 180. Map bearings can then be set on the compass dial as read from the map, but the magnetic needle now needs to be aligned with the tape line, rather than the orienteering arrow. Note if the declination is west, place the tape strip at 360 minus declination to 360 minus declination minus 180. The mechanical declination adjustment on so-enabled compasses uses this very procedure.
- Compass Dip
As learned in the declination section, magnetic needles are affected by the horizontal direction of the Earth’s magnetic field. Bearing that in mind you might not find it surprising to learn that they are also affected by the vertical pull as well. You see, the closer you get to the magnetic north pole (located near Bathurst Island in Northern Canada in 2007), the more the north-seeking end of the needle is pulled downward. Whereas, at the south magnetic pole (located just off the coast of Wilkes Land, Antarctica in 2007) the north-seeking end of the needle is deflected upward. Only at the equator is the needle unaffected by vertical magnetic forces. To overcome magnetic dip manufacturers must design compasses that have the needle balanced for the geographic area in which they will be used. Thus, a compass built for use in North America, will not work in South America. The North American compass will have the pivot point the needle rests on slightly into the north half of the needle thus offsetting the downward pull. When the compass is taken to South America, the imbalance will work in the same direction as the vertical pull and the needle could very well rub against the roof of the housing making the compass unusable. In other words you will need a compasses manufactured for use in the part of the world you intend to use it. As a result of these magnetic variances, the compass industry has divided the earth into 5 "zones", which you can learn more about at thecompassstore.com . Compasses with so-called global needles are available, and they can be used accurately in any part of the world. Global needles are also useful if you tend to take bearings while moving making it difficult to hold the compass level. Global needle compasses can handle tilts up to 20 degrees.
- Triangulation
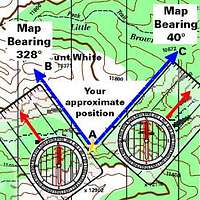
It was mentioned early that one of the most important uses of a compass is for taking and following bearings. Equally important is using a compass to pinpoint your exact location on a topographic map. If you can look at a map and determine a line you are on, such as a road, hiking trail, or mountain ridge, you can pinpoint your location with only one other piece of information. Say you are on a hiking trail, and to the west you can identify a mountain peak. You take a bearing on the peak and learn that is at 280 degrees. Next you adjust it for, say, the 10 degree easterly declination of the area arriving at a map bearing of 290 degrees - remember to convert a field bearing to a map bearing do the opposite conversion of a map bearing to a field bearing by adding east declination and subtracting west declination . Next, with the adjusted bearing set on the compass dial, find the landmark on the map, and point the direction of travel arrow in the direction of the landmark with the edge of the base plate on the landmark. Keeping the edge of the base plate on the landmark, rotate the base plate (not the dial) until the meridian lines of the compass align with the north/south lines of the map. Now plot this line back to the position line (in this case the hiking trail) you are known to be on, and where the line crosses the position line is your exact location. This method is known as free triangulation. If you are not on a position line, you will need to identify two landmarks in both the field and on the map to pinpoint your location. This method is known as triangulation. First take a bearing on landmark A, and adjust it to a map bearing and set that on the compass dial. Follow the above described process to orient the compass on the map by passing the base plate edge over the landmark and rotating the base plate (not the dial) until the meridian lines of the compass parallel the north/south lines on the map, and draw a line on the map along the base plate edge. Repeat the process with the second landmark and the intersection of the two lines is your exact location. See Figure 6. Another use for triangulation is in being able to return to an exact location. Say you are hiking and decide to stash a water bottle part way along the trail so you can drink it on your return trip and avoid carrying it for the whole hike. You take a look around, and stash the water bottle behind a rock. Next you pick out two permanent landmarks which are preferably about 90 degrees apart, and take a bearing on each. Make a note of each landmark and it’s bearing, then when you return to the general area all you need to do is position yourself where the two bearings match and you will find you hidden water bottle.
- Navigation Tips and Tricks
Understanding Maps : To be truly strong at orienteering and navigation, one must become very familiar with maps, and the abundance of information they contain. Unfortunately, it would require a separate article to fairly explain maps, but it’s still worth looking at some map basics here. Know the scale of your map. All maps list their scales in the margin. A scale of 1:250,000 means that 1 unit (be it inches, feet, meters, or whatever) on the map is the equivalent of 250,000 units in the real world. Most USGS maps are 1:24,000, (also known as 7.5 minute maps) where 1 inch equals 2,000 feet (3/8 mile) in other words 2.64 inches equals one mile, thus a 7.5 minute USGS map has a north-south extent of about 9 miles. Clearly, the smaller the scale, the more detail is revealed. Maps are drawn based on latitude and longitude lines. Latitude lines run east and west (that is, parallel to the equator) and measure the distance in degrees north or south from the equator (0° latitude), and are often called parallels. Longitude lines run north and south intersecting at the north and south poles. Longitude lines measure the distance in degrees east or west from the prime meridian that runs through Greenwich, England, and are often called meridians. Latitude and longitude are measured in degrees, minutes and seconds. One degree equals sixty minutes, and one minute equals sixty seconds. The latitude and longitude grid allows us to calculate an exact point using these lines as X axis and Y axis coordinates. Another way to identify a point on a map is with the Universal Transverse Mercator (UTM) coordinate system, which similar to latitude and longitude also uses a north/south and east/west grid. On the USGS maps you will see markings for both grids. The UTM grid is more precise than latitude/longitude because USGS maps identify UTM scales every thousand meters compared to only every 2.5 minutes (about 3500 to 5000 meters) for latitude and longitude. Working with one meter number, can be less confusing than working with three degrees, minutes, and seconds values. Trip Planning and Pseudo Maps : Before setting out on a back country trip into unfamiliar territory, it is wise to carefully study a map of the area, and make some notes. Note such things as landmarks, bearings between landmarks, distances and elevations. Notes of this type can save valuable time in the field, and will help you both stay orientated as well as assist in measuring your progress. I refer to such notes as a pseudo map. There is a tool on the Internet that I like to use to make my pseudo maps called ACME Mapper 2.0 . This tool allows you to enter a latitude/longitude and it returns a topographic map, which can be zoomed to various scales. It also allows you to mark spots on the map, and then it gives you the distance between marks as well as bearings to them. I find it faster than measuring distances with a ruler on the map, and a very precise way to calculate map bearings. Even with a pseudo map at hand sometimes it can be useful to track distances as you are hiking. A trick to do so is to count your double steps. Typically one double step (that is just counting the steps of one of your feet, while ignoring the other) is about five feet. So, a thousand double steps is about one mile. Also, if you keep an eye on your watch, and time yourself over known distances, you soon get an idea of how long it takes you to cover distances over various terrains. Altimeter : An altimeter can be a useful companion to your topographic map and compass, assuming one knows how to calibrate it. As you hike the altimeter approximates your current altitude (based on atmospheric pressure), and you can use that information as a "Z" coordinate, if you will, to determine your location on a map. Knowing your general location on the map, if you find the contour line of your current elevation you know your position. Aiming Off : When navigating to a target, if you realize that it could be easily missed if you get slightly off course one way, whereas missing the target the opposite way wouldn’t be a problem, you should use a trick known as aiming off. Consider this example; you leave your car at the north most end of a road that runs south to north. Leaving your car you walk SW at 240 degrees, making your literal return bearing 60 degrees. Returning you worry you will miss your car, if you get off course a bit and end up to far north, where there is no road. On the other hand, if you were to miss your car by being to the south you would cross the road, and you could just follow it back to the car. To avoid going to far north, you intentionally aim off so you will end up south of your car, thus guaranteeing you encounter the road. To do so, in this case, you might follow a return bearing of 70 degrees. Awareness : When hiking, or mountain climbing, in an area unfamiliar to you, make use of a topographic map and compass to learn the area. As you spot a landmark, such as a mountain peak, take a field bearing on it, and convert it to a map bearing. Starting at your current location pinpointed on the map (see the section on triangulation), plot the converted bearing on the map, and see which mountain it passes through, and then read the name of the unfamiliar mountain from the map. That quickly and that easily, you will learn the area, and that knowledge will help you stay oriented and lessens chances of becoming lost. Reverse Bearing : When hiking in and back out from somewhere one should know who to calculate a reverse (or opposite) bearing. For example, if you walked south following a 177 degree bearing, and turned around to return to your starting point what bearing would lead you back? Simply look at your compass and the straight line across the dial (the number on the opposite side) is the return bearing. The easiest way to calculate the opposite bearing is to add 180 degrees to the original bearing when it was less than or equal to 180 degrees, and to subtract 180 when the orginal bear was greater than 180. So for our example, the return bearing for the orginal bearing of 177 is 177 + 180 = 357 degrees (or almost due north). One can also leave his compass set to the orginal bearing and turn the compass 180 degrees by lining up the white end of the magnetic needle with the orienting arrow, as opposed to the normal red end of the magnetic needle. Another orientation trick, which I learned as a child from reading Louis L'Amour books, is to occasionally turn around and have a good look at the back trail, because a trail looks difference in the reverse direction. It’s also beneficial to pay attention to wind directions. For example some areas are known to have winds that blow from the west. If you are hiking in such an area, even if the wind isn’t blowing, you can often observe the results such as pine trees being leaner on their west side. We have all heard the saying that moss grows on the north side of trees. Why not verify if that is true in your area? If your trail crosses, or parallels a stream or river, pay attention to the direction it flows. Does it flow east, or northwest? Being aware, will reduce lost time, and disorientation, and make your outdoor experiences more rewarding. Wristwatch as Compass : A watch with an hour hand can be used as a makeshift compass. If is set to the correct time, simply point the hour hand at the sun, and in that position, the point halfway between the current hour and the 12, is south. In a vice versa way a compass can act as a watch. For example knowing the sun is in the east at 6:00 am, southeast at 9:00 am, south at noon, southwest at 3pm, and west at 6pm, you can take a bearing on the sun, and get a good idea of the current time.
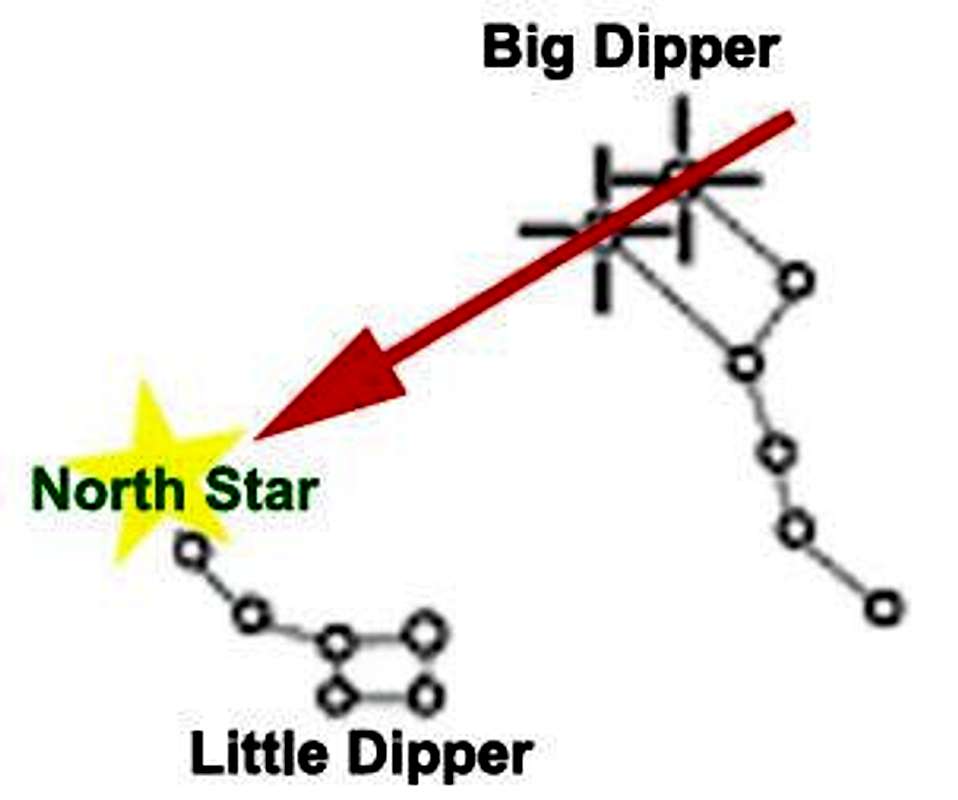
The North Star : In the Northern Hemisphere, Polaris (the North Star) is visible all year round. To find it, locate the Big Dipper and follow the two pointer stars at the end of the cup to the tail of the Little Dipper, Polaris is the last star on its tail, see Figure 7. Roughly the distance to the North Star from the Big Dipper is 5.5 times the distance between the two pointer stars forming the non-handle side of the cup. The Big Dipper rotates around Polaris. The North Star can be used to measure declination. At night, place two sticks in the ground lined up with the North Star, with the taller one to the north of the shorter. Set your compass dial at 360, and point the direction of travel arrow north at the longer stick. Look at the compass needle, and note the difference between its bearing and true north, the difference is declination. In the Northern Hemisphere, latitude is obtained by measuring the altitude of Polaris. At the Equator (0° of latitude) the North Star is on the horizon, making an angle or "altitude" of 0 degrees. Whereas at the North Pole (90° of latitude), Polaris is directly overhead making an angle or "altitude" of 90 degrees. Likewise, at 30°N the star is 30 degrees above the horizon, and so on. In other words, in the Northern Hemisphere, if you know your latitude, you can use that as an angle from the horizon to locate the North Star. To measure your latitude, point a stick at the North Star, then measure the angle the stick makes from a level horizon. Note, some compasses, include an inclination gauge (not covered in this article) by which you can easily measure the angle. Determine East and West Via a Shadow : To determine east and west, place a stick in the ground so you can see its shadow (alternatively, you can use the shadow of any fixed object). Ensure the shadow is cast on a level, brush-free spot. Mark the tip of the shadow with a pebble or scratch in the dirt; try to make the mark as small as possible so as to pinpoint the shadow's tip. Wait 10-15 minutes, as the shadow moves from west to east (the opposite side the sun moves on, ie the sun moves from the east to the west -- but both the shadow and the sun move in a clockwise direction). Mark the new position of the shadow's tip with another small object or scratch. Connect the two shadow tip markings with a straight line and you have an east-to-west line approximation. Midday readings give more accurate approximations. To get an exact east-to-west line join the marks from two shadows of equal length. In either the approximate or the exact case stand with the first mark on your left, and the second on your right, and you will be facing toward true north. Pay attention to your own shadow during the course of the day while on a long walk - if you are moving north your shadow will be over your left shoulder at sunrise and over your right shoulder at sunset. You might be the only object to throw a shadow when walking in barren terrain like a desert. Global Positioning System : The U.S. Department of Defense has 24 satellites orbiting the earth, which give off signals that handheld GPS devices can pick up and translate into a user’s position and altitude to within roughly 50 feet. These devices are useful, but are not a replacement for knowledge of the basics of orientation and navigation with a compass and map. Also always remember that a GPS unit is a delicate, battery powered device that can fail or be easily damaged. Never rely solely on, nor allow yourself to become dependent on such a piece of equipment. The tops of pine trees tend to dip to the north. If you do lose your way , keep a cool head - a cool head can accomplish much, a rattle one nothing. Note that lost people tend to wander in circles; as such above all don’t run around aimlessly. First stop, relax, and think, then look around for a familiar landmark, or climb a tree or a hill to try to find one. Estimate the time you have been traveling, and the remaining about of daylight - this will help you figure out how far you have traveled. If possible consult your compass, if not possible pay attention to sunset or sunrise which will indicate east and west, or use a wristwatch as a compass. Consider blazing your way by leaving small marks indicating the direction you have taken such as arrows in the dirt or snow, peeled bark on a tree, toilet paper on a tree branch, and/or rock cairns. If it gets dark it may be best to stay put, as such build a rousing fire, making it easier for others to find you and allowing you to stay warm. At night find the North Star and mark that direction on the ground to guide you come daylight.
- Other Outdoor Tips and Tricks
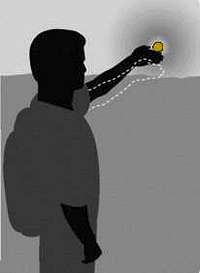
Estimating Remaining Daylight : If you can see the sun and the horizon you can estimate the remaining daylight time. To do so, hold your hand up so it appears that your pointer finger is just touch the bottom of the sun. Then count the number of finger widths to the horizon. Each finger is worth about 15 minutes of time. For example, if you can fit eight fingers (two hands without thumbs) between the bottom of the sun and the top of the horizon there is about two hours of daylight remaining. Note that this trick doesn't really work when one is near either of the poles, as the sun hovers over the horizon longer at those locations. If thirsty and can’t find water, suck on a pebble or a button, it will relieve the dryness. Make a sundial from a piece of stick stuck in the ground where the sun’s rays can cast a shadow from the stick onto the ground. Refer to a watch to mark the hours, then when the watch goes missing or the owners leaves camp, or the batteries die, you can use the sundial to tell time. To prevent sickness, keep your feet and inner cloths dry, your bowels open, and your head cool. A warm head makes you sweat causing you to remove your hat, and then leaving you open to a cold.
The surest way to stay both fit and healthy is to simple make a point of walking each and every day. Consider this statement by Soren Kierkegaard a 19th-century Danish philosopher, "Above all, do not lose your desire to walk. Every day I walk myself into a state of well-being and walk away from every illness." To dry the inside of wet boots, heat peddles in a frying pan or kettle, or in the fire and place them in the boots, shaking the boots now and then. Reliable Weather Indicators "Red at night, campers delight; red in morning campers warning." A red sunset indicates clear weather, whereas a red sunrise indicates rain and wind. Pale Yellow sky at sunset indicates wet weather. "Rain before seven quits before eleven." In other words morning rain often makes clear afternoons. Slow rain tends to last, but sudden rain is typically short in duration. Heavy dew indicates dry weather to follow. Daytime temperatures drop about five degrees Fahrenheit per 1,000 feet of elevation gain.
Seasons
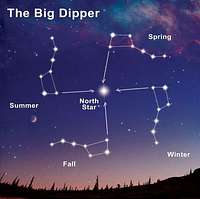
In the Northern Sky the Big Dipper is one of the most familiar asterisms of the constellation Ursa Major (the Great Bear). As the Earth moves around the sun the angle of our view of the Big Dipper changes and thus is different for each season.
In summary, a compass is an invaluable tool that every outdoors enthusiast should understand how to use. Two of its main uses are to measure bearings, and to pinpoint locations. When working with bearings one needs to be aware of declination and how that causes map bearings and magnetic (field) bearings to differ. Remember it’s simply a matter of subtracting an east declination from a map bearing to convert it to a magnetic (field) bearing, and a matter of adding a west declination. Of course, when converting a magnetic bearing to a map bearing apply the opposite of the rule. Remember, the magnetic needle of a compass is for use in the field, and is never used on a map. Also recall that the top of a map is always north, so when taking map bearings always turn the compass housing to point the orienting arrow at the top of the map. Of course a compass isn’t the only thing that will help you stay oriented in the back country. Always study a map before entering unfamiliar territory. In the field always carry a map and pay attention to the surroundings, as well as make use of natural direction indicators, like shadows, stars, wind, and landmarks.
- About the Author
I considered myself to be an outdoors enthusiast. Very few activities provide me with as much joy as hiking, camping, skiing, mountain biking, rock climbing, ice climbing and exploring.
This passion began in my childhood. At the young age of 10 years, I climbed Chief Mountain in Glacier Park, MT, and not long after I back-packed the 26 mile from the USA/Canada border over Stoney Indian Pass to Goat Haunt.
Over the years, I have crossed paths with cougars, been charged by moose, and spooked by grizzly bears. I have stood on the Great Wall of China, strolled beaches in Australia, enjoyed winters in Canada, and lived in Asia. I have cycled the Golden Triangle from Banff, Alberta and the full C&O Canal Trail from Washington, DC. I have rock climbed at Stone Hill Montana, ice climbed in Ouray Colorado, scaled Denali in Alaska, explored the Copper Canyons of Mexico, skied the Trinity Chutes of Mt. Shasta California, and white-water rafted on the Gauley River of West Virginia. I have climbed to the highest point of all 50 states.
I don't like GPS and never use any type of electronic navigator.
- Enjoyed this Article?
If you enjoyed this article, perhaps you would like to read another article by this same author? Read, The Effort Scale of Highpointing the Fifty US States . I have published a book about my journey to the highest point of every U.S. state. The book, All Fifty: My Journey to the Highest Point of Every U.S. State , is available on Amazon.com.
View Compass Basics: An Introduction to Orientation and Navigation Image Gallery - 15 Images


Alpinist - Nov 19, 2007 3:56 pm - Voted 10/10
Nice addition to SP. Thanks for posting it.

vanman798 - Nov 19, 2007 4:14 pm - Hasn't voted
Your welcome! I enjoyed brushing up on my compass skills in order to write it.

Dmitry Pruss - Nov 19, 2007 4:22 pm - Voted 10/10
Nowadays most watches are dial-less, and therefore the rule should be made from analog into digital. The Sun is at 15 degrees true * military time (or one hour less if daylight savings time is in effect). A bit more complex formulas apply to sun shadow (add 180 deg), and to the Moon (subtact 13 degrees times number of days since New Mooon). Yeah, and as to retracing your steps ... most of the time I can 100% trust my dog. It is a fun and useful means of navigation :)
vanman798 - Nov 19, 2007 4:39 pm - Hasn't voted
Thanks for the digital rule. If you flesh it out a bit more I will gladly use it in the article. The Wristwatch compass rule is useful to know whether one uses an analog or a digital watch. From this rule one understands how to approximate directions based on the time of the day. If I know the time of day, but I don't have a watch, I can always scratch a drawing of one into the dirt and approximate directions based on the rule.

Mark Doiron - Nov 21, 2007 3:04 pm - Voted 10/10
Great article--thanks for this! FYI, you can use a compass with an inclination gauge to determine your latitude. Point a stick at the North Star, then measure the angle of that stick with a level horizon (a compass with an inclination gauge makes this easy). One may not think this is especially useful, but the inverse can be: The North Star is always located at an angle from your horizon approximately equal (within one degree) to your latitude. Don't bother looking anywhere else for it, and if you think you've found it, but it isn't at that angle, you haven't found it! --mark d.
vanman798 - Nov 22, 2007 12:08 pm - Hasn't voted
Great tip! I have included it in the article. Thanks a lot.

Corax - Nov 21, 2007 4:41 pm - Voted 10/10
Great addition.

tommi - Nov 22, 2007 6:19 am - Voted 10/10
A very good idea to post that article about something important like this, you did a good job.

zenalpinist - Nov 22, 2007 10:26 am - Hasn't voted
Great article! We need more people to work on their compass skills rather than their GPS skills. One way I help people remember to deal with declination in areas to the west of the line (or with East Declination) is the following: Field to Map: add the declination (and the way to remember is you are going forwards in the alphabet from F to M) Map to Field: subtract (and the way to remember is you are going backwards in the alphabet from M to F) Of course it would have to be reversed for those on the east half of the line. Good tips for aiming off too, blindly following the compass or GPS is not always the best way to go.

donhaller3 - Nov 22, 2007 12:18 pm - Voted 10/10
1) Two other tricks for remembering how declination works help in most of North America. "East is least and West is best." Visualizing the general shape of North America and remembering where the big hole at the top is(Hudson's Bay)--Shezam! roughly where mag North is-- helps this idiot. 2)If the map legend lists a "third north", grid north, the degree or so correction can be added or subtracted from from your declination correction. Not to worry if it's not there, but eliminating cumulative systemic error if it's there. It would be seen as a little set of arrows showing true, magnetic and grid north. Makes setting off the compass very easy by the way. 3)Finally, one may run across a bearing listed like "N67W." This is an alternate convention that is useful where you're doing engineering, surveying or air and sea navigation because it makes trig easier. Unless your curious, ignore it. http://en.wikipedia.org/wiki/Bearing_%28navigation%29 4)Anything somebody else says is an azimuth is a bearing in our author's sense.

singularity - Nov 26, 2007 3:32 pm - Voted 10/10
thx for adding it!

MakeItHappen - Nov 26, 2007 7:47 pm - Hasn't voted
Yet another reason why SP is such a useful and helpful website.

Moni - Nov 28, 2007 1:28 pm - Voted 10/10
Nicely done. I take issue with two terms, however. A bearing is a direction gotten from a compass with the quadrant scale (like N37W) while a direction from a compass with 0 - 360 is an azimuth. The term triangulation is incorrect: this technique is called resectioning and involves the intersection of any two linear features, which can be 2 compass directions but also a road and an elevation, etc. See here
vanman798 - Nov 28, 2007 3:03 pm - Hasn't voted
Synonyms. :) It seems there was a time when "bearing" was restricted to referring to the direction of a terrestrial object or point. And back then an "azimuth" referred to the direction of a celestial body. That distinction seems to no longer apply. I'm not sure, but prehaps the military uses the word azimuth instead of bearing.
Moni - Nov 28, 2007 8:10 pm - Voted 10/10
It is not an opinion. Look here - one of many sites which use the terms correctly. In fact, when you use 2 compass directions, it is called determining position by intersection, but it comes under resection Resection Azimuth

dpk - Nov 30, 2007 11:01 pm - Voted 10/10
great detail and links - an excellent reference tool thank you

idahomtnhigh - Nov 30, 2007 11:38 pm - Voted 10/10
I teach a land navigation class and I think or article was well done, Thanks for the post.
vanman798 - Dec 13, 2007 12:16 pm - Hasn't voted
That is a great compliment coming from a land navigation teacher. Thank you very much.

cp0915 - Dec 7, 2007 1:18 pm - Voted 10/10
You did a terrific job on this page! Excellent, truly.

chel3178 - May 31, 2008 10:39 pm - Voted 10/10
This looks really great. I bought a compass but haven't really used it yet, though I haven't needed it yet either. But, at some point I will and I'd like to practice where I can't get lost. I'm wondering how I can save articles also without commenting for future reference...
You need to login in order to vote!
Don't have an account.
- Rating available
- Suggested routes for you
- People who climb the same things as you
- Comments Available
- Create Albums
- PRO Courses Guides New Tech Help Pro Expert Videos About wikiHow Pro Upgrade Sign In
- EDIT Edit this Article
- EXPLORE Tech Help Pro About Us Random Article Quizzes Request a New Article Community Dashboard This Or That Game Popular Categories Arts and Entertainment Artwork Books Movies Computers and Electronics Computers Phone Skills Technology Hacks Health Men's Health Mental Health Women's Health Relationships Dating Love Relationship Issues Hobbies and Crafts Crafts Drawing Games Education & Communication Communication Skills Personal Development Studying Personal Care and Style Fashion Hair Care Personal Hygiene Youth Personal Care School Stuff Dating All Categories Arts and Entertainment Finance and Business Home and Garden Relationship Quizzes Cars & Other Vehicles Food and Entertaining Personal Care and Style Sports and Fitness Computers and Electronics Health Pets and Animals Travel Education & Communication Hobbies and Crafts Philosophy and Religion Work World Family Life Holidays and Traditions Relationships Youth
- Browse Articles
- Learn Something New
- Quizzes Hot
- This Or That Game
- Train Your Brain
- Explore More
- Support wikiHow
- About wikiHow
- Log in / Sign up
- Navigation and Directions
How to Use a Compass
Last Updated: March 29, 2024 References
Learning the Basics
Using the compass, finding your bearings when lost.
This article was co-authored by Josh Goldbach . Josh Goldbach is an Outdoor Education Expert and the Executive Director of Bold Earth Adventures. Bold Earth leads adventure travel camps for teenagers all over the world. With almost 15 years of experience, Josh specializes in outdoor adventure trips for teens both in the United States and internationally. Josh earned his B.A. in Psychology from Eckerd College in St. Petersburg, Florida. He’s also trained as a wilderness first responder, a Leave No Trace master educator, and a Level 5 Swiftwater rescue technician. There are 9 references cited in this article, which can be found at the bottom of the page. This article has been viewed 1,586,839 times.
A compass is an essential tool in wilderness survival. Along with a good quality topographical map of the area you're navigating, knowing how to use a compass will ensure that you're never lost. You can learn to identify the basic components of the compass, take an accurate reading of your bearings, and start developing the necessary skills of navigation with a few simple steps. See Step 1 to start learning to use your compass.
How do you use a compass?
Hold the compass so it's flat on your palm with your palm centered in front of your chest. Use the magnetic needle for guidance—it will spin unless you're headed north. Adjust the direction-of-travel arrow on your compass so it's pointing in the direction that you're traveling.

- The baseplate is the clear, plastic plate on which the compass is embedded.
- The direction of travel arrow is the arrow in the baseplate pointing away from the compass.
- The compass housing is the clear, plastic circle that houses the magnetized compass needle.
- The degree dial is the twistable dial surrounding the compass housing that displays all 360 degrees of the circle.
- The magnetic needle is the needle spinning within the compass housing.
- The orienting arrow is the non-magnetic arrow within the compass housing.
- The orienting lines are the lines within the compass housing that run parallel to the orienting arrow.

- Turn the degree dial until the orienting arrow lines up with the magnetic arrow, pointing them both North, and then find the general direction you're facing by looking at the direction of travel arrow. If the direction of travel arrow is now between the N and the E, say, you're facing Northeast.
- Find where the direction of travel arrow intersects with the degree dial . To take a more accurate reading, look closely at the degree markers on the compass. If it intersects at 23, you're facing 23 degrees Northeast.

- True North or Map North refers to the point at which all longitudinal lines meet on the map, at the North Pole. All maps are laid out the same, with True North at the top of the map. Unfortunately, because of slight variations in the magnetic field, your compass won't point to True North, it'll point to Magnetic North.
- Magnetic North refers to the tilt of the magnetic field, about eleven degrees from the tilt of the Earth's axis, making the difference between True North and Magnetic North different by as many as 20 degrees in some places. Depending where you are on the surface of the Earth, you'll have to account for the Magnetic shift to get an accurate reading.
- While the difference may seem incidental, traveling just one degree off for the distance of a mile will have you about 100 feet (30.5 m) off track. Think of how off you'll be after ten or twenty miles. It's important to compensate by taking the declination into account.
- In the US, the line of zero declination runs up through Alabama, Illinois, and Wisconsin, [5] X Research source at a slight diagonal. East of that line, declination orients toward the West, meaning that Magnetic North is several degrees West of True North. West of that line, the opposite is true. Find out the declination in the area in which you'll be traveling so you can compensate for it.
- Say you take a bearing on your compass in an area with West declination. You'll add the number of degrees necessary to get the correct corresponding bearing on your map. In an area with East declination, you'll subtract.
- Twist the degree dial until the orienting arrow lines up with the north end of the magnetic needle. Once they're aligned, this will tell you where your direction of travel arrow is pointing. [6] X Research source
- Take off local magnetic variation by twisting the degree dial the correct number of degrees to the left or right, depending on the declination. See where the direction of travel arrow lines up with the degree dial.

- If visibility is limited and you cannot see any distant objects, use another member of your walking party (if applicable). Stand still, then ask them to walk away from you in the direction indicated by the direction of travel arrow. Call out to them to correct their direction as they walk. When they approach the edge of visibility, ask them to wait until you catch up. Repeat as necessary.
- Draw a line along the compass edge and through your current position. If you maintain this bearing, your path from your current position will be along the line you just drew on your map.
- Rotate the degree dial until the orienting arrow points to true north on the map. This will also align the compass’s orienting lines with the map’s north-south lines. Once the degree dial is in place, put the map away.
- In this case, you'll correct for declination by adding the appropriate number of degrees in areas with West declination, and subtracting in areas with East declination. This is the opposite of what you'll do when first taking your bearing from the compass, making this an important distinction.
- Repeat this process for the other two landmarks. When you’re done, you will have three lines that form a triangle on your map. Your position is inside this triangle, the size of which depends on the accuracy of your bearings. More accurate bearings reduce the size of the triangle and, with lots of practice, you may get the lines to intersect at one point.
Community Q&A
- You can also hold the compass square to your body by holding the sides of the baseplate between both hands (making L shapes with your thumbs) and keeping your elbows against your sides. Stand facing your objective, look straight ahead, and square yourself with the object by which you are taking your bearing. The imaginary line extending out from your body will travel through your compass along the direction of travel arrow. You can even rest your thumbs (against which the end of the compass is resting) against your stomach to steady your hold. Just be sure you aren't wearing a big steel belt buckle or some other magnetic material close to the compass when doing this. [12] X Research source Thanks Helpful 0 Not Helpful 0
- Trust your compass: 99.9% of the time it is giving you the correct direction. Many landscapes look similar, so again, TRUST YOUR COMPASS. Thanks Helpful 7 Not Helpful 0
- For maximum accuracy, hold the compass up to your eye and look down the direction of travel arrow to find landmarks, guide points, etc. Thanks Helpful 6 Not Helpful 3

You Might Also Like

- ↑ https://americanhiking.org/resources/how-to-use-a-compass/
- ↑ https://www.seattleymca.org/blog/how-use-compass
- ↑ https://irp.fas.org/doddir/army/fm3-25-26.pdf
- ↑ https://www.sco.wisc.edu/learning-center/magnetic-declination/
- ↑ https://www.nationaltrust.org.uk/features/how-to-read-a-compass
- ↑ https://www.nwcg.gov/sites/default/files/publications/pms475.pdf
- ↑ https://www.usgs.gov/educational-resources/method-1
- ↑ https://www.princeton.edu/~oa/manual/mapcompass3.shtml
- ↑ http://www.princeton.edu/~oa/manual/mapcompass3.shtml#Scenarios
About This Article

To use a compass, hold the compass flat on your outspread hand in front of your chest. Next, turn the degree dial so that the orienting arrow lines up with the magnetic arrow inside the compass. Then, look at the travel arrow on the baseplate of the compass to tell you which direction you’re facing. For example, if you want to find which direction is North, rotate slowly with the compass until the travel arrow is pointing to the N on the dial. If you want to learn how to use a compass to find your bearings on a map, keep reading the article! Did this summary help you? Yes No
- Send fan mail to authors
Reader Success Stories
Mario Manzur
Jun 23, 2020
Did this article help you?
Gabriel McLaughlin
Jun 8, 2021
John Connolly
Mar 30, 2018
Ed Sommerfeld
Jan 21, 2019
Keith Brooks
Aug 18, 2017

Featured Articles

Trending Articles

Watch Articles

- Terms of Use
- Privacy Policy
- Do Not Sell or Share My Info
- Not Selling Info
wikiHow Tech Help Pro:
Level up your tech skills and stay ahead of the curve

So how do we resolve the issue of these two different Norths? Declination! Declination is simply the difference in degrees between true north and magnetic north for any particular area. But be aware: the amount of difference between true and magnetic north varies by location. (Hang in there – this gets really cool!)
Now if you’re using a topographic map, it probably has a legend that displays the declination as two straight lines, where true north has a star at the top of the line and magnetic north is indicated as MN on the other line. If your map isn’t fairly new, please feel free to ignore this legend, because not only does declination vary by area – it varies over time. Just because the declination was 12 degrees west when the map was published, it doesn’t mean that it still is.
So what’s a person to do? Just type in the zip code or coordinates for the area you’ll be hiking at this NOAA website and you’ll have the exact current declination figured out for you!
Once you know the declination – it will be expressed in degrees west (a negative number) or degrees east (a positive number) – you should be able to adjust your compass appropriately. Sometimes there is a screw to adjust this, but it varies by model. If you no longer have the owner’s manual, you might be able to find directions at the compass manufacturer’s website.
For more information about magnetic declination and how to use your compass, we encourage you to view this page on the National Wildfire Coordinating Group website .
Traveling by Compass
There are two ways you can take a bearing out on the trail – by map or by sight in the field. Here is a very brief explanation of each method.
By map: place your map and compass on the ground. Then mark your current position as well as your intended destination and draw a straight line between them. Line up the edge of your compass on this line so that the travel arrow is in the direction you wish to travel, then twist the azimuth ring (which is simply the ring with the measured units of degrees on a compass) until north on the map and the orienting arrow are aligned. When you remove your compass from the map and turn until the orienting arrow and red magnetic needle are lined up, you will be in the right direction.
By sight, it’s much simpler. If you are heading to a mountain for example, point at it from your current position with the travel arrow on the compass. Then rotate your azimuth ring until the orienting arrow is lined up with the red end of the magnetic needle pointing towards north. Continue on your path so that the needle and its housing remain intact and you should have no problem reaching your destination.
- Odnoklassniki icon Odnoklassniki
- Facebook Messenger
- LiveJournal
How to Use a Compass
Similar Entries In: Technique , Gear , Hike Safety , Recommended Reads , Bushwhack , True Bushwhack , Tutorials , Winter Gear .
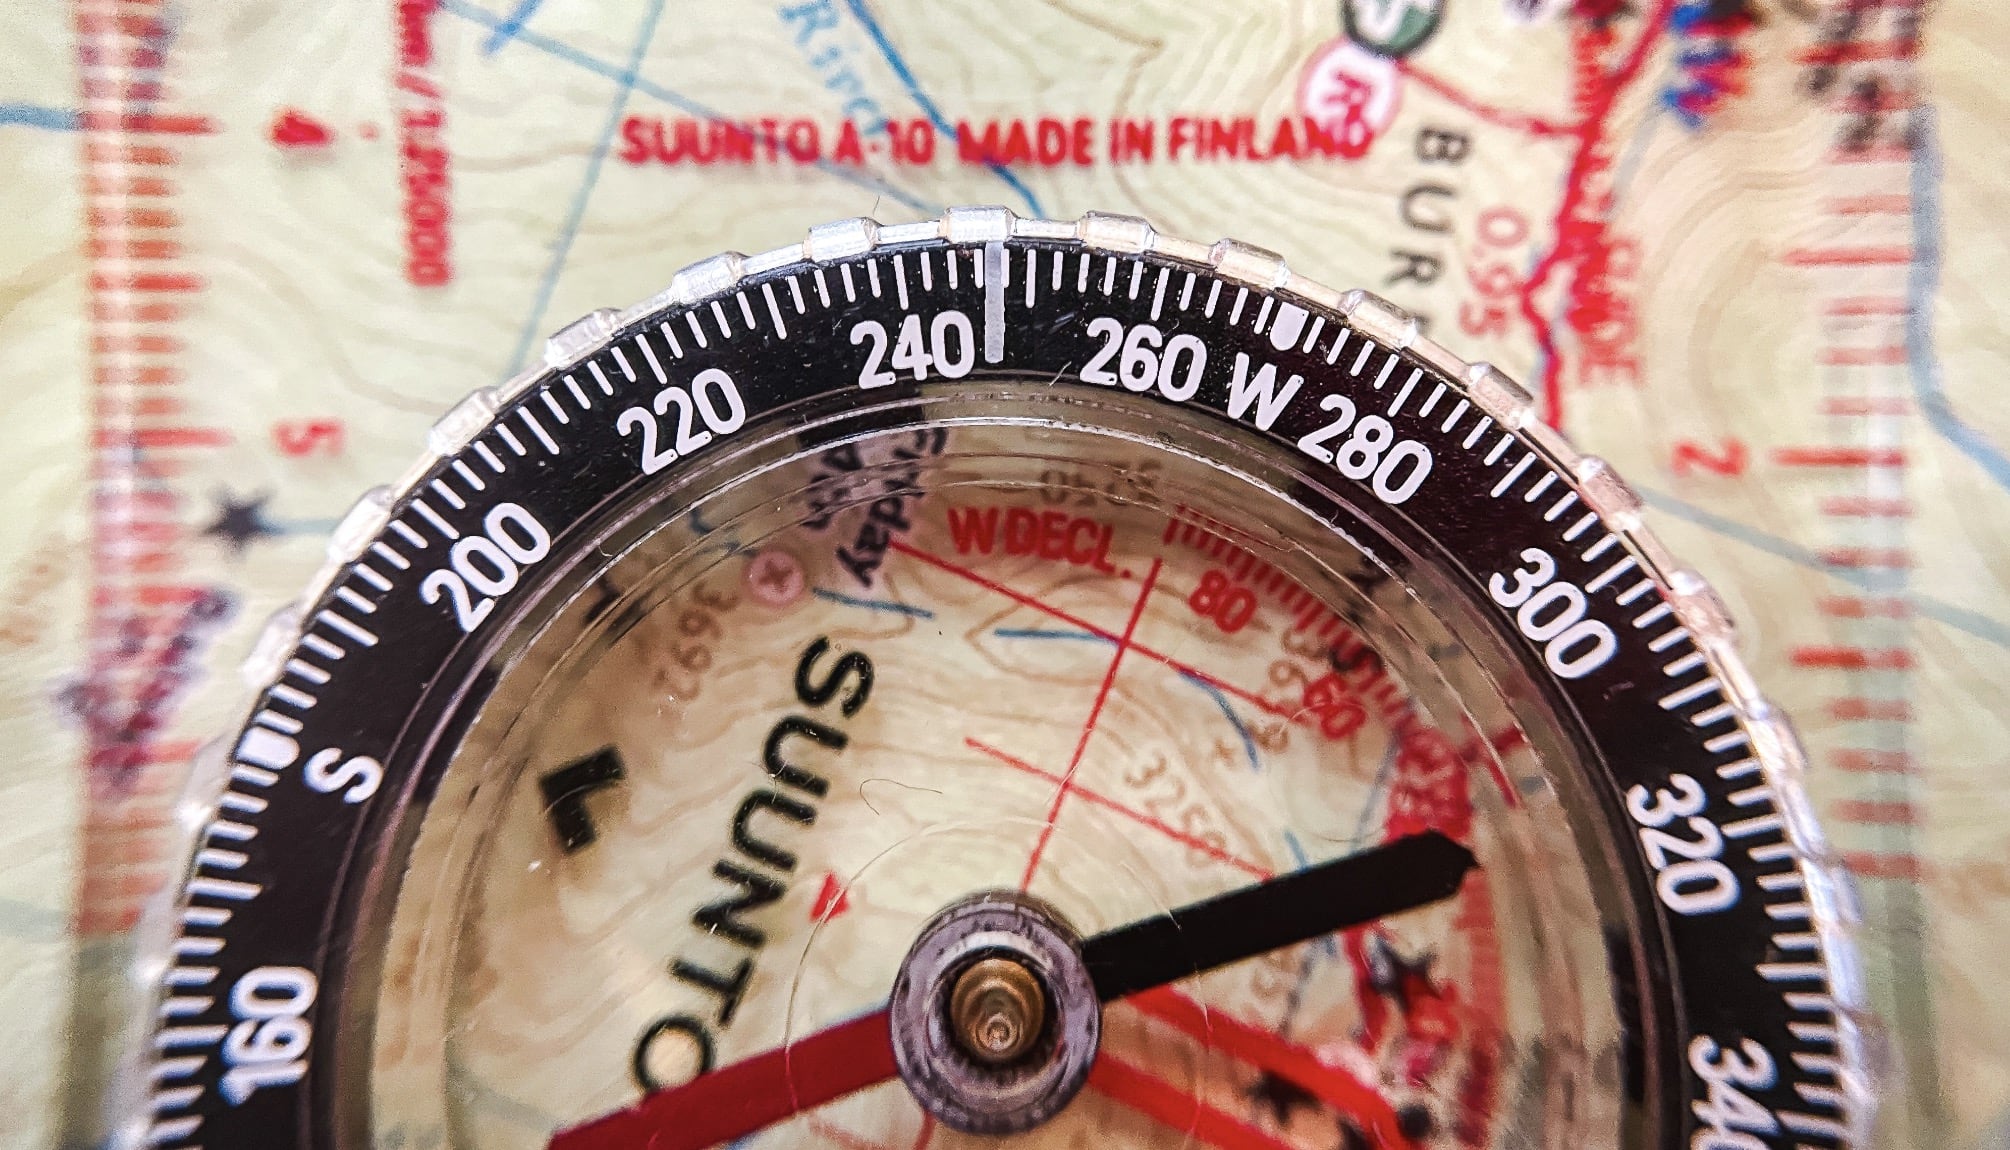
Initial bearing
Disclosure: This content may contain affiliate links. Read my disclosure policy .
If you’ve found learning how to use a compass intimidating, this guide simplifies the journey and makes each step along the way a confident and enjoyable one.
The first time I navigated by compass was on January 17, 2021 . It was so easy, I couldn’t believe it! On a solo winter bushwhack, I set a bearing beside Biscuit Brook in the Catskills, stepped off the trail, and headed directly up Fir Mountain . I didn’t have to tweak my compass until I got to the summit. Huge success! First time out of the gate! If I can do it, you can do it too.
Like most people, I’d always been too intimidated to learn how to use a map and compass to navigate. Turns out it’s actually super easy; the problem is usually how it’s taught.
This post takes a non-jargon-based approach that will walk you through the whole process, step-by-step.
Table of Contents
Basic Map & Compass Skills Make You Feel Amazing
The sense of freedom, self-reliance, and the thrill of exploring uncharted territory become more than just skills; they become the gateway to unforgettable adventures and the joys of self-discovery.
Knowing your map and compass navigation basics means…
- You’ll never feel lost again — in fact, you’ll become instantly un-get-lost-able ;
- You’ll be able to hike in a straight line through even the densest fogs and forests;
- You’ll feel a much deeper connection to the terrain around you;
- You won’t have to rely on a smartphone for backcountry navigation;
- You’ll feel 100 times more self-reliant. You will not believe the wonderful sense of freedom and accomplishment that comes from navigating with map and compass.
Learning How to Use a Compass is EASY!
You can learn how to use a compass in minutes. You will learn it in minutes. There are only 4 simple steps…
- Orient your map and compass;
- Set a bearing;
- Hang the compass around your neck;
- There’s no fourth step!
LOL. Let’s walk through it, step by step. Afterwards, we’ll get into the gear, the jargon, and the nuances. For now, I just want to show you how easy it is…
Note: This guide is focussed solely on how to set a bearing and navigate with a compass. It does not teach important map reading skills — i.e. interpreting map symbols, contours, etc. — which are, comparatively, much easier to learn.
How to Use a Compass for Hiking
Mastering the art of map and compass navigation opens up a world of possibilities for hikers and outdoor enthusiasts. It’s not just a skill; it’s a key that unlocks the beauty and wonder of the great outdoors. How do you use a compass step by step? Here’s exactly how…
STEP 1: ORIENT YOUR MAP & COMPASS
Your first step is to make sure that your map , your compass and your body are all facing magnetic north .
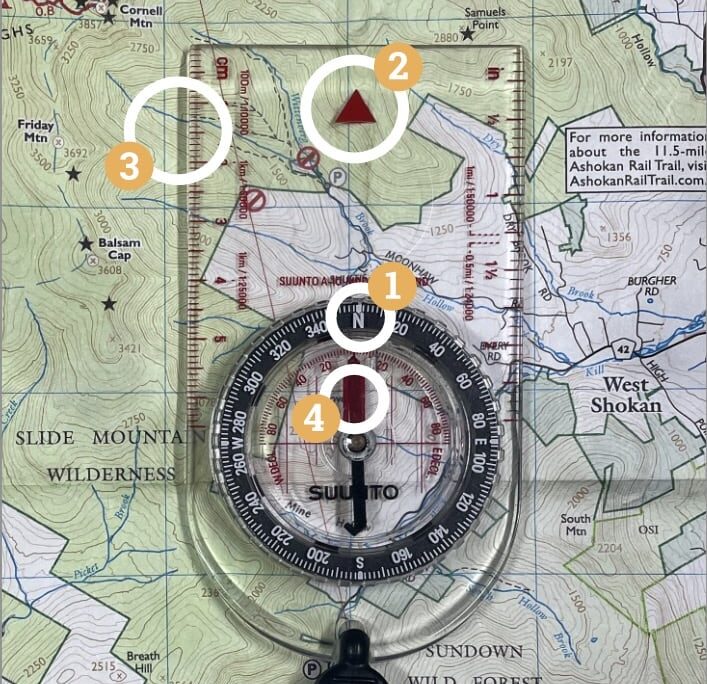
Turn your compass dial until it shows N at the index mark 1 under the direction-of-travel arrow 2 .
Line up a side edge of your compass with the map’s vertical gridlines 3 .
Next, holding the map and compass, turn your body until the red arrow is inside the red “shed” 4 .
Now that “red is in the shed”, you, your map, and your compass are all facing magnetic north .
Why skim the surface when you can plunge into the heart of every trail? By joining Mountain-Hiking.com on Patreon, you’re not just gaining access; you’re stepping into a passionate hiker’s world, complete with vivid imagery and personal insights. Get full access to all content on this website instantly and enjoy unique supporter benefits.
STEP 2: TAKE A BEARING
In this example, we’ll set a bearing between the summits of Balsam Cap and Rocky mountains in the Catskills.
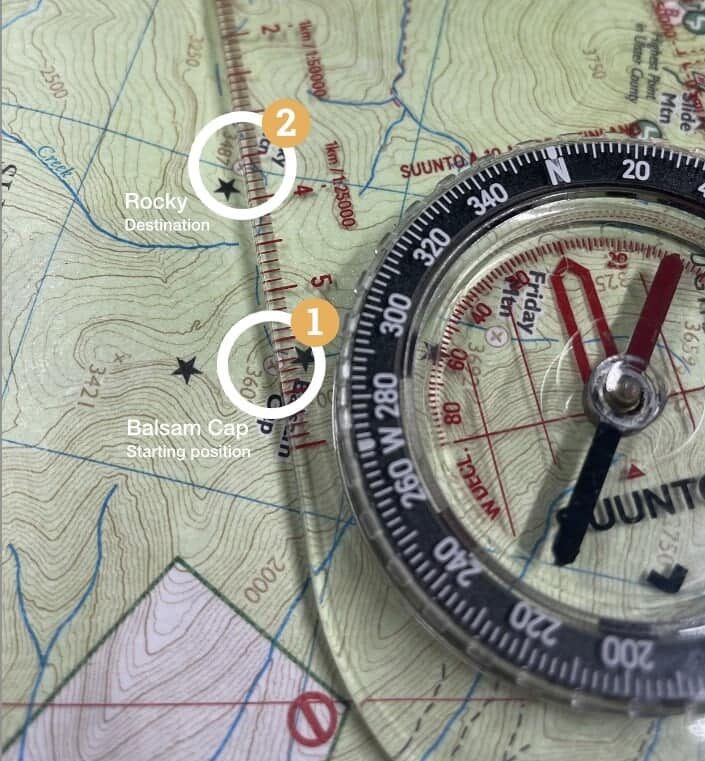
Simply place the edge of your compass’ baseplate so it forms a line between your current/starting position 1 and your intended destination 2 .
While keeping the compass tight against the map — so it doesn’t shift — turn your compass dial until the red orientation lines on the dial are facing north and are once again parallel with the vertical gridlines on your map.
In this example, your initial bearing, visible at the index tick , would be 247°.
Adjust your bearing…
If true north and magnetic north were one and the same, you would now be finished and ready to set off.
Usually, they are not, and because they are not we have to make a small adjustment to account for the difference between the two.
This is the part that confuses people the most. But it’s easy…
Every topographic map includes the key you need. Near the edge of your map, look for a small diagram like the one below which will tell you that (in our example area) Magnetic North is 13° west/left of True North.
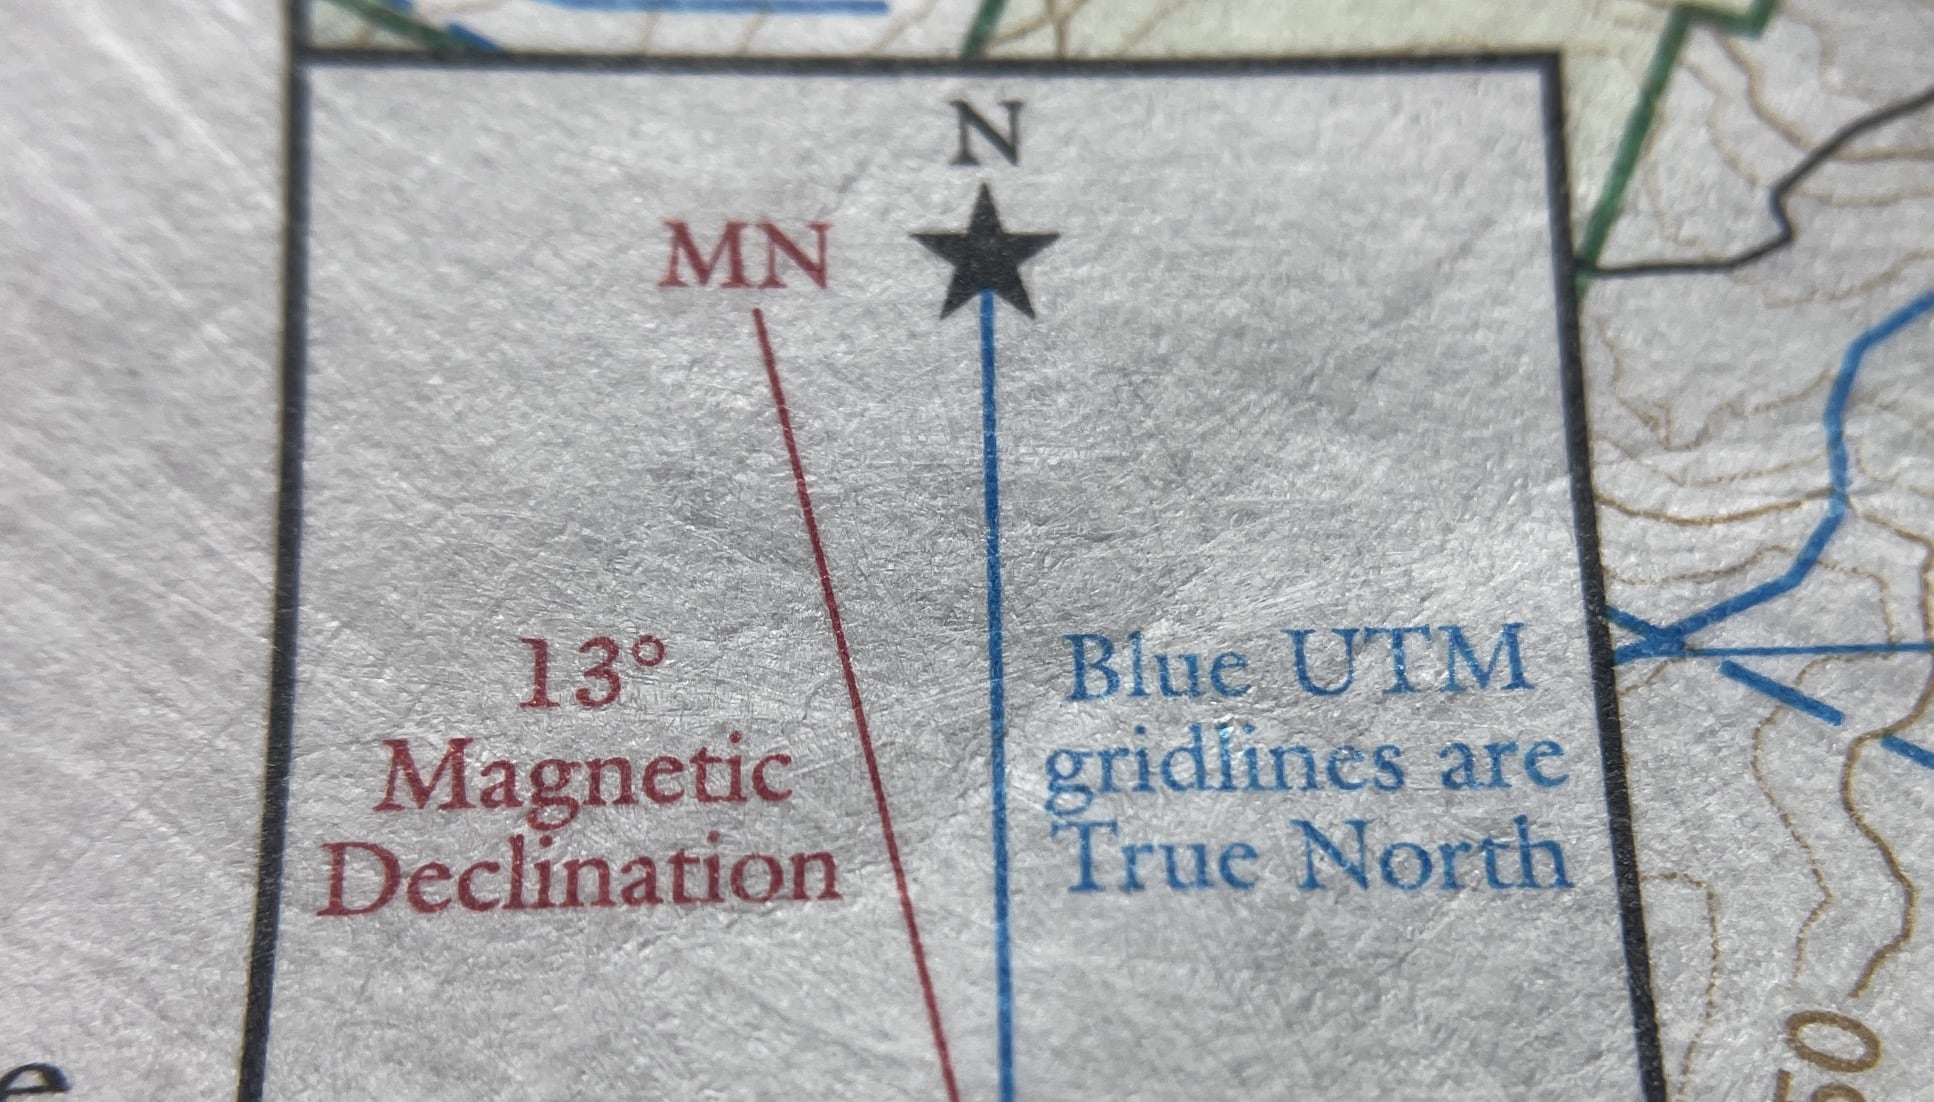
Elsewhere in the world, this value is very different. This is why you need high-quality topographic maps for any area you plan to navigate with a map and compass. (Thanks to NYNJTC for allowing me to use their amazing maps for this tutorial.)
Okay. 13° West. How do we use this piece of information? Read on…
It’s easy to remember…
If Magnetic North is to the LEFT of True North, turn your dial to the LEFT (counter-clockwise). If Magnetic North is to the RIGHT of True North, turn your dial to the RIGHT (clockwise). The mnemonic for this is: “West is best / East is least.”
In our example, magnetic north is to the west/left of true north, so we will turn our dial 13° to the left. This adds to our initial bearing: 247 + 13 = 260°.
For now, you no longer need your map — and the bearing itself is no longer very important either because…
Your compass is ready to use!
STEP 3: USING YOUR COMPASS
First, hang the compass around your neck. Good job. 50% done.
Second, whenever you want to check which way to walk, hold the compass in your hand and turn your body until red is back in the shed 1 . Then simply follow the direction of travel arrow 2 .
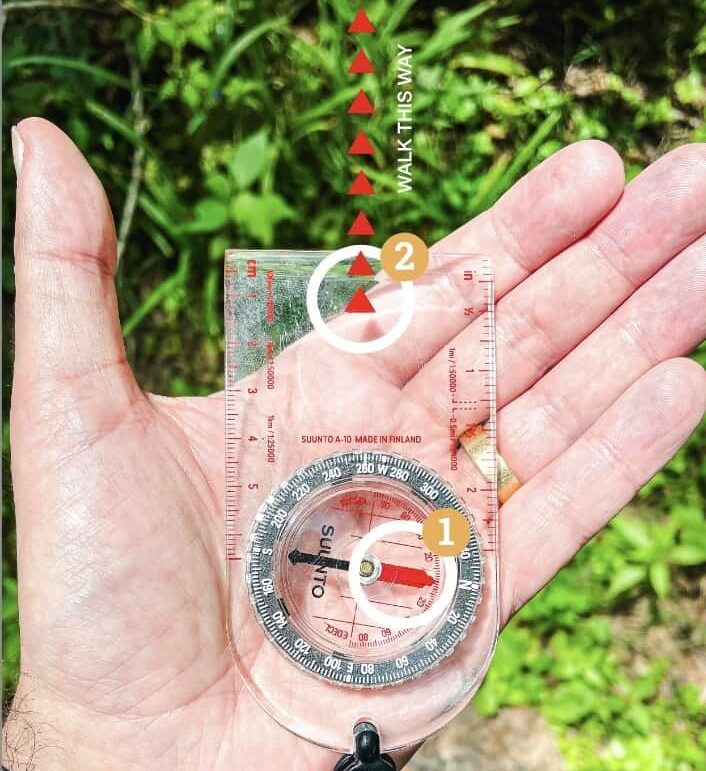
That’s it! 100% done!
You just learned how to use a compass. Remember, practice makes perfect. The more you practice navigating with a map and compass, the more confident you’ll become in your navigation skills.
Get the Step-by-Step Visual Guide
If you’d like an even more thorough walk-through of the whole process — with clearly labeled photos of every single step — grab this step-by-step visual guide from my Ko-fi store…
- Map & Compass Navigation: A Step-by-Step Visual Guide
“As a very active senior citizen Catskill mountain hiker I would highly recommend your map and compass navigation skills guide. It refreshed my memory of a long forgotten skill in 10 minutes. It’s the best 12 bucks I’ve spent in a long time.” — Bob G .
You’ll also learn…
- The best compass to buy
- How to deal with magnetic interference
- How to think about terrain issues
- How to navigate in low visibility (e.g. thick fog and dense forest)
- The individual part names of your compass
The step-by-step visual guide is designed in 9:16 aspect ratio as a PDF, perfect for reading on your phone. This is independently produced content with excellent reviews. Buy it here . I appreciate your support.
Frequently Asked Questions
How do you read a compass for beginners.
There are only three steps. This guide shows you how to read a compass correctly. The Step-by-Step Visual Guide breaks it down even further, with more detail and clear photographs of each step.
How to use a compass for orienteering?
The process is the exact same as shown above. A compass is used in combination with a topographic map to orient yourself and direct your travel.
How do you find north on a compass?
The red needle always points north. Just make sure to hold it away from any other metal.
Does a compass always point north?
In the absence of any magnetic interference, the red needle on every compass always points north.
Which arrow do you follow on a compass?
When used correctly, the red arrow always points north.
You might also enjoy…
- Challenge › Fire Tower Challenge 2024
- New › Say Goodbye to Blisters
- Follow › Sean’s content on Instagram
- Identify › Black Fly Season Means Black Fly Bites
- Explore › The Hardest Hikes You Can Do
- Hike More › Catskills , Adirondacks , Hudson Highlands , Gunks , Berkshires
Get full access…
Get instant access to the full version of this site and enjoy great supporter benefits: full galleries, full trail notes, early access to the latest content, and more.
Hot on the website right now…
Follow for more….
Follow my @TotalCatskills content on Instagram for regular hiking inspo and safe, inclusive community.
I also stay active on Facebook and Threads .
You might like…
One response to “ how to use a compass ”.
- Pingback: How to Properly Use a Compass: A Clear and Confident Guide - surviving another day
Your comments are welcome here… Cancel reply

Hello, I’m Sean
I write independent hiking content to help hikers like you find amazing hikes in the Catskills, Adirondacks, Gunks, Hudson Highlands, Taconics and beyond.
On social media, I’m @TotalCatskills. Follow me on Facebook , Twitter , YouTube and Instagram .
My free weekly hiking newsletter is low key awesome.
You won’t regret signing up…

How To Use A Compass | The Complete Beginners Guide
It’s hard to imagine life without the handiest orientation tool of them all, the humble compass. If you are a true hiker, camper, hunter or even just general outdoors enthusiast then you would definitely have a basic understanding of how to use a compass. You would swear by one of these bad boys as you would never know when you could become lost or stranded for whatever reason.
The humble compass has been used and improved over the years and has surprisingly been around for centuries! In fact, it is well documented that the first compass can be dated back to the ancient Han dynasty of China between 202 BC – 220 AD. They were created from a naturally magnetised ore of iron called ‘Iodstone’. As time progressed and improvements were made, they were then conveniently upgraded using iron needles. These iron needles were magnetised by striking them with a lodestone. That is where they get their form that we know of today. They were more than likely created as navigational backups for when the sun, stars, or other landmarks could not be seen. But enough of the history lesson as this article is designed for you who want to learn how to use a compass. Not only that, we’ll try to make it as simple as possible for you to do so!
Why would you need to learn how to use a compass?
Learning to use a compass is a basic outdoor skill that you should learn and master if you are serious about making sure that you never get yourself lost for whatever reason. The skill itself is pretty much like learning to ride a bike, once you do it a few times and succeed and you gain confidence within it, you’ll find that it’s very hard to forget. Sure, there’s a ton of gizmos and gadgets out there today that can do it all for you but in a way, they kind of dumb you down a bit. Not only that, what happens if you run out of battery or the power grid goes down? If it ain’t broke, don’t fix it. This rings true with the ancient skill of compass reading. So when all else fails, it’s just a heck of a lot more reassuring to be able to get out the old map and compass and just put your sure fire skills to the test!
Things you should understand before you begin
There are a few things to think about before even attempting to take your chances in the lost art of orienteering. Any expert would tell you that it’s super important to make sure that you get your head round these small issues before you begin. So let’s go through some of the basics first and then with extra confidence, take those skills out onto the field.
Getting to know your compass
If you have never even laid your eyes upon a compass before then you’ve come to the right place. Here we have some of the most common components of a compass, what they look like and their function.
Take note that a lot of compass designs may vary but they all share one common factor. That is that they include some sort of magnetized needle which orients itself to the magnetic fields of the earth. The most simple and common design is the baseplate compass, A.K.A. ‘The field compass’. We have chosen to base our learnings on this design due to it’s common nature. It features the following simple components which you should familiarize yourself with to enable you to continue forward.
Baseplate: The clear plastic, rectangular shaped plate which the compass housing is mounted on. It’s transparent to enable the user to hover it over a map and see the map underneath without any restrictions. It has a ruled edge to help with triangulation and contains directional lines/rulers and scaled numbers to help the user to navigate.
Scales & Rulers: The lines and numbers marked out along the edges of the baseplate. These numbers help the user to convert distances on a map to real life distances on a scaled level (Ratios). Eg: 1cm on the map equals 1km on the ground. Scales will vary from map to map. Depending on the maps scale, you may need to convert your compass scale to match that of your map before you begin. Meaning, if your compass is in inches and your map is in cms, you will have to convert your map to inches to suit your compass. The good thing is that when you do it once, you don’t have to keep doing it for the duration of the map usage.
Compass housing: The clear plastic, liquid filled, raised circular container part which houses the magnetic needle. It’s the main part of the compass in terms of function. The needle spins inside of the container as the user either rotates its body or the dial itself.
Direction of travel arrow: Marked on the baseplate, the arrow that begins at the compass housing and points away from it towards the top/front side of the compass. Shows the user which direction to point the compass to obtain a bearing in the direction that they wish to travel in. The user would hold the compass flat and the direction of travel arrow would face outwards, away from the user.
Magnifier: Small, circular magnifying glass used to help the user see smaller details on the map.
Index Pointer/Index Line: The base end of the direction of travel arrow. Begins at the edge of the dial and is where the user takes degree readings to navigate their path.
Degree dial: Rotating circular dial which surrounds the compass housing and displays all 360 degrees of the circle.
Declination Scale/Marks: This part is used to orient the compass in an area with known declination (When magnetic north and true north don’t align) Declination is a term used to show the difference between the 2 ‘norths’ There are many variables that can occur to change the state of declination. Knowing how to adjust your compass for it is vital.
Orienting Arrow: The non-magnetic arrow marked on the base/floor of the housing. Commonly marked in a colour such as red. It rotates with the housing when the dial is turned. When lined up with the magnetic needle, it ensures its user is properly following its bearing.
Orienting Lines: The lines inside the compass housing that run parallel to the orienting arrow. They rotate with the orienting arrow.
Needle: The needle is a magnetised piece of metal that spins within the compass housing. It’s the key component of a compass. One of the ends of the needle is commonly coloured red and and will always point to magnetic north (Not true north as they can be up to hundreds of miles apart depending on your location).
Understanding the difference between True North/Flat North or Magnetic North
Just because there are 2 Norths to think about, it doesn’t mean that it has to be confusing so let’s look at how to easily distinguish between the 2 to save you from any further headaches!
True North or Flat North: This is a fixed point on our earth realm. The two ends of the earth realms axis are documented as the geographic poles, North and South – known as True North and True South.
Magnetic North: On the other hand, magnetic north isn’t fixed and can vary depending on where you are located at the time. The term Magnetic North refers to the tilt of the magnetic field. Magnetic north is estimated to be about 11 degrees from the tilt of the earth’s axis. Meaning that the difference between true north and magnetic north can differentiate up to 20 degrees in some places. If you want the most accurate reading possible then it is important to account for the magnetic shift. Even the tiniest of miscalculations could throw you off kms from where you want to be.
Adjusting your compass for declination
First of all, what even is declination? Declination is the angle between true north and magnetic north. This angle can vary depending on the user’s location and it will gradually change over time due to the shifting of the earth’s tectonic plates.
Most maps will have declination diagrams as well as that date that it was last revised so you can use those figures to more accurately locate your starting position. Of course, the newer the map, the more accurate the figures will be as the declination will change over time. You would usually find an angle and a direction. For example, your map may show something like ‘11 degrees West’
Any time you venture out, it is advised that you check your maps to see what state they are in and how old they are. Some of the older maps may be a little tricky so you might want to check online for any updated maps of the area. You may even be able to find the declination somewhere on the internet which you can write down and use as a reference for your expedition.
Once you have obtained your declination figure, you should either add the figure from your compass bearing for west or subtract the figure to your compass bearing for east. An easy way to remember whether to add or subtract is “ West is best and East is least .” So for West declination, add to the true reading (West is best, and therefore a larger number) and for East declination subtract from the true reading (East is least, and therefore a smaller number).
How to hold your compass
One thing that you should always remember is to hold the compass flat. Whether that be on the palm of your hand or resting on a map. Keep the compass flat at all times.
You should also establish the direction that you are actually facing to get a feel of how the compass functions. You can do this by orienting yourself. Have a look at the magnetic needle, as you hold the compass flat in the palm of your hand and rotate your body. The needle should swing from side to side depending on which way you rotate.
Now turn the degree dial so that the orienting arrow lines up with the magnetic arrow. You should make sure that both of them are pointing North. To find the general direction you’re facing, have a look at the direction of travel arrow. If the direction of travel arrow sits between the S and the W, you can safely assume that you are facing Southwest.
To get an even more accurate reading, check out the number of degrees on the compass. If the direction of travel arrow intersects with the degree dial and shows a degree reading of 52 then you’re facing 52 degrees Southwest.
Using your compass
When it comes to actually using your compass, unless you know exactly where you are in relation to your map then you will need to first locate yourself and mark that point out on your map. This is so you have a reference point to begin. This is a crucial step because if you get this wrong, you could easily become lost.
Locating Yourself – Even If You’re Lost
The best way to begin with compass usage is to understand where exactly you are in relation to your map. You may already know and that’s fine, you can skip this step but if you’re unsure of your location due to being lost or disorientated then this method will help give your approximate location. It’s a triangulation method that has been used with minimal failure for as long as has been documented.
The easiest way to locate yourself is to try to find 2-3 landmarks. Both on your map and by physically locating them in your line of sight. Things such as mountains or lakes are great landmarks to use as they are usually quite easy to spot from a distance. Use these simple steps to give you your approximate location.
1. Using your compass, aim the direction of travel arrow at the first landmark. Orient your map so that north is pointing to true north. You can do this by twisting the degree dial so that the orienting arrow lines up with the northern tip of the magnetic needle. Once they are both lined up, this will enable you to see where your direction of travel arrow is pointing. Don’t forget to correct any declination depending on where you are located.
2. The next step is to get a bearing on the first landmark that you are using. So, line the direction of travel arrow up with your chosen landmark, then slowly rotate the dial until the needle is aligned with the markings for north. The bearing to note down is the degree number that is shown next to the index line.
3. Now, by placing one corner of your compass’ straightedge on your chosen landmark, slowly rotate the entire compass until the needle lines up with north on the dial. Use a pencil to draw a line across the straight edge.
4. Go through this same process for each of your landmarks. Once complete, you will have 3 lines that form a triangle on your map. Your position is inside that triangle. The size of this triangle will all depend on how accurate you were with working out the bearings. With a bit of practice, you will become more accurate and the triangle will become smaller which of course will give you a more accurate position.
Finding your bearings to enable you to move to your desired destination
After working out your location in relation to your map, you can then focus on moving towards your destination. It’s a good idea to break your journey down into manageable steps as it may not be possible to map it out just by standing in one position. You may need to head toward landmarks to use them as a guide and as you reach them, you can relocate yourself and start the process again.
To begin mapping out a route, you will want to:
- Adjust your compass for declination as we went over just before.
- Then orient your map to true north. (Put your compass on your map. Look at which way the red needle is pointing. Turn your map so that north on the map, points in the same direction as the needle).
Once you have completed these 2 foundational steps you are ready to begin with the fun stuff.
- Start by carefully placing the corner of your compass’ baseplate on your location. Next, rotate the compass itself so that the straight edge of the compass forms a straight line between your location and your desired destination.
- Then rotate the dial of the compass until the grid lines on the compass’ baseplate match the grid lines of your map. This can be a little tricky so try to be as accurate as possible.
- You will then be able to discover your degree bearing. This can be found by reading the degree number next to the index line.
- Next, hold your compass flat in the palm of your hand and rotate your body until the north arrow on the degree dial matches up with the needle of the compass. With some practice and luck, your direction of travel arrow will now be pointing towards your desired destination.
As mentioned before, once you have the direction of travel arrow pointing to your destination and you head there. To accurately follow the direction of travel arrow, try to focus on a distant object like a tree, telephone pole, or other smaller landmark, and use this as a guideline. It’s advised that you don’t focus on anything too distant or broad, such as a mountain. Bigger landmarks aren’t precise enough to navigate by accurately and throw you off by a fair bit. Stop, regroup and focus on your next line. It gets a lot easier with patience and practice.
These are some great basic tips to begin with. There are more advanced ways to use a compass which we will save for another post. There are also a range of different compass types that you can use these days. Some are easier to use than others. There are bare bones compasses like the baseplate and you can also use smartphones. Smartphones are a little unreliable in the way that they need to be updated and require power for batteries. Not only that, they just don’t allow the user to think for themselves.
We hope that we have been able to help you find your way around a compass and its usage. Any feedback or questions will be welcomed with open arms so we can further educate all of outdoor enthusiasts who enjoy our content! Happy trekking!
Related posts:
- Interceptor body armor vs dragon skin body armor – Who reigns supreme?
- Top 10 Best Camping Fans
- Best Hiking Backpack Under $100 2023: Reviews and Buying Guide
- How To Wash A Sleeping Bag (Step by Step Guide)
About The Author
Glenn Gissing
Related posts, top 10 best dutch ovens for camping.

How Much Weight Can an Air Mattress Hold: Best Answer!

Leave a Comment Cancel Reply
Your email address will not be published. Required fields are marked *
Save my name, email, and website in this browser for the next time I comment.
- Skip to main content
- Skip to primary sidebar
Additional menu

Your Ultimate Guide to the Great Outdoors

How to Read a Compass: Expert Tips for Successful Navigation

Outforia Quicktake : Key Takeaways
- Learning how to read a compass is essential for navigating the outdoors and finding your way to your destination.
- Understanding the different parts and features of a compass, such as the magnetic needle and orienting arrow, is crucial for accurate navigation.
- Adjusting for magnetic declination (the difference between magnetic north and true north) is critical for obtaining an accurate bearing.
- Compasses come in various types and models, such as base plate, lensatic, and digital compasses, each with their own features and uses.
- Practice and familiarity with your specific compass model will improve your compass reading skills and ensure successful navigation in the wilderness.
A compass is a trusty navigational tool used to help you find your way to your destination. You can learn how to read a compass by orienting a compass and adjusting its magnetic declination to get an accurate bearing.
Learning how to read a compass comes with some practice. When you use a compass, you’re using the Earth’s magnetic field to find magnetic north. Orienting a compass helps you find true north.
With some math skills and the help of the Earth’s magnetic field, you can navigate to your destination.
History of the Compass
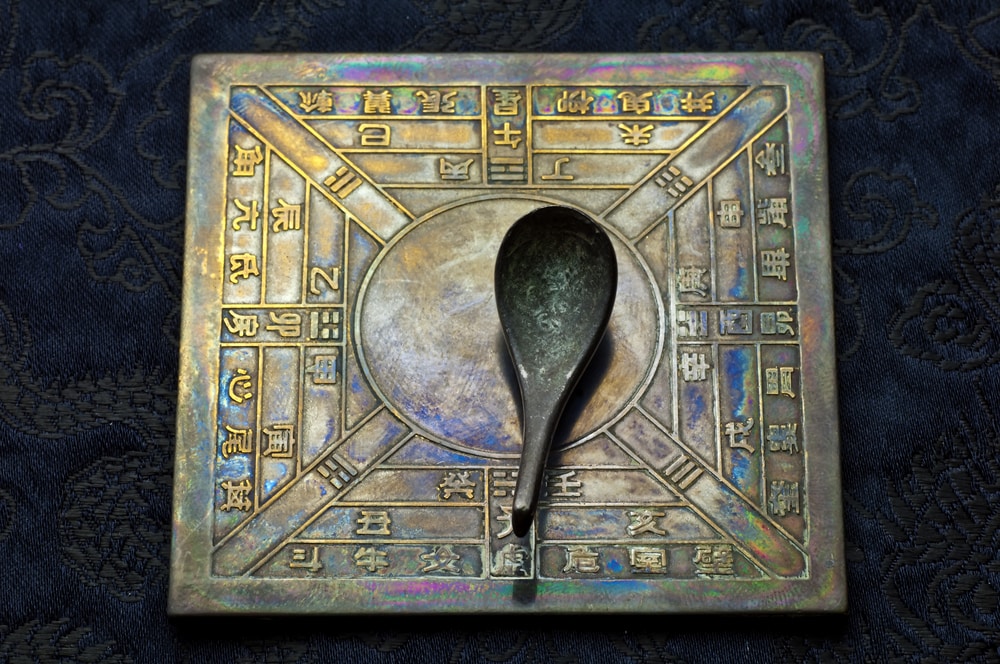
Compasses date back to thousands of years. Although not as reliable as the hi-tech compasses we have today, these tools still came in handy for early navigation. The compass dates back to the Chinese Han Dynasty sometime between 2nd Century BCE to 2nd century CE.
One of the oldest compasses from this period was a spoon-shape navigational tool made from a magnetic ore called lodestone.
The spoon was set on a bronze plate and used constellations as points of direction. The compass was called a south-pointer . The handle of the spoon pointed south and the plate had directional characters for north, south, east, and west.

The magnetic compass didn’t come into the picture until the North Song Dynasty that ruled between 960 and 1127.
Chinese scholars realized that iron needles became magnetized with magnetite , which is a magnetic mineral. The compass was then placed in a bowl of water and would drift towards north. The lodestone, or magnetite, could also be used to point north by hanging it on a sting.
Sailors in the 13th century began using dry compasses. These compasses used a pivoting needle placed on a card in a wooden box. It resembled a rose which gave it the name rose compass .
More detailed compasses with additional directions, such as northeast or southwest, were created.
What is a Compass Used For?
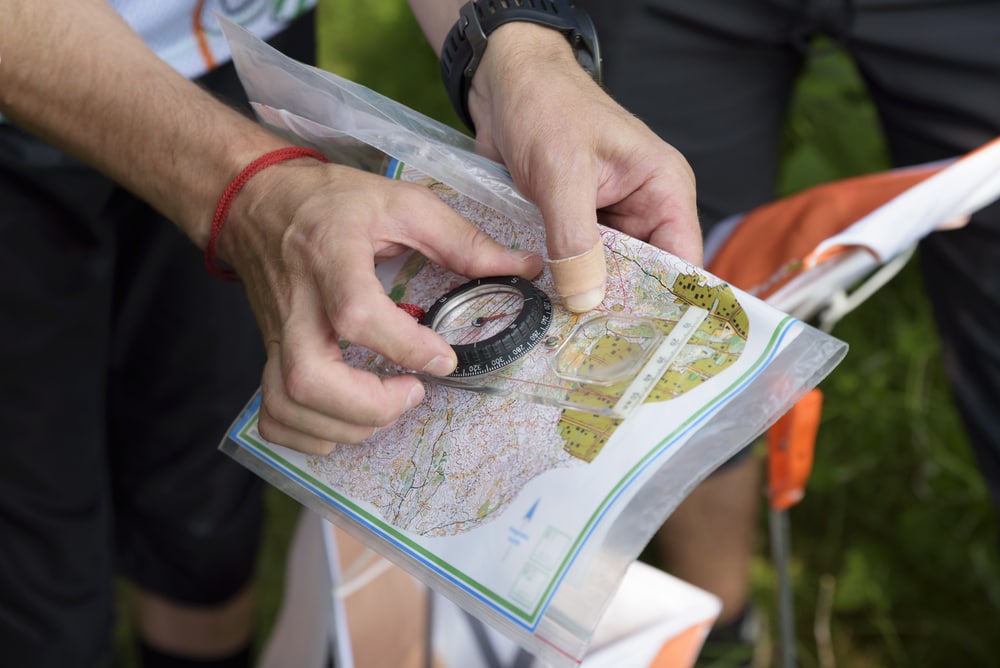
A compass can be used for many navigational purposes. You may use a compass by itself or with a map to determine landmark locations or plan a route to your destination .
A compass is commonly used to help people travel in the proper direction of their intended destination. It can also help you find your way back to the starting point.
The navigational tool can be used for various outdoor activities, such as hiking, camping, or skiing.
If your destination is out of sight, you can use a compass to plot points on a map. Intermediary objects you can see that align with your destination can be reached using your navigational tool.
If you want to know what an object or landmark is, you can use a compass and a map to figure it out. A compass can also come in handy if you need to communicate with someone who isn’t in your area by calculating the degrees of your location in relation to a landmark.
Parts of a Compass
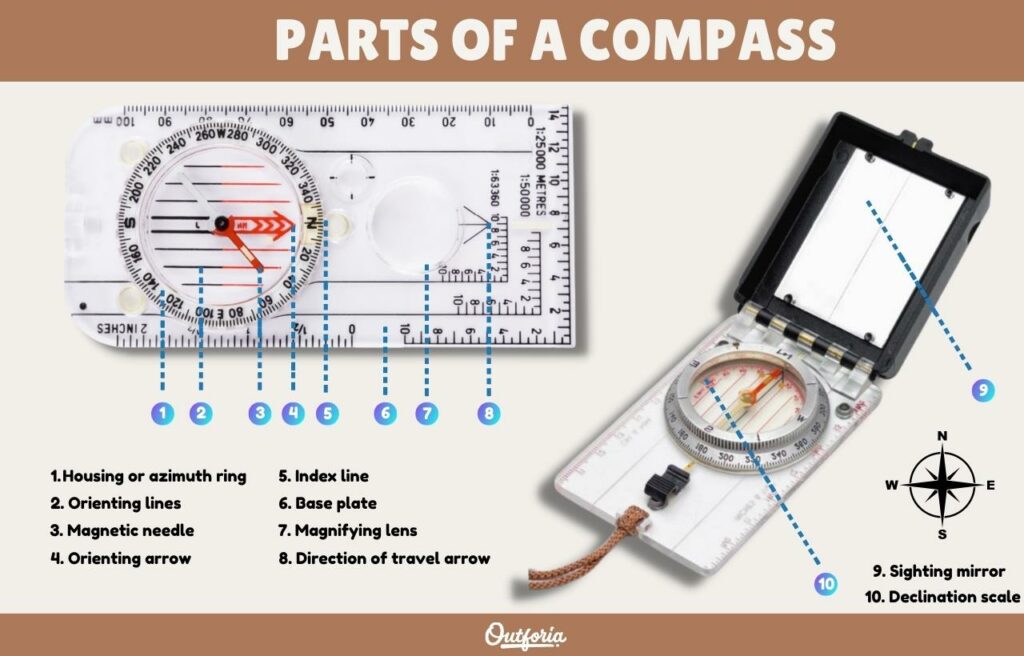
In order to know how to read a compass, it’s important to understand each part. Compasses have a number of features that all serve an important navigational purpose.
There are different types of compasses and models, which can have additional parts. We’re going to talk about the parts of a base plate compass . This is a basic compass that’s inexpensive, has standard features, and doesn’t need batteries to work.
- Magnetic needle: This is the pivoting needle of a compass, usually with a red tip, that always points to magnetic north.
- Orienting arrow: The orienting arrow is usually red or black and is used to align the magnetic needle when taking a bearing. It helps when you’re adjusting your compass according to magnetic declination.
- Housing or azimuth ring: This is the ring of a compass that includes degrees markings and cardinal points.
- Orienting lines: These lines lay parallel to the orienting arrow on a compass. They can be used to line up the grid lines of a map with the compass dial.
- Index line: This line is located on the outer part of the compass dial or azimuth ring above the north cardinal point. It helps you read the bearing you set.
- Base plate: This the platform that the compass is on. Base plates often include ruler markings to help measure map distances. Some compasses also have a protractor on the base plate for map measurements.
- Direction of travel arrow: This is the arrow located on the base plate of a compass that should be pointed in your desired destination or landmark.
- Magnifying lens: Most compasses have a magnifying lens to help you look at map features and landmarks easier.
- Declination adjustment screw: This is the screw located on the side or back of a compass. Simplistic compass models may not have this feature.
- Declination scale: The declination scale is on the azimuth ring or housing of a compass. These are all of the degree lines marked on the ring. These markings allow you to adjust your compass according to the angle of your direction or bearing.
- Clinometer: Some compasses come with a clinometer, which allows you to estimate the degrees of a slope or hill.
- Sighting mirror: Some compasses have a mirror that flips up at the top of the compass. This mirror can help you read your bearing more accurately by looking at the reflection of the dial and lining the bearing up with the line on top of the sighting mirror.
All of these nifty features on a compass should be used to get an accurate bearing. A bearing is the direction in which the compass points, either north or south, that’s measured by degrees.
Adjusting the Magnetic Declination of a Compass
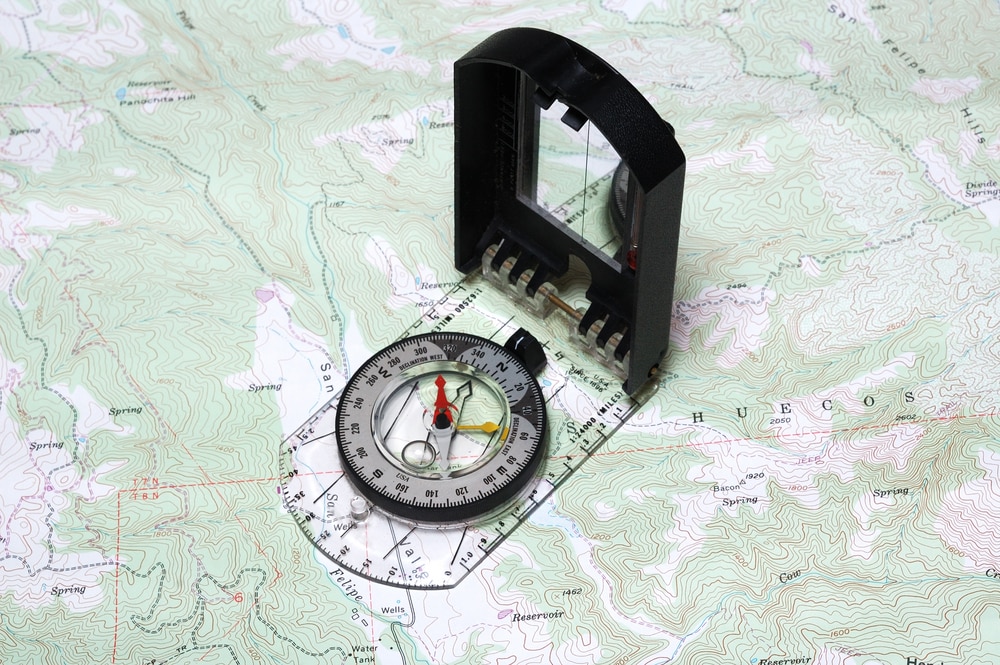
Now that you know the different features of a compass, you can start learning how to read one!
One of the first steps to learning how to read a compass is understanding the importance of magnetic declination.
The pivoting magnetic compass needle points toward magnetic north . However, topographic maps are drawn using true north, or the north pole. Magnetic declination can depend on geographic location. It can also change over time.
If you’re using an older topographic map, the declination may be different than a new map. Adjusting your compass’ magnetic declination is critical to receive an accurate bearing.
If the declination is off by just a single degree, it can throw off the accuracy of the bearing.
Your compass should come with an instruction manual that gives you specific details on how to adjust the declination based on your compass model.
Some models have a declination adjustment screw to set your compass to the proper declination. Other models may require the rotation of the azimuth ring to the proper declination degrees. The compass declination line should be moved the amount of degrees necessary to equal true north.
Calculating Easterly and Westerly Declination
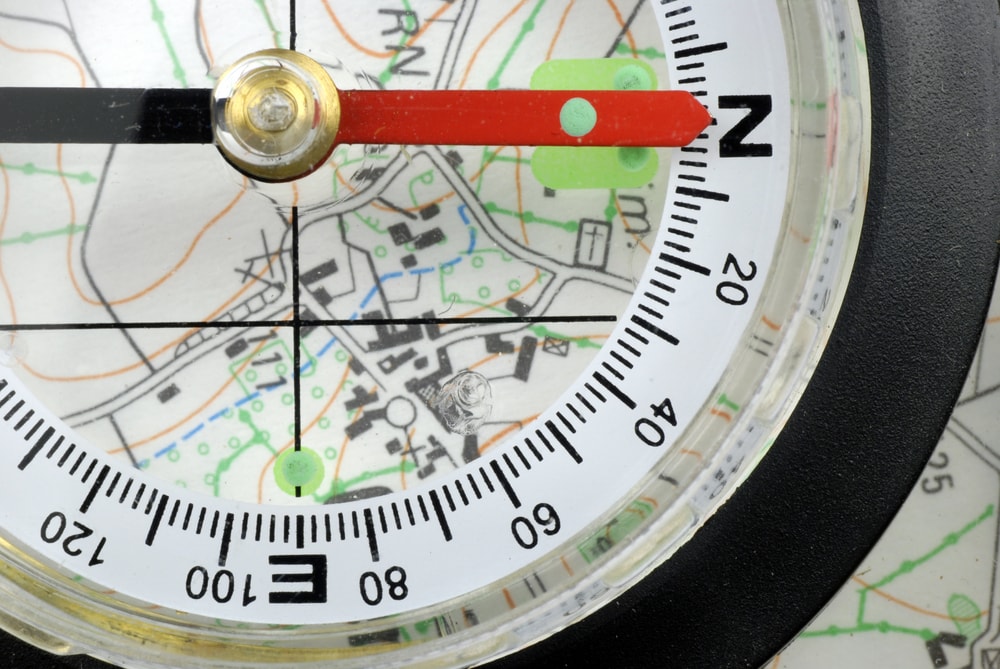
Magnetic declination for the United States ranges between 0 and 20 degrees. True north and magnetic north are the same for areas located along the zero declination line or agonic line .
The magnetic needle of a compass points east of true north when you’re west of the agonic line. If you’re east of the agonic line, the magnetic needle points west of true north. For example, Labrador, Maine has a magnetic declination of 20 degrees west. Alaska has a magnetic declination of 30 degrees east.
There’s some math involved for calculating magnetic declination. If you’re located west of the agonic line, it’s called easterly declination. If you’re east of the agonic line, it’s called westerly declination.
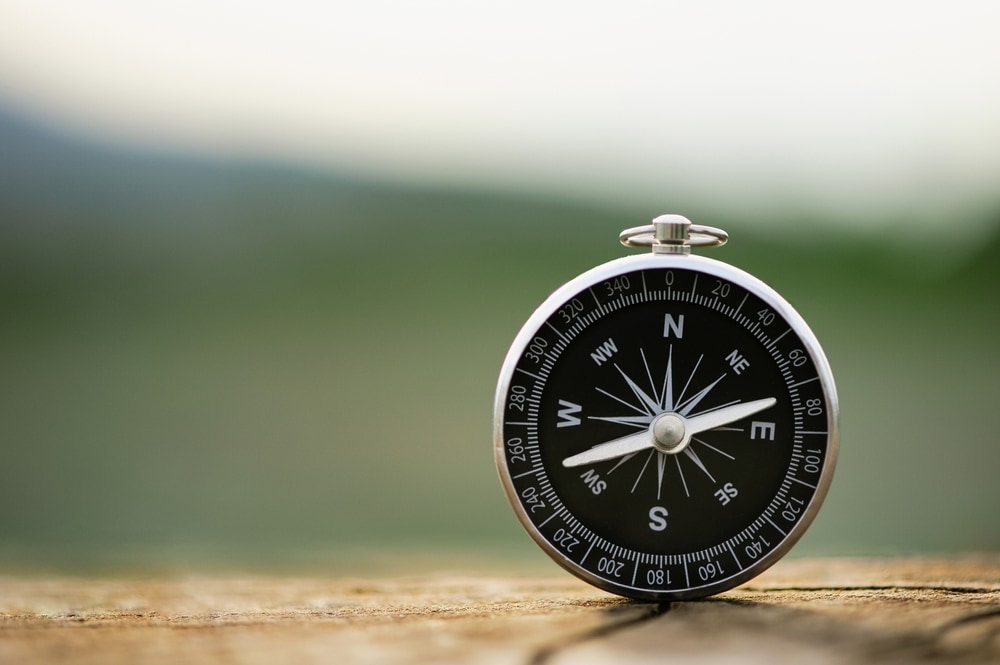
When calculating easterly declination , you subtract the true reading from easterly declination to receive the magnetic reading.
For westerly declination , you add the true reading with the westerly declination to receive the magnetic reading.
Here is a scenario that may help break down adjusting your compass to magnetic declination:
- You’re located in Labrador, Maine with a westerly declination of 20 degrees
- You’re facing the landmark you want to travel to
- The magnetic needle of your compass facing toward the landmark reads 25 degrees
- You subtract 25 degrees from 20 degrees west
- You get the true reading, which is 5 degrees
If you were located in an area with easterly declination, these numbers would be added together instead of subtracted.
The National Wildlife Coordinating Group provides some examples of calculating true readings from various locations.
Some electronic compasses may automatically adjust the magnetic declination. However, it’s important to double check if your compass is giving you accurate bearings.
You can also look up the magnetic declination of your area using the declination calculator on the National Centers for Environmental Information website.
You may also like: 5 Primary Types Of Maps Through The Ages (Pictures, History & Charts)
How to Read a Compass
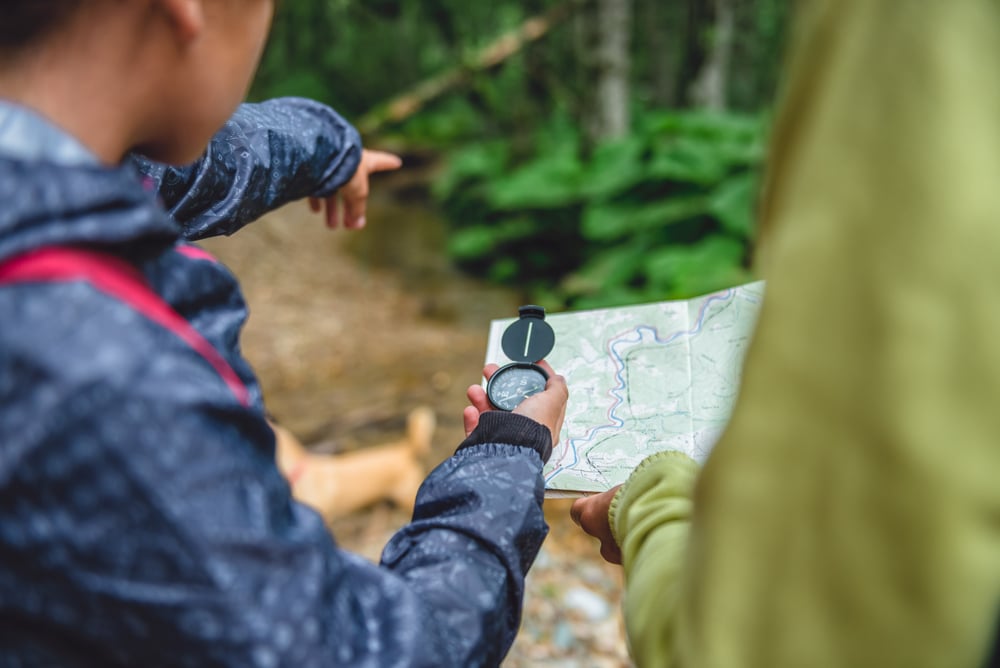
Once you’ve adjusted the compass for magnetic declination, it’s time to orient the compass to get an accurate bearing.
You can orient your compass by sight or using a map.
If you’re using a map , you can follow these steps to orient your compass with a map to get a bearing (or direction) of where you need to go:
- Make sure the compass is adjusted for magnetic declination
- Mark your current position and intended destination on the map
- Draw a straight line from your current position to your intended destination on the map
- Align the edge of the compass with the line you created on the map
- Rotate the azimuth ring until the orienting arrow and magnetic needle are aligned
- Pick up your map and compass
- Hold the compass at your waist in front of your body
- Turn your body until the magnetic needle and orienting needle are aligned
- Once aligned, the magnetic needle will be pointing toward your intended destination
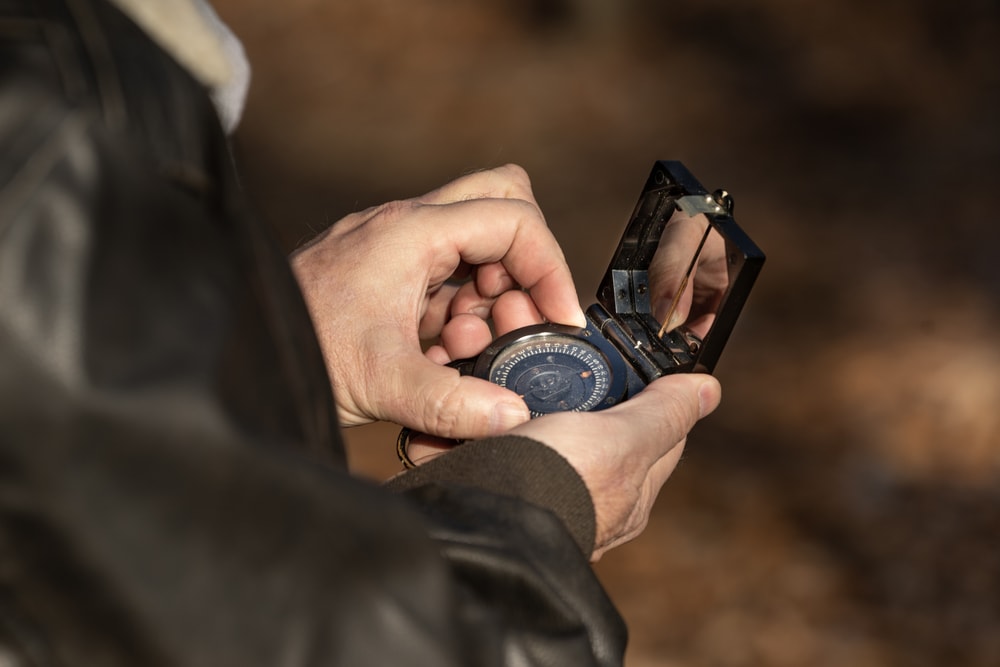
If you don’t have a map, you can still adjust your compass by using your sight . To figure out the proper direction toward your direction by sight, you can follow these steps:
- Face in the direction of your intended destination or landmark
- Point the direction of travel arrow at the landmark
- Line the orienting arrow up with the magnetic needle by rotating the azimuth ring
- Once aligned, the magnetic needle will be facing the direction toward your landmark
Adjusting your magnetic declination and orienting the compass properly is critical to getting an accurate bearing.
You may also like: 7 Must-Know Hiking Trail Signs
Tips to Get an Accurate Compass Reading
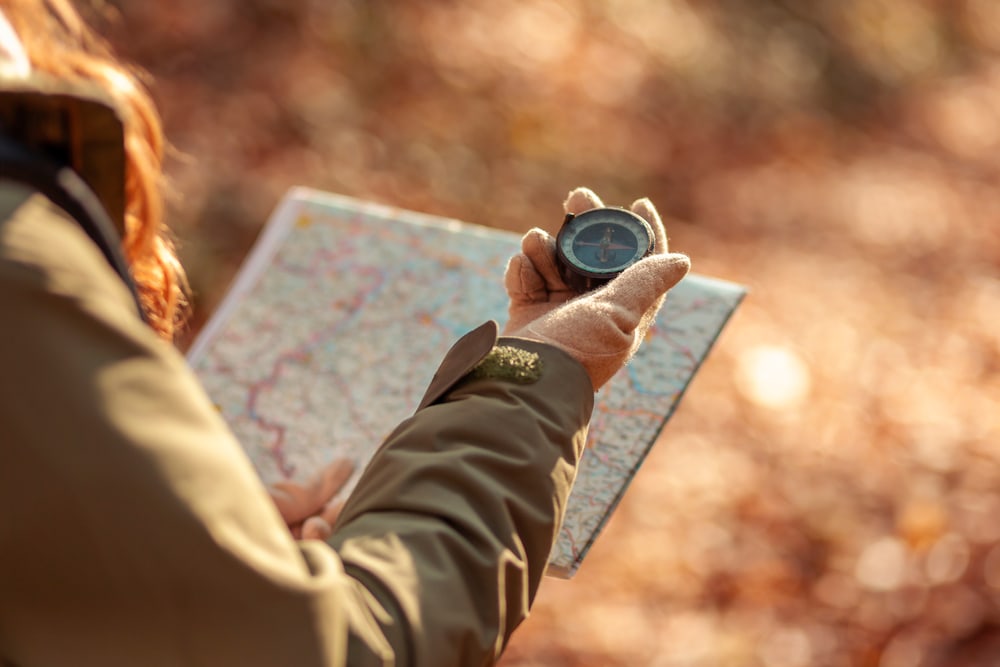
There are a few factors that can alter a compass reading, causing it to be inaccurate. Here are some tips to keep in mind when reading a compass:
- Hold the compass level at your waist.
- Try to keep your hand steady so the magnetic needle can move properly.
- Don’t move your head when taking a bearing. Only raise and lower your eyes.
- Keep the compass away from magnetic materials (such as metal from a vehicle, belt buckle, or clipboard).
- Double-check your bearing.
If you’re just learning how to use a compass, testing yourself to ensure your calculating magnetic declination and orienting your compass properly can be helpful. If you’re not fully comfortable using a compass, it shouldn’t be the only navigation tool you use.
Since compass models can vary, the process of adjusting the magnetic declination and orientation of a compass can be different than what’s been described. Be sure to read and follow the directions of the user manual that came with your compass.
You may also like: Smartphone Vs. Standalone GPS for Hiking
Types of Compass
Features of the compass have changed and evolved over time. As humans have advanced, so have our tools. There are several different types of compasses with varying styles and features.
Basic compass models only have features that are essential to the main purpose of a compass: to determine location and help you navigate.
More advanced models have additional features that can measure slope angles or be used for other neat things.
With the digital age came the digital compass. Although these compasses may need batteries or require charging, it can make reading a compass a little easier.
Base Plate Compass
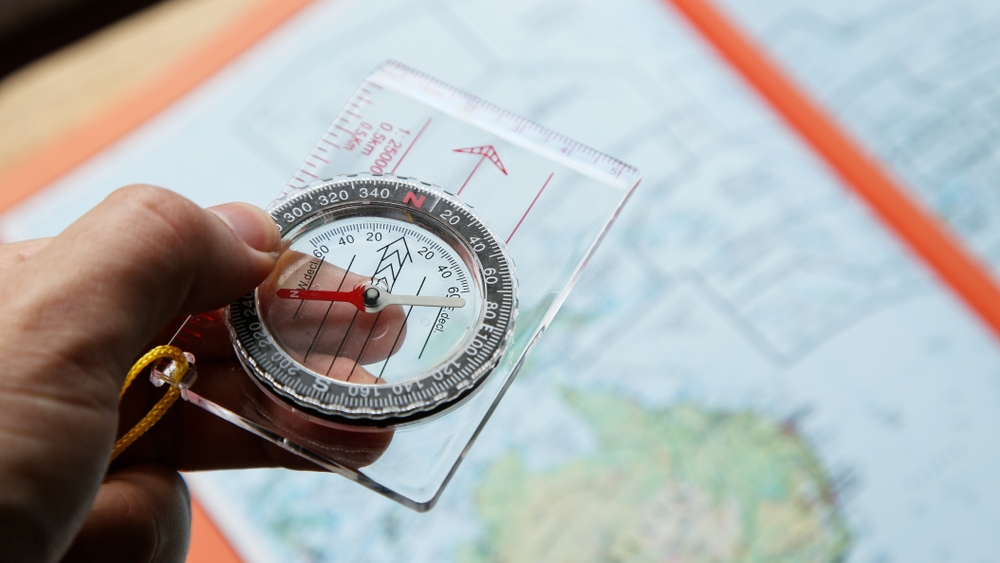
The base plate compass is a simplistic model that doesn’t require batteries. This compass has basic features and is great for beginners . Most standard base plate compasses have five essential features , including:
- Direction of travel arrow
- Scales and rulers
They may also come attached with a lanyard for easy carrying.
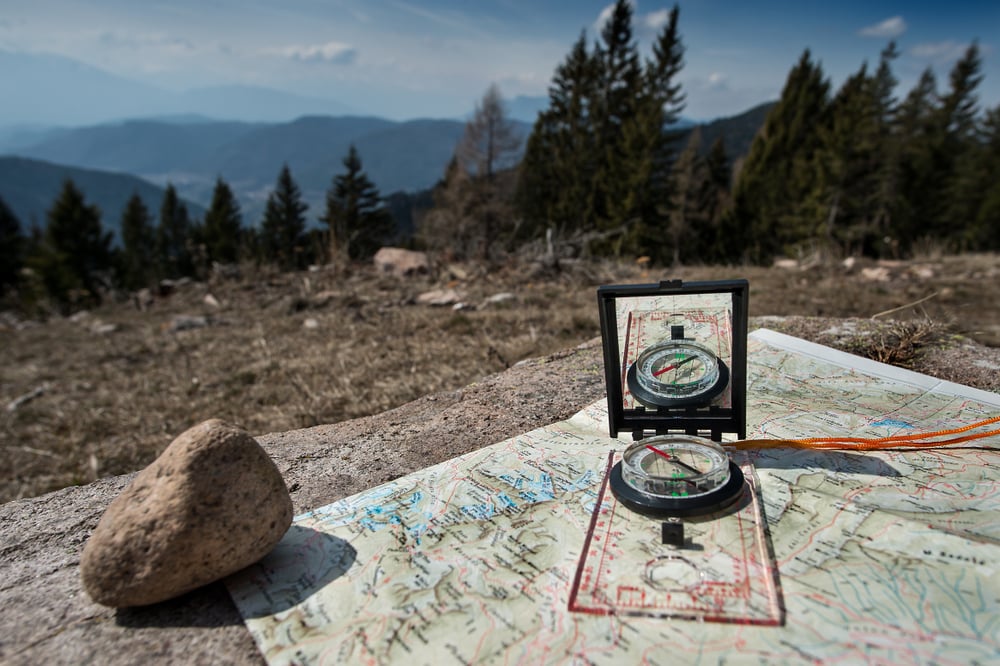
Another type of base plate compass is the mirrored base plate compass. This has the same features as a regular base plate compass, with the addition of a sighting mirror. They’re also called sighting compasses .
These compasses may have additional features that a regular base plate doesn’t have, such as a clinometer.
Lensatic Compass
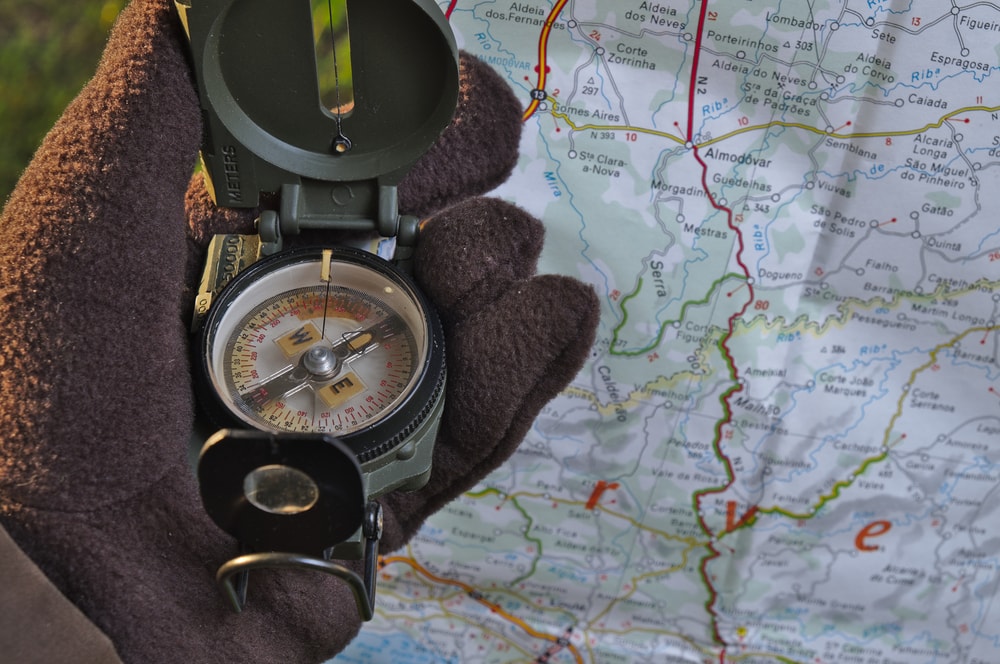
The lensatic compass has several additional parts compared to the base plate compass model. These compasses are also known as military compasses because they’ve been used by the US military.
Lensatic compasses have a lens on the back side of the compass. This lens is used for compass orientation. There are three main parts of a lensatic compass, including:
- Reading lens
The base of a lensatic compass contains the common components of a standard compass. However, it includes a thumb ring. The thumb ring should be utilized when using a lensatic compass.
The cover looks like a lid that covers the base of the compass. It has an oblong oval cut out of the center with a sight wire in the middle.
The features of a lensatic compass are designed to help you get a more accurate bearing.
Using the additional features, such as the cover with the sight wire and thumb ring are optional. The additional features can be moved out of the way to use it as you would a standard compass.
Digital or Electronic Compass
Digital or electronic compasses operate differently than standard compasses. This compass detects the Earth’s magnetic field just as a standard compass, but it does so through technology.
The technology used is referred to as magneto-inductive . While detecting the Earth’s magnetic field, it also distinguishes it from other magnetic materials.
Errors with magnetic distortion can still occur. Likelihood of error can depend on how strong an object’s magnetic field is and its relative location to the compass.
There are a wide range of digital compasses, so magnetic declination adjustments can vary. You may find specific directions for adjusting the magnetic declination of a digital compass in the model’s instruction manual.
You may also like: Ultimate Camping Checklist – Complete Guide To Everything You’ll Need + Printable PDF
Compass FAQs
Are smartphones or watch compasses reliable?
The reliability of smartphone and watch compasses is still up for debate. These versions of digital compasses shouldn’t be the only thing you rely on to navigate.
Phones and watches use a magnetometer and other sensors to give you a reading. It doesn’t work like a normal compass because a phone or watch has magnetic materials in it.
The readings for these compasses aren’t always accurate and until they’re proven to be reliable, they shouldn’t be depended on as such.

What can mess up a compass?
Magnetic fields from objects made of metal and other magnetic materials can mess up a compass. Since magnetic compasses detect the Earth’s magnetic field, other objects with magnetic fields can offset the compass.
Holding a compass improperly can also cause inaccurate readings. Additional factors that can cause errors include miscalculation of declination and improper compass orientation to true north.
How do you know if a compass is working?
Looking at the movement of the magnetic needle can help you determine if a compass is working. When oriented properly, the magnetic needle should point toward the true north.
If the needle isn’t moving in accordance with your turns, this is a sign it isn’t working.
What do the numbers mean on a compass?
The numbers on a compass dial signify degrees. The numbers go from 0 degrees to 360 degrees. Truth north sits at 0 degrees.
Each cardinal point is 90 degrees apart. East is 90 degrees, south is 180 degrees, and west is 270 degrees. These numbers are important when calculating magnetic declination.
What is the best type of compass?
The wide range of uses and features a compass offers can give you different answers to this question. If you plan on using your compass for a specific outdoor activity, you might consider certain features.
It’s ultimately up to your personal opinion based on the different features you like.
Skiers and mountain climbers may want a sighting compass with a clinometer to calculate slope angles. The US military prefers using the lensatic compass. Beginners may like the simplistic features of a base plate model.
What can a clinometer be used for?
A clinometer is used to measure slopes, including height and distance. This compass feature can be useful for determining avalanche hazards . Clinometers are also used by surveying professionals and other field researchers.
You may also like:
- Camping Vs. Backpacking: Which Adventure Is Right For You?
- Camping Rules: Does Camping Have Unwritten Rules?

About Amy Hayes
Amy Hayes is an outdoor enthusiast and writer specializing in conservation, research, and history. She has been fascinated by the wonders of nature since she was a child and has always loved exploring the great outdoors. Her written works display her passion for research and thirst for knowledge.
B.A. in History and English from Old Dominion University. Passionate about hiking, kayaking, and sightseeing in the Blue Ridge and Appalachian mountains.
Related Posts

10 Brands Like Patagonia to Shop At For Your Outdoor Adventures

Fleece vs. Cotton: Which One Is Best?

How Do Hand Warmers Work? Exploring The Magic of Chemistry

Freeze-Dried vs Dehydrated Food: Unveiling the Ultimate Choice

The Unearthing of Prehistoric Life: When Were Dinosaurs Discovered?

No Dry Wood? No Problem: How to Start a Fire with Wet Wood

How Does a Compass Work? Follow This Simple Guide
Know where you are, and where you want to go, even when the batteries die.
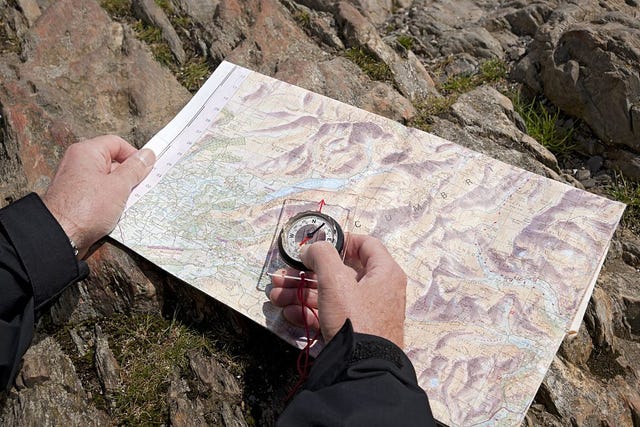
With a compass, you can navigate a map , shoot bearings to find your location, and even participate in fun activities like geocaching , an orienteering-based scavenger hunt.
Navigating with a compass starts with, well, a compass. While the old army style with a flip-up cover is cool, a rectangular plastic orienteering compass with a spinning dial is your best bet.
We love this affordable option:
Reliable Outdoor Gear Reliable Outdoor Gear Orienteering Compass
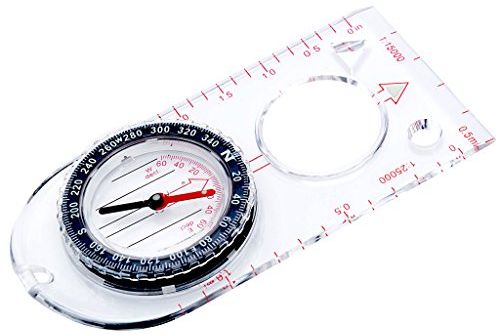
What makes up a compass?
Baseplate: The plastic rectangle that makes up the base of your compass. The straight edges on the sides help to shoot bearings.
Direction of travel arrow: The arrow fixed on the middle of the baseplate.
Magnetic needle: This arrow, often red, is what points you north.
Compass housing (Bezel): The spinning marked with N,E,S,W, the cardinal directions, and 360 degrees, all of which help you head in the right direction.
Orienting arrow: The arrow or box, usually about the width of the magnetic needle, drawn on the interior of the compass housing.
Index line: The line that comes down from the direction of travel arrow and points to the bezel.
How does a compass work?
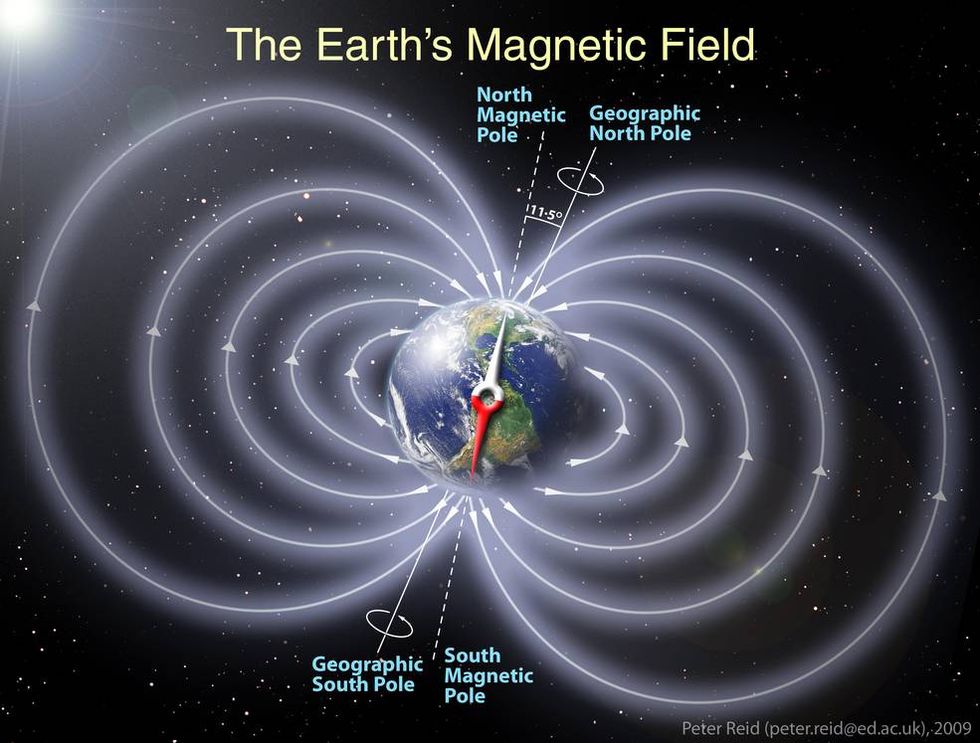
The magnetic needle on a compass points to magnetic north , rather than to the true north pole . While the earth does act like a giant magnet with a north and south pole, the churning molten core makes magnetic north wander away from the pole.
In order to account for the difference between magnetic north and true north, every map will be marked with declination—this is the difference—in the specific area that that map covers, between true and magnetic north. This number varies depending on where you are in the world. If magnetic north lies directly between you and true north, then you’ll have a declination of zero. But in most areas, you’ll have to add or subtract to what your compass reads as north.
Because magnetic north is wandering, it's important to have a modern map. Because even if the declination only changed by one degree, that can make an enormous difference over the course of a few miles.
OK, so where do I find this declination figure?
Check the legend of your map, usually in one of the corners, which should also have the date the map was created so you can be sure you have an up to date map.
What if my map is pretty old?
Worry not, head to the National Oceanic and Atmospheric Administration (NOAA) website to calculate your most up to date declination . If you own the map, go ahead and write the new figure down next to the old one, just make sure you date it.
How do I find true north?
1. Hold your compass flat near your belly button, let the magnetic needle settle. The red end points to magnetic north.
2. Spin the bezel of your compass until N (north) is in the center of the baseplate, with the index line pointing directly at N.
3. Rotate in place until the red arrow of your compass lies within the orienting arrow and points at N. You are now facing magnetic north.
4. Read your declination. If it reads X Degrees WEST, twist your bezel clockwise to subtract that number. If it reads X Degrees EAST, spin your dial counterclockwise to add that number on your bezel. If you have trouble remembering which way it goes, consider learning one, or a few, of these rhymes .
5. Spin in place until the magnetic needle is once again inside of the orienting arrow. Now the direction of travel arrow, and you, are pointing true north.
How do I align my map with true north?
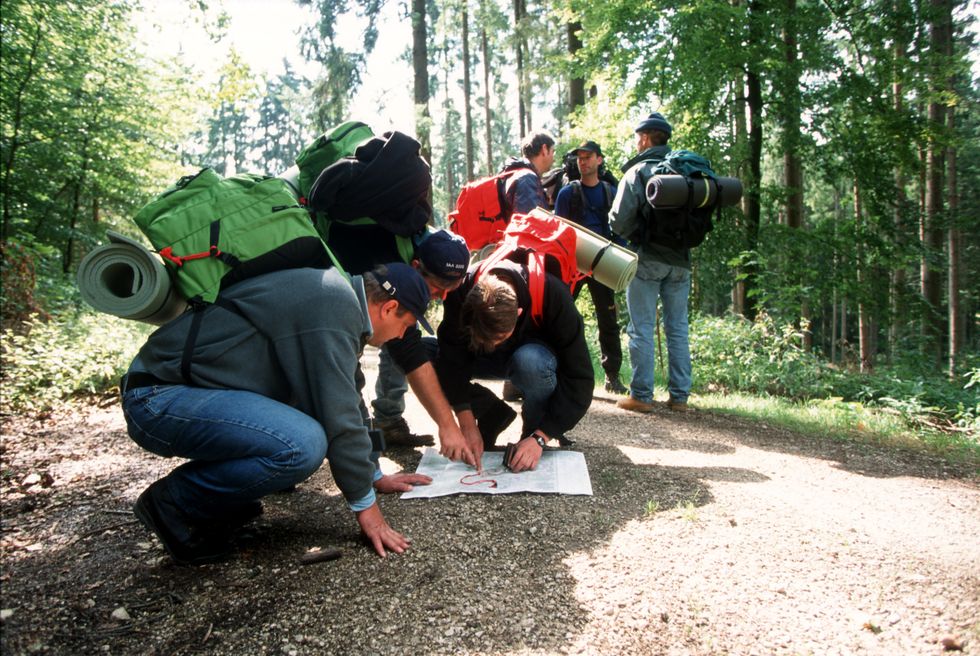
1. Lay your mat on a flat surface, beware of metal bolts on picnic tables which can affect the magnet.
2. With your compass pointing to true north, line the straight edge of the compass up with the north south lines of your map. Your map is now oriented toward true north.
3. Put rocks on the corners, or otherwise secure your map, so that it doesn't move while you navigate .
How do I use my map with my compass?
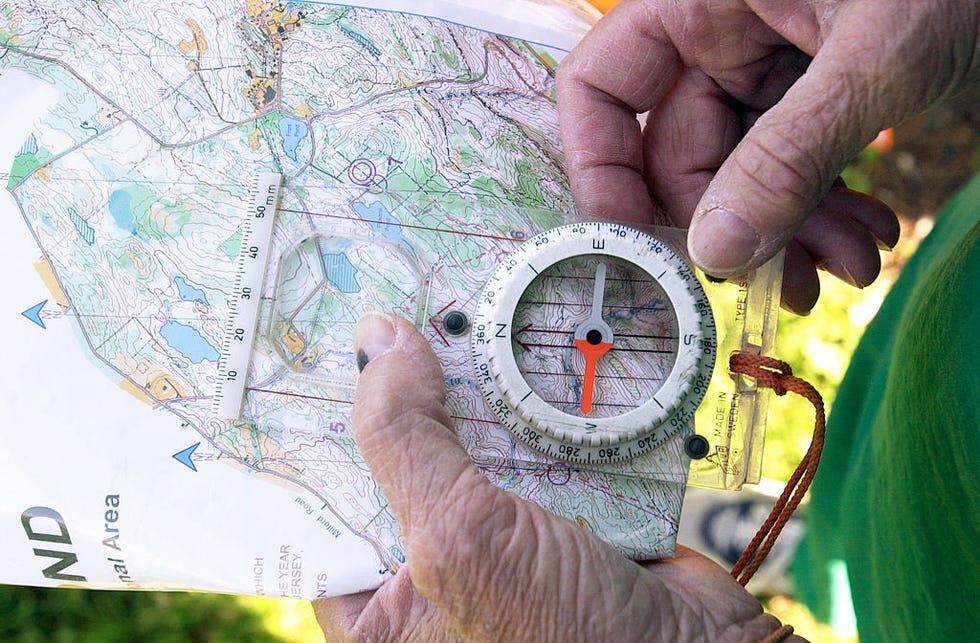
1. With your map aligned to true north, look around you for two known landmarks. Mountains work well, lakes work well, even water towers or road intersections can work great.
2. Find these landmarks on your map.
3. Take your first landmark. Pick up your compass, adjusted for true north, and point the direction of travel arrow at the landmark .
4. Spin the bezel of your compass until the needle is in the orienting arrow (put red Fred in the shed, as we used to say in Boy Scouts). The number at the index line is your bearing.
5. Put the compass on your map with one corner touching the landmark. With the compass corner touching the landmark, spin the compass until the needle is once again in the orienting arrow. Draw a line with a pencil on your map along the straightedge of your compass, intersecting your landmark.
6. Repeat steps 1-5, with your second landmark. Where the lines intersect, is your location.
7. If you’re on a trail, pay attention to how the land or trail around you corresponds to the map as you travel so you don’t have to continue shooting bearings. If you do get turned around, shoot bearings once again.
How do I pick the right direction?

1. Align your map to true north.
2. With a straight edge, draw a line between where you are and where you want to be.
3. Put your compass straight edge, adjusted for declination, on that line, turn the bezel until the needle is in the orienting arrow.
4. Pick up your compass, and holding it flat, put it against your bellybutton so the direction of travel arrow is pointing away from you. Turn yourself in place until the needle is in the orienting arrow. The direction of travel arrow now points where you want to go.
5. Pick a landmark in the distance that your direction of travel arrow points to, walk to it. This makes it easy to stay true to your course.
Happy adventuring.
James Lynch is Popular Mechanic’s Field Editor looking for stories across the U.S. about those building a better America. He’s passionate about the Erie Canal and the Apollo Space Program.

.css-cuqpxl:before{padding-right:0.3125rem;content:'//';display:inline;} Essential How-To .css-xtujxj:before{padding-left:0.3125rem;content:'//';display:inline;}

7 Ways to Silence Your Squeaky Floor
How to Fix an Ugly Lawn
How to Sharpen Your Chainsaw Like a Pro
Chopping Metal is Fun With a Cold Chisel

8 Super-Effective Ways to Soundproof a Room

How to Kill Those Pesky Mosquitoes in Your Yard
How to Make a Forge and Start Hammering Metal
Safe and Fun Rules for Using an Angle Grinder

15 Secrets to Cleaning Your Home in Half the Time

How to Clean a Cast-Iron Pan

The Amazing Math Inside the Rubik’s Cube
How to Use a Compass: Orienteering Basics
Share this:.
- Click to share on Facebook (Opens in new window)
- Click to email a link to a friend (Opens in new window)

Anytime you venture out into the wild, there’s a handful of essential items that should be in your backpack. Snacks, water, and extra layers make that list, but something that many people forget or take for granted is a reliable navigation tool.
Perhaps we’ve become too reliant on cellphones or simply lost the art of map and compass navigation. When it comes to wilderness travel and survival, a basic compass can’t be replaced. Reliable and intuitive, a map and compass should always make your wilderness packing list .
But before adding a map and compass to your gear list, learn how to use them properly.

Parts of a Compass
Compasses are relatively simple pieces of technology that have been around in some form for thousands of years. To properly use a modern compass, familiarize yourself with a few common parts.
All compasses are mounted on a baseplate. These should be transparent so you can see your map underneath. Additionally, the baseplate’s straight edge will assist in taking bearings to transfer to your map and navigate onward.
Direction-of-Travel Arrow
This arrow indicates where you need to point the compass when taking or following a bearing.
Rotating Bezel
The rotating bezel is the circular area marked with degrees from 0 to 360 and also known as the “azimuth ring.”
The index line is found above the bezel and shows where to read bearings. It’s an extension of the direction of the travel arrow described above.
Magnetized Needle
Essential for navigation, the magnetized needle can be found inside the bezel and is usually red or white. This needle always points to magnetic north, not true north.
Orienting Arrow
This arrow allows you to orient the bezel with the map and is often designed to match the magnetized needle.
Orienting Lines
These are the parallel lines that move with the bezel and will help set your orienting arrow to north on the map.
Declination Scale
The hash marks inside the bezel are known as the declination scale and are there to use when adjusting declination.
Declination
One of the most common mistakes made when navigating with a map and compass is failing to adjust for declination. True north and magnetic north are not the same, and for accurate navigation, you must correct for this difference.
Depending on where you are in the world, the discrepancy between true and magnetic north could be anywhere from a few degrees to upwards of 20 degrees, which could send you a couple hundred feet — or even miles — off course.
Every region has a different declination, and the respected topographic map of the area you’re traveling in will list this value. Even so, these values vary over time, so check the map’s publication date or cross-reference the NOAA magnetic declination website for the most up-to-date readings.
Once you confirm the declination value (expressed as several degrees), you can translate that to your real-world navigation. Simply subtract that value from your compass bearing if the value is X degrees west, and add that value if the indicated declination is X degrees east.

Maps, Bearings, Navigation: How to Use Your Compass
To navigate correctly with a map and compass, you need to orient your map with the surrounding landscape. Setting declination is step one. From there, you can easily piece the rest together:
- First, put your compass on the map with the direction-of-travel arrow pointing to the top.
- Second, rotate your bezel to match the direction-of-travel arrow with north on the compass. Move the compass so the edge of the baseplate is sitting on the left or right side of your map, with the direction-of-travel arrow still pointing to the top.
- Rotate your body with map and compass in hand, so the magnetic needle lands in the outline of the orienting arrow. These steps should leave you oriented appropriately, and you can cross-check this by comparing the landscape to what you see on the map.
- Bearings entirely depend on a specific location; think of them as a numerical way to describe the direction of travel. That is, due south is equivalent to 180 degrees. It is crucial to remember that following the same numerical bearing from different places will not deliver you to the same location. Setting a bearing using your map and compass is quite simple.
- Place your compass on your map so the straight edge of the baseplate is between your current location and where you would like to travel.
- Double-check that the direction-of-travel arrow is pointing in the direction you would like to travel!
- Rotate the bezel so that the orienting lines within match the north/south running lines on your map.
- Check out the index line on your compass and record the bearing it is indicating to begin traveling onward.
- To move toward your destination, hold your compass and ensure the direction-of-travel arrow is aimed away. Still holding the compass, move your body until the magnetized needle lines up inside the orienting arrow. By doing this, the direction-of-travel arrow will now be facing the bearing you took from your map. Follow its direction to your desired destination.
These are the basics of map and compass navigation. As you get more comfortable and familiar with the process and equipment, you can work this process backward and use a bearing to identify where you are on a map.
After putting all the pieces together and devoting a fair amount of time to familiarization and practice, you will soon be able to travel off trail in the wilderness with ease!

Follow Us On
Subscribe Now
Get adventure news and gear reviews in your inbox!
Join Our GearJunkie Newsletter
Gear Top Stories Deals
Reading a Compass
General directions.
There are four cardinal points on a compass - North, South, East, and West. When reading a compass, and telling other people directions, you need to wipe "right" and "left" out of your vocabulary. Right and Left are relative directions and differ depending on your location and direction, but the cardinal points are constant.
The direction halfway between North and East is an intercardinal point and is called NorthEast . The other three intercardinal points are SouthEast, SouthWest, and NorthWest.
Finally, there are secondary intercardinal points halfway between each cardinal point and intercardinal point. These are North-NorthEast, East-NorthEast, East-SouthEast, South-SouthEast, ... and so on. With these directions, you can give someone a fairly good idea of what direction they need to go. We could add additional points, continueing to break each section in half over and over, but telling someone to go East-EastEastNorthEast-EastNorthEast would not be fun.
Since there IS a need for more precise directions, the circle of a compass face is split into 360 marks called degrees . For rough directions, go ahead and use North or NorthWest. But, for finding your way or locating destinations in the wild, use degrees as you'll see in a bit.
Two Types of Compasses
Basic compass reading.
Become familiar with Parts of the Compass before learning to read your compass.
- Hold your compass steadily in your hand so the baseplate is level and the direction-of-travel arrow is pointing straight away from you.
- Hold it about halfway between your face and waist in a comfortable arm position with your elbow bent and compass held close to your stomache.
- Turn your body while keeping the compass in front of you.
- Notice that as the compass rotates, the needle stays pointing the same direction.
Take a Bearing
When you need to find your way from one particular place to another, you need to use these numbers to find out the bearing to that remote place. The direction you are going is called your heading . Heading and Bearing are pretty much the same thing. The image above is a heading of about 250 degrees.
- You computer screen: ____________ degrees
- Your window: ____________ degrees
- Your door: ____________ degrees
- A lightswitch: ____________ degrees
Compass Reading Tips
- Hold the compass level - if the compass is tilted, the needle will touch the clear lid and not move correctly.
- Read the correct end of the needle.
- Use common sense, such as knowing that if you are in North America, Europe, or Asia and heading anywhere towards the sun during the middle of the day, you are heading in a southerly direction. If you are south of the equator and heading towards the sun, it's just the opposite and you are heading in a northerly direction. (If you are in the tropics, between the Tropic of Cancer at 23.5 degrees North of the equator and the Tropic of Capricorn at 23.5 degrees South of the equator, then this tip should not be used. The sun can be either north or south of you, depending on the time of year.)
- RED IN THE SHED!
- Keep the compass away from metal objects - even a knife, flashlight, or keychain can cause a false reading if too close to the compass.
Free shipping on orders $75+ within the continental U.S. Learn more
Free Standard Shipping
Orders $75 and above, after all discounts have been applied and before tax or shipping costs have calculated, qualify for free standard shipping to addresses within the continental United States.

- Shop All Backpacks
- Backpacking Packs
- Hiking & Daypacks
- Hydration Packs & Bladders

Top-Rated Packs
New Numa 30L Pack!
- Rectangular Sleeping Bags
- Canvas Sleeping Bags
- Mummy Sleeping Bags
- Two-Person Sleeping Bags
- Children's Sleeping Bags
- Sleeping Bag Liners
- Shop All Sleeping Bags

New Celsius Sleeping Bags!
- Shop All Tents
- Backpacking Tents
- Pop-Up Tents
- Canvas Tents
- Tent Accessories
Lightweight, Mesh Top Tents

Mountain Ultra Tent Collection
- Camping Cots
- Sleeping Pads
- Camping Pillows & Cushions
- Cot Storage & Accessories

Patented Pivot Arm Camp Cots
- Outdoor Blankets
- Tent Footprints
- Tent Rainflies & Covers
- Shop All Accessories

New Outdoor Camp Blankets!
New Camp Pillows!
- Gear Garage
- Best Sellers
- Our Most Popular Cot
- Daypack Favorites
- Packs 65L & Larger
- Mountain Ultra Tent Family
- Adventurer's Gift Guide
- Shop All Gear & Equipment
- Contact Customer Service
- Warranty Info
- Adventure Blog
- Join Our Community
- Become an Ambassador
Your cart is empty.
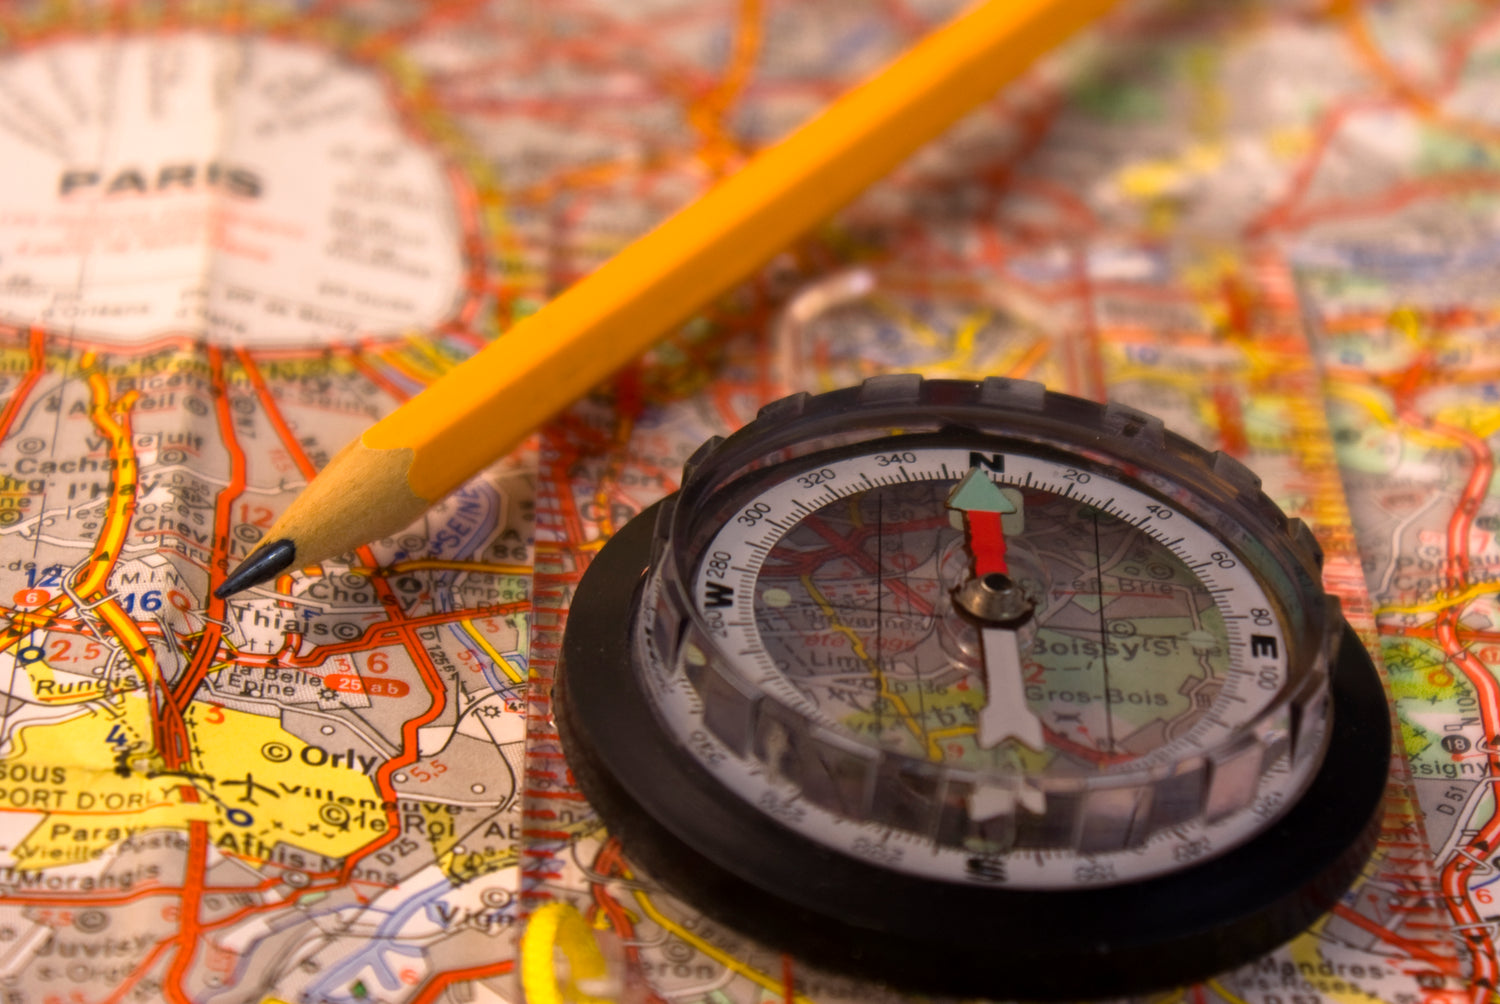
How to Navigate and Use a Compass
- backpacking
- Using a compass
A tool for the Ages—the compass is a great companion for any off-trail hiker or explorer. There are many different uses for a compass. Here, we’ll cover the simplest use—taking a bearing. You’ll learn the different parts of a compass, how to use a compass to discover which direction you are heading (taking a bearing), and which direction you are located in from the perspective of another vantage point (taking a back bearing). But first, you might be tempted to ask, “Why use a compass when there’s GPS?” As with any electronic device, there might not always be strong satellite connection—and in the case of GPS you need three. Also, you’ll be relying on a battery powered device—it may just flat run out on you. So many a trail blazing hiker will pack along a GPS, map, and compass for the trip. For more information about using this triple threat for navigation in the wild, www.traditionalmountaineering.org gives detailed instructions.
Parts of a Compass To know how to use a compass, you need to understand the role of each part of the tool. Below is a diagram of a simple orienteering compass and a short explanation for each part.
- Direction of travel arrow. The direction of travel arrow or sighting line is used for sighting and following bearings. The arrow should be pointed in the direction of the destination or landmark you intend to reach.
- Needle. The magnetic needle points to magnetic north.
- Orienting arrow. The north-south orienting arrow (red or black outline of an arrow) is used to align the magnetic needle when taking a bearing. It is also what is adjusted to set the compass for magnetic declination if you’re using your compass with a map. We will learn how to navigate using a map and compass in a future post.
- Compass Dial. Sometimes referred to as the housing, this revolving dial is labeled with the cardinal points and degrees. Rotate the dial to line up the compass needle with the orienting arrow when taking a bearing.
- Base plate. The transparent plate everything else is either printed on or attached to—the base plate can be used as a ruler to measure map distances, which we’ll teach at another time. Now that we’ve got that down, we’ll offer a few tips on getting accurate compass readings. Don’t worry if you don’t recognize the jargon. We’ll go into depth soon. This advice can be especially helpful since small errors in reading a compass can mean big inaccuracies on the ground:
1. Hold the compass level and steady so the needle swings freely.
2. Hold the compass about waist high in front of the body.
3. Raise and lower eyes when taking a bearing, do not move your head.
4. Always use the same eye when taking a bearing.
5. Turn your body until you are directly facing the object that is being measured.
6. Be aware: Magnetic fields will give incorrect compass readings. Avoid taking readings near magnetic fields such as steel, iron, vehicles, rebar, and clipboards. Even belt buckles, glasses, and rings can interfere when reading a compass.
7. Take bearing twice.
8. Follow the direction of travel arrow, not the compass needle, when walking a bearing.
9. Always follow the line indicated by the compass rather than relying on judgment as to the direction.
10. Use back bearings to ensure you are on track when navigating. These tips can be found at www.nwcg.gov along with more instructions on how to use a compass.
Orienting a compass To help the visual learners, refer to the picture below. It’s a picture of the unit circle with the cardinal points and degrees. It looks similar to your compass’ dial.
Cardinal points and degrees on a compass When using a compass to find magnetic north you’ll need to set the compass dial at 0 degree or 360 degrees in relation to the direction of travel arrow. Holding the compass as recommended above—now turn your body until the magnetic needle is perfectly housed in the orienting arrow and you’ll be facing magnetic north. T
aking bearings Bearings are expressed in angles or a certain number of degrees from magnetic north. To take a bearing find your destination, in this case, by sight since we’re not using a map with our compass today. Face your landmark and turn the dial until the orienting arrow and magnetic arrow line up. Read the angle at the top of the compass—the one that is perfectly aligned with the direction of travel arrow. This is your bearing to your destination. When taking bearings in the wilderness without a map, it can sometimes be helpful to use an intermediate object to gain your desired destination. Especially if you track through vegetation or are dealing with varying altitudes, each of which could cause you to lose the line of sight to your destination. Set a course for that object first. Then recalculate when you’ve reached this first destination for the final destination. Back bearings can also be a useful tool for checking to be sure you’re still on course or to alert someone ahead of your location. You can determine your back bearing by either adding or subtracting 180 degrees from your original bearing. So what’s the point? One instance where you may need your back bearing would be to tell a rescue party where you are in relationship to a landmark you and the party can see. With the proper communication device you could tell them which bearing to take; i.e., “I’m 120 degrees from the windmill.” If they begin at the windmill and follow a straight course on the bearing 120 degrees, they can find you. Your compass would read 300 degrees to the windmill (a 180 degrees difference).
Following bearings Once you have your bearing simply follow the direction of travel arrow, remembering to use the advice given earlier in the article to keep well on course. Don’t turn the dial on your compass until you’ve reached your destination.
Practice in a familiar location It’s a good idea to give this kind of navigation a spin in a familiar place first. When you feel comfortable with your skill, move out to more challenging terrain. Using a compass can be a rewarding skill to acquire and, as always, TETON Sports wishes you the best in all your adventuring! Get Outdoors! TETON Sports
Continue reading
How to Pick a Sleeping Bag
How to Keep Cool While Camping and Hiking
CURRENT PRICES END MAY 12
Outside Festival feat. Thundercat and Fleet Foxes.
GET TICKETS
Start Your Free Trial
Powered by Outside
Navigation 101: Understanding Your Compass
If you don't know what triangulation is, read this article..
Heading out the door? Read this article on the new Outside+ app available now on iOS devices for members! >","name":"in-content-cta","type":"link"}}'>Download the app .
Interested in improving your navigation skills? Join Backpacker’s Backcountry Navigation or Basic Map and Compass Skills online course today.
The only place you’re likely to find a big red “YOU ARE HERE” sign on a mall map, so before you can make use of a topographic map, it must be oriented properly to your surroundings. Knowing which direction North is isn’t enough–you must also find your own position on the map
That act of figuring out where you are in relation to a map is called triangulation, a long-winded term for using at least two recognizable landmarks to pinpoint your own position. To triangulate properly you will need a compass, a ruler and a pencil or pen.
Before you leave the house, prepare your map.
Find the declination diagram at the bottom of your map.
- Align your ruler along the line labeled “MN,” which stands for magnetic north. Using pencil, extend that line from the bottom to the top of the map.
- Draw parallel lines every 1.5 inches on both sides of this line all the way across the map.
It’s not necessary to draw lines across the entire map ~ just do the sections you’re actually going to use.
In the field, identify at least two landmarks that you see and locate them on the map. Look for easily identifiable features such as peaks, clearings, lakes, ponds, roads, rivers and buildings. Scan the map carefully until you find two (preferably three) such distant landmarks.
The second landmark should be at a right angle to the first as you look at them in the field; the third should fall between these two.
Mark these landmarks on your map if necessary so you don’t “lose” them.
Align your map to your surroundings. Spread the map out flat.
- Set the compass dial to North (0 degrees).
- Lay the compass on top of the map and align one long side of the baseplate along one of the magnetic north lines you added.
- Turn both map and compass together until the red end of the needle is on the “N.” The top of the map now points to true north.
Align your map to a landmark.
- Pick up the compass.
- Point the direction of travel arrow at the first landmark you chose in the field, in this case the north end of the lake down in the valley in front of you.
- Rotate only the dial until the red end of the needle points again to North. Hold the baseplate still at this time, keeping it pointed at the landmark.
- Put the compass back on the map with one long baseplate edge touching the landmark.
- Carefully pivot the entire compass until the orienting lines inside the compass housing are parallel with the magnetic north reference lines you drew before you left home.
- Draw a five or six-inch line from the landmark along the edge of the baseplate.
Triangulate your position. Repeat steps 1-6 above under Align Your Map To A Landmark.
Your approximate location will be where the 2 lines cross.
To further verify your location, select a third landmark between the first two and repeat steps 1-6. This third line should pass through the intersection of the first two lines to confirm your position. If not, recheck your work for all three landmarks.
I see a stream on my map. How do I find it in the real world? You may encounter a situation where you can see a choice location on a map, but because the terrain around you blocks the view (high trees, rolling hills, riverbeds and so on), you can’t see it in “real life.”
After you oriented yourself to the map, you can easily judge the location of a landmark in the field even if you can’t see it.
Mark both your current location and destination. Lay one side edge of the compass baseplate on the map, aligned with these two points. (The direction of travel arrow should be pointing toward the goal, not away from it.)
Holding the baseplate steady on this line, turn the dial until the needle and the orienting arrow line up.
Read the bearing at the marker line.
Pick up the compass and map with the needle still aligned with the orienting arrow, follow the direction of travel line with your eyes. It is now pointing to the object you wish to find in the field.
Getting from here to there, however, probably won’t be a simple matter of walking in a straight line. To learn how to navigate around obstacles without losing your way.
I see a peak up ahead. How do I find it on the map? If you know your position on a map, you can use a compass to identify landmarks in the field.
Let’s say you’re on a mountain peak, and you’d love to identify a nearby summit so you can brag to your friends back home about the view. Nothing to it!
- Orient the map.
- Draw a straight line connecting your current location with the summit you want to identify.
- Place one side edge of the baseplate on this line, with the direction of travel arrow pointing toward the summit on the map.
- Turn the dial until the orienting arrow and the north end of the compass needle are lined up. Read the bearing, which is the number on the dial at themarking line.
- Pick up the compass and, after making sure the orienting arrow and needle are still aligned, sight along the bearing. The direction of travel arrow now points to your peak.
- Doublecheck your work visually by making sure that the terrain around the object you identified on the map matches the terrain around the object in the field.
How do I navigate around this huge bramble patch without getting lost? Following a compass bearing is hard enough, but nature makes it even more difficult by throwing up obstacles that block your nice straight line. Marshes, ponds, boulders, trees, cliffs, steep slopes, brambles and dense foliage can all thwart hikers trying to follow a straight course. Sometimes, you’ll soon find, the shortest distance is not the easiest.
Planning your route in advance helps here. If you know ahead of time, for example, that an outcropping of rock lies between your campsite and that cave entrance, study your topographic map and plot a route around it.
But you never know when your path will be unexpectedly blocked ~ by a fallen tree, a washed out bridge, an unmapped quarry ~ forcing you to navigate around without benefit of planning. Here’s how.
- Sight ahead while you’re walking in order to identify landmarks along your compass bearing. For example, say you’re truckin’ along a bearing of 270 degrees (due west) and you encounter a huge fallen tree. Before moving around it, sight along 270 degrees ahead of you and note a conspicuous landmark ~ tree, rock, or other easily identified point ~ on the opposite side of the log that’s at the same bearing.
- After detouring around the downed log, go to the landmark you noted earlier and resume your previous course of 270 degrees.
- Here’s another technique called “right angle navigation.” We’re back at the downed tree again and want to navigate around it on a bearing of 270 degrees (due west).
- Turn 90 degrees from your bearing. In this case, you decide to turn left, (due south). Turn the dial so the direction of travel arrow and the marking line point to 180 degrees.
- Begin your detour. Carefully count your paces as you go.
- As soon as you clear the tree, turn 90 degrees back toward your previous bearing. In this case, you’d turn right (due West) again, back to 270 degrees. Rotate the compass dial to match that bearing.
- Walk past the obstacle.
- Turn 90 degrees to the right, this time in the opposite direction of your first turn, and rotate the compass dial again; in this case, you’d rotate it to 360 degrees (due north).
- Walk back along the other side of the log, counting off the number of steps you walked the first time you turned. This will return you to your original course.
- Turn 90 degrees left to 270 degrees, your original bearing (due West).
The key to making this technique work is keeping out and back portions of the detour equal in length. Keep close track of the number of paces you walk, and keep your strides as uniform as possible.
How do I measure hiking distance accurately on a map? “Linear distance” and “travel distance” are almost never the same in the backcountry. “As the crow flies,” in other words, “ain’t as the hiker walks.”
If you’re trying to estimate how many miles you have ahead of you, measuring the distance straight from point A to point B won’t do you any good ~ because unless you’re actually a crow, the route you take will likely follow a more roundabout path.
To measure actual or nonlinear distance on a topographic map–of a winding trail, say, or a meandering creek ~ use one of these two methods. (Note that the Paper Method does not work very well on the trail.)
String Method
- Find something long and flexible, such as a piece of string or dental floss. An item that retains its shape is even better ~ a twist-tie or pipe cleaner, perhaps.
- Place one end of the twist-tie at the starting point.
- Use your fingers to conform the twist-tie to the shape of your route.
- Mark the end of the route on the twist-tie with your thumb and forefinger, or give it a sharp crimp.
- Straighten it out and lay it down next to the bar scale at the bottom of the map to read the distance.
Note: If you’re using string or something that won’t keep its shape, always keep it anchored with one finger as you move forward. Otherwise, if the string slips you’ll have to start over again. Also, don’t stretch the string when you straighten it out.
Paper Method
- Find a thin strip of paper about a foot long.
- Align the edge of one end of the paper with your starting point. Make a tick mark there.
- Now rotate the paper gently to follow the bends in the trail, making tick marks at significant turns until you reach the end point.
- Lay the paper along the bar scale and read the distance.
Some guidebook maps will have a numerical scale ~ such as “one inch equals one mile” ~ indicated in the legend, but no accompanying bar scale. In a case such as this, measure the distance with a ruler (there’s a small one on the baseplate of your compass) and multiply that number by the scale. A distance of 3.75 inches on a map with a “one-inch-equals-one-mile” scale would represent 3.75 miles on the ground.
Return to the Backpacking 101 home page.
Popular on Backpacker

Join Outside+ to get access to exclusive content, 1,000s of training plans, and more.
Healthy Living
- Clean Eating
- Vegetarian Times
- Yoga Journal
- Fly Fishing Film Tour
- National Park Trips
- Warren Miller
- Fastest Known Time
- Trail Runner
- Women's Running
- Bicycle Retailer & Industry News
- FinisherPix
- Outside Events Cycling Series
- Outside Shop
© 2024 Outside Interactive, Inc
- Bear's Books
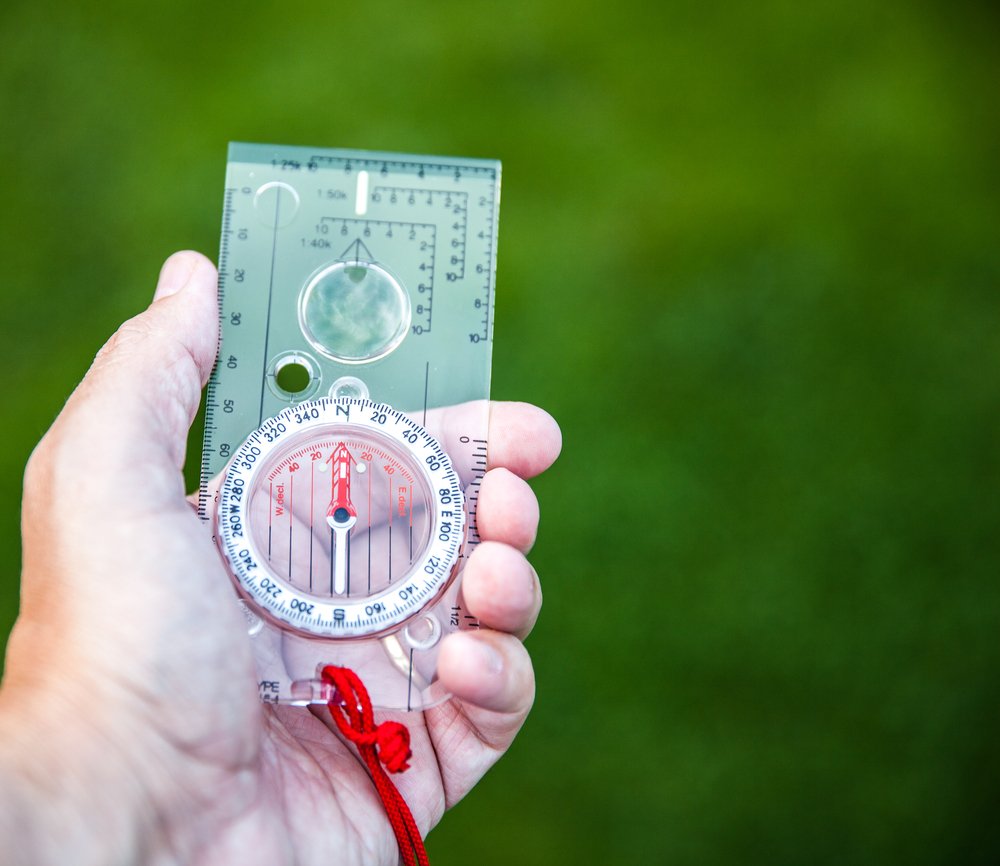
How To Read A Compass
By Nick from 50 Campfires
The GPS (Global Positioning System) rules when it comes to all kinds of navigation today. Every smart phone is capable of getting you from Point A to Point B more efficiently than we ever could have imagined just a decade ago. Triangulation of its many satellites orbiting the earth will put you within feet of any pinpoint on the globe. If your batteries are charged and if you can pull a signal, there’s no excuse for getting lost in the woods.
Yet those are two mighty important, and sometimes unreliable “ifs.” There’s a simple way to make them irrelevant – for backup, learn how to use a compass and always carry one with you.
The most important thing all makes of orienteering compasses have in common is one end of the needle is red. The red end of the needle always points north. Remember that—red always points north.
Orienteering compasses also all have a flat, see through rectangular base plate. The compass needle is surrounded by a dial you can turn. This is called the housing. The outside edge of the housing is marked with N, E, S, W and is further broken down with hash marks representing degrees from 0 to 360. Inside the housing, extending from the needle’s pivot to the edge of the dial is a special arrow made from two bars, usually topped with an arrowhead. If you hold it up, it should look like a little shed for a stickman. Remember that—it’s the shed.
The base plate is etched with a direction of travel arrow. That’s usually a thin line with another arrowhead on top of it. For fun, we’re going to call this direction of travel arrow “Fred.” Remember that–Fred.
So here’s a simple rhyme to get you out of the woods: “Put red in the shed and follow Fred.” You don’t even need a map. For the rhyme to work you only need know the general direction you must travel.
For example, let’s say you parked the car at an intersection of two roads a north/south road and an east/west road. You headed southeast toward a special section of stream you always wanted to fish. Hiking in at sunup was easy, because you knew that if you kept the sun in your left eye you’d be on the right course to hit the stream. Now, it’s time to hike out, but the clouds have rolled in. It’s even starting to mist so you can’t really see very far in the woods.
You know you need to head northwest to get back to the car or at least hit one of the roads you can follow back to the car. Here’s what you do:
Pull out your never fail compass and turn the housing to line up NW or 315 degrees with the base of Fred (direction of travel arrow), then with the compass laying flat in your palm and Fred pointing straight in front of you, turn your whole body until red lines up in the shed.
You are now facing directly northwest. Pick out a distinct object like a tree, rock or clearing straight in front of you as far ahead as you can see. Walk to it and stop.
Bring up the compass, put red in the shed, and follow Fred to the next distinct object on the line northwest. You’ll soon be at your car, or hit one of the roads not too far from it.
Now an orienteering compass combined with a good topographic map and more advanced compass skills are capable of every bit of accuracy in a GPS, but knowing to put red in the shed and follow Fred will get you out of the woods in a pinch and that’s what counts.

Related Tags:

10 Mother’s Day Gift Ideas From an Outdoorsy Mom and Gear Tester

Grizzly’s Sweet Dance Moves Caught on Trail Cam in Alberta
Leave a comment cancel reply.
Your email address will not be published. Required fields are marked *
Save my name, email, and website in this browser for the next time I comment.
Register for newsletter (optional)
More Like This

How to Visit Glacier and Banff in the Same Trip: Crossing the U.S./Canada Border and More Tips

Anchor Guide for Kayak Fishing from YakGear
The Crack: Here’s What We Thought of HBO’s The Climb, Episode 6

How to Understand Avalanche Risk When Winter Hiking in Washington State, Oregon and British Columbia

Batteries Low? Use the Sun, Grab the Solio Solar Charger

Fourth of July : Patriotic Country Camping Playlist
How To Prep Your Boat For Winter: Full Or Empty Tank?
How to Pack a Hiking Backpack For All Day Comfort
More stories.

Finding Your Way with a Compass
In today’s push-button society, even navigation is as easy as talking to Siri, checking a smartphone app or GPS-equipped smartwatch, or even a car’s entertainment system. It’s modern, convenient, and makes you look cool, but not exactly useful in real survival situations.
What if there’s a real catastrophe that takes down all the power and comms infrastructure? What if your GPS device runs out of juice, or you lose it? What if a full-scale war takes out the constellation of satellites that form the backbone of GPS? These are the times when the old-school, tried-and-true methods of navigating with a map and compass come in handy. Here’s a guide on how to do it.
There are different kinds of compasses on the market, but for this guide, we will focus on the use of a Baseplate or Orienteering compass. These are usually filled with liquid, with a rectangular base made of transparent plastic to enable map reading underneath. Many also have a magnifying lens, luminous markings for reading in low-light conditions, a scale, or even a reflecting mirror, and several of these features can perform multiple functions in a survival environment.
Parts of the Compass
Here’s a rundown of the parts commonly found on a Baseplate compass and their functions.
- Baseplate – This is the “body” of the compass. Usually made of sturdy, transparent plastic so you can place it over a map for easier orienteering.
- Straightedge/Ruler –Compass baseplates are typically engraved with measurement units in inches or centimeters for calculating map distance and waypoints.
- Orienting Arrow – Used to orient the Bezel with “true north”. Once you know what the degree of declination is, move the Orienting Arrow to that setting, so your compass will always be oriented to true north regardless of your heading.
- Direction of Travel Arrow – This may be an arrow, a notch, line or other mark located at the center of the baseplate, opposite the rotating bezel. This is what points to the direction where you want to go, and determines your “bearing” or navigational point on a map (hence the saying “Find your bearings”).
- Magnetic Needle – This indicates where the “magnetic North” is located, relative to your present location. Wherever the needle points is where magnetic north is located. Note that the “magnetic north” is different from the “true north”. This degree of variance between them is called “declination” and this must be considered and compensated for, to get a truly accurate map reading… unless you don’t mind ending up 3 states away from your destination.
- Rotating Bezel – Encircling the compass is the Rotating Bezel, aka the Degree Dial or Azimuth Ring. This is marked clockwise with numbers from 0° to 360°, and tells you which direction to point the compass when you need to pinpoint or go to a specific direction (bearing).
- Index Line – Found right above the Rotating Bezel and in line with the Direction of Travel Arrow, this is the mark at which where you’ll read your bearings.
- Orienting Lines – Used to line up the compass with north on a map.
- Declination Scale – Some compasses have this convenient feature that helps find the degree of variance between true north and your compass’s magnetic north. Look for the declination diagram, near the legend of your map. This will indicate how many degrees and in what direction (east or west) the declination is to true north, at your present location. Just remember that magnetic declination changes over time. In a scenario where GPS and the internet are no longer available, the latest updated map is your best bet for an accurate declination.
Finding a Bearing with a Map
Be sure to have set or oriented your compass to “true north” by moving the orienting arrow to the degree of declination. After that’s set, you can now proceed to finding a bearing, or direction denoted by degrees on your map. Doing this is simple if you know where you are on the map.
- Spread your map on a flat level surface. Set the compass on top of your location on the map, such that the straight side of the baseplate lines up with your position. Determine where you want to go on the map, then rotate the entire compass (without taking it off your spot on the map) until both your current location and your destination are lined up.
- Rotate the bezel until the orienting lines are lined up with the map’s north and south. Remember to always align the north on your compass with the north of your map.
- Once you’ve matched the orienting lines with the north and south of the map, get the bearing on your Index Line. This is your bearing. Now that you have your bearing, hold the compass in front of you, with the Direction of Travel pointing away from you.
- While holding the compass, rotate your whole body until the “north” of the magnetized needle is inside the Orienting Arrow. This is called putting “red in the shed” for easy recall.
Once you’ve put “red in the shed”, you’ve got your bearing and you’re facing your destination. All you have to do now is to move in that direction to get to your plotted destination.
Triangulating your Position
If you don’t know where you are, your map and compass can help pinpoint your location.
- Bring out your map, and see if you can spot any distinguishing landmarks near you. When you’ve identified a landmark, hold up your compass in front of you, with the Direction of Travel Arrow facing away from you, and pointing right at the landmark.
- Keeping the compass level and steady, rotate the bezel until the Magnetized Needle is inside the Orienting Arrow, or, when you’ve got “red in the shed”. Take note of the bearing indicated by your Index Line.
- Lay the compass on the map, lining up its edge with the landmark. Ensure that the Direction of Travel Arrow is pointing in the direction of the landmark on the map.
- Line up the compass’s edge against the landmark, and line up the baseplate until the Orienting Lines are in alignment with the map’s north and south, and the north on the bezel is also pointing to north on the map.
- Draw a line on the map with the edge of the compass; your exact location is somewhere along this drawn line. Then do the same with another landmark you see that’s at least 60° away from the first landmark.
- Find a third landmark and draw its line on the map. The three lines should intersect, forming a triangle. Your location should be somewhere inside that triangle. The smaller the triangle you’ve made, the more accurately you’ve triangulated your position.
Important Notes
When using a compass, certain precautions must be taken to avoid getting an inaccurate or completely wrong reading. This is especially important if you’re in an emergency or survival situation.
- Always keep the compass level when holding it or when placing it on a flat surface. Even a slight tilt could destabilize the needle, making it wobbly and result in an inaccurate reading.
- Hold your compass such that the Direction of Travel Arrow is facing away from you.
- Keep your compass close to your stomach in a comfortable but level position, with your elbow bent and in the palm of your hand.
- Store and use your compass away from cellphones, radios, laptops, and other electronic devices that create magnetic fields. These may diminish your compass’s magnetization and affect your “magnetic north”.
- Keep your compass away from metal objects — pocketknives, flashlights, or even keychains can make your compass give a false reading.
- For the correct bearing, always make sure the Orienting Arrow and the Magnetized Needle line up – remember: “red in the shed”.
Despite our high-tech society, old-school navigation is still a valuable skillset worth learning and practicing. Modern navigation relies on a complex web of satellites, cellular data and vulnerable infrastructure, any one of which can be affected by a catastrophe. When SHTF and GPS goes down, your trusty compass, maps and wits are still your best tools of survival.
It's Official!
You're signed up for the American Outdoor Guide Boundless newsletter.
We can't wait to send you the latest tips, trends and info. Want more right now?

Help topics
- Purpose of the site
- Compass features
- Compass menu
- Compass or GPS - advantages and disadvantages
- Compass Test
- Draw a single or multi-legged route
- Extending the compass direction of travel arrow
- False readings when using a compass
- Fine Tuning the Set Compass
- Getting started with Set Compass
- Google Maps projection
- GPS or Compass - pros and cons for navigation
- Grid references test
- How to use a compass
- Import Google Map routes
- Latitude and longitude positions: degrees, minutes and seconds
- Magnetic declination or variation
- Magnetic declination or variation adjustment
- Magnetic declination or variation calculation
- Map projections
- Map reading
- Map reading skills test
- Moving the Set Compass
- My Google Map Compass Routes
- Negative magnetic declination or variation
- New Features
- North: different types
- North on Google Maps
- Ordnance Survey Compass
- Ordnance Survey maps integration
- Ordnance Survey map projection
- Abbreviations
- Panning and Zooming with Google Maps
- Positive magnetic declination or variation
- Print Map Function
- Route drawing
- Route Information Display
- Save and Store Set Compass Google Map Routes
- Single leg or multi-legged routes?
- Test your compass reading skills
- Types of bearings
- Watch as Compass
- What is a compass?
- What type of compass is used on the site?
- Zooming with Google Maps
What are the features of a compass?

- 1. The base plate mounting of the compass, with a ruler for measuring scale.
- 2. The compass housing contains the magnetic needle and has the points of the compass printed on a circular, rotating bezel.
- 3. The compass needle floats on liquid so it can rotate freely, the red end should always point to magnetic north.
- 4. Orienting lines fixed within the compass housing and designed to be aligned with the vertical grid lines on a map. Half the lines are coloured red to indicate north.
- 5. Orienting arrow fixed within the compass housing, aligned to north on the housing.
- 6. The index line fixed within the outer edge of the compass housing as an extension of the direction of travel arrow. It marks the bearing you set by rotating the compass housing.
- 7. Magnifier for detailed map reading.
- 8. The direction of travel arrow shows the direction that you want to travel along or the bearing you are taking. It is fixed parallel to the sides of the base plate and aligned with the fixed index line on the edge of the compass housing (number 6).
- 9. Compass scale displayed along the edge of the base plate so you can measure distances on maps.
- 10. Luminous strip to assist navigation at night.
A beginners guide to the compass
Published on May 1, 2022 4 min read

Types of compass and their features
Improve your map reading skills with this beginner’s guide to the compass. We take a look at the different types of compass, such as a baseplate compass, and explain how to orientate a map with one.
Whether you are out walking or cycling or simply driving somewhere new, being able to use a compass is a great skill that will always come in handy. Rather than just showing north, modern compasses have many features to assist in planning and navigation.
Without a compass, you can still use your map by relying on visible features, but a compass allows you to be more accurate and navigate where there are few obvious landscape features,
Types of compass
There are loads of magnetic compasses available, from ones attached to penknives to huge, expensive ships compasses. Here’s some of the most common:
Basic compass
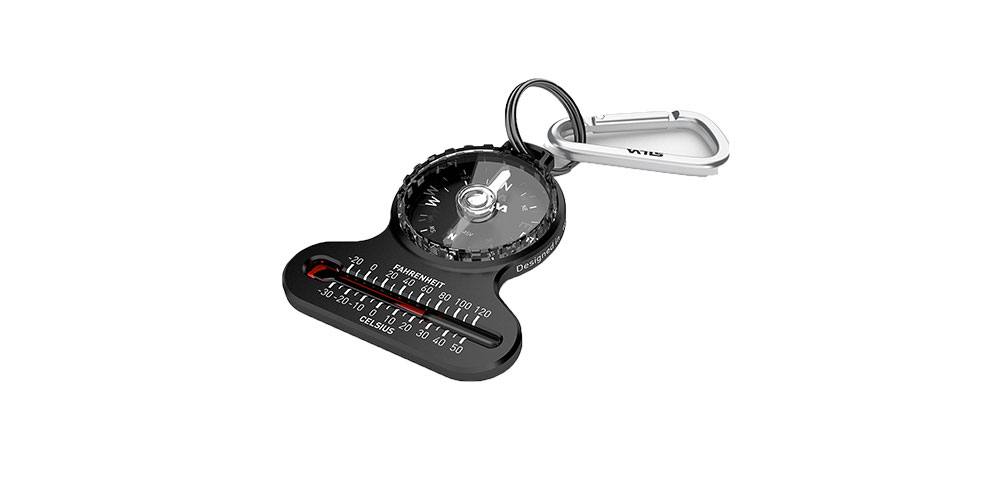
Silva Pocket Compass
This will tell you which way is north, but without a rotating bezel or an easy way of alignment, it will never be very accurate. They are inexpensive, but very cheap ones can be poor.
Best for: driving and road cycling where you only need the approximate direction, or as an emergency spare
Shop basic compass.
Baseplate or orienteering compass
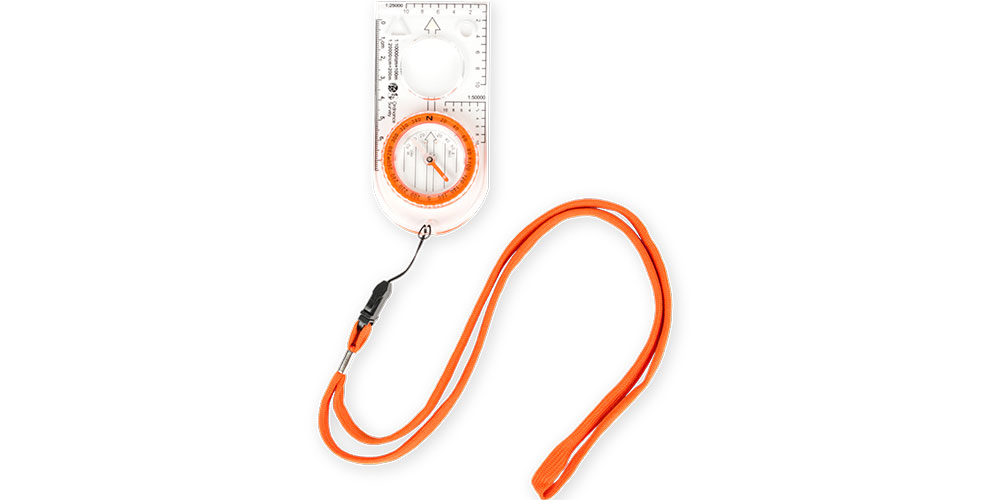
This is probably the most flexible type, as it can be used for taking bearings, setting a heading and measuring distances. The clear base allows it to be laid on top of the map.
Best for: accurate navigation with a map
Shop baseplate compass .
Mirror compass
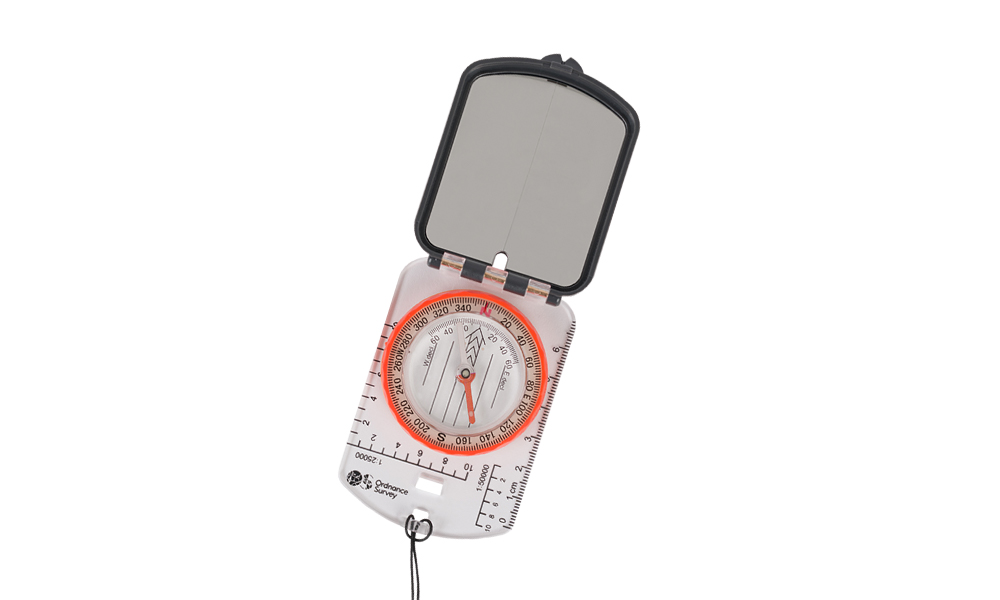
OS Mirror Compass
Some more advanced compasses have mirror housing. The mirror allows the user to see the bezel and the landscape at the same time improving accuracy.
Best for: long treks in pathless terrain
Shop mirror compass.
Sighting compass
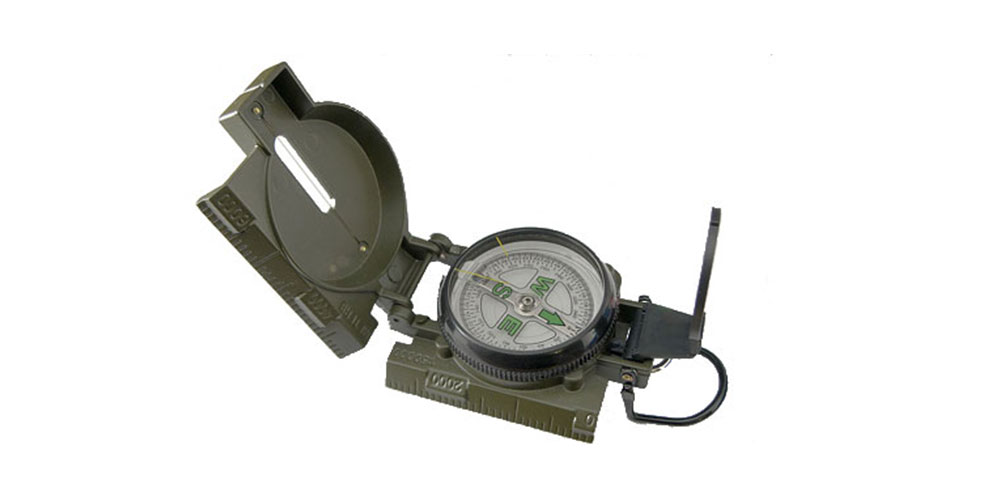
Source: Wikimedia commons – Adamantios
This compass is designed to make it easy to take a bearing from a distant object, and are still often used by the military. They don’t have all the features you may want, but can be very accurate.
Best for: Using triangulation to work out exactly where you are
Know your compass
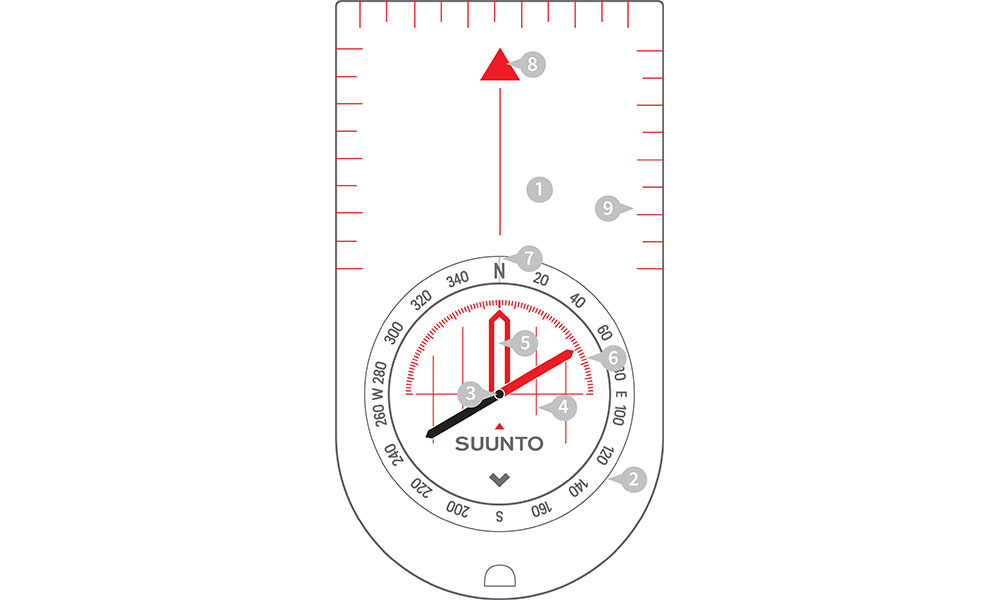
A compass and its features
- Baseplate – The mounting of the compass. Clear, so when placed on top of the map you can still see the map features
- Compass housing – Contains the magnetic needle and has the points of the compass printed on a circular, rotating bezel.
- Compass needle – Floats in liquid so it can rotate freely but without being too sensitive to movement, the red end points to magnetic north.
- Orienting lines – Fixed within the compass housing and designed to be aligned with the eastings on a map.
- Orienting arrow – Fixed within the compass housing, aligned to north on the housing. Enables conversion between grid and magnetic north.
- Magnetic variation – allows accurateadjustment for magnetic variation or declination
- Index line – Fixed beneath the rotating bezel of the compass, it marks the bearing you wish to travel along.
- Direction of travel arrow – Shows the direction that you want to travel along once you have taken your bearing. It is an extension of the index line.
- Compass scale – Displayed along the edge of the base plate so you can measure distances on maps.
Features of a compass with Steve Backshall
Using your compass.
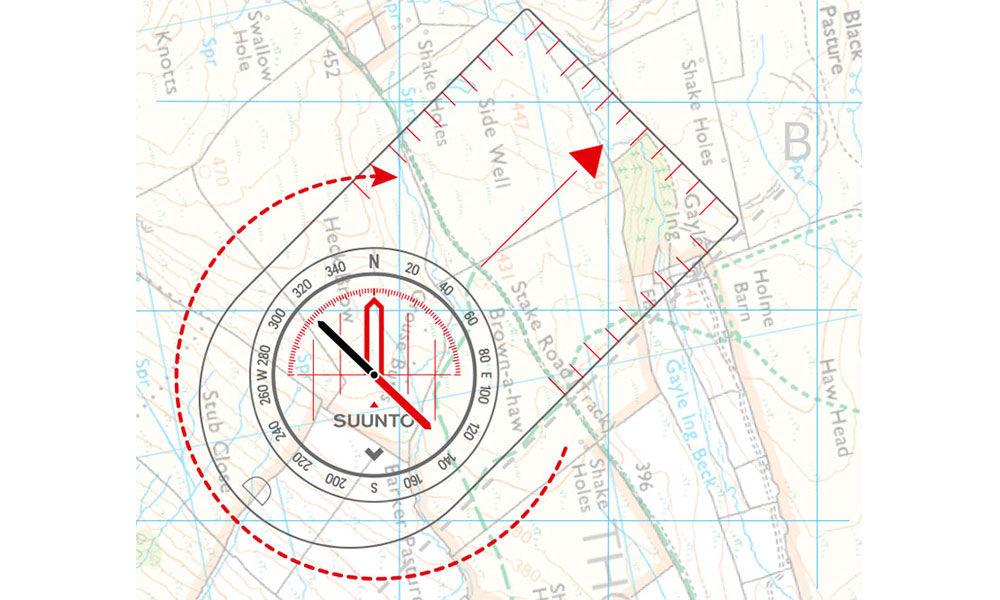
How to orientate a map
Where do you want to go?
- From your starting point on the map, place the index line on an imaginary line between where you are now and where you want to be – with the direction of travel arrow on the base plate pointing the way. Start by drawing a line from A to B now.
- Holding the baseplate in place, rotate the compass housing so the orienting arrow lines up with grid north on the map. The orienting lines should be parallel with the vertical blue grid lines (eastings).
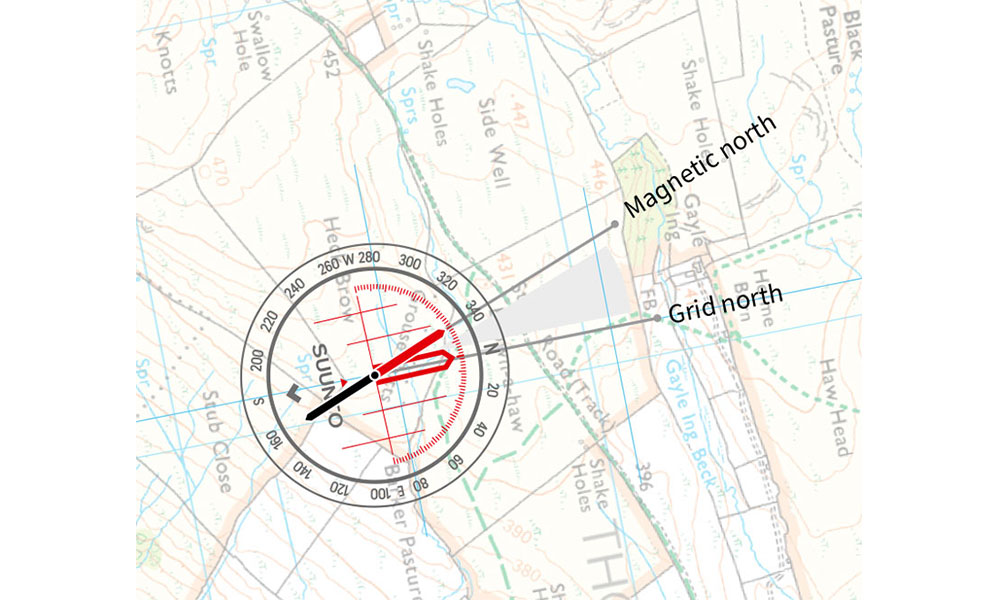
Adjust for magnetic variationim
- Your compass does not point to grid north. Magnetic north throughout Great Britain can range from 0º to 5º. The amount of variation changes every year, so check your OS map to work out the most current value. You’ll find this in the map legend. Add magnetic variation to your bearing by rotating the compass housing.
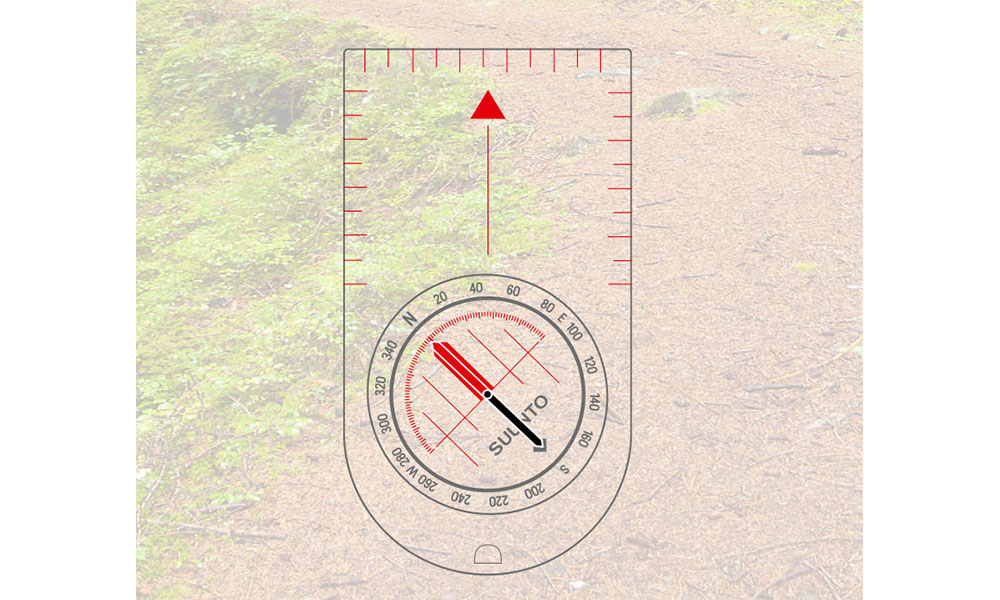
Adjust the compass, line up the arrow and follow the direction of travel
- Take your compass off the map. Hold your compass flat at waist height and turn yourself until the red needle meets up with the letter N and is positioned over the orienting arrow. You’re ready to go. The red direction of travel arrow will point the way.
Compass readings are also affected by the presence of iron and steel objects, so be sure to look out for – and stay away from – pocket knives, belt buckles, mobiles and GPS devices when using your compass.
How to take a compass bearing with Steve Backshall
The red end of the compass points to north, the black end points to south
Using land features instead
As an alternative to using a compass to orientate your map, you can use your eyesight. This method will only work if you are in an area with visible prominent features or landmarks. First, locate yourself next to a feature or landmark and place your finger on the map at the point where you are standing. Then begin to rotate the map so that other features and landmarks on the map begin to line up with the actual ones you can see. The map is now orientated with the land, although not as accurately as it would be using a compass.
By Jonathan Elder
Related guides

10 best NC500 walks
The Northern Highlands of Scotland are home to the most remote and dramatic landscapes in Britain and there is one epic route which encapsulates it all, the North Coast 500 (NC500). Popular with both drivers and cycle tourists, we break this iconic journey up into sections and share our 10 best NC500 walks along the route for you to enjoy.

10 outstanding circular walks
Discover Britain’s 10 best circular walks for a great day out. Featured in the OS Pathfinder Guides, each walk provides key information like where to park, where to eat and what to see on route.

- Sustainability
Could you go plastic-free for a month?
Anna Hughes went plastic-free for a month. Here, she shares her top tips for how to make it work so you can try it too.
EXPLORE WITH
Digital Maps
Use OS Maps to see more detail including footpaths, bridleways, cycle tracks and rights of way.
Use world-renowned Ordnance Survey mapping with unlimited use of every OS Explorer and OS Landranger map for the whole of Great Britain. That’s instant access to 607 maps to view, print, or download to your phone – all included in your subscription.
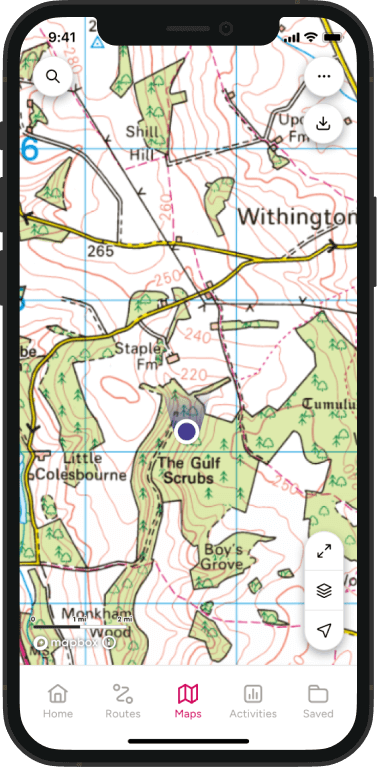
EXPLORE THE
Be inspired by the outdoors
Get 10% off a purchase in the OS shop by signing up to our newsletter!

IMAGES
COMMENTS
To take a bearing hold the compass in front of you with the direction of travel arrow pointing at the object of interest. Hold the compass level and steady, and rotate the housing dial, until the orienting arrow lines up with the red end (north end) of the magnetic needle, all the while keeping the direction of travel arrow pointed at the object.
Hold the compass so it's flat on your palm with your palm centered in front of your chest. Use the magnetic needle for guidance—it will spin unless you're headed north. Adjust the direction-of-travel arrow on your compass so it's pointing in the direction that you're traveling. Part 1.
Here is a very brief explanation of each method. By map: place your map and compass on the ground. Then mark your current position as well as your intended destination and draw a straight line between them. Line up the edge of your compass on this line so that the travel arrow is in the direction you wish to travel, then twist the azimuth ring ...
Take a bearing on your first landmark: Line up your direction of travel arrow with your landmark, then rotate the bezel until the needle lines up with the markings for north. (The number next to the index line is your bearing.) On the map, place one corner of your compass's straightedge on the landmark, the rotate the entire compass until the ...
Turn your compass dial until it shows N at the index mark 1 under the direction-of-travel arrow 2. Line up a side edge of your compass with the map's vertical gridlines 3. Next, holding the map and compass, turn your body until the red arrow is inside the red "shed" 4.
The direction-of-travel arrow should point in the direction you want to go. It does not matter which side of the compass you choose to use. Both will give you the same direction. Rotate the ...
The user would hold the compass flat and the direction of travel arrow would face outwards, away from the user. Magnifier: Small, circular magnifying glass used to help the user see smaller details on the map. Index Pointer/Index Line: The base end of the direction of travel arrow. Begins at the edge of the dial and is where the user takes ...
Direction of travel arrow: This is the arrow located on the base plate of a compass that should be pointed in your desired destination or landmark. Magnifying lens: Most compasses have a magnifying lens to help you look at map features and landmarks easier. Declination adjustment screw: This is the screw located on the side or back of a compass ...
Orienting arrow: The arrow or box, usually about the width of the magnetic needle, drawn on the interior of the compass housing. Index line: The line that comes down from the direction of travel ...
Step 2: Align to grid north. Compass bearings step 2: align to grid north. Now, hold the compass still and turn the compass housing bezel so that the "N" on the bezel and the orienteering arrow are point to grid north (the top of the map). To help do this - make sure that the orienteering lines are lined up with the easting lines on the map.
First, put your compass on the map with the direction-of-travel arrow pointing to the top. Second, rotate your bezel to match the direction-of-travel arrow with north on the compass. Move the ...
Notice that as the compass rotates, the needle stays pointing the same direction. Keep turning until the needle points to East on the compass like the picture below, keeping the direction-of-travel arrow and North mark facing straight in front of you. The needle on this compass is pointing East (90 degrees) Important: This is a very common mistake!
7. Take bearing twice. 8. Follow the direction of travel arrow, not the compass needle, when walking a bearing. 9. Always follow the line indicated by the compass rather than relying on judgment as to the direction. 10. Use back bearings to ensure you are on track when navigating.
Turn both map and compass together until the red end of the needle is on the "N." The top of the map now points to true north. Align your map to a landmark. Pick up the compass. Point the direction of travel arrow at the first landmark you chose in the field, in this case the north end of the lake down in the valley in front of you.
Next while maintaining the direction of travel arrow position, rotate the compass dial until the red end of the needle is directly over the red needle outline on the base plate ("red in the shed"). Look across the dial and note the degree rating at the direction of the travel arrow (90 degrees). Now your compass is set for your hike east.
First, hold the compass flat, parallel to the ground at about belly-button height. Make sure there are no strong magnetic fields nearby, like your phone or a car. Turn the housing so north lines up with the direction of the travel arrow. Turn your body (not just the compass) so the magnetic needle is contained within the orienting arrow.
Here's what you do: Pull out your never fail compass and turn the housing to line up NW or 315 degrees with the base of Fred (direction of travel arrow), then with the compass laying flat in your palm and Fred pointing straight in front of you, turn your whole body until red lines up in the shed.
This is your bearing. Now that you have your bearing, hold the compass in front of you, with the Direction of Travel pointing away from you. While holding the compass, rotate your whole body until the "north" of the magnetized needle is inside the Orienting Arrow. This is called putting "red in the shed" for easy recall.
To travel forward on a bearing of 137 degrees when navigating with a compass, you simply turn the bezel of the compass to a measurement of 137 degrees. Then, align the red side of the magnetic arrow with the red side of the orienting arrow. Navigate big adventures with ease, by knowing the basic ins and outs of reading a compass.
5. Orienting arrow fixed within the compass housing, aligned to north on the housing. 6. The index line fixed within the outer edge of the compass housing as an extension of the direction of travel arrow. It marks the bearing you set by rotating the compass housing. 7. Magnifier for detailed map reading. 8.
Orienting arrow - Fixed within the compass housing, aligned to north on the housing. Enables conversion between grid and magnetic north. ... The red direction of travel arrow will point the way. Compass readings are also affected by the presence of iron and steel objects, so be sure to look out for - and stay away from - pocket knives ...
2. Set the compass at the correct declination bearing so that you compensate for declination. 3. Place your compass on the map so that the edge of the baseplate lies is parallel to the east or west edge of the map with the direction of travel arrow toward the north edge of the map. 4.