- Student Successes
- My Learning

How to Become a Travel Photographer (And Get Paid)
You can also select your interests for free access to our premium training:
If you have a passion for photography and dream of one day becoming a travel photographer, there are certain things you need to do in order to make that dream a reality. In this article, we will outline some steps on how you can become a travel photographer.
If you buy a product through one of our referral links we will earn a commission (without costing you anything). Prices last updated on .
As an Amazon Associate, I earn from qualifying purchases. Product prices and availability are accurate as of the date/time indicated and are subject to change. Any price and availability information displayed on Amazon at the time of purchase will apply to the purchase of this product.
How to Become A Travel Photographer and Get Paid Professionally
Travel photography is an all-encompassing field. It incorporates all sorts of photography styles and career paths within it. But what does professional travel photography look like? It’s incredible shots of rolling landscapes , captivating portraits , and exciting food!
And how do you get started? Like almost every unique photography style, you begin by creating! It might not make sense, but you need to get out there and start taking travel images.
Step 1: Determine if It’s the Right Photography Style For You
First, do you like to travel? How do you feel about long flights, stuffy airports, and unpacking and repacking your gear ? What about living out of a suitcase?
Travel photography is not for the faint of heart. Many see it as an easy career path, yet that is not the case. A freelance travel photographer has to deal with many demanding situations. Poor , aggressive locals, or long journeys are common difficulties. Traveling can suck away all your energy. And it makes it all the more difficult if you have limited time to capture the images you need. You may think, Oh, great… I get to go to Paris! But you may only have 36 hours to capture four different locations, leaving you little time to enjoy the area you are in.
There is a lot of stress involved… Not everyone speaks a language you know or understands your dietary constraints. It is a job like any other photography career and not always as glamorous as Instagram feeds portray it to be.
Travel photographers must be tolerant, flexible, and patient. And, of course, they must know how to work with a camera.

Step 2: Learn a Wide Range of Skills
Knowing how to use your camera is essential. Learning a wider variety of photographic skills is vital. And understanding how to capture landscapes, take portraits, or take a street scene with a long exposure will go a long way.
The more techniques you have under your belt, the better. Photography is a visual art and very hands-on, so you must show you can do it by showing you can do it.
Travel photographer education requirements vary. A photography course can help you learn photo basics and editing skills if you are starting from scratch.
But you do not need a degree to become a travel photographer. Some might find it easier to find work with a certificate or qualification, and having one might help open up some opportunities. Still, it is not a prerequisite if your images are strong and captivating.
Step 3: Define Your Travel Photography Niche
Becoming a freelance travel photographer requires a lot of hard work. Unfortunately, the photography business is highly competitive. Part of this hard work is finding a way to stand out.
Your work will reflect your vision of the world, which is unique for every travel photographer. It would help to find a way to show your viewpoint in your travel photographs. Create a signature style that stands out from your competitors.
To become a freelance travel photographer, you must define your niche. You can focus on a specific technique or subject within your travel photography journey. Ask yourself what you like to photograph the most or are good at taking pictures of, and stick to that.

Step 4: Build a Portfolio of Your Best Travel Images
A portfolio is a series of images that you have captured. It can be an online portfolio or a print version, letting clients see the kind of travel photos you take and how you take them. It is a visual guide of the photo quality they can expect from you. Without a portfolio to look at, clients will likely find it challenging to give you work based solely on your word.
If you do not have a lot of money to start traveling, you can start locally. Research photos clients are looking for, then capture them and present them. The images you do not sell could also work well on stock image libraries or websites as sellable prints.
As you start building a reputation as a travel photographer, clients will want to hire you. Keep creating a body of work until you start finding commissions, and then keep exploring. In the end, clients are looking for stunning images. Only a photography portfolio can show that.

Step 5: Create a Travel Website or Blog
Creating your website or blog to showcase your work is essential as a travel photographer. These tools will help you show your clients you are a professional photographer . Also, it makes it easier for potential clients to find you and reach out to you. Using one of these platforms will help you organize your work and display it in your preferred format and style. You can get creative and use a design that makes your content more appealing.
Creating a blog or website is very easy. You can use a free website builder like Wix or Weebly . All you have to do is sign up, select a pre-set template and upload your work. There are many travel bloggers you can follow and get tips from. Then you write your first travel blog post!
Step 6: Sell Your Images Digitally
Selling your travel photography can be a sustainable business idea. Many travel photographers sell their images on a digital platform. And it’s the bread and butter of their money-making machine.
To start, I recommend adding your images to an online platform. These will help put your name out there. Also, they serve well as a portfolio of travel photography for others to view. Potential clients are always searching for examples of work.
It might be challenging to sell your images when you start. But there are a few places to begin posting your pictures.
Stock Photography and Photo Websites
Unsplash is a free stock photography site that others can use for free content. The page is well known, so they receive lots of exposure. If someone uses your images, they can place them on their page with your link or name. You don’t get paid, but it can help spread your pictures and reputation.
You also can use a platform like 500px , where you can license your images with a few clicks. Plus, as mentioned before, you can sell your pictures through many stock photography websites . The site dropstock.io will even upload your photos to many stock websites for you!
Having images for sale on a stock photography website is beneficial. You can sell pictures while you eat, sleep, and travel by licensing your work. As the number of images grows, so does your chance to make money .
If you are still building up a reputation, you can sell travel photos through your website. That way, you don’t have to pay the commission to stock photography sites. If you build up a good network of companies or blogs that need images, they might even come to you first.

Step 7: Sell Your Travel Images in a Physical Format
You might be the kind of travel photographer who is not into the digital world. There is still a market for making money and a living from travel photography.
One way to do this is to create prints of your images and sell them through specific art websites. Etsy is one good example. Fine Art America is another one. Some travel photographers even use eBay due to the number of people who use the website and the low cost of hosting a print.
You could approach galleries when you have a series of works. There is a chance you find buyers through them. They will take a commission depending on the space. But in turn, they provide an outlet that many people have access to.
Selling Prints Yourself
The benefit of selling physical prints is that you can sell them online and in person. I have created photography books , postcards, and photo prints . And I sell them in art markets, art shops, and hostels.
You can sell prints on your own out on the street, but the money can come in dribs and drabs. There is no guarantee that you will sell enough of them to be worth your time standing out in the cold (or heat).
Unlike digital images, prints can’t be stolen or reused without your say-so. But they might need a lot of your time to produce, plus the initial capital required to print these can be high.

Step 8: Find Photography Work Where You Travel
As you travel to foreign places, you can offer your services to travel businesses. Many are in great need of images from the destination you are in. These could be travel magazines , newspapers, or local tourism boards. Anyone in the travel or tourism industry needs strong images. I have stayed in hostels for free by exchanging professional interior photographs for free accommodation.
Many businesses prefer working with the same person if they provide high-quality images. They might even commission you to capture the images they need. Be aware that this type of work may have to be under the table, depending on your visa. If you are going somewhere abroad, research opportunities each area might present. For example, a beautiful image in a tourism brochure can say a lot about a company. It can show that they will pay top dollar for images. You could also see if the area you’re traveling to has trending stock photography themes to take advantage of.

Step 9: Capture and Write Great Travel Content
The number one idea with travel photography, like any other niche, is to create strong content. Success is due to the quality, the post-processing, or the techniques you use. It could also be due to the uniqueness of your approach.
Strong content is crucial. Your images need to be top-notch if you want to sell your work through a gallery or online. The more compelling your travel photos are, the more people will search for them and your services.
One other area you can look at is photography writing. If there is an area of photography that you know about, why not write about it. It could be about time-lapse photography or your experience as a portrait photographer . The possibilities are endless.
There are many places you can do this, for yourself, a travel company, or a photography website. The benefit is that not only are people reading your helpful content, but you also get to share your images.

Step 10: Use Tours and Workshops as an Extra Income Source
When I first arrived in Budapest, I tried to find a job. I looked at all the photography possibilities I could. However, nothing seemed to fit my style, work ethic, mentality, photography style, or background. As a documentary photographer , I contacted newspapers and magazines but didn’t land a position. It was not an easy time.
So I started thinking outside the box. And I realized that, with a bit of marketing , I could host street photography workshops . It fitted with my travel photography passion and experiences. Luckily, I had a background in both photography and tutoring. It was a success, but it took a while for me to get my name out there. The good thing was that it only took a day or two to develop some free advertising online. It allowed me to start immediately.
For every travel photographer, there is something they can teach. It could be composition , landscape photography, or location scouting .

Step 11: Pick a Place to Travel and Go
Many resources can help you get started as a travel photographer. Yet, I believe in baptism by fire. If I were just getting started and had a small travel budget, I would pick a place to travel and go. That’s it. You can work out everything else once you have a place to go. You could do a documentary piece in India or capture the cloth-dying process in Morocco.
Once you have a destination, you can start researching. Learn about photography etiquette, what time the sun sets, and where to stay. Then, with a clear idea of the “where” and “what,” you can find who might be interested in the images you take.
As mentioned, if you can write, then your opportunities widen. GoNomad , for example, is always looking for stories to publish. Magazines and online publishers will pay for content because they do not need to do the research or find and commission someone else. It’s even better if you have images to go alongside your writing.
So, find paid photo projects, put some of your travel photos on stock photography websites, and sell a few physical prints—the more avenues of income you establish, the better chance to have a travel photographer salary successfully.

It doesn’t matter if your goal is to work for National Geographic or make a living from your prints and website. Becoming a professional travel photographer requires a lot of work. But don’t worry! Many travel photographers started with the basics, like a beginner’s photography course , and just went for it. You will get there!
We hope these travel photography tips help you figure out how to become a travel photographer and carve out a travel photography career!
Try out our Fantastic Photo Adventures course to learn unique and creative storytelling techniques and get out and start your journey into travel photography!

A Sincere Guide on How to Be a Travel Photographer
- By Nicholas Tinelli
- July 14, 2020
- Last Updated: May 19, 2023
How to Be a Travel Photographer and live off your passion?

This idea fascinated me since I was young, when I dreamt among the pages of National Geographic with the images and stories that led me to live exciting imaginary adventures in faraway places.
I’m sure that, If you’re reading this article, you probably feel the same emotions and want to develop your passion and go one step further as a Professional Travel Photographer .
I’ll tell you a secret: it’s not as simple as many people think, but it’s not impossible either. It is absolutely worth it and in this guide I will explain step by step how to get results and improve over time , with dedication and patience.
My photography journey began a long time ago, first as an amateur, in my spare time, and now as a professional.
It is a process of personal discovery, still in progress, that keeps generating emotions and changing my life, allowing me to combine my greatest passions.
After this brief introduction, we are ready to dive into the first part of this guide on How to Be a Travel Photographer . If you are not interested in reading the entire guide, use the table of contents below to move between topics.
What is Travel Photography?
Travel Photography is a very broad genre, including landscapes, portraits, wildlife,culture, food, architecture, documentary/reportage, events, and advertising related to the tourism industry.
From a more human point of view, we can consider it as a means to share moments, stories that tell the essence of a place , of a culture , that transmit emotions and take us on an imaginary journey.

Can you make a living from Travel Photography?
Of course, even if competence is higher than in the past and there are already many images in circulation, there is always a need for new material and creative people in the world.
The possibilities are two:
- Work for someone (for example a magazine or an agency);
- Start as a freelancer, independently.
In my case, I decided to opt for the second choice and build my own space.
For some time now I have been dedicating myself to travel stock photography, as a contributor for AWL Images , obtaining good results and publications.
I also began to propose myself with Photoshoot Buenos Aires , a portrait service for travelers, and started teaching through courses and tailor-made experiences in the capital with Photo Tours in Buenos Aires .
In addition, I offer Editorial & Commercial Photography services for hotels, resorts, personalities and tourism institutions.
All this with the warm support of my students and people close to me, which is fundamental on a mental plane and important to receive constructive feedback and continue to improve.
The key to growing your business and become a Professional Travel Photographer is first of all to diversify your services (staying in the same niche), without expecting everything to work at the beginning and setting yourself short term goals .
Slowly you will understand what works best and what doesn’t. The important thing is that what you do reflects you and your personality.
At first it is never easy, there is a lot to learn and some expenses to take into account, but if you stick to the guidelines that I will show you next, result of my personal experience, you can live this change with more awareness.
How much does a Travel Photographer make?
It is not easy to define the Travel Photographer’s salary in numbers. It really depends on the type of service you offer, the connections you manage to generate, how you promote your work, and who supports what you do.
If a great name like National Geographic sponsors your work, the results are guaranteed.
The Characteristics of a Travel Photographer
Usually, a Travel Photographer has certain characteristics that serve to deal with situations that can be very different from those in which one is accustomed to the everyday environment and help to relate to others.

Respect and Humility
The journey often involves meeting with situations of extreme poverty and people willing to offer us the few things they have to show hospitality.
As well as cultures and societies that live differently from us, with aspects that we may not agree.
The Travel Photographer must be able to approach these realities with humility and respect , not only because it is the right way to relate to others, but also because this attitude will open up many more possibilities.
It is a sign of great nobility and you will get the gratitude of the people you meet along the way.
Mental and Physical Strength
The Travel Photographer must get used to moving for hours and hours with different means of transport, on planes, trains, or a nice Tuk Tuk!
You will often have to complete the work in a limited time, without being able to take any breaks. In addition, you will have to deal with long queues, temperature changes, language barriers, health problems, etc..
All of which can be stressful in the long run.
For this reason you need a good physical and mental preparation , which will help you to live your profession with serenity.
Good Language Skills
A minimum knowledge of languages helps you move around better.
For sure, You could always rely on a translator, but many times the budget doesn’t allow it, so it’s convenient to be able to ” arrange ” in some other way.
Already with English, Spanish and French you will cover a good part of the world and on occasion you can rely on a local guide, which in any case, especially when it comes to ethnic photography, is always an ideal choice to approach another culture.
See also: Ethnic portrait in Travel Photography
Flexibility and Reliability
Get ready to cover a traveling event, a documentary assignment from a magazine, or any other task with a last-minute change.
In real life you get as organized as possible, but the unexpected is always around the corner.
Especially if you work as a freelancer , it won’t be enough to be a good photographer, you’ll also have to show flexibility in your schedule, reliability in the field and in the delivery of work.
It’s a quality that every photographer should have, not just a travel one. I’ll never get tired of repeating it, try to be creative.
There is always a high demand for original content and creativity is the most important skill , which also depends on your preparation and inspiration.
See also: 6 Helpful Exercises to Improve Your Photographic Eye
Get Up Early!
It’s not a quality, it’s a suggestion. Local life starts before dawn and you don’t know how many things you’re missing by staying under the blankets. Get used to getting up early and taking advantage of the best light hours .
See also: 10 mistakes that a travel photographer should not make
Below you will find a list of 16 steps , consider it as a “checklist”. Print it out and review it over time, keeping track of your progress.
There are many paths you can follow to Become a Travel Photographer and each one will add something extra to your experience.
Behind the success there is above all a great effort, dictated by passion, study, practice and experience .
A trial and error that depends on you, as well as other factors: your geographical location and the working relationships that you will develop along your career.
Step 1 - Ask Yourself Some Questions
What do I like? What kind of Travel Photographer do I want to be?
To understand How to Be a Travel Photographer and answer to these key questions it is important to move towards a choice that is a result of your personality, of what you really like.
Maybe you want to work as a Humanitarian Photographer or Photojournalist and cover events in difficult areas of the planet to tell a story.
Or maybe you want to photograph for large hotel chains or tourism-related businesses, be a Wedding Destination Photographer or even just share your passion with others.
There is an important difference between one case and the other, and you will have to take it into account from the beginning.
See also: Inspiring Interview with Gavin Gough, Humanitarian Photographer
Don’t You Have a Clear Idea?
Start working on what you’re most passionate about and gradually, with experience, you’ll understand what is the right path for you .
Step 2 - The Travel Photographer Gear
The weight of the equipment is a key element for the travel photographer. Less weight, less effort, and easier mobility when travelling.
The difficulty lies in maintaining a good balance between weight and quality, since in general, especially in optics, “weight” is also a synonym for quality .
Where do we store the equipment? What is the ideal bag for a Travel Photographer?
In my case, I’ve been traveling for a long time with a “Think Thank” photo trolley, custom-designed to be carried as hand luggage and indispensable to transport all the equipment I need.
Once at destination I choose only part of the necessary gear according to the type of activity I am going to do , placing everything in a Lowepro backpack, well-padded and with rain protection.

The type of equipment clearly depends on what photos you want to do.
If you’re into documentary photography, for example, you might want to go for a Mirrorless camera with a short focal length lens (like 50mm), a combination that’s not invasive when approaching people.
If you’re focused on landscapes and sell prints instead, you’ll probably need a camera with a large sensor to maintain high quality, a carbon tripod, solid and lightweight for travel, at least a wide-angle lens and a good set of ND filters.
Study your equipment and get to know it well to get the most out of it on journey.
If you’ve just dived into the world of travel photography, check the article below about the essential equipment to get started .
See also: Essential equipment for getting started with Travel Photography
Are you worried about safety during the trip with expensive equipment?
You’re right to think so.
In a place you don’t know you’ll have to be even more careful, ask the local people for advice before you go and perhaps insure your equipment .
I’ve been relying on World Nomads for a long time, which offers good coverage for photographers.
Step 3 - Learn Travel Photography
This point is often overlooked. The truth is that you never stop learning and even the best photographers always need to study and update in order to remain active in an ever-changing market.
Personally, I started training myself with photography manuals, on my own, by reading. Then, over time, I realized courses with other photographers, even those not related to travel photography, to have a wider vision of the topic.
I especially like to imagine, looking at a picture, what the photographer did to get it and I don’t give up until I understand it.
To date I continue to study, learn and teach through my courses, to try to convey my personal experience . From travel photography, to color theory, post-production, composition, portrait, the study of light. etc.

Study takes time, but it is fundamental, as well as practice . If you can’t travel that much, start photographing locally , maybe some festivals, portraits and landscapes around home.
You will be able to put what you have learned into practice and get to know your equipment better.
TIP : Taking part in a Travel Photography Workshop will exponentially increase your skills, with the practice, experience and support of a professional photographer. An amazing experience to learn photography.
Step 4 - Get Inspired By Other Travel Photographers
See also: 8 travel photography books to get inspired.
This will also help you realize what kind of travel photography you are looking for.
The Travel Photographer Job requires commitment and sacrifice, but first of all passion and inspiration for what you do.
The photos will speak for you!
Step 5 - Develop Your Own Style
To learn How to Become a Travel Photographer you will first have to understand what you like. That’s why it is important to study the work of other professionals.
Gradually decide how you want to show yourself to your audience : through the use of color or black & white, or maybe you want to make your portraits known only through the use of natural light, or on the contrary, with studio lights.
Whatever the case, this choice will help others to recognize your photos more easily, thanks to a Unique and Particular Style .
See also: Black and White vs Color Photography
Therefore, the study of technique and post-production is fundamental, in order to maintain a homogeneous work.
TIP : don’t worry so much about trends, they come and go. Do what you like, follow your own style.
Step 6 - Produce Content, Build An Effective Portfolio
To generate interest in a client and start earning money you will first have to produce content related to what you want to do and then organize it into a portfolio .
Consider it your business card. You will often need it and it will demonstrate, at least at first glance, your experience and professionalism as a photographer.
The portfolio represents the best of your work , choose a few images, but powerful. Try to be critical and improve it over time. Personally, I decided to divide it into themed galleries , but you can present it in different forms, depending on your style.
Nowadays it should be enough for you to present your portfolio in digital format, through a website or Instagram . If necessary, in any case, you can always create a physical copy, printed on paper.

In order to be able to improve your travel photography portfolio over time, try to keep your photos organized , as the number of images has increased considerably with digital photography and you may find it difficult to retrieve what you need when you need it.
TIP: when travelling, take a wide selection of your portfolio with you on an external drive or in the cloud.
It’s possible that a client will get in touch with you and need a quick response, and it’s convenient to have more material with you to show them before they look for another photographer.
See also: How to Build a Photography Portfolio
Step 7 - participate in travel photography internships.
You need to produce new content. You already photographed a lot around home and now, you feel ready to expand your vision.
You’re on your way!!
An interesting idea to grow your portfolio and at the same time live a wonderful experience abroad is to participate in a Travel Photography Internship .
In this way, you will be able to participate in different projects worldwide, ranging from community volunteering and conservation of flora, fauna, and environment, to teaching, human rights, and photojournalism.
Here are some example of companies that organize this kind of activity:
- Global Nomadic
- African Impact
- Global Leadership Adventures
- Intern Abroad HQ
- Frontier Gap
- Projects Abroad
You will be part of a team, meet new people, acquire new skills and make a great contribution to the community.
There are many projects and destinations available. Check carefully what best suits your needs and interests . You will approach situations that were previously just a distant dream.
It will be the beginning of a new adventure and an important step in your career as a professional travel photographer.
Once you have collected the material you will have a more solid portfolio and more chances to be accepted in large multimedia content agencies.
Step 8 - Create a Logo
A beautiful logo identifies your business , has an impact on the public and helps to show your professionalism .
Try to be creative and if you can’t design it yourself, rely on an experienced freelancer and not on a generic logo design service.
Step 9 - Build a Website
A simple and clear website, not only improves your presence as a professional , but is also the ideal way to show your portfolio .
Try to take care of the aesthetics, says a lot about you as a photographer .
Depending on the commitment you want to put into it and your interest in getting results, you will be faced with important choices:
What system do I use to build it?
Personally I chose WordPress (the .org version, be careful! wordpress.com is not the same thing), a development ecosystem that allows me a good dose of freedom .
I can do most of the “routine” work on my own and rely on a developer if I need to do something more complex.

Other platforms, like Wix , Squarespace or Weebly allow, through a “drag and drop” system, to build a website easily, but in reality the limitations are many and at a certain point you find yourself forced to a change.
Perhaps with the need to implement a function that is not yet available or continuous problems with the layout.
The third option is to rely on a web developer to build it directly in code and possibly a designer , two fundamental figures if you decide to take this path.
It may be a bit more expansive, but you will certainly get a completely customized job.
Where do I buy the domain?
Choosing the hosting for your website
Think about SEO
SEO (“Search Engine Optimization”) is an important factor if you want your customers to find you in organic form by entering keywords related to your business on Google or other search engines.
The choice of platform you use to build your site will also affect SEO. The advantage of WordPress.org is that you can optimize your OnPage SEO easily using plugins like Yoast or RankMath .
TIP: Search “Travel Photographer Website” on Google to find inspiration from the work of other professionals in your own niche.
Step 10 - Improve Your SEO
Now that you’ve got yourself in the game with a website, you’ll have to think about improving your SEO .
You can do this for example by creating valuable content for your blog or developing your social networks .
There’s a lot to learn on the subject and you’ll find interesting articles to start with in Yoast and RankMath’s blog.
Step 11 - Develop your presence in Social Media
Never before have social networks been so important. Don’t exaggerate trying to run many social profiles .
I recommend you to invest your efforts on Instagram and YouTube as a professional photographer. They’re two channels that can give you more results.
Remember that achieving success on social media is not easy, but it’s worth a try.
Instagram Tips:
- Don’t rely on services that promise paid followers, it’s an unfair and useless technique that doesn’t produce results. Instead, try to get them to follow you for who you are. You’ll have fewer followers, but obtained organically, of greater value .
- Search among your “Competitors” and find relevant “Hashtags” with your niche that can better position you with the Instagram algorithm.
- Reply to comments and engage with people related to your niche to build relationships.
- Tag travel and photography brands , as well as tourism agencies.
- Use the “Geo-Tag” in posts and stories.
- In addition to images, using quality video content in the feed and stories can increase your chances of success.
- Take care of your “Feed” style and optimize your “Bio” and “Highlight Stories”.

Don’t get obsessed!
Social Media requires great effort, just try to do your best and, if you really want to do things properly seek the advice of an experienced freelancer who can give you useful tips to organize your social strategy .
Step 12 - Promote Yourself, Search for New Clients
Now that you have everything in order and can present yourself professionally, it’s time to make yourself even more known and go looking for new customers.
Try to promote your work first among family and friends, and then with small local businesses.
Especially these days, with social networks, everyone is looking for a better way to introduce themselves to their audience and the need to renew their image.
Have a look at my commercial service for companies and individuals to get an idea.
Tip: Get a certification on Google My Business (you can do it even without having a physical direction).
Optimize your account properly to improve your local SEO , allowing more customers to discover your business. In addition to this, you can also register in some photographers’ directories.

Work on your website, SEO and social networks should already give you results and visibility.
If in any case you feel that this is not enough, you can promote your business through advertising on Facebook, Instagram, Youtube or Google Ads .
Tip: At least at the beginning you should rely on the advice of an expert in Digital Marketing . This way you will avoid throwing money away.
Optimizing a campaign without the necessary knowledge is not easy.
Step 13 - Enter a Travel Photography Contest
It takes time and concentration, but participating and achieving results in a travel photography contest can increase your visibility exponentially , with all the benefits that follow.
Photo Contest Insider is a source where you can stay up to date with the latest news from the competition front.
Tip: Read the rules well and make sure that the contest organizers respect the rights of the photographer and that by giving your consent you do not allow a perpetual and free use of your images.
Step 14 - Get Your Work Published
I remember the first time one of my pictures was published in National Geographic . As soon as I heard about it, I exploded with happiness.
As a photographer, there is no better recognition and it means that your work is considered professional .

Getting a publication is a great achievement and possibly the first of many.
Unless you work directly for a magazine or an agency, as a freelancer you will have two paths to follow to increase your chances of being published :
1. Contribute to Stock Agencies
Participating actively with your images in stock agencies will take up your time, you’ll need to make sure you offer quality images and “tag” them correctly.
Over time you will get important publications that will help you promote your business .
There are many image stock libraries on the market.
Generally divided into:
- Premium Stock

2. Pitch a Story to a Magazine
This is another effective method to obtain publications, although it takes a lot of time and preparation. In this case you will need to create a direct contact with a journalist or editor . So try to be prepared, friendly and professional.
Also keep in mind that a publisher receives a lot of emails a day and yours may get lost for some reason. Insist without exaggeration, let some time pass in the case and send it again. If at the second chance you don’t get a reply, forget it.
You’ll have to put together a sellable story , that includes text and photos. If writing is not your strong point, get help from a professional copywriter , you’ll find plenty on Fiverr.
Tip: Do an accurate research . This means reading other articles published by the magazine carefully, analyzing its style and the audience it addresses.
Take a look at Wanderlust Magazine’s guidelines to better understand how to move and create important and lasting working relationships.
Step 15 - Sell Prints
There’s nothing like seeing your artwork printed . Selling prints can help you earn more money and make your work more popular.
You can do it in different ways. Start by offering this service to family and friends, and then you can do it through your website and social networks. Have a look at my Fine Art prints page to get an idea.
Another option is to offer your work to local galleries , it will help you to create an important space as a photographer and artist .
Step 16 - Teach and Organize Travel Photography Workshops
Once you have reached maturity as a Travel Photographer , you will also be ready to pass on your knowledge and passion to others.
You will be able to teach and organize courses in person and online, and form a group that will grow over time.
You can also provide Photography Workshops.
I personally offer Travel Photography Workshops in Argentina . This allows me to travel even more, produce more content and give a unique experience to other enthusiasts like me.
TIP: There are already many groups of photographers who organize this kind of activity on the market, try to propose yourself showing them your solid experience , they might be interested in expanding their proposal.
See also: Travel Photography Workshops: Guide to the Best Choice
Step 17 - the importance of storytelling.
You have reached the final step of this guide on How to Be a Travel Photographer . You almost made it!
Last but not least: the importance of visual storytelling. A travel photographer must be able to convey emotion , through the use of composition, light, colors, and telling a story, involving the public .
It is the soul of this work and gives meaning to what we do.

Take example from photographers who dominate storytelling and capture the attention of their audience, such as GMB K Akash , who tells with extraordinary images the harsh street reality of Bangladesh or Ami Vitale , who has long been dedicated to the conservation of rhinos in Africa.
If you can communicate with your audience not only with images, but also through your experience and use of words, you will have achieved the greatest of results .
How to Be a Travel Photographer - Final Notes
Finally, I must say that I enjoyed writing this guide on How to Be a Travel Photographer , which I hope you found useful.
The references to external sites and photographers have no commercial purpose, they are the result of my personal experience and if I have included them is because I believe they are really valuable .
The Travel Photographer’s career is very attractive but certainly not easy to pursue. Think of it this way: you’re following your passion and it’s not a waste of time .
Don’t be in a hurry, try to understand what you want, put into practice the points I have described gradually and above all: Have fun on the way!
On my side, I will continue to keep this guide updated over time, so that I can always share relevant information and hopefully add a few more travel photography tips.
If you have any comments I’d love to read them.
Stay up to date with the latest articles and news from the blog.
- guide , travel , travel photographer , travel photography

Nicholas Tinelli
2 thoughts on “a sincere guide on how to be a travel photographer”.
I’ve been following your blog content with interest for a while. Until now, I have always been photographing as an amateur, but I would like to be able to pursue a professional career. Thank you for providing this guide and your experience. I was wondering, what camera and lenses do you use?
Thank you, Thomas, for taking the time to read it and leaving a comment. I really hope the guide will be helpful. Actually, I’m photographing with a Canon 5DSR, a great camera body. As for the lenses, I don’t separate myself from the 24-70 mm and the 70-200 mm, two optics that I always carry with me on travel.
Leave a Comment Cancel reply
You might also be interested in..

8 Travel Photography Books to Get Inspired

How to Build a Photography Portfolio

3 Movies with Extraordinary Travel Photography by Bernardo Bertolucci and Vittorio Storaro

5 Essential Travel Photography Apps – Updated 2021

Ethnic portrait in Travel Photography

Triassic Parks: What to Photograph in Talampaya and Ischigualasto
Welcome to my travel photography blog.

I’m Nicholas, a Travel and Portrait Photographer with a passion for writing.
In this blog, I share articles about Travel Photography, my personal experience, tips, and information about the activities I organize.
GET CONNECTED!

+54-9-11-27289416
© Nicholas Tinelli, 2016 - 2024
- Exhibitions
- Photo Tours in Buenos Aires
- Portrait Photoshoots
- Editorial & Commercial
- Argentina Photo Workshops
- Fine Art Prints
+54-911-27289416
Buenos Aires, Argentina
The leading authority in photography and camera gear.
Become a better photographer.
12.9 Million
Annual Readers
Newsletter Subscribers
Featured Photographers
Photography Guides & Gear Reviews

Travel Photography Tips, Ideas, Examples & Jobs
Have a passion for travel photography but not sure how to take it further? This post covers careers, what gear is best, and tips for improving!
Learn | Photography Guides | By Ashley Darrow
Shotkit may earn a commission on affiliate links. Learn more.
Travel photography is one of the most exciting styles of photography, but it can also be one of the most intimidating to get started with.
I’m at my most inspired as a photographer when I’m on the road.
Even when I’m not headed to an exciting new location, I’ve started to think about all of my photography from the standpoint of travel.
This guide is going to give you everything you need to know to get started with travel photography.
I’ll be covering everything from the basics, to the equipment you need, to 20 travel photography tips that will improve how you approach taking photos.
When you’re ready to hit the road, we’ll start our adventure with some travel photography 101.
Table of Contents
What Is Travel Photography?
Defining travel photography can be a little bit challenging as this is one of the most open and free categories of photography.
In general, travel photography involves documenting people, landscapes, and cultures anywhere in the world.
Your travel photography counts whether you have to hike for thousands of miles or you took a 10-minute bus ride from your home.
Travel photography can be done by career professionals working for major magazines like National Geographic or it can be done as part-time freelance work.
Many travel photographers make their money by taking contract work from tourism departments or brands looking for product photography shot on location.
Travel photographers often find themselves working in challenging conditions. There’s a good chance that you’re going to be snapping pics in low light conditions , rough weather, or even half a world away from the comfort of your own bed.
- Related: 77 useful travel tips for photographers
What Does Travel Photography Include?

Image Credit: Sam Forson
Travel photography incorporates countless different styles.
Travel photographers often take landscape photographs, architectural photographs , as well as street photography. It’s also common to see food photography and documentary work being done by travel photographers.
As a travel photographer, your goal is to capture and express the story of a particular time and place. You’ll be giving people a taste of what’s happening in the moment while you’re in a particular location.
How Much Do Travel Photographers Make?
Travel photography is made up of a wide range of styles, but it’s also made up of a wide range of pay rates.
If you’re lucky enough to land a staff photography job with a major magazine, you could wind up with a six-figure salary. However, freelance travel photographers can make as little as around $18,000 a year.
Beginner travel photographers often make even less than that as they start to piece together their career.
Part of your pay as a travel photographer will come in the form of comped travel expenses. It’s pretty common for travel photographers to take a job with a tourism department that includes free transportation and lodging as part of their payment.
Is travel photography in demand?
Travel photography is in high demand.
How Much Do You REALLY Know About Photography?! 🤔
Test your photography knowledge with this quick quiz!
See how much you really know about photography...

Your answer:
Correct answer:
SHARE YOUR RESULTS
Your Answers
This demand is being driven by tourism departments, brands looking for more engaged lifestyle photography , and the rise of social media making travel photography a viable path for a content creator.
There are more people taking travel photos than ever before which means that you’re also going to have a lot more competition despite there being more job openings.
How Do I Become a Travel Photographer?

Image Credit: Kamaji Ogino
Becoming a travel photographer is pretty similar to how you would start up almost any photography career.
If you’re a total beginner, you want to start by mastering the craft of working behind the camera. This means learning how to stay in control of your exposure, frame captivating shots, and just get comfortable taking pictures wherever you go.
Here’s a basic outline of the steps you’ll take to start your travel photography career.
- Learn your photography basics
- Identify your travel photography niches
- Build your portfolio
- Grow a social media presence
- Begin reaching out to clients
- Publish your photography
- Grow your business by reaching out to bigger clients
- Continue to promote your work
- Have fun traveling!
I should note that plenty of travel photographers also crowdfund parts of their career.
Building a presence on social media sites like YouTube and connecting that to your crowdfunding platform of choice is a great way to bring in some additional money.
What Equipment is Needed for Travel Photography?

Image Credit: Hiren Lad
In all my years of photography, the one thing I’ve learned is that if there’s anything photographers love nearly as much as taking pictures, it’s talking about their gear.
Whether you see this equipment as the tools of your trade or the raw materials of your art, you’re going to need some equipment to get started with travel photography.
I’m going to cover the standard gear that most travel photographers will gravitate towards, but I’ll also be talking about different setups for film photographers and mobile photography.
I’m going to kick things off with the absolute must: a camera.
You’re not going to get very far in your career as a Travel Photographer without a camera. I’m being a little silly here, but it’s not just as simple as picking up any random mirrorless camera for travel blogging .
So, what camera is best for travel photography?
The absolute best cameras for travel photography are going to be, no surprises here, the latest mirrorless releases from the big-name brands like Sony, Camera, and Nikon.
Those cameras are packed full of the latest features and offer some of the best image quality.
You can also get amazing results, and save money, by picking up older cameras. My Sony a7s II is still my main camera body and my Canon 5D Classic, which was released way back in 2005, still takes pictures that get people asking me “How did you do that?”
You don’t need to spend a lot of money on your travel photography camera. A skilled photographer will be able to take amazing pictures using a point and shoot digital camera from the 90s. It’s craft that makes the photographer, not gear.
Travel photography can also be done with your smartphone. There are plenty of professional photographers out there primarily shooting on smartphones.
I also want to highlight film cameras. Film is the historic origin of our art form. Any film camera from a toy lomography camera to a professional large format camera can help us see our travels in a new way.
With all of that said, there are a few important features that you should look for in a travel photography camera.
- Weather sealed designs are much more important when you’re trekking through unknown territory than when you’re at home in the studio
- Your camera should also be ready for the road. Just like your car, you should take your camera in for a tune-up before a long trip
- Double-check for the specs that matter most to you. For me, that’s low-light performance and color science
Your camera is only half the equation which means we need to take a look at the lenses that will be going on this journey with you.
- Related: How to choose a camera and what is the best camera for travel photography?
I bet you’re wondering which lens is best for travel photography? You don’t need to worry, I’ll walk you through my top pics for a travel lens whether you’re shooting on a brand-new Sony mirrorless camera or you plan on taking a Canon 5D Classic on the road.
The first place you need to start is by asking yourself the most essential question in photography: What types of pictures do I plan on taking?
Here’s a quick breakdown of my recommendations for travel photography lenses based on my experience for a variety of photographic styles and budgets.
- Standard Zoom Lens —A standard zoom lens like the classic 24 to 70mm is the go-to travel lens for so many photographers I know. This lens easily handles street photographs, landscapes, and portraits. Pick this to make a flexible one-lens kit
- Wide Angle Zoom Lens —Wide angle zooms are better suited for photographers who know they’ll be shooting landscapes and architecture. If your wide angle zoom goes up to 35mm, then you can even get away with using that as your every-day lens
- Wide to Telephoto —These lenses have focal length ranges like 24 to 105mm. They are usually affordable alternatives to pro-level lenses that can still capture stunning images. You’ll want this lens if your main concerns are budget and stylistic flexibility
- Telephoto Zoom Lenses —These massive lenses typically top out at 200mm or 400mm focal lengths and are ideal for wildlife, bird, and sports photography. Their size, weight, and cost make them less flexible than other options, but these lenses are a must-have for photographers interested in the styles I just mentioned
- Pancakes and Nifty Fifties —Pancakes lenses have such a small profile they double as a body cap while the iconic Nifty Fifty is a budget 50mm with a huge fanbase. These lenses are perfect for photogs who want to stay ultralight or for anyone who wants an emergency backup lens.
- THAT lens —We all have a lens that, despite never getting much use, we just can’t seem to leave at home. Mine is the Helios 44-2. I take that lens on pretty much every trip even if it doesn’t get much use. Allow yourself a little room for that “fun” lens and you might be surprised by how much use it gets over time
I always have at least two lenses on me when I’m traveling—just in case.
I once dropped an expensive prime lens and watched it roll off the edge of a mountain in the desert. Luckily, I had a pancake lens in my bag so the photography trip wasn’t a total loss.
Ever since then, not only do I treat each of my lenses with the utmost care, but I also make sure but I’ve got backup options on hand.
- Related: How to choose a camera lens and best lenses for travel photography .
Travel Photography Bag
Just like with lenses and camera bodies, you have a few options to consider when it comes to picking the right travel bag for your next adventure.
Before I get too far into talking about camera bags, here’s the five things I always consider when I’m packing a bag for my next trip.
- Camera Bag Size —Size is one of the most important things to look at when shopping for a new travel photography bag. You want to find a bag that’s going to comfortably fit all of your equipment without causing too much strain on your back. Sling bags are great for days out in the city with light gear, but you should look for a comfortable backpack if you plan on covering some serious distance with your gear
- Pack Weight —Here’s a quick piece of advice I picked up from hiking. Your maximum pack weight should only ever be 20% of your total body weight. This means that if you weigh 200 lb, the heaviest your camera bag should ever be is 40 lb. The lighter, the better
- Features —There are some features that I consider an absolute must have in any of my travel camera bags including rugged build quality, plenty of padding and protection for my gear, and easy access to at least my main camera body and lens so I can shoot on the fly
- Style —You could buy the most technically perfect travel camera bag, but if you don’t actually like the way it looks you’re never going to take it on a trip. I definitely believe that form should be second to function when it comes to camera bags, but I’d also be lying if I said it wasn’t a huge factor in my camera bag purchasing decisions
- Your Gear —Your gear is actually going to dictate the type of bag that you’ll be looking for. A travel photographer shooting on a Leica Q2 can get away with a much smaller bag than a photographer shooting with a Canon 1DX
I also typically bring a packable backpack with me as part of my kit. This could be a really lightweight sling bag or something like the Lowepro Runabout.
This lets me leave the bulk of my gear at my hotel when I just want to have a quick trip around a new city taking pictures.
- Related: How to choose a camera bag
Tripods for Travel Photography
Tripods are an interesting—and somewhat contested—piece of the travel photography puzzle. I never used to take a tripod with me while traveling and that’s because most of my photography was shot street style which means lightweight and handheld.
However, the more I get into film photography and more interesting exposures, the more I find myself relying on my travel tripod.
My absolute number one pick for an adventure tripod would have to be the Peak Design Travel Tripod . It’s fairly lightweight, intelligently designed, and packs down small enough to fit in most of my bags.
Depending on the type of photography you’re looking to capture, you can also use tripods like a gorilla pod or even just take the tripod you have—even though it might be a little larger and heavier than would be ideal for travel.
This roundup of the 7 best travel tripods is a great place to get started if you’re shopping for something designed for the road.
Do I Need a Tripod for Travel Photography?
I’m going to dig into this mild controversy for just a moment. The question of whether or not you need a travel tripod to begin with is the source of some debate for photographers.
Honestly, the answer is maybe. It really depends on the type of pictures that you’re hoping to capture and your personal style as a photographer.
If you like to run and gun while capturing slices of life on busy city streets, you probably don’t need to bring a tripod with you.
Styles of photography that are highly mobile and rely on fast composition changes typically ditch the added stabilization that a tripod brings because it just slows them down too much.
Tripods might also not work for certain events and organizations. Trying to set up a tripod during a rock concert is a recipe for disaster and some museums won’t even let you bring in a tripod unless you pay their professional photography fees.
Then again, there are a few types of photography that absolutely need a tripod in order to work. Long exposures, shooting in dimly lit situations, and using some telephoto zoom lenses pretty much mandate shooting on a tripod.
The long and short of this is that owning a tripod and learning how to use it will make you a better photographer, but it’s not quite a mandatory piece of your travel photography kit.
The Camera Accessories I Always Forget for Travel Photography!
There are so many small accessories that are vital for digital photography that I find myself constantly forgetting. Far from being little odds and ends, these are essential parts of my kit that I’ve started to just leave in my travel bag so I never have to worry about packing them.
I’m talking about SD cards , microfiber cloths, sensor cleaning kits, and all those other little things that you might not miss until you’re in the field and you’ve got a speck of sand on your sensor ruining your shots.
I’ve started making a checklist that contains all these little items before I pack out. There’s nothing more defeating than being in some beautiful destination and realizing you only have enough space on your memory card for a few dozen more shots.
This is the checklist that I use for your average trip. Feel free to adjust things based on the gear that you use.
- Sensor cleaning swab x 2
- Lens cleaning Spray
- Microfiber cloth
- Spare camera batteries for each camera
- Memory cards—one in each camera, extra in the bag
- External SSD if I’ll need to backup files while traveling
- iPad for editing, emailing, and posting pics on socials
- Camera strap
- Camera body cap and rear lens cap
- Remote shutter release
- Chargers and cables
Lighting for Travel Photography
Lighting is a bit of an interesting topic when it comes to travel photography. We don’t often associate this incredibly mobile genre of photography with the piece of equipment that defines studio work, but there’s some great reasons to take some lights with you on your next trip.
Photographers like Briscoe Park are doing incredible work mixing bold, almost giallo, lighting styles with travel photography. There’s also a wealth of photographers using the dark nights of remote locations as canvases for their light paintings.
I started taking a few small lights with me when I hit the road and it’s definitely pushing my abilities behind the camera.
Lights like the Aputure MC and MC Pro are great for adding lights to portraits, throwing splashes of color into images, or creating other-worldly scenes. The Infinibar or MT Pro, also from Aputure, are solid choices for light painting .
Even something small like the Lume Cube can help gain control over lighting while away from the studio. Just don’t try to haul around your old tungsten lights on your next trip!
Mobile Travel Photography Gear
Before you start thinking travel photography requires a mountain of expensive equipment, you might be reading this article on the only device you need to get started with travel photography.
That’s right, smartphone cameras have come a long way and they are perfectly capable of being your main camera body for traveling adventure photography .
Even though your smartphone is essentially a pocket camera that can surf the internet and make phone calls, you still might want to add some extra gear to make the most out of being a mobile travel photographer.
My biggest recommendation would be to pick up a Moment smartphone case and a few Moment lenses.
These lenses will dramatically change your composition and help make your images look a bit more professional and a bit less like a quick shot on a smartphone.
A lightweight Gorillapod, a photo editing app like Lightroom mobile, and a power bank to keep you charged are a few must-haves.
This might sound a little unconventional, but my smartphone is one of the cameras I use the most. It’s lightweight, can take high quality pictures, and it can be a great budget alternative to expensive cameras because you probably already own one.
I almost never leave the house without throwing one or two Moment lenses in my bag. This is true whether I’m going on a 10-minute walk to the store or I’m about to hop on a 10-hour flight.
Travel Film Photography Gear
Is there any sound more relaxing than the shutter of a film camera when you’re deep in the woods or on top of a mountain ridgeline?
I don’t think so and that’s one of the reasons why I tend to travel with film photography equipment.
Film photography is almost a completely different animal than digital photography. You have to be much more engaged with your subject, composition, and exposure since you only have a few frames before your roll is spent.
Here’s a quick list of the film photography gear that I travel with. Just as a quick note, I’m leaving out things like tripods and camera bags that overlap with digital photography.
- Gallon zip-top bag to store film
- Permanent marker to jot notes on the side of a film canister
- Light meter
- Film (I always try to bring one more roll than I think I’ll need—just in case)
Read our guide to film photography for more tips.
20 Tips to Help You Improve Your Travel Photography
Want to improve your travel photography? I’ve put together 20 travel photography tips to help you up your game the next time you take your camera on vacation.
These tips are going to cover everything from advice for total beginners to some really interesting things that caught me by surprise while I’ve been on tour with my camera.
Tip 1—Get Comfortable With Your Gear Before You Travel

Image Credit: Amar Preciado
This is my number one tip for travel photography because it applies to experienced photographers as well as beginners. Before you head out on your big trip, take some time to get comfortable with your equipment.
This means packing your camera bag just like you’re going to for your travel photography trip and wearing it around your home city or just walking around your neighborhood.
There’s nothing worse than being hundreds, or thousands, of miles from home only to find out that you actually don’t like that brand new camera bag you bought.
Giving all of your gear a comfortable trial run ahead of time ensures that you don’t run into any sudden surprises while you’re traveling.
I’ve started doing this with all of my travel photography gear and it’s hard to express just how much it’s helped me. Most of the time I’m just adjusting my backpack to make sure it’s got a comfortable fit for a long day of hiking, but there have also been times where I realized that piece of my equipment just wasn’t right for me.
This will also help make things easier when you’re out there taking pictures.
It can be a little stressful to try and line up the right composition in a busy downtown neighborhood of a foreign city. Knowing your gear inside and out will give you a huge confidence boost when you need it the most.
Tip 2—Set Your Travel Photography Intentions
This might seem like a silly question to ask, but why do you want to do travel photography?
Setting some intentions and being aware of your goals ahead of time is going to help improve your career as a photographer.
If you need some inspiration for your goals, here’s a few that I’ve used in the past.
- Have at least 5 new pictures that I can turn into prints once I’m home
- Spend two days on location, day one focuses on lifestyle photography while day two is all about landscapes
- Get out of my comfort zone and network with other travel photographers shooting the same location
Remember that goals are a lot like onions. They have layers.
Your ultimate goal might be to become a world famous travel photographer with National Geographic calling you every day, but you’ve got to start somewhere.
Let’s say that your goal is to start getting freelance travel photography contracts with tourism departments. You can start from scratch by pretending that you’re on contract to take photos of a particular location.
This will help you with your future goals as well as allow you to build your portfolio in the now.
Tip 3—Always Bring (Your) Camera

Image Credit: Ketut Subiyanto
Everything starts with the ABCs and for travel photographers this means to Always Bring (your) Camera and always be taking pictures.
You really never know when the right moment is going to strike for your photography. There have been countless moments where I wish I would have had a camera on me to capture a moment that was either beautiful or could have even been historic.
Whether you’re carrying your main camera body, a pocket camera, or even your smartphone, you should always have a camera on you when you’re traveling. Be ready to start snapping pics at a moment’s notice if you spot something that catches your eye.
Worst case scenario, you’ve got another few hundred pictures to sort through when you get home. Best case scenario, you’ve caught the once-in-a-lifetime shot that you might have otherwise missed.
Tip 4—Be Patient with Your Shots
Here’s something that’s happened to me nearly every single time I’ve gone on a travel photography trip.
I’ll be at a historic ruin or in a national park with the perfect shot framed only for there to be dozens of other tourists cluttering up my shot.
When I first started with photography, I didn’t have enough patience just to wait it out. I thought that I would have to spend hours standing at a particular spot waiting for people to disperse.
As it turns out, the longest I’ve really ever had to wait for a shot to clear up has been about a half hour. If you’ve got someone to talk to or a book to read, that’s no time at all.
Don’t pass up on the shots that you want to capture just because there’s something cluttering your frame. Patients will reward photographers every single time.
Pro travel photography tip: Using an ND filter on your camera can let you lower your shutter speed which will cause fast-moving cars and people to “vanish” from your shots!
Tip 5—Learn How to Photograph People
This travel photography tip can be one of the most challenging to incorporate. Getting comfortable cold approaching strangers takes a lot of social energy.
I know extroverted photographers that have a dozen model release forms printed and ready to go in their backpack. They have no problem chatting up strangers, but it took me some time to build up that confidence.
Here’s a quick template that you can use for approaching strangers for portraits.
Be cheerful and open about being a photographer. You can say something like “I’m a photographer taking portraits today in [Location] and I’d love to take your picture.”
If you’re on a freelance contract or working for a client, feel free to name drop them to give yourself some added credibility.
After snapping their pic, I like to give people my business card, email, or Instagram handle so they can contact me later if they’d like a copy of their photo.
If they say no photos, that’s just business.
It also really helps if you can speak just a little bit of the local language. You’ll be shocked how much more accommodating people can be if you can handle a few lines of the local tongue.
Tip 6—Study Local Laws and Customs
Photography laws and customs are different the world over. As a travel photographer, you’re going to need to familiarize yourself with local laws and customs—especially when you’re traveling abroad.
Remember that the letter of the law and the local customs might not necessarily be a one-to-one match.
I’m based in the United States and here it’s perfectly legal to take pictures of strangers as long as you’re in a public location. However, social customs dictate that it’s considered rude to take someone’s picture without asking their permission first.
When in doubt, always default to asking permission first. This means asking someone’s permission before taking their portrait or asking permission before taking pictures at a historic site or museum.
Tip 7—Get in Frame

Image Credit: Dominika Roseclay
This is something I’m still working on becoming more comfortable with.
When I’m in the studio, I’ve got no problem hopping in front of the lens and doing some self-portraiture. However, once I’m out in the field I’m a little bit reluctant to stand in as my own model.
Travel photography is about telling your story. This means that you’re going to need to get in frame for some of your photographs.
Even if it’s just a few shots of you setting up, traveling to your destination, or getting dinner after a long day of shooting, people want to see the photographer behind the camera.
If you’re traveling with other photographers, why not consider making this a game? Challenge each other to see who can take the most interesting photos of your fellow photographers.
You can even take some quick selfies on location to contrast your professional photography. This will make your self-portraiture a little more intimate and warm while your travel photos show off your full talent.
Tip 8—Scout Travel Photography Locations with Your Smartphone
A great way to dramatically improve your travel photography is to scout your locations ahead of time. Before you haul all of your gear on a quest for the perfect photo, go out there with just a day pack and walk around soaking up the scenery.
Location scouting gives you a strong understanding of what speaks to you as a photographer about this location before you even start pressing the shutter button.
I recommend carrying your smartphone or a point-and-shoot camera when you’re out scouting locations.
This lets you take some test shots of a travel location before bringing all your gear out.
Tip 9—How to Always Pack the Right Lenses
I used to be so worried about not bringing the right lenses on a trip, but it’s been years since I’ve felt like I picked the wrong lens for the job.
Part of this is knowing your lenses inside and out. You should learn the basics of your lenses like aperture, how their focal length compresses an image, and which focal lengths are ideal for different styles of photography.
Lenses like the Sony FE 24-70mm f/2.8 make a great choice for travel. The focal length options on that lens easily handle majestic landscape panoramas and street photography portraiture.
I also recommend taking at least two lenses with you for most travel photography trips. I’ll take one primary lens with me that I plan on doing most of my shooting with and a secondary lens for those “just in case” moments.
Tip 10—Staying Safe While Traveling with Camera Gear
Being a tourist always carries some risk when it comes to crime. Being a tourist that happens to be carrying $3,000 in photography equipment carries a little bit more risk.
Here’s a few tips that I stick with when it comes to staying safe while shooting with expensive camera equipment.
If you can, try to do your travel photography with a group. Even if you have one other person traveling with you, that company is usually more than enough to deter most would-be thieves.
This might seem a little obvious, but you always want to keep your gear in sight. Unless I know I’m alone in the wilderness, my camera bag is never further than an arm’s reach away.
I’ve got a tip for you that I don’t see a lot of people talking about when it comes to traveling safely with your camera equipment. I like to stay discreet when I’m traveling with my camera gear.
This means I leave the branded Sony strap at home and opt for a much more neutral Peak Design strap . I also throw a velcro patch over things like the LowePro logo on my backpack that might otherwise announce that there’s some expensive camera equipment in there.
If you stay smart and aware of your surroundings, your odds of having an unfortunate encounter while carrying camera equipment will be greatly reduced.
Tip 11—Shoot Some Short Format Video
We’re all photographers here. This means I can be a little honest with you about shooting short form video.
It might not be your main stay, but social media platforms are putting a lot of emphasis on TikTok style videos. If you can incorporate a little short form videography into your travel photography routine, you’ll have that much better performance online.
There are countless ways that you can build short form video production into your photography routine. You could record a 60 second video demonstrating your setup for the shot or even just an interesting voice over on top of a still image.
Shooting short videos can also be fun. Building this into your photography routine is a great way to improve your skill set while you’re also increasing your social media following.
Tip 12—Find Your Voice by Getting Lost
Some of the best travel photography stories happen because you get lost. Getting turned around is a great way to change your perspective on things and improve you or travel photography.
This is easily one of the most underrated travel photography tips. Best of all, you can do this from the comfort of your hometown.
Try getting lost on purpose by walking through a neighborhood you don’t usually go to or checking out a city that you might have otherwise overlooked.
While all the other travel photographers are gathered at the tourist traps we’ve all seen a thousand times on Instagram, you’ll be exploring something new while catching refreshing pictures of your travels.
Tip 13—How to Fly With Film
If you plan on doing some film photography while you’re traveling, you’re going to need to know how to transport your film while traversing through airports safely.
The x-rays used in airport security scanners can damage undeveloped photographic film. The more x-rays undeveloped film is exposed to, the more haze and distortion starts to pop up on the final image.
Film with an ISO 800 and above can be damaged by any airport X-ray machine. Expired and experimental films can also be damaged by x-ray equipment.
Some airports now use more powerful CT scanners. These are often used for checked baggage, but they can also be used for carry-on as well.
CT scanners put out enough x-ray radiation to damage film of any ISO. You should always bring your film with your carry-on luggage in its own zip-top bag.
When you’re traveling through security at an airport, you can ask the security personnel for a hand examination of your photographic film. In my experience, they almost always say yes no matter how busy the airport is.
However, it is at the discretion of airport security and I have had them turn down a hand examination of my film. One trip through an X-ray scanner won’t damage your film, but multiple trips will.
This is why I recommend buying film on location if possible. You can also have film mailed to your hotel or to a friend’s address who lives near where you’re traveling.
Tip 14—Become a Traveler at Home
Traveling is expensive and it’s not always available for us. However, this doesn’t mean that you have to stop your travel photography plans.
If you’re looking for the true zero-budget way of starting a travel photography career, you have to start in your home city.
While this might not seem exciting at first, keep in mind that the city that you live in is an exotic travel destination for someone else.
Try using all of the travel photography tips and tricks I’ve talked about in this article while taking pictures of your home city. Even if you live in a sleepy little town, there are compelling stories that you can tell by documenting the life and history of the place you live.
Tip 15—How to Find Travel Photography Inspiration
No matter what style of photography you’re in, it’s easy to get stuck in a rut. What should you do if you’re running out of inspiration before your next big travel photography trip?
Here are five quick ways I stay inspired and motivated as a photographer.
- Start following more photographers on social media to see what other people are doing
- Research historic photographers and get inspired by how they were shooting when our medium was still new
- Check out international photographers to see how people are shooting across the world
- Get experimental by looking into the weirder side of photography with things like film soup or databending
- When I’m heading to a new location, I like to look at the history, upcoming events, and what photographers are shooting for that local
Tip 16—Turn Regular Trips into Travel Photography Trips
If you’ve always got your camera with you, and you’re always shooting, every trip you go on is a travel photography trip.
A great way to stay active as a travel photographer who has yet to break into the full-time business is to transform every trip you go on into an opportunity for travel photography.
Whether you’re heading across town for a family dinner or going on a work trip, you’ve got an opportunity to do some trouble photography.
Not everything has to be a grand adventure. You could use that trip across town as an excuse to work on catching shots of yourself in transit, for example.
Tip 17—Becoming a Better Photographer
Every photographer has an area that they can improve on. Whether you’ve always wanted to be one of those photographers who only ever shoots on full manual mode or you’ve been hoping to add sports photography to your travel routine, now’s the time to start working on those skills.
Skills building exercises can be a great activity during your travel photography downtime. You’re not always going to be on the road to an exotic destination and that time in between trips is vital to your success.
Even if you’ve been a professional photographer for decades, there’s still countless things about this art form that you can learn.
Tip 18—Get Your Photos Seen
Now that you’ve got a portfolio of travel photography images, how do you get people to see them?
As with most freelancing gigs, the name of the game is networking. Here’s a few tips for getting your pics in front of more eyes.
- Be more consistent with social media by posting regularly and using hashtags strategically
- Enter into photography competitions
- Ask local shops if you can display your work
- Get your photos published
- Reach out to travel agencies, tourism boards, and parks departments for freelance work or partnerships
- Network with other photographers
As the old saying goes: It’s not what you know, it’s who you know.
Tip 19— Travel Photographer Tips for The Business Side of Things
Making it as a working travel photographer has gotten harder in recent years, but it’s not out of reach. Here’s a few business tips to help you stay on top of your budding photography career.
Always try reaching out to new clients. Keep in mind that bigger clients are harder to land, but there are plenty of smaller travel destinations that are ideal for a beginner photographer.
You should create a budget for your travel photography work. If you’re just starting out, you don’t need a fancy app. A simple spreadsheet is more than enough for you to stay on top of your money.
You can also try becoming a content creator while you’re working on landing clients. Building up a social media following and generating some income through a site like Patreon can help you stay on the road longer.
Tip 20—How to Tell Your Travel Photography Story

Image Credit: Ena Marinkovic
You’ve reached the end of my travel photography tips. The last tip, and the most important one, that I’m going to give you is some advice on how you can tell your story.
Travel photography is all about storytelling. This means documenting your journey, engaging your audience, and finding your voice.
Taking captivating pictures without context isn’t enough. Your travel photography needs to speak to people on a deeper level and communicate something yet untold about the experiences behind your journeys.
It’s going to take time to figure out how you want to represent your adventures. The best thing you can do is get started today.
Even if you’re just taking travel photos a few blocks from your home, you’ll be breaking the ice and taking those important steps in finding your voice as a storyteller.
What is the purpose of travel photography?
The purpose of travel photography is to share your journey with the world. Travel photographers help to tell the story of not only their adventures, but also the people and places they encounter whether they are traveling around the world or within a few miles of where they grew up.
Is travel photography a good career?
Travel photography can be an amazing career that is rewarding and potentially very lucrative. It can be challenging to get started, but there are countless photographers who do travel photography as both their main job as well as a side gig.
What is the single best lens for travel photography?
The single best lens for travel photography is the wide angle to telephoto zoom like the Sony FE 24-105mm f/4 G OSS Lens. This lens allows you to capture everything from sweeping landscape panoramas to sports and wildlife photography .
Is travel photography a job?
Travel photography can absolutely be a job. You can make money as a travel photographer by freelancing for clients, photographing destination weddings , or working as a photojournalist.
Is GoPro good for travel photography?
A GoPro can be great for travel photography especially if you’re interested in capturing video and using stills from that footage for your photography.
Even though a GoPro is a good choice for travel photography, you’re probably going to be better served by a dedicated camera if your main goal is photo rather than video.
Final Words
I hope this guide gives you everything you need to hit the ground running with travel photography. If you’re an experienced travel photographer, I hope you’ve picked up a few new tricks that can help improve your next adventure.
I’ve tried to cover travel photography from nose to tail in this blog, but I’m sure I left a few things out.
I want to hear your travel photography tips, tricks, and experiences in the comments. If you like this article, make sure to check out my other photography blogs .

Check out these 8 essential tools to help you succeed as a professional photographer.
Includes limited-time discounts.
You'll Also Like These:

Ashley is a photographer, writer, and film critic. When Ashley’s not writing essays on photography, cinema, and theory, he’s out taking pictures with retro film cameras.
Unlock Your Creative Potential in San Miguel de Allende! Calling all shutterbugs, aspiring photographers, and adventure seekers! Join us for an unforgettable photography workshop in the vibrant heart of Mexico’s cultural gem, San Miguel de Allende. Immerse yourself in the enchanting streets, colorful markets, and breathtaking landscapes of this UNESCO World Heritage city as you hone your photography skills under the guidance of seasoned professionals. Whether you’re an amateur photographer looking to capture stunning images, a photography enthusiast eager to refine your technique, or a traveler yearning for a truly immersive cultural experience, this workshop is tailor-made for you. Discover hidden gems, uncover unique perspectives, and unleash your creativity against the backdrop of San Miguel’s rich history and vibrant culture. From sunrise strolls through cobblestone streets to golden hour shoots overlooking panoramic vistas, every moment promises inspiration and discovery. Don’t miss this opportunity to elevate your photography skills while immersing yourself in the beauty and charm of San Miguel de Allende. Secure your spot today and embark on a journey that will not only transform your photography but also leave you with unforgettable memories to cherish for a lifetime.
https://www.shewanders.com/creative-courses/sma
Keep Sharing more impressive blogs.
Leave a Comment Cancel Reply
👋 WELCOME TO SHOTKIT!

🔥 Popular NOW:

Unlock the EXACT blueprint to capture breathtaking iPhone photos!
10 great travel photography tips from a professional photographer
Want to be a travel photographer? We asked a pro photographer about the tips and secrets behind taking great travel shots

Getting paid to travel the world and capture incredible images of people, animals and landscapes is many people’s dream job, but it’s also one of the most competitive and challenging.
• The best cameras for Instagram: take your gram game to the next level!
• The best travel tripods you can get right now
Professional travel photographer Graeme Green gives his practical advice and insider knowledge for improving your photos and getting ahead.
1. Go the extra mile

Life as a travel photographer often means getting out of bed (if there is a bed) when it’s dark and cold. I’ve gone out taking photos while wiped out by illness or after getting no sleep on the wooden floor of a hut. There have been long trudges through snow, sand and swamp, and exhausting journeys on dusty tracks. The unexpected or disastrous often happens. Life on the road is hard to predict, but you still have to get the photos you need.
A big part of the lifestyle’s appeal is getting to travel to remote, often wild and fascinating locations, meeting new people and having experiences you just can’t get at home – but it takes effort and time. Early starts, tough journeys, and long, hard days in difficult environments are all part of the job. There might be times when you don’t feel like taking photos, when you just want to rest, but missed opportunities always come back to haunt you. You never know what you might miss.
2. Make a plan

One of my favourite ways to photograph is just to walk, to explore a city or a location without an idea of what I’m looking for or where I’m heading to. You never know what scenes wait just around the next corner for spontaneous photographs.
But sometimes it really pays to plan, especially if you need to get specific shots for an assignment. Think about what you’re trying to achieve, whether it's a close-up or a wider picture of a whole scene. If you’re photographing a festival or event, you need to take into account what time it will all kick off. If you have one, ask your guide or fixer for details on where exactly things will happen, then plan ahead to make sure you’re in the best possible location.
It’s especially worth looking around at where the light is coming from. It’d be frustrating to be present at a dramatic moment only to realise you should be on the other side of the room.
Get the Digital Camera World Newsletter
The best camera deals, reviews, product advice, and unmissable photography news, direct to your inbox!
3. Always be ready

Whether photographing people or wildlife, great photographic moments often pass by once and then they’re gone. You need to always be ready and alert to the action. That particularly means spending time getting to know your camera, experimenting with elements such as shutter speed.
With some photos, you’ll want what you’re photographing to be sharp and clear, whereas others might look good with a blurry suggestion of movement. Also consider focal points and depth of field; what you want to draw the eye to, and whether you want a person or animal to stand out or to be part of it’s environment.
You want to get familiar enough with your camera so that you can make changes quickly, almost instinctively. The last thing you want to be doing when something unmissable happens is struggling to find the right settings.
I usually test my camera in a location ahead of time, while there’s nothing happening, to make sure I have something close to the right settings if and when something does occur.
4. Take your time

Time and patience are often the key elements that make the difference between a good photo and a great one.
You can come across a building that’s going to look brilliant in few hours, when the light hits it right, or you might find a composition you like but it takes a while for all the key features, including people, to line up in just the right way. As tempting as it can be to take the photo as it is and move on, it pays not to accept compromise and to wait for the best possible picture.
Working in Morocco, I found plenty of compositions that I liked a lot, but it sometimes took an hour or more of waiting to get the photos I was really happy with, with people passing by at just the right moment.
5. Get in the thick of the action

Great photographs really give the viewer a sense of a place or people. They trigger their curiosity and make them want to know more.
With adventure travel photography, you need to capture the action and take people there. Whether it’s biking in Vietnam, snowshoeing in Japan or trekking in Mexico, people looking at your pictures have to feel that sense of adventure and excitement. You need to get in the thick of it.
If you’re spending time with local cultures, you need to communicate a sense of local character, how people live and the surrounding environment. If photographing a sombre religious event or a chaotic carnival, your photos need to capture that atmosphere.
6. Let people see the real world

For me, it’s a real turn-off when I see photos online that bear almost no relation to the real world. I don’t, of course, see anything wrong with post-production work to bring out the best in a photo, but I see pictures everyday in which photographers have clearly got carried away with Photoshop or Lightroom ’s settings.
Our eyes are pretty clever and detect when something doesn't add up. An over-manipulated photo instantly loses credibility, whether that’s intensely oversaturated colours, a lack of shadows, or oddly manipulated pictures with dark, cloudy skies but scenery bathed in sunlight. Pictures like that might get Likes on Instagram but they're likely to be rejected by newspapers and magazine editors.
For me, it’s more satisfying to capture something real. There are so many remarkable sights in the world without sprinkling digital magic all over them.
7. Think about the impact of your pictures

Wherever you go, always treat people with respect. I’ve been shocked by tourists swarming locals with cameras and iPads, treating them like an exotic curiosity, not a person. Whether I’m working with a person or a group for several days or just photographing someone I see on a street, I always check first. Quickly pointing at the camera and asking “OK?” usually does the trick.
You should also always stop and consider what you’re photographing from an ethical position. Photos can do a lot of good, communicating important stories, but they can also have a negative impact, especially if you become part of cruel or harmful practices. In parts of Asia, some tribal women wear heavy metal chains to give them unnaturally long necks, causing painful physical deformities. What was once a local tradition is now more about someone extracting money from tourists who come to take photos.
The same goes for wildlife too, whether it's drugged tigers, dancing bears or performing elephants. I don’t want pictures on my memory cards that helped cause any kind of suffering.
8. Think outside the box

It’s possible to get so focused on photographing one thing, the main event, that you miss what else is happening, including other details that tell a story or make for interesting photos. Remember to look away from the viewfinder; often, it’s small details that others might miss or walk by, rather than the obvious main attraction, that bring a story to life.
Looking around, you can often find interesting juxtapositions between the person or animal you’re photographing and features of the landscape, or perhaps a tower or tree, or even the moon. For one of my favourite wildlife photos from the Falklands, instead of coming in tight on a group of penguins, I zoomed out to show a tiny little cluster of the birds facing an approaching storm, which gave a completely different, and, in my view, more interesting result.
A travel story often requires variety, which means looking around at smaller details, and not just the big, key elements (people, landscapes, animals, buildings, and so on). Details, such as a funny street sign or a unique statue, can add layers to a set of photos and give a fuller idea of a place.
9. Challenge yourself to find new approaches

Photography should always be exciting. You never want to get stuck in a rut, repeating the kind of pictures you’ve taken before, or to be satisfied with pictures that are less than your best.
The more time you spend taking photos, the more rewarding it is to be creative and find your own way of doing things. Working for other people, especially demanding editors, is one way to push yourself further. But you should always be challenging yourself to produce photographs that excite you to look at. Study what other photographers do, including what you like and what you don’t like about their work.
Most of all, study and critique your work. How could it be improved? Try to push your photography in new directions, whether framing things differently, seeking out interesting light, or just getting yourself into more interesting situations.
10. Get paid

Given the sheer volume of photos produced each day, there’s a culture in the media of asking photographers to give away their photos for free. At some point, unless your landlord and local supermarket accept payment in smiles, you need to get paid for your work.
Getting a job or freelancing for newspapers, magazines and websites means competing against many other would-be professional photographers, so you need to work hard and your photos need to stand out. Build up a portfolio, improve your photography, and work for smaller publications, all of which puts you nearer the front of the line. Having a good social media following and a reputation for being enthusiastic, hardworking and reliable helps.
You can also work for advertising companies, or sell your pictures via online galleries such as Alamy and Flickr. Many photographers sell prints, give talks, teach photography classes, or lead photography tours and workshops.
You need to put a value on your work and your time. In every situation, ask: what am I getting out of this? Is it worth my time and expertise? Travel photography is a tough business but an incredibly rewarding one if you can navigate your way.
Read more: The 10 best travel cameras you can buy right now Best travel tripods in 2019 10 ultimate locations for wildlife photographers How to prepare for a safari or wildlife photography trip
Thank you for reading 5 articles this month* Join now for unlimited access
Enjoy your first month for just £1 / $1 / €1
*Read 5 free articles per month without a subscription
Join now for unlimited access
Try first month for just £1 / $1 / €1
Related articles

Want to Be a Travel Photographer? Pro Photog Ken Kaminesky Tells Us Why It’s All About The Business (and the shoes.)
This month we’re thrilled to unveil the new website of one our favorite travel photographers: Ken Kaminesky. While he’s not new to PhotoShelt...
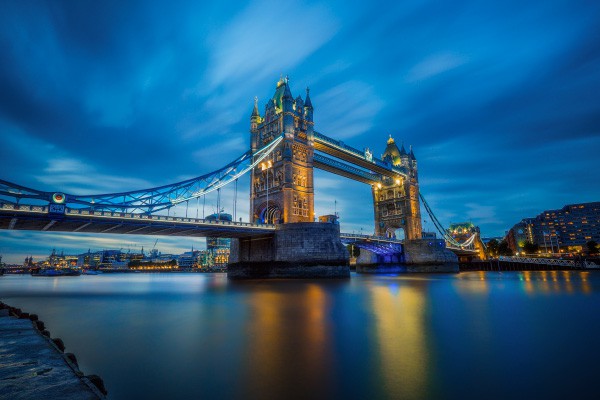
This month we’re thrilled to unveil the new website of one our favorite travel photographers: Ken Kaminesky . While he’s not new to PhotoShelter — Ken’s been selling stock via a PhotoShelter site since 2010 — a few months back he was looking to update his formal website, and our Sonnet template fit the bill. Ken’s images of sweeping skies and distant lands are positively majestic, and Sonnet, with its hovering image captions and full-bleed image display, suited Ken’s work perfectly – helping tell the whole story of his travel adventures.
With over 100,000 Twitter followers, a robust workshop schedule and partnerships with the likes of Fuji and G-Technology, Ken is also no stranger to knowing the in’s and out’s of building a photography career. We caught up with him to talk about his work and gather advice for the aspiring travel photographers out there – including what mistakes you should flat out try to avoid, and tips on how to find “the” shot. Plus, why you should never underestimate the value of a comfortable pair of shoes. Read on to find out more from Ken.

Ken’s Sonnet Homepage
What are the must-have qualities to be a successful travel photographer?
A sense of wonder and rampant curiosity are vital as is a passion for wanting to see awesome places and experience new things. You don’t get into this field for the money but rather for the things that enrich your soul.
That being said, there is also the commitment to crazy long hours, no holidays, little time for social life and lots of uncomfortable travel days, carrying lots of gear, and being alone in unfamiliar places. Accepting the negatives as part of the job is vital. The key is to try and find some balance between the difficult or less desirable aspects of the job and the ones that make your heart beat faster with excitement when everything comes together just right. At that special moment you know that you’d rather be right there, more than anywhere else in the world.
Some other vital aspects of what it takes to be a travel photographer is a keen sense of business, the capability to communicate effectively with current and potential clients, sponsors, and colleagues, and some really comfortable shoes. Trust me on the shoes.

Photo by Ken Kaminesky
What mistakes did you make that you learned from early on in your career?
Wearing the wrong clothes and shoes can lead to discomfort and pain so why not give yourself every opportunity to be warm, dry, blister-free, and comfortable? Wear the right clothes and shoes for your destination and you’ll be thinking more about how to get that next shot rather than how miserable you feel.
Also working for free is something I consider a major mistake. If you work for any client for free they will always expect you to do so and you’ll be labeled as the “free” or “cheap guy”. As soon as those clients have a budget to spend on photography, they will go elsewhere because they’ll think that they can get someone better. I always counter client’s “work for free” proposals with an offer of doing the first 3 jobs at full rate and the 4th one for free. So far, I’ve had zero takers.
Another thing I can’t stress enough is how important it is to get a solid contract between you and your clients. A contract benefits all signing parties and should be a solid foundation of the established working relationship you develop with your client. Be honest, fair, and willing to compromise on certain things while holding steadfast to the things you value most. Get it on paper, get it signed, and get to work doing the best damn job you can for your client.
And lastly, putting all my eggs into one basket. It is very easy to justify spending 90% or more of your time and energy on the one thing or one client that earns you the most of your income. I was having a good run with my best client back in the mid 2000s and I pretty much abandoned all other potential income sources. It worked quite well for a while, but when my client’s latest competitor bought them out they cancelled all the contracts they had with their photographers. I lost 80% or more of my income overnight. Lesson that I learned? Diversify.

Is being a travel photographer a viable career?
I think a lot of people have the very wrong impression that people that do this kind of work for a living are jet setting all over the world, staying in 5 star hotels, eating gourmet food all the time and so on. Um… Not so.
There are just a handful of people on the planet that actually do nothing but travel photography as their job. So no, to be brutally honest, this really is not a viable career for many people. With the amount of decent photography being done by amateur photographers who basically give their work away in order to be published, it makes it all the more difficult to make travel photography a violable career choice.
I wish that these photographers who work with micro stock agencies or just give their work away would realize that they are undermining their own chances of making travel photography a career and they are also hurting the photography trade in general. Getting published (by a magazine or company that is making damn good money by publishing your work) does not make you a professional photographer. Running a viable and sustainable photography business where your photography and business skills allow you to buy and regularly upgrade photo and computer equipment, pay rent or mortgage, put food on the table, be properly insured, put something away for the future, travel (in the case of a travel photographer), etc.
Being a professional travel photographer involves significant monetary investment.

What are the outlets to make money in travel photography?
In today’s world there are many ways that one can make money with travel photography and many don’t involve taking photos at all but rather celebrating the places you’re already been to with the photos and stories you can share to a worldwide audience. Social media and blogging has helped me get my name and brand out there, and I worked hard to make that happen. Now I’m sponsored by several awesome companies who help promote my work, hire me as a consultant, work with me on speaking engagements at places like Photokina, PPE NYC, and Apple stores across Europe. They sponsor my photo walks, provide me with gear, and I’m constantly looking for ways to work with these companies on marketing projects that help celebrate travel and photography. I’m honoured to be on sponsored teams of photographers and other digital artists that I have deep respect for. The companies that I work with on a sponsorship level all share a passion for photography and the photographers that create some incredible imagery.
I also still sell image licenses and even though stock photography is no longer a main income stream it still is nice to get a good sale every once in a while. I’m currently rebuilding my PhotoShelter image archive and in the last 5 years have done better at licensing images this way than via Getty or Corbis.
Essentially, I make a living with travel photography via:
• Commercial and editorial shoots • Running photography tours and workshops in Italy, Jordan, Iceland, and more. • Corporate sponsorship • Consulting • Public speaking • Large format print sales • Photo licensing • Salary of a secret agent [just kidding!]
When traveling to unknown places, how do you find “the” shot?
Depends on the place but I always do my research and do google image searches, look at online resources like 500px, other travel photographer sites, travel magazines, and ask colleagues. I’m looking for cool buildings and scenes, unique interiors, unique vantage points and ways to get to them.
Once you get to your location, scout it out. Is it a sunrise, sunset, or blue hour shot? Is there scaffolding or fences? Is it accessible or open? Proper Planning Prevents Poor Performance.
Once you think you have “the” shot, look for an alternative. Take 2 is often the keeper.
Sometimes the job is specific and I need to do something precise so that makes it easier but most of the time I’m looking for awesome in any form. A good way to get some great shots (if you have the time) is to walk everywhere. Remember when I said that bit about good shoes? You’re not going to see the place you’re visiting if you are in a bus, train, cab, car, or metro. You’ll come across some unexpected treasures this way.

What gear do you never leave home without?
• Light weight, wind and water resistant jackets and pants made by Arc’teryx. • 3 portable G-Technology hard drives for backing up all my images files and for bringing my office with me on the road. • Unlocked iPhone so that I can get a local SIM card. • Neutral density and polarizer filters from Formatt-Hitech. • Comfortable shoes and boots. Right now I’m using Oboz hiking boots and Salomon trail shoes and winter boots. My feet have never been happier. • The more I use it, the more I love my new 15mm Zeiss lens. • Small things can also be important. Garbage bags, ziplock bags, paper towels, baby wipes, polysporin, ibuprofen, q-tips, international electric plug adapter, power bar.
What are 2 or 3 pieces of advice would you give to an aspiring travel photographer?
Take some business courses. This is a business and if you want to survive amongst a sea of competitors who often work for free then you best have some kind of plan.
Plan some time off both at home and while on the road. Jet lag, bad food, illness, and fatigue will catch up to you.
Less is more. Clients, editors, and pretty much anyone would rather see 3 kick ass photos rather than 100 meh ones.
Be realistic. I once had a father of 3 who had 2 full time jobs and was struggling to make ends meet ask me how he could become a travel photographer. The truth is he likely can’t and if he finds a way, then I’ll stand up and applaud. Just amassing a good portfolio will cost a small fortune without some kind of backing, sponsorship, rich and generous relative, etc. This is not an easy field to get into and stay in for any period of time. Whatever you do, do your research and make a game plan. Get better at your photography and Photoshop skills before you get on the road and start spending serious coin. Eisenhower once said: “Plans are nothing; planning is everything.”
I do believe he was right.
Share this:
- Click to share on Twitter (Opens in new window)
- Click to share on Facebook (Opens in new window)
You May Also Like

Expert Advice and Top Tips from Pro Photographers for 2024
What’s one piece of advice you would give to aspiring or up-and-coming photographers? We asked nine experienced photographers and PhotoShelter members to share their top tips for those looking to get ahead in their photography careers. From finding your own visual voice to working with a mentor or photo assistant, each piece of advice listed […]

What’s On Your Photography Holiday Wish List?
The holiday season is around the corner and that means it’s the perfect opportunity to upgrade your gear or find that special gift for the visual storyteller or photography enthusiast in your life. We reached out to a handful of renowned photographers and PhotoShelter members, each with their unique styles and preferences, to bring you […]

Share a Photo That Means the World to You
We all have a photo that means the world to us. Maybe it’s one we made ourselves – the first photo from our first camera. It could be an old family photo in a beloved photo album. Or maybe it’s an iconic image that hangs on our wall at home. With World Photography Day coming […]
National Geographic content straight to your inbox—sign up for our popular newsletters here
The Masterclasses 2023: 10 practical tips to help you succeed as a travel photographer
From packing the right kit to picking the right guide, the autumn series of The Masterclasses saw our panellists reveal their top tips for making it as a professional travel photographer.

In September 2023, The Masterclasses by National Geographic Traveller (UK) returned with a brand-new series of expert-led online sessions for aspiring travel writers and travel photographers.
Each hour-long session saw an expert panel of National Geographic Traveller contributors focus on a different aspect of the modern travel photographer’s toolkit, with the likes of Teagen Cunnife, Matt Dutile and Holly-Marie Cato sharing practical advice on everything from picking the right gear to photographing animals in their natural habitats.
These 10 pieces of advice can help you improve your travel photography, from building your portfolio to using your gear optimally and connecting with your subjects.
1. Plan ahead
“Do your research and get familiar with your own equipment before you travel…Get ahead of the game, pre-visualise and make a plan. When I go to a place that I’m not familiar with, I can start recycling and adapting those ideas to suit the environment.” — Renato Granieri, The art of wildlife photography in travel
2. Maximise your time on a shoot
“There’s never ever enough time on a shoot. Mostly, though, we only have a day or two, or sometimes just a few hours, to capture animals for a story. Regardless of the weather conditions, I’ll head out and see what surprises me. Getting out and seeing what’s happening around you is the only way to guarantee you’re going to get images. Don’t talk yourself out of shooting just because the weather isn’t perfect.” — Teagen Cunnife, The art of wildlife photography in travel
3. Use local guides to your advantage
“Choose experienced safari guards — they know where the animals will be and can predict behaviour. When you’re choosing a safari operator, pay specific attention to what’s written about the guides on the websites and look for places that have mentioned that their guides are highly awarded or extensively trained. There’s a really big difference between a guide and a guide with photographic knowledge; communicating to a guide who understands composition and lighting is so much easier.” — Teagen Cunnife, The art of wildlife photography in travel

4. Use kit to connect with your subjects
“I bring a little Fuji Instax camera with me. And that’s for when I’m going into more remote regions so that I can not only ask for a photo but give one back as well. For me, I’ve found that this opens doors to getting people to sit for portraits. Because, if you’re always just showing up and you’re this guy with this big camera coming up in front of them, there’s a little bit of shyness and reticence. But if you can sit with them and open up a little bit of a dialogue, even if you can’t exchange in the same language, that’s a really great way to get them involved.” — Matt Dutile, Picking the perfect kit for your assignment
5. Stay safe as a lone traveller
"I always dress to blend in. For example, what I’m wearing to photograph a high-end restaurant and what I’m wearing to go and photograph agave fields is going to be different. I want to blend in so that I feel comfortable and so that the people around me feel comfortable. There are certain places that you’re going to stand out, but just try to be aware of what’s going on around you.” — Lindsay Lauckner Gundlock, Picking the perfect kit for your assignment
6. Stay inspired
"I’ve been doing this for 15 years now, but every week I seem to discover a new photographer that I’ve never heard of. As long as someone’s out there creating amazing images, I’ll always be inspired by that. Another part is looking at art, or a place itself. We are storytellers, so I think you can be inspired by the story of a place, a people, an idea, all on its own.” — Matt Dutile, Picking the perfect kit for your assignment
7. Use social media to find contacts
"Go on social media. Often, when people get hired, they might thank the person who gave them the job. So, follow other photographers and look in their captions and actually read who’s hiring them, who did they work with, and then follow those commissioners.” — Holly-Marie Cato, How to go professional
8. Present your work to photo editors
“Something that I’ve always done is to create a PDF or something that sort of has a layout that looks like the [finished] article so that the photo editor can kind of get an idea of what your story is. When you do that, you might realise that you don’t have the right photos for a story — and that really teaches you what storytelling is.” — Nori Jemil, How to go professional
9. Know your destination
I think if you’re especially interested in [photographing] some region of world, it really helps to be there. Spend time there and get to know the local traditions, the language or local culture. That can definitely help when presenting a story.” — Ulf Svane, How to go professional
10. Shoot with passion
"I’m really strong on finding your niche and making sure you’re passionate about it. I could say “build a portfolio”, but often, and I think especially with Instagram, you could build a portfolio of work that you don’t even like. If you want your work to last, if you want to be able to sell that work and really make people believe in it, then be passionate about what you photograph.” — H olly-Marie Cato, How to go professional
Related Topics
- PHOTOGRAPHY
- ADVENTURE PHOTOGRAPHY
- PHOTOGRAPHY TECHNIQUES
- PHOTOGRAPHY TIPS
- NATURE PHOTOGRAPHY
You May Also Like

How I got the shot: Ben Pipe on coming face to face with a lion

The 10 best compact cameras, according to National Geographic
For hungry minds.

7 video cameras we love for every kind of traveler
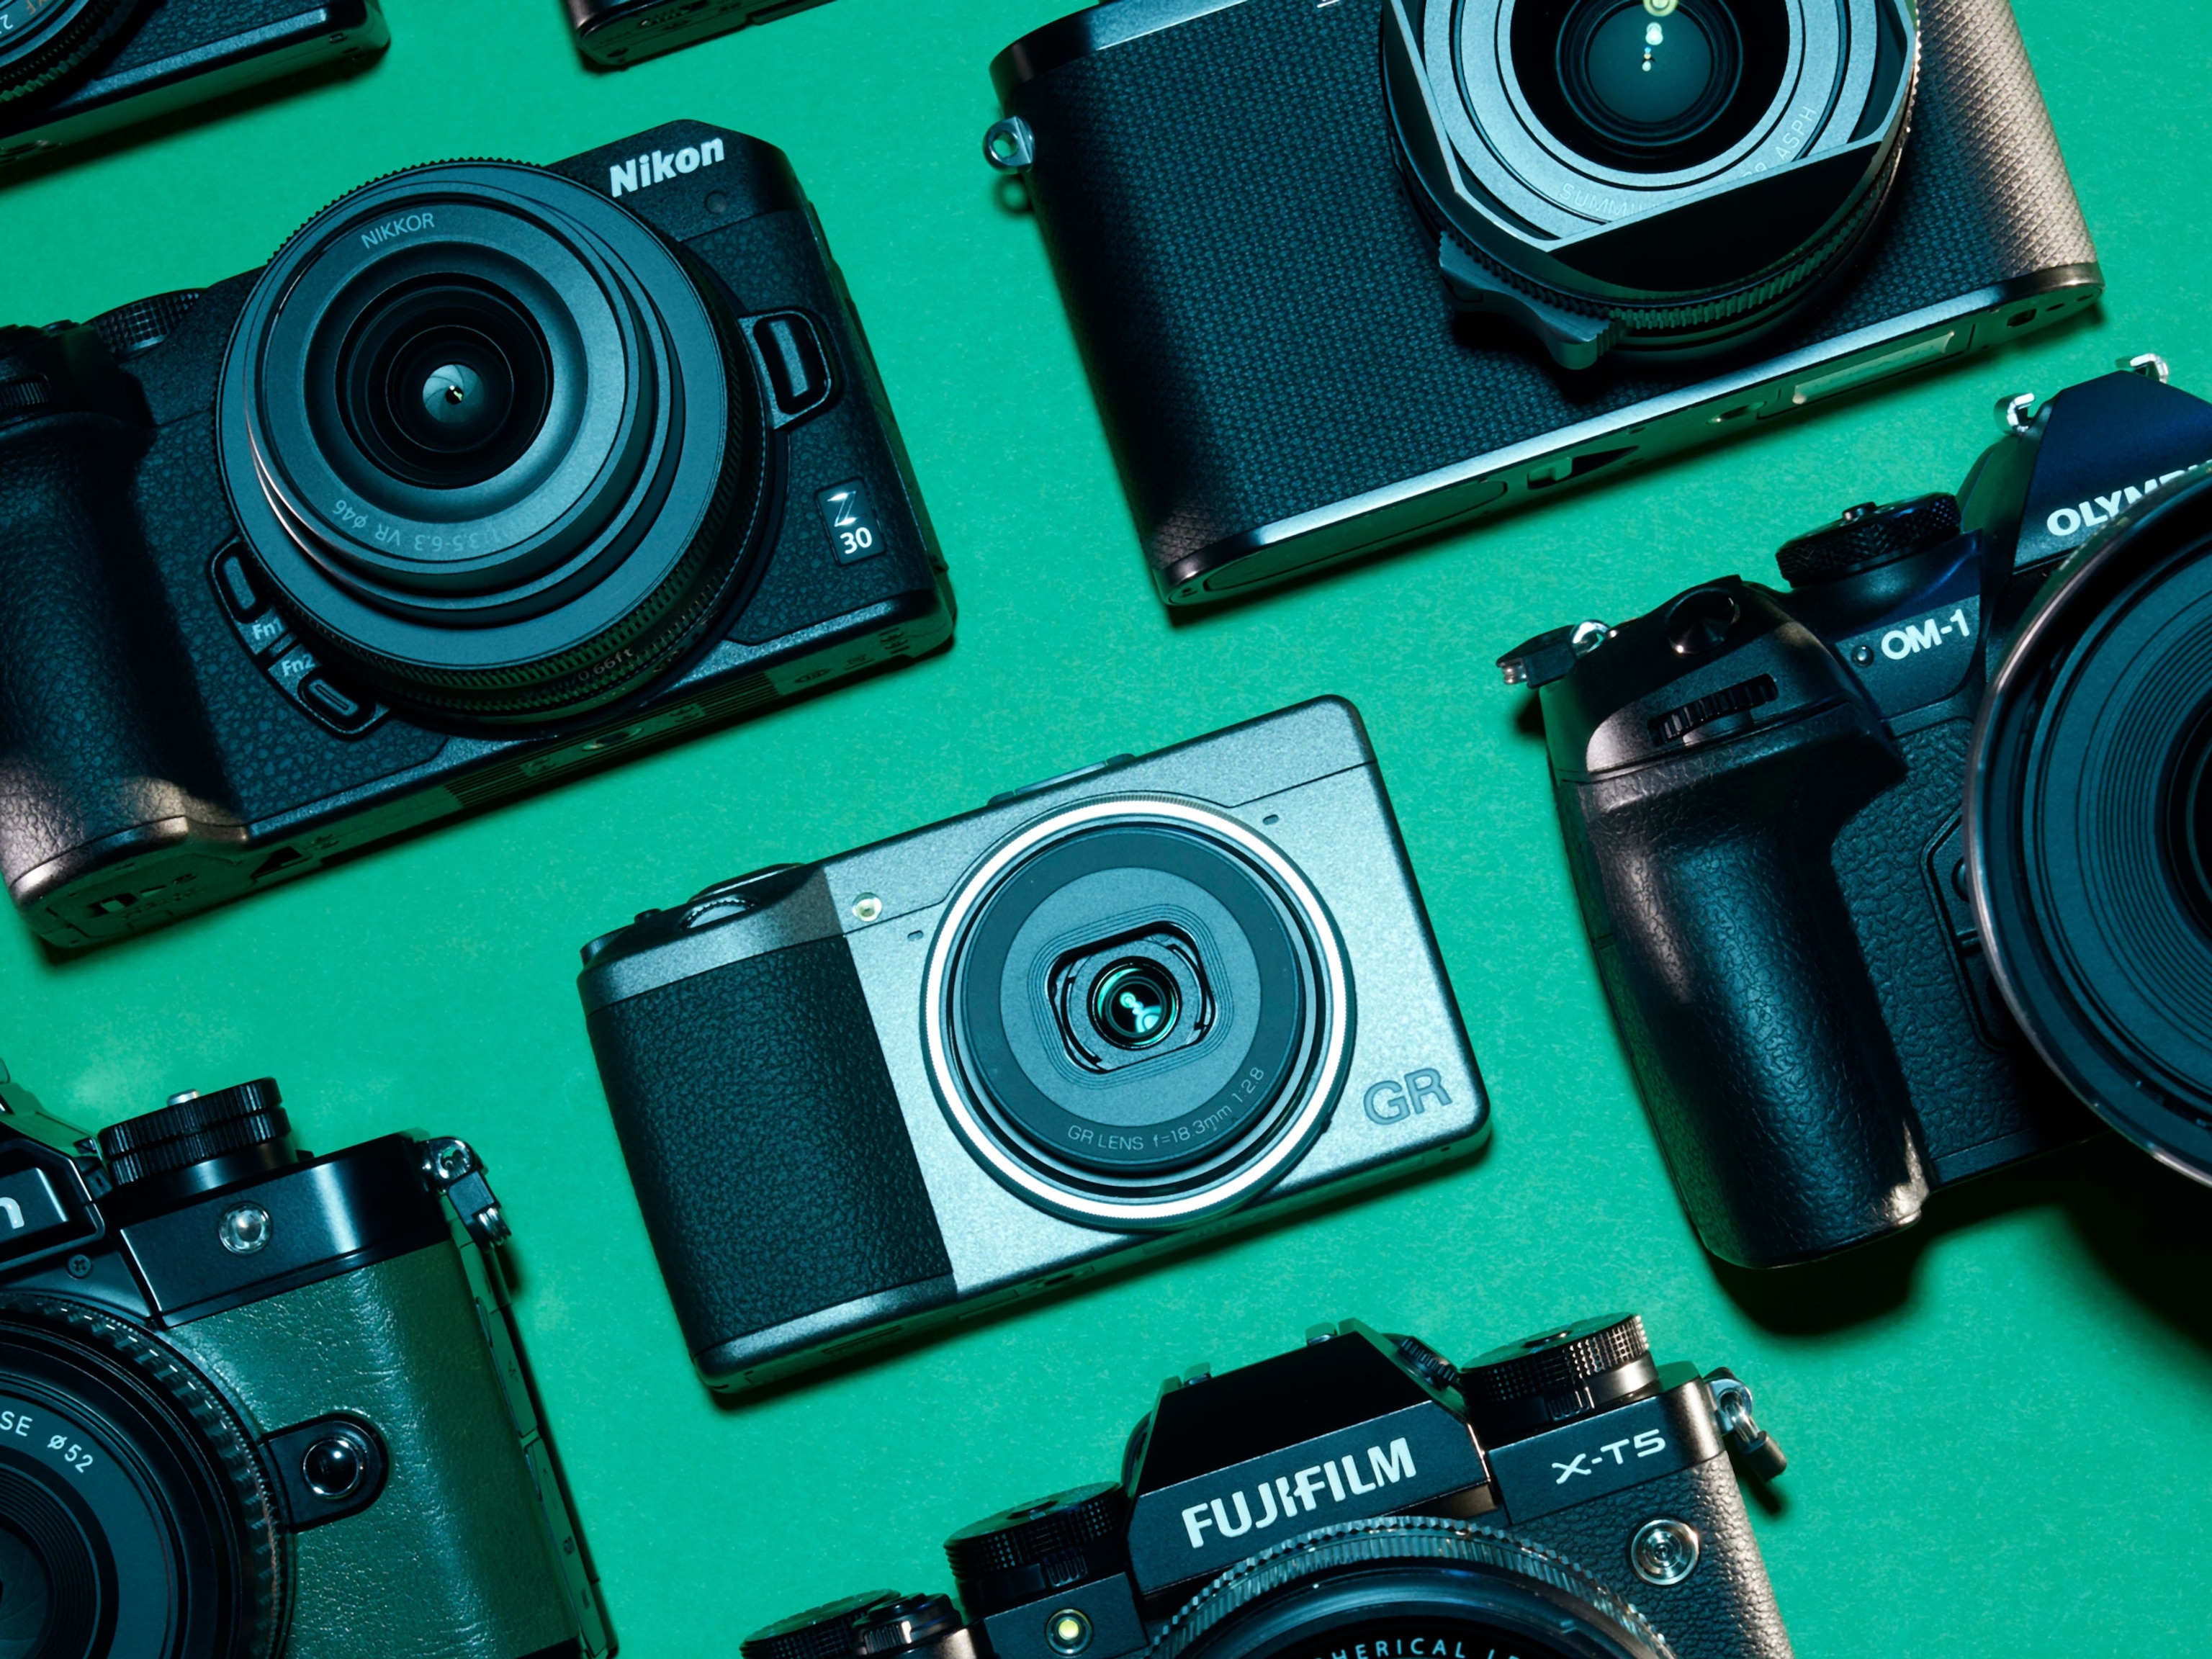
The 9 best digital cameras for travelers, according to National Geographic

How I got the shot: Jonathan Stokes on distilling Marseille's past, present and future

How I got the shot: Richard James Taylor on capturing Mekong sunset magic in Laos

A total solar eclipse is coming. Here's how to photograph it.
- Environment
- Perpetual Planet
History & Culture
- History & Culture
- History Magazine
- Mind, Body, Wonder
- Terms of Use
- Privacy Policy
- Your US State Privacy Rights
- Children's Online Privacy Policy
- Interest-Based Ads
- About Nielsen Measurement
- Do Not Sell or Share My Personal Information
- Nat Geo Home
- Attend a Live Event
- Book a Trip
- Inspire Your Kids
- Shop Nat Geo
- Visit the D.C. Museum
- Learn About Our Impact
- Support Our Mission
- Advertise With Us
- Customer Service
- Renew Subscription
- Manage Your Subscription
- Work at Nat Geo
- Sign Up for Our Newsletters
- Contribute to Protect the Planet
Copyright © 1996-2015 National Geographic Society Copyright © 2015-2024 National Geographic Partners, LLC. All rights reserved
- Start Free Trial
Please select the country/region in which you do business.
- European Union
- United Kingdom
- United States
Home » Blog » Tips for Making a Living as a Travel Photographer with Pro Laura Grier
- Photography Business Tips
- Photography Tips
Tips for Making a Living as a Travel Photographer with Pro Laura Grier

Laura Grier has spent the past 22 years working as a photojournalist on all seven continents and made a life out of exploring the world, capturing and writing about her experiences. We recently had the pleasure of sitting down with this inspiring photographer and long-time Zenfolio Ambassador to discuss her tips for how to get started in travel photography. From researching the most interesting destinations to gear to how to find paid work, Laura held nothing back.
Laura: Thank you. I’m an adventure travel photojournalist. I shoot for the National Geographic Artisan Catalog. I also started a hat company working with the same artisans I’ve been photographing for the last 20 years. Now we’re in business and partnership with each other, exporting artisan goods.
I’ve had lots of different experiences through working with National Geographic . And also I do a lot of travel tourism. I’ll shoot for hotels or cruise lines tourism boards, which are essentially the PR companies of every state and country.
Another part of my business is providing supplementary photography for different writers that I work with a lot. I also still shoot weddings and events.
How can someone who doesn’t have any experience get into travel photography?
There are a couple things I would suggest. I did an internship with National Geographic in DC when I was in college, and I think internships are a great way to begin. There’s a lot of different travel publications and blogs, such as Thrillist or Matador Network . They’re constantly looking for contributors, and a lot of their contributors are writers so they’re not really good at photography. You can always partner up with existing writers that you find and say, “Hey, I’d love to supplement your articles with my imagery.”
Another way is to build up an online portfolio and have your own blog. It is really helpful because a lot of travel photography involves writing as well. A lot of publications want you to be able to do both and be an actual photojournalist. So I think showing and self-publishing your work with a story attached is really helpful. If you already have a library of imagery on your website or blog , you can market that to tourism boards and say “Hey, I shot amazing images from Mexico (or here or there.) Would you like to use them?”
There’s a website I recommend called TravMedia , where you can create a profile as a journalist or a photographer. They also have a show every year. The biggest one is called International Media Marketplace , and it’s in January, usually in New York. That’s a great marketplace to go to because it’s all editors; all the tourism boards go there, and journalists and writers. It’s a great way to network. Basically it’s speed dating between travel media people and editors, because everyone gets their budget in January for the year.
Based on the people you meet and network with, you can either be invited on a trip with their budget, or you can just go out and shoot the locations you want to visit and submit it to them. For me, that event was a really helpful place to meet other travel media people.
I still feel like I’m learning as I go and I’ve been doing it for years. If you’re not a writer, remember that writers get invited on trips, and the tourism board doesn’t always think about photographers. My boyfriend is a travel writer and I’ve provided photography for a lot of his articles. I’ve pitched to the PR people or the tourism boards being like, “Hey, could I come as the photographer on your trip, and I could stay in my boyfriend’s room. It wouldn’t cost you an extra hotel room.” And a lot of times they reply “Oh yeah, we didn’t even think about that.”
Then they’ll bring you on a trip or hire you. A lot of times, even just partnering with a writer and supplementing them can turn into a lot of jobs, too. Even though I’ve been doing it for a long time, I’m still pitching ideas. Nat Geo hires me five or six times a year, but they’re not my main form of income. There is still a bit of a hustle involved.
Basically, the best advice is to either partner up with a writer or reach out to tourism boards and seriously, everyone should join TRAVMedia. It’s a great travel media resource.

At this point in your career, are you choosing destinations yourself or are you being sent by publications to go places?
I’m mostly choosing them. So for instance, at the show I was just talking about, I went and said “I really want to go to Japan. I really want to go to this region of the world, over to Uzbekistan.” I chose regions I either hadn’t been to or that I’m very interested in going to. And then a few regions that I’m very familiar with, like California. I spend a lot of time in California and sometimes I forget about my own backyard.
I was very specific about who I talked to and who I reached out to. It doesn’t have to be a giant net that you throw out there hoping to get something. I think everyone can be a little bit more intentional about where they want to shoot and what they want to do. It doesn’t make sense to go somewhere that you don’t really feel connected to or you’re not familiar with, unless you really want to go there.
I also feel that way about wedding photography and really any type of photography. I go to hotels that I really want to work with for a wedding, and I make meetings with their marketing director or specifically do a styled shoot there. This way I would have images from the location to blog with and promote so I could attract weddings from there.
I think we can all cast a smaller net and be very specific about where we want to be.
How do you plan and research so you know where the best places are and opportunities for photography are, especially if you’ve never been there before?
This is another reason why reaching out to the tourism board is really important. You can find a lot of the tourism boards through Instagram, or Google it; tourism board of Australia , or whatever location. There’s probably 15 different ones for different regions, but they will work for you for free, almost like a fixer, because their job is to get beautiful stories and imagery and people to come to their locations.
So if you reach out to the tourism board and say “Hey, I’m a photographer. I’d really like to do a styled shoot here. I’ve been dying to go here, and I’d like to write a story about what adventures there are to do in South Australia.” They will be more than happy to help; These are the restaurants you should go to, these are the hotels, this is where you should stay, this is our person that can help you organize this and that.
I use them as a fixer because their job is to show their location in the best light. So they go out of their way to help any journalist or photographer with any type of questions like that, at least in my experience. So even if you’re not getting hired by them to go somewhere, they are still a really good resource to help you or to answer questions. You can also research online for the best weather times to visit, and whether there are any festivals.
You can do a lot of your own research, but I like asking the tourism board because they always know what most people don’t know and can’t find online yet. They’ll know the new things that are about to open, the best spots to visit.
What about your stylized shoots in places that most people have never been before? How do you find those places?
My stylized shoots, for instance Sri Lanka; I did a workshop in Sri Lanka, I had 12 women and we wanted to go to iconic places all across Sri Lanka.
I had a Sri Lankan coordinator that helped me a little bit, but I also did a lot of the research finding insta-famous places and famous images that people have shot for National Geographic and Sri Lanka for inspiration. Then I found out how to get to those places.
Once we were there, I would talk to local people to find out what was the best time of day, and how should we do this? It was crazy because a lot of these places that were insta-famous, the Instagrammer went to the parking lot or the entrance way of a place, but never actually hiked it or explored it.
Our whole vibe was to debunk the Insta-famous places and show you what it really takes to get there and what it’s really like. I found that these places were even more beautiful and cool than Instagram let on. Usually the place that becomes famous in the image is not the coolest part about that location.
I found this one image from National Geographic of the stilt fishermen in Sri Lanka . The men stand on these stilts in the ocean and they fish. I asked locals for help with that; sometimes you’re showing a picture and asking “How do I find this place?” A lot of times an entire trip I’ve done, or a workshop has been planned around and inspired by one image I saw somewhere.

Is communicating with the locals and getting to know the culture a big part of your photography?
In the beginning when I first was traveling in my twenties and shooting pictures, I would just kind of walk around and think “Oh, that’s cool, the woman with really wrinkled skin, I want to photograph her.” I would shoot everything with a long lens and I felt almost like I was stealing images here and there of whatever I was attracted to.
I also found that style of shooting didn’t really help me later on when I was trying to write an article or to do any type of travel writing because the images didn’t really go together. They didn’t tell a story, they were just sort of disjointed images of random people that I didn’t really get permission to photograph.
In order to get images sold or published, you have to have a release and get their permission. Some of the best pictures come from when you actually spent the day with somebody and they know you’re there. They’ve invited you into their house and you’ve had a meal with their family and you’re shooting with a 50 millimeter lens, right near their face.
There’s a really easy app, it’s literally called easy release app , on your cell phone that you can download and have anybody sign a photography release; model release, location release, things like that. Whenever I’m traveling, I don’t need to have a piece of paper or pen, you can just have someone do it on your cell phone. That’s super handy.
How do you get the confidence to go up to someone that you don’t know, especially in another culture or a language that you don’t speak, to make that connection?
My work with National Geographic helped me a lot with that, because we would already have the relationships with a lot of these artisans and have the permission to go into their villages and photograph them and meet them. I’ve been able to call upon them a lot of times saying “Hey, I’m going to Thailand, I’d love to meet these kind of artisans. Could you help me find a person?” I find that you can’t just walk into a random village and start photographing; a lot of villages don’t even accept tourists.
Beside Nat Geo, there’s always local tour guides or companies that work with villages and artisans. Let’s say that you want to meet artisans that work in Guatemala; you could reach out to a clothing company or someone that’s maybe working with those artisans and ask them if they will help get you permission to visit for the day.
One example is Intrepid Travel . They have trips to go meet up with artisans and stuff all over, so you can get that experience, and have a translator with you and permission.

Who do you bring with you to assist on a trip, and what is your essential gear?
A lot of times I’m doing things by myself, which is crazy. Then I’m finding people that help me on the ground, on location. I think the most I’ve ever traveled with was three other photographers or assistants.
I have to keep it pretty minimal. Not only is it kind of just a lot to bring a lot of people in gear and I think, you know, even just my own gear, I keep very minimal. So everything I have has to be portable and carried.
I carry all my own stuff. All my photo gear is always my carry-on when I’m traveling. If it doesn’t fit in the carry-on, I’m not bringing it. I have a tiny drone, my Mavic Pro Air . I have a tiny portable Lowel softbox . I use my Canon external flashes with a little slave on top of the Canon, so I can just put the little flash in the portable softbox and create a studio, all battery powered.
I always have extra batteries and a charger for my phone. I use my cell phone and a little DJI Osmo gimbal for video. I only really use the main video in my camera if I have a tripod and I’m already sitting there doing something on the tripod. I also bring maybe three lenses, a couple camera backs, and my laptop; it all fits in my backpack.
I use a Peak Design backpack , which I think is the greatest photo backpack ever. This thing has gone through hell and back and it’s still in perfect condition and it just holds so much. It’s a smaller backpack, but it holds everything; my laptop, my lenses, this and that. Then I’ll have a side side second bag, either a roller bag or backpack, depending on where I’m going, with all my other gear in it.
So I just have a backpack and a smaller bag. And that’s all my photo gear that I bring, because there’s things like, hiking Kilimanjaro or hiking to some of the villages I’ve had to go to, where there are no power outlets. There’s no way to roll anything. You just have to carry everything.
You just have to figure it out and be portable; that’s my best advice on that.
Do you have a recommendation for a good travel tripod?
There was one that I bought years ago and I now don’t have it, but for years it would go everywhere with me. I think I got it at WPPI and it was one of the best little portable travel tripods; it was only a couple pounds.
I have a little one that folds up really small from Manfrotto , but it’s a full tripod. If I was shooting with a 7,200 lens on it, I wouldn’t want to just leave it by itself. I feel like that would be a little topheavy. But other than that it’s been pretty stable.
Cheryl: I have done quite a bit of photography while hiking, and settled on one from 3 Legged Thing . They’re out of the UK and they have some really great tripods and heads; good for video and still photography. So that’s another one to check out.
What three lenses are your go-to for travel photography?
My favorite three to go on assignment are my 50 prime, f 1.2, my 16 to 35 wide angle, and my 70 to 200. I love my 24 -70 as well; that would be my next choice. Honestly, you have to have a telephoto, you have to have a wide lens, and then you have to have a very, very fast portrait lens.
A lot of times you’re in super low light situations and you just want to have that super low depth of field. Or out in a landscape, you want a high depth of field. So I would say those are my go-to lenses, but I can’t tell you how much I use my 16 to 35. There’s something about, for all my landscape stuff, to get those epic clouds and that sort of distortion and everything. It’s just a magical lens.
What other useful gear would we find in your camera bag on a trip?
Portable chargers for everything that you can actually plug into your regular outlet, as well as USB’s for using with the computer. I think my biggest thing is having power, especially since my drone has to be flown using my cell phone? I use my cell phone as my video. I use it for social media. I also use it as my navigation and everything. So it’s constantly draining. Having a portable charging device is really, really important.
Also having the little mini LED panels that are portable that you don’t need to plug in have been really helpful, whether you’re interviewing somebody on camera or you just need an extra pop of light in a dark place. That’s been really great when you don’t want to use on camera flash for portraits and things like that.
Honestly, having a little mini steady cam/gimbal for my cell phone has been a game changer. You can shoot so much cinematic stuff with that; I use it all the time, and it’s tiny. They range from around $200 down; you can find cheaper ones. The Osmo is the one that I love.
Lastly, having my GoPro and being able to shoot underwater; it has been really easy to use. I just went canyoning the other day in Dominica Island and I wanted to bring my big camera, but you’re jumping off cliffs into the water. I don’t want to do all that with my big waterproof casing, so having a waterproof underwater camera is really helpful.
What is the most invaluable but inexpensive piece of gear you bring on a trip?
My universal adapter; I get so geeked out over having power.
The cheapest, tiny little thing that’s in my bag; zip ties, bare bands, the little carabiners. Having the little plastic sleeve for your cell phone, the waterproof thing that you can put around your neck. Those things have come in handy so many times.
Free Download: Laura’s Gear Checklist
Download Laura’s travel photography equipment checklist to make sure you’re prepared for your next photography adventure.
How do you take care of your gear while you’re traveling? You go places where there’s water, sand, and humidity.
I have to get my stuff overhauled and cleaned a lot. When I come back, I go to Canon, I’m a Canon Pro Service (CPS) member. You can ship your camera off and within two days they have it back to you. In general, I calibrate and clean my stuff once in a while cause it gets banged up.
I photographed a wedding this past year at Burning Man : Let me talk to you about destroying your photo equipment. You do everything, tape it, do all the things; it doesn’t matter. That dust gets everywhere. That experience was crazy.
I’m really good about keeping my lens caps on; and the other thing that just sounds like a no-brainer, but I always turn my camera off before switching my lenses. While it is turned on, your camera is an electromagnetic vacuum and if you take your lens off, it just sucks in everything. So you get a lot of dust spots and stuff in your camera if you don’t turn your camera off when you switch lenses.
I’m also really good about having clear filters on all my lenses to protect the glass while shooting.
Do you ever use other lens filters?
I do it all in post. I used to have filters. I think it’s such a pain to be switching filters all the time, and then you’re getting stuff trapped in them. I’d rather keep one filter on that protects the lens and then do everything in post production for polarizing and stuff like that.
Have you ever thought about creating your own line of camera straps?
That’s really funny that you should say that. We just asked our artisans if they could make guitar straps and things like that. And I guess it would be intention straps, because you can choose which one. So the answer is yes. It’s going to happen soon.
What’s your current favorite camera strap or harness?
I’m not a multi-camera carrier; I’m not a harness person. I don’t like things being strapped to me all the time, so I’m definitely a one camera, maybe I’ll have a side bag with some lenses kind of person. I like the freedom of being able to move around and through places quickly, and I don’t like having a lot of stuff on me.
I did get a new camera strap from Custom SLR , it has the two straps where it splits so it’s better on your shoulder. It’s not just all the weight on one, it separates it into two, because I get really tight neck and shoulders all the time. So there is a camera strap that can be easier on your neck and shoulders.

Do you still enjoy your trips or do they feel like work?
I always enjoy everything. There is no separation for me between work and play, and even when I’m sitting here spending time with my family in Virginia, I’m ironing hats for a hat show, and then I’m doing a photo shoot tomorrow. Everything blends all together all the time.
I use my photography all the time in my hat business and met the artisans through my photography and these artisans also are helping me with a nonprofit I’m forming. You never know what your connections are going to be, but I love what I do. I really, really love shooting photos. I think the only time where I’m not having a good time is when I’m not sleeping enough.
In general, if I plan my life well enough and I can get rest, I’m enjoying all the things I’m doing and all the travel I’m doing. I think it is important to make sure that there is rest built in. Even now with certain clients I’ve had, I make sure they fly me in a day early and I make sure that I have time to edit and downtime because it’s really important to build that in. It’s going to make you a happier, better photographer.
I finally realized that you have to have a level of self care, whether it’s yoga or some sort of massage, that needs to happen. I build that in, it’s included in the pricing of my packages because it’s part of the deal, and it’s not that much.
I do enjoy all of it. I wish I could clone myself and have more hours in a day.
Do you also travel just for fun, without your camera?
Sometimes I’m going to new, beautiful places I haven’t been, and then those images I can license to my stock agency. If I didn’t have my camera, I would want my camera. So even as a tourist, I would have my camera. I don’t consider that work, but I could never just travel without my camera, you know?
Especially if I’m going somewhere new, because I would want to document it and it could be something that could make money later on. It’s still fun, but I’m always thinking of ways I can repurpose things and multitask .
It’s also my gift that I give to a lot of my friends and family, this photography. Or I’ll [be traveling and] will want to do a styled shoot somewhere. I’m always blending it. Even with the hats, I’ll wear a hat and I’m going on a trip and of course I’m going to want to shoot pictures of me in a cool place wearing the hat for the hat company.
There’s always things that I’m thinking about when I’m on a trip, even if it’s just a vacation that ends up being kind of a blend of work. And same thing with work; when I’m on a work trip, I’ll extend it a few days and make it a vacation, too. It’s all blended together.

How can photographers learn from you in person?
We had a couple trips that were planned earlier and we had to push them just for various reasons. But in the fall there are going to be a few trips. One is to Iceland. It’s going to be a goddess session trip; a women’s trip where we’re going to be shooting Fashion Goddess portraits along the way in epic locations, similar to the Kilimanjaro series . It’s going to be an amazing journey. We’re going to be going to places in Iceland I’ve never even been to, either.
As for teaching, a lot of my trips I’m there to help you out with your own thing. In some ways, a lot of it is adventure and I’m just a tour leader. Then we set up photo shoots along the way. For the Iceland trip, I’ll facilitate setting up the photo shoots and help people with their settings. Each person’s going to be modeling and having their own pictures taken during that time. It’s a fun, empowering trip that involves photography; I won’t be teaching every day about the basics of photography, but I’ll be there to help with any type of need.
Another trip that we’ll be doing is a visit to our artisans for the hat company ; the next one is in November 2023 centered around Cusco and the Sacred Valley. This is one of our origin trips, where everybody on the trip gets a hat and you get to meet all the indigenous artisans and learn about their cultural practices. We will have permission to go into the villages; we’ll do portraits with them.
All of my trips create amazing opportunities to come back with an incredible portfolio from [the location]. It’s not hardcore where every day there’s photo instruction. We’ll usually do photo shoots during the day, then at night we can have a discussion over dinner, cover questions people have or exchange thoughts.
I’ll usually do one evening where I’m talking about editing tips and things like that. It’s very relaxed: It’s like going on an epic trip during the day where you’re taking incredible images and having an adventure, then at night having a fireside chat about photography.
Do you require participants in your trips to have a certain level of photography experience or type of equipment?
I always tell people, bring your professional camera or bring your iPhone.
We can teach on anything; I don’t want people to feel like they’re not good enough, or don’t have good enough equipment to come. I think you can do amazing imagery on any camera that you have, and I want people to be able to enjoy it no matter what level they are.
How many people do you allow each trip?
The most I ever bring on these trips are 12. It’s usually eight to 12, they’re pretty small.
I will be doing more trips to Africa next year. Our Madagascar trip will probably be in the spring of 2024.
Then there is a potential North Pole adventure; Greenland and Northern Arctic Adventure. That will be later in the year, probably wintertime. It seems counterintuitive to go in the winter, but that’s actually the best time to go. We don’t have the dates on it yet, they are TBD, but we have the actual trip planned. That will be on a cruise ship that makes different stops, and we will Zodiac boat to different places.
The upcoming ones will be fall; Guatemala, Peru, and then Iceland will be also probably October, November. Madagascar would most likely be February or March of 2024.
When we post the dates, everything will be found on lauragrier.com . You can follow me on Instagram or join the newsletter on the site. We’ll be announcing them and posting them on the trip section as soon as we have all the dates.
Are there any places still on your bucket list?
My bucket list: I swear it keeps getting longer and longer as I’ve gone places, because you hear about new places you’ve never been. Papua New Guinea is high on my list. Believe it or not, I have not been to Turkey. I’ve flown through the airport, but I haven’t spent a lot of time in Turkey, so I really, really want to head over there.
My main thing is to do an Eastern European road trip. There’s 15 countries I could visit in one road trip, and a lot of them I just don’t know that much about: Albania, Estonia, and Moldova. There’s so many different places out there.
I’m at 88 countries right now, so I’m like, “Hmm, I could probably hit a hundred if I did an Eastern European road trip,” but that isn’t the main reason why I want to do it. I think it would be so cool to just explore on a road trip, learn a lot on the ground and understand the geography because I’m driving. That’s something I’ve always wanted to do.
My jam is going to places where there’s vanishing cultures and indigenous people. I would love to see the Eagle Festival in Mongolia or Siberia and visit the tribes in Papua New Guinea.
I’m also an advanced diver, so I’m trying to hit as many reefs as I can before some of those disappear. I just went and swam with the sperm whales in Dominica Island, it was amazing. I want to go to Tonga, there’s Raja Ampat in the Indonesian islands that’s supposed to be the most spectacular reef on the planet, and it’s really hard to get to.
Find Laura’s top tips for composition and editing in part two of this blog series, and visit her Facebook , Instagram feed , and website to see what exciting things she’ll do next.
Watch our full interview with Laura Grier for more of her professional tips on travel photography.

Related Posts

Contributors

Laura Grier of Beautiful Day Photography has spent the past 22 years working as a photojournalist on all 7 continents and has made a life out of exploring the world, capturing, and writing about her experiences. She has been a platform speaker for WPPI, WIPA, Canon, Zenfolio, Step Up Women’s Network, and the Wedding MBA Conference. Presently, she is a Los Angeles and Miami based Photojournalist, Travel Writer, and owner of both Beautiful Day Photography (specializing in Destination Weddings) and Laura Grier Travel, featuring her Fine Art Prints, travel workshops, and behind-the-scenes of her jet setting around the world. Laura’s ability to combine her love of travel, adventure, weddings, and art into a chic, colorful perspective, has made her a renowned International photographer. (Author Profile)
View all posts

Cheryl is the Director of Content Strategy at Zenfolio and the Owner/Photographer at Portraits by Cheryl and Seniors by Cheryl in Raleigh, NC. Cheryl has mentored countless new photographers looking to build successful photography businesses.

Amanda is the Content Marketing Specialist at Zenfolio and the Owner/Photographer of Wild Orchard Studios photography. A BFA graduate from Maine College of Art and Design and professional Portrait, Family, and Branding photographer for nearly 20 years, she thoroughly enjoys drawing from her experiences to guide new photographers as they are starting out. Amanda lives in the wilds of Maine with her husband and two imaginative daughters. If there’s such a thing as too much dark chocolate, she hasn’t heard about it.
Create your photography website in minutes.
- Privacy Overview
- Strictly Necessary Cookies
This website uses cookies so that we can provide you with the best user experience possible. Cookie information is stored in your browser and performs functions such as recognising you when you return to our website and helping our team to understand which sections of the website you find most interesting and useful.
Strictly Necessary Cookie should be enabled at all times so that we can save your preferences for cookie settings.
If you disable this cookie, we will not be able to save your preferences. This means that every time you visit this website you will need to enable or disable cookies again.
Graeme Green | 07 November 2017
10 tips to help you take better travel photos.
From looking for 'stories' and respecting your subjects to going that extra mile for a special shot, Graeme Green reveals the 'tricks of the trade' that set great travel photographers apart
1: What's the story?

Snowshoeing in Hokkaido's Daisetsuzan NP, Japan (Graeme Green)
A great photo opens up the world to people. With adventure travel photography, you need to capture the action and take people there. Whether it’s paragliding in Nepal or snowshoeing across Japan’s frozen north, people looking at your pictures have to feel that sense of adventure.
If you’re spending time with local cultures, you need to communicate a sense of character and how people live.
Whatever it is you’re looking at, you need to figure out what the story is and who the main characters (and supporting cast) are – whether that’s people, wildlife, buildings, food… What aspects of a place do you need to capture to bring this particular story to life?
2: Give a little respect

Rang-sri Prasopturm of the Red Lahu tribe in northern Thailand (Graeme Green)
I’ve seen shocking examples around the world of tourists treating local people like any other curiosity, including a group in Bhutan crowding around a girl at a monastery who was too shy, polite or scared to push away the iPads and cameras in her face.
I sometimes take candid photos of people from a distance, using a zoom lens – an unobtrusive way to get an authentic sense of local cultures, without any posing.
More often, I’ll ask someone if they mind me taking a photo (if language is a barrier, just pointing at the camera and asking “ok?” is usually enough). People around the world are friendly and, certain cultures aside, surprisingly open to having their photo taken – even up for a bit of direction, moving into positions or reproducing an action to help you get the photo you want.
When possible, I like to spend a day or several days with a person or a group, checking they’re happy to be photographed, then just asking them to “pretend I’m not here”, so I can take authentic, natural shots as we go about our time together.
3: Be a decent human being

Ashaninka in Amazonian Peru, threatened with loss of land (Graeme Green)
It’s worth thinking about what you’re photographing from an ethical position, especially if money is changing hands in order to get a picture.
Travelling in Burma, I heard that the heavy layers of metal chains worn around the neck by women in remote tribes painfully deform the women – not so much a local tradition anymore, but a way to collect money from tourists who come to take their picture. Likewise, it’s reported that using cormorants for fishing in China actually chokes the birds – again, less a tradition, more a pose for photographers. Neither are photos I need on my memory card. The same goes for drugged tigers, de-toothed snakes or chained monkeys
Photos tell stories, good or bad, and even have an impact on the outcome of those stories, from violence and human rights to wildlife conservation. Taking pictures that continue any kind of suffering to humans, animals or the environment isn’t something I want to be involved in.
4: Show something real

Maasai warrior and ranger in Olmoti volcano, Tanzania (Graeme Green)
There’s nothing wrong with a bit of post-production to bring out the best in a photo. I see pictures online everyday, though, where photographers have obviously got carried away with Photoshop's settings, editing their pictures to the point where they bear no relation to what they saw or to scenes that are even physically possible.
The eyes are pretty clever, and detect when something doesn't add up. Photos with intensely oversaturated colours, or weirdly manipulated pictures where skies are dark and stormy but, somehow, magically, the rest of the scene is bathed in warm, colourful sunlight might get Likes on Instagram but they're likely to be rejected by editors at newspapers and magazines.
Instead, capture something real. There are plenty of incredible sights in the real world, without adding magic effects.
5: Have a little patience

Cyclist passing entrance to Ben Youssef Madrasa in Marrakech, Morocco (Graeme Green)
The difference between an ok shot and a great shot is often time. It’s hard to be patient when there’s often so much to see and do – especially when you’re on assignment, with places to be, people to meet, things to photograph.
Often, you can see a building is going to look fantastic in half an hour or later in the day, when the light hits it right. Waiting, or leaving and returning later, is better than a sub-standard photo.
At Ben Youssef Madrasa in Morocco, I found a shot of the entrance that looked pretty good as it was, with just the ornate doorway and the street outside. But the picture I wanted was someone walking or cycling by. I waited, perhaps for half an hour, taking various photos of people speeding by, until I got the one I wanted.
6: Look around

Local woman crossing fields near Colca Canyon, Peru (Graeme Green)
To take great pictures, you need to keep your eyes peeled. Often, it’s small details that others might miss or walk by, rather than the obvious main attraction, that’s the detail that brings your story to life. Sometimes, it's the spectators at an event, rather than the event itself, that make the standout photo.
When I’m on assignment, I’m always looking around. It pays to take your eye away from the viewfinder and away from the main focus. Working in Peru, my focus was the condors of Colca Canyon. Looking around, though, I spotted a woman in colourful skirts walking through the surrounding fields, a picture that gave a sense of local life and the scale of the landscape. Those kind of photos, easily missed, help make a story.
7: Think big, think small

Vodou-influenced artworks in Port-au-Prince, Haiti (Graeme Green)
A series of epic landscape photos, one after another, doesn’t really sum up a place – and nor does a collection of portraits. What a story often requires is variety, not just the big, key elements (people, landscapes, animals, buildings…) but also smaller details.
Piles of colourful fruit or shining fish in local markets can give a real flavour of a place. Road signs or shop signs often show the local sense of humour. I like to keep an eye out for artworks, statues, murals and other details that add an extra dimension and say something about a place.
8: Go the distance

Sunset on the remote Ton Le Sap Lake, Cambodia (Graeme Green)
The ‘glamourous’ life of a travel photographer often means getting out of bed (if there is a bed) when it’s still dark. I’ve completed assignments while wiped out by illness. There have been tough journeys on jarring dirt tracks, long trudges through thick snow or desert heat, and endless waits in dawn’s early light with nothing happening. You need to deal with disappointment, the unexpected, the impossible-to-predict and the failed-to-appear.
Early starts, sleepless nights, long days blurring into each other, dodgy vehicles and difficult journeys are all part of life as a travel photographer. There might be times when you don’t feel like taking photos, but missed opportunities always come back to haunt you. Few people know regret like a photographer who didn’t get their shot.
9: Be original

Burmese girl applying Thanakha in motorbike wing mirror (Graeme Green)
With billions of images online and in newspapers, magazines and books, it takes something original to stand out and make people look.
The world probably doesn’t need another photo of the Holi paint festival or sunrise over Angkor Wat. I prefer to seek out subjects that I haven’t already seen elsewhere 1,000 times. If you are going to photograph a well-covered subject, you need to find your own fresh take.
10: Seek out interesting places and situations

Silver miner walking through Mexico's Copper Canyon (Graeme Green)
One of the great pleasures of travel photography is the travel itself. It’s a job that can take you around the world, meeting people you’d rarely meet in any other walk of life, witnessing scenes and having adventures that are unforgettable.
It pays to go to unfamiliar and remote places, even if that means difficult journeys. The extra effort is usually rewarded with fascinating cultures, wildlife, buildings and other new sights. Keep an ear out for local festivals or find out about local practices, from religion to art, farming to celebrations, all of which can make for original pictures.
Exploring and finding something unique that you’re interested in - as a person, a traveller and a photographer - is the big motivation for many travel photographers.
Graeme Green is an award-winning travel photographer and journalist, whose work has appeared in The Sunday Times, Wanderlust, National Geographic, The Guardian and others. For more on Graeme's photography, see graeme-green.com .
Related Articles
Looking for inspiration.
Join our newsletter
Get the very best of Wanderlust by signing up to our newsletters, full of travel inspiration, fun quizzes, exciting competitions and exclusive offers.
How to Become a Travel Photographer – the Blueprint
If you want to learn how to become a travel photographer , you in the right place.
It was a beautiful day in Montreal. I was on a regular afternoon jog listening to a popular photography podcast. The topic of the episode was travel photography. The guests of the show were two professional photographers with the years of experience.

At the end of the podcast during the listeners’ question and answer session, the first question immediately grabbed my attention. Why? Because I’ve been asked the same, or nearly identical, question many times before.
So what’s the question?
“I want to start traveling more specifically for photography, but I do not know where to start. Do you have any idea where I should go or how to plan my trip? Should I edit photos while I am there or should I wait until I return home? What cameras, lenses and other equipment do I take? Help! I am suffering from analysis paralysis“.
Ok, so perhaps the question has multiple parts but it still rang true to my experience. I was curious to hear the answers because I knew it was a loaded question and definitely not an easy one.
The photographers’ answers surprised me.
Here are some of them:
“South Asia is a good place to go.”“Do not go to Bangkok.”“If you do not know, choose a place randomly.”“Europe, maybe.”
Instead of addressing the complex subject of travel photography, the photographers only concentrated on a single aspect: the location. Their answers disappointed me because I do not consider the location to be an essential part of travel photography. You do not need to travel to a remote and exotic destination to enjoy travel photography.
A simple 4-step process on how to become a travel photographer
I decided to put together a blueprint or guide to help people who want to get involved in travel photography but do not know where to start. I used a similar approach when I first started and it has proven successful over the years.
First and foremost, please do not start your travel photography journey with a trip to South Asia. It will be a waste of time and money, not to mention it will be full of disappointments.
Start smaller and grow from there.

Step 1: Testing Ground
Find a local park in your neighborhood, preferably within walking distance or a short drive. Make this your testing ground for your equipment and photography routines.
Any urban park has all the essential elements of travel photography: landscapes, cityscapes, people, etc….
Plan your visits during different times of the day. Learn how to deal with the harsh midday light, overcast, rain, sunsets and sunrises. In doing so, you will figure out what minimum equipment you need to cover different scenarios of travel photography.
For example, I realized pretty early that a minimalistic approach to photography suits me the best and all I need is a camera with a walk around lens. For years, I used a combination of a Canon 60D + Sigma 17-70mm and now I have a similar setup of a Sony a6000 + Sony 16-70mm.
Admittedly, I have more equipment in my possession including a wide angle lens (Sony 10-18mm), tripod, filters and remote triggers. But, if necessary, I can go on an extensive trip and only take a camera and one lens with me.
I am lucky enough to have a beautiful park in only short walking distance from where I live. Even now, when I have a new piece of equipment, I always test it there. When I switched from a Canon to a Sony, it was a steep learning curve and the local park was the ideal place for learning and testing my new equipment.
Now that it is winter, I ordered new photo gloves and, when I receive them, I will go to the park for a few hours to see if I like them or not.

Step 2: Mini Simulation
The next step is to go on a day-long trip at a location within a 1-2-hour driving range. In my case, I know all the national and provincial parks around Montreal and most of them make perfect destinations for short photo trips.
This trip will take you away from the comfort of your home for the entire day and will allow you to start micro planning and testing your skills.
Make sure you plan in advance what spot to visit at sunset or sunrise. It is not always easy to do both during a short trip, so choose only one and make sure you visit the best spot. Use Google search, Google maps, and 500px to pinpoint the perfect location for your sunrise or sunset shoot.
Also, you have to decide how many camera batteries to bring with you, if you need spare memory cards, and so on. If your trip involves challenging hiking, it also might be a good idea to leave the tripod at home.
These trips are designed for photographers to make mistakes and to learn from them. With every new trip, you will learn more about planning, your equipment, and your habits.
When you comfortable with the short trips, it is time to graduate to multi-day trips.

Step 3: Multi-Day Driving Trips
This is how real travel photography started for me.
Montreal is located within a 5-7 hour driving distance from New York, Boston and Toronto with Niagara Falls. My trips dedicated exclusively to photography started with 2-3 day driving trips to those destinations.
Multi-days trips require much more planning where you should always do your research first and then plan all your sunrises, sunsets and everything in between.
Another new challenge you have to face on these trips is to figure out how to deal with editing and backups.
I am not giving you a specific scenario to follow because, based on my experience, travel routines are always changing and evolving.
For example, in the beginning, I always did some basic edits of my new photos by the end of every day of the trip. Now, I only concentrate on my shooting and I start the editing process when I am back at home. But, I always have the option to edit photos simply by connecting my tablet to camera using Wi-Fi, grabbing a few photos, editing them with Snapseed and posting them to social media.
At the same time, my backup routine has not changed a lot. By the end of the day, I backup all new photos to two external hard drives and always make sure to keep them in two separate places. I have one with me at all times in my bag and the second I keep in the safe in the hotel or in the trunk of my car.
Also, I do not rush to format my memory cards. I keep photos on the cards until I run out of space on all four of them and only then do I start formatting.
The beauty of driving trips is that you do not have to be too selective about the equipment you bring with you. You can load your trunk with everything you own and later figure out what pieces are essential for your style of photography.

Step 4: Hacking Family Vacation
The next step is to hack your family vacation.
You have to be careful with this one so as to ensure you do not agitate your loved ones or ruin the vacation for them.
A family trip can serve as the perfect opportunity for testing your air travel routines. It requires additional research to figure out carry on allowances on every leg of your trip and to decide what equipment to bring.
After I brought all my equipment on one of my first family trips to Cuba and hardly used any of it, I started to pack differently by bringing only the necessities along. Also, after I switched from DSLR to Mirrorless, I can pack everything (almost everything) in my carry on without worrying about lost luggage.
So how do you start planning?
Begin by planning your vacation as you normally would and concentrate on family activities first. When these are done and everybody is happy, you can enhance your trip with photography adventures.
During the vacation, the only time when you can be 100% dedicated to your photography is when everybody is sleeping. On each day of vacation you will have a few hours between sunrise and breakfast to concentrate on your photography. And, not only will your family be in bed at 5 am, about 99.9% of tourists will be in their beds as well. In fact, you would be surprised how beautiful Venice looks at sunrise – it is completely different and calm without the chaos of crowds.

Last year, my wife and I went to Niagara Falls in the middle of summer on a weekend getaway. It was so crowded during the day that I had no chance of using a tripod. It was even difficult to take any pictures without having people in the frame. But, when I went to the Falls the next morning just before sunrise, I had the entire place to myself. The only person I met there was another photographer who had the same idea.
The goal of successfully combining a family vacation with photography and to be able to enjoy them both is to plan every single sunrise in advance. The rest of the days will be dedicated to family activities and are much more difficult to plan. You can enjoy your family while trying to be as opportunistic as possible with your photography.
After you have completed dozens of one-day local trips, half a dozen of short driving trips and at least a couple of family vacations, you will be ready to go on extensive trips dedicated exclusively to photography. You will acquire the necessary skills and establish personal routines that will help you be comfortable, confident and safe during your travels.
Learning any new complex process requires breaking it down into smaller digestible chunks that you can then start to tackle one at a time. Travel photography is no different. You cannot learn everything in one shot. By starting small, you will gradually accumulate knowledge, experience and establish your unique routines.
I hope my simple blueprint will help you fulfill your dream of becoming a travel photographer and accelerate the learning process.

by Viktor Elizarov
19 thoughts on “how to become a travel photographer – the blueprint”.
Great advice, my friend!
thanks Ugo, I am glad you liked it
Thanks Viktor for very interesting and useful tips!
you are very welcome
Great tips! I love the idea of waiting to edit until back home and using the tablet and apps for a few social media shots. However, it appears that you still carry a laptop for using the back up external drives, right? I’d love to travel without the laptop but using the backup drives is one reason I take it. I’ve not found another option. ‘ideas?
until now I always travel with a laptop but now I am testing travel workflow where I only take a tablet with me. I will let you know how it goes.
Can you back up onto an iPad?
you need to backup on multiple locations. Plus, there is not enough room on iPad when you shoot RAW.
‘look forward to hearing about it! I looked up the wifi drive you show in your bag and comments (on Amazon) say it’s slow and may not take every image off the card; are you finding that to be true? I suppose if you have enough cards, it’s not a factor. So, you take 2 of these drives? The travel workflow is a continual source of study!
it is not fast but so far no missing files, still testing
Thanks, very interesting, I will tray to follow you advice
Great advice! I especially liked the one about family vacations. The only problem being that you need just as much sleep as the others, so when you get up that early you’ll be tired during the day.
photographers do not need any sleep 🙂
Thanks Viktor. I recently added a monopod to my camera bag, easier to carry than the tripod. It enabled me to shoot some panoramas at sunset while on vacations in Spain. Not as powerfull as the tripod but sometimes a good compromise !
I absolutely agree, monopod is better than nothing. I wish I could transform my tripod into monopod.
This was a great article. I had come to a very similar conclusion about starting close to home and working up to bigger trips. We do travel extensively but I find that I need significant practice in order to efficiently interject serious photography on these trips. I set the goal for 2016 to travel somewhere specifically for photographing every month. This will force me to be creative about finding parks and events closer to home. For instance I found a festival this weekend for eagle watching about an hour from home(Milwaukee, WI). I have a new camera and can’t wait to head out tomorrow.
wow, eagle watching festival. It should be exciting. Good luck.
Great tips. I use a bean bag a lot of time because can rest on the front of my control panel on my mobility scooter .
OK, thanks for teaching us the basic steps of how to capture good images. But now that I have the images, now-what do I need to do with them?
Leave a Comment Cancel reply
Save my name, email, and website in this browser for the next time I comment.
Privacy Policy
Photography Basics
Camera Settings Guide ISO in Photography F-Stop Chart Photography Cheat Sheets Shutter Speed Chart ISO Chart Histogram in Photography Camera Settings for Sunset Hyperfocal Distance Canon STM vs USM Lens
Lightroom Tutorials Lightroom Histogram Lightroom Before and After Lightroom Workflow Tips Lightroom Smart Previews Where Lightroom Presets Stored Overexposed Photos in Lightroom How to Export Lightroom Presets Free Lightroom Presets Free RAW Photos for Editing
Composition
Leading Lines in Photography Golden Ratio in Photography Elements of Composition Rule of Thirds in Photography 12 Rules of Composition Foreground, Middleground and Background Symmetry in Photography Perspective in Photography Vantage Points in Photography
Photography Gear
Best Camera Brands Vintage Looking Digital Camera Parts of a Camera How to Choose a Camera Lens Holy Trinity of Lenses Sony vs Fujifilm Fujifilm X-T5 Review Best Fuji Lenses Best External Hard Drives for Photographers
PhotoTraces.com is a participant in the Amazon Services LLC Associates Program, an affiliate advertising program designed to provide a means for sites to earn advertising fees by advertising and linking to Amazon.com
© 2014 - 2024 - PhotoTraces.com
- Tìm kiếm thành viên Tìm kiếm thành viên và những người bạn đang theo dõi
- Tìm kiếm câu trả lời Tìm kiếm câu trả lời cho câu hỏi của bạn
- Giáo dục công dân
- Tiếng anh thí điểm
- Tự nhiên và xã hội
- Lịch sử và Địa lý
- Khoa học tự nhiên
- Hoạt động trải nghiệm, hướng nghiệp
- Hoạt động trải nghiệm sáng tạo
Chủ đề / Chương
FINAL TEST 1
- trắc nghiệm
- bài tập sgk

- Cù Thị Bích Ngọc
1. I have always wanted to be a travel..................and take pictures of exotic places. (photograph).
2. None of us were sure which.............to go in, so we got out the map. (direct)
3.Since I was 5 years ago, Delhi has changed so much that it's practically............... (recognize)
4. Once we got to the station, I quickly looked through the...............to see when the next train was. (time)

- ✿✿❑ĐạT̐®ŋɢย❐✿✿
1.I’ve always wanted to be a travel photographer and take pictures of exotic places.
2.None of us were sure which direction to go in, so we got out the map.
3.Since I was here five years ago. Delhi has changed so much that it’s practically unrecognizable .
4.Once we got to the station, I quickly looked through the timetable to see when the next train was.

- Vũ Minh Tuấn
1. I have always wanted to be a travel....... photographer ...........and take pictures of exotic places. (photograph).
2. None of us were sure which...... direction .......to go in, so we got out the map. (direct)
3.Since I was 5 years ago, Delhi has changed so much that it's practically...... unrecognizable ......... (recognize)
4. Once we got to the station, I quickly looked through the...... timetable .........to see when the next train was. (time)
Chúc bạn học tốt!

- Titania Angela
1.I’ve always wanted to be a travel photographe r and take pictures of exotic places.

- Việt Anh Đậu
I. Chia đúng thì
1. There are many ways ( lead) to Rome.
2.I am reading this novel. By the time you come bacj fron work I ( finish)
3. When we got home. Dinner ( prepare), so we had a drink first.
4. Before Nam leaves New York, he ( have) several talks.
5. We had just got out of car when it ( begin) to set fire.
6. He was told that ( knock) out in the first round.
7. Since the appearance of karaoke machines, they widely ( use).
8. In 1996, my brother ( study) at Havard University.
9. Are you learning your lessons? - No, I ( finish) it
10. Lan ( appear) on TV forba long time.
11. We ( wait) for her half an hour before she came.
12. We saw the criminal ( arrest) by the police this morning.
13. In one year's time, I ( work) in this school for 15 years.
14. They( finish) this course by next june.
15. After I ( have) luch, I looked for my bag.
16. The man got out of the car, ( walk) round to the back and opened the boot.
17. For several years his ambition ( be) to he a pilot.
18.He ( go) into the restaurant when the writer was having dinner.
19. Before you asked me the letter ( write).
20. I shall be glad when he ( go)
21. When he returned home, he found the door ( unlock).
22. I could not cut the grass because the machine ( break) down a few days previously
Tối mình học rồi các bạn ạ. GIÚP MÌNH VỚI

- Đinh Quang Minh
1,combine each pair of sentences , using so that ; in order (not) to ; so as (not) to
1, He always drives carefully. He doesn't want to cause accidents. 2, Please arrive early. We want to be able to start the meeting on time 3, I went to the colege . I wanted to see Professor Taylor. 4 ,she wore warm clothes , She didn't want to get cold . 5, I clothes window . I didn't want to waste electricity. 5, We turned out the lights. We didn't want waste electricity

- pham tien hung

- Khánh huyền Nguyễn
Put the verbs in brackets into the past simple or the present perfect
Hi! How are you? I'm having such a great time here in Singapore. The city is so clean and the people are very kind and helful!
We(1).........(be) here for three days now and we(2)........(do) something different each day. On Monday, we(3)........(go) to the shops in Singapore's Chinatown. I(4).......(buy) souvenirs for my friends and some CDs for me. On Tuesday, we(5).........(go)on a riverboat tour on the Singapor River. It(6).......( be) fantastic! Yesterday, we (7).....( visit) Singapore Botanic Gardens. We (8)..........(see) many beautiful,exotic flower and plants
There are still a couple of things we(9) .........( not/ do) yet. We (10).........(not/visit) the Jurong Bird Park yet and we(11)......(not/go) to the Singapore Zoo. We're going there tomorrow. I can't wait to see the white Bengal tiger!
Singapore is a beautiful city! I(12)........ ( already/take) so many lovely photographys and I can't wait for you see them when I get back
See you next week!
Lots of love

Complete the second sentence so that it has similar meaning to the first sentence
1.Tom started recycling rubbish two year ago.
Tom has ......................................................
2.We have donated books and clothes for ten years.
We began ......................................................
3.The last time we saw her was on Christmas Day.
We haven't .......................................................
4.I haven't eaten this kind of food here.
This is .......................................................
5.It started raining an hour ago.
It has...........................................................
6.I have studied English for 5 years.
I began.....................................................
7.I last saw him when I was a student.
I haven't...................................................
8.I haven't talked to him for 8 days.
The last.........................................................
1) We often (go).......................................to the library three times aweek. 2) I (buy)..........................................this book yesterday. 3) Lan anWd Nga (live).............................here since they were young. 4) You ought to (study)...................................harder. 5) She usually (finish)...................................her work at 5:30. 6) I (drink)................................a coffee with my friends last saturday. 7) The workers (build) ...................................this school for ten years. 8) You must (eat)...................................more fruit and vegetable. 9) The sun always …………………(rise) in the East. 10) Nam (visit) …………………..his aunt five years ago. 11) The students (study)_________ lesson seven for two hours. 12) I need (buy) __________some notebooks. 13) Hoa always (do)...................................the homework after school. 14) My mother (teach)................................me how to cook when I was 14. 15) He (participate) ...................................in social work for 2 years. 16) Would you like (listen)...................................to music? 17) The sea (cover)...................................two-thirds of the world. 18) They (start)................................playing soccer an hour ago. 19) She (learn) ...................................this guitar since she was 12. 20) We are looking forward to (spend)...................................our free time relaxing on the beach.

- ĐĂNG NGUYỄN HỮU HẢI
Write the word
1 the ship radioed to say that it was in .......
2 Smoking should be .......in public places
3 living conditions have been i........ in many parts of the world
4 An organization which collect money to help those in need incalled a c.......
5 the thing that makes you cool in summer (and warm in winter) is an a..........
6 when women and girls go on holiday on the beaches they always bring some beautiful s....... with them
7 when some one has an accident you should call an a....... immediately
8 Sally is very s....... she cannot put up with being looked at
9 Harry is actually k....... on classical music
10 it is a good idea to u......... important parts of the lessons
Khoá học trên OLM (olm.vn)
- Toán lớp 7 (Kết nối tri thức với cuộc sống)
- Toán lớp 7 (Cánh Diều)
- Toán lớp 7 (Chân trời sáng tạo)
- Ngữ văn lớp 7 (Kết nối tri thức với cuộc sống)
- Ngữ văn lớp 7 (Cánh Diều)
- Ngữ văn lớp 7 (Chân trời sáng tạo)
- Tiếng Anh lớp 7 (i-Learn Smart World)
- Tiếng Anh lớp 7 (Global Success)
- Khoa học tự nhiên lớp 7 (Kết nối tri thức với cuộc sống)
- Khoa học tự nhiên lớp 7 (Cánh diều)
- Khoa học tự nhiên lớp 7 (Chân trời sáng tạo)
- Lịch sử và địa lý lớp 7 (Kết nối tri thức với cuộc sống)
- Lịch sử và địa lý lớp 7 (Cánh diều)
- Lịch sử và địa lý lớp 7 (Chân trời sáng tạo)
- Giáo dục công dân lớp 7 (Kết nối tri thức với cuộc sống)
- Giáo dục công dân lớp 7 (Cánh diều)
- Giáo dục công dân lớp 7 (Chân trời sáng tạo)
Travel Photography Advice From 7 Pro Travel Photographers
Table of Contents
Here are 7 pieces of travel photography advice from people who have achieved their dream.
Here at WTP, we like to show people how they can lose the 9-5 and achieve their dream of becoming location independent through travel photography.
We are always saying how it’s not impossible to find travel photography jobs ; it’s hard work, but not impossible.
Sometimes you need a little inspiration to motivate yourself to push through the hard times, the hard work and the downright terrifying thought of putting yourself and your work out there in front of the whole world to see.
Well, we contacted 7 of the most inspiring photographers and video makers we can think of and asked them what their one piece of travel photography advice would be for anyone brave enough to go after what they really want out of life.
These were their answers.
Thomas Heaton
Thomas Heaton is without a doubt one of the most successful landscape photographers on Youtube . His passion and methodical approach are infectious, and his videos are both inspiring and educational in equal measures.
Here’s what he said:
“Look closer. The world’s most magnificent vistas are awe-inspiring, but they can also distract from hidden beauty.”
“After you have captured the ‘Hero’ shot, take time to observe and look closer at the landscape around you as it is these hidden gems that often tell the real story of an Instagram location and what it is like to be there and experience it.”
View this post on Instagram A post shared by Thomas Heaton (@heatonthomas)
You can also find Thomas on Twitter , Facebook & his website .
Fel and Wes (Feather and the Wind)
Fel and Wes are a couple from Canada who travel the world making travel videos for both their own Youtube channel and as freelance videographers/video editors.
“Finished is better than perfect. Whether it’s a photo or video, you’re not giving yourself a chance to make progress until you complete the edit and hit that publish button.”
“A lot of the time we get in our own way because we’re afraid to fail, but once you really strive to improve with every single upload, you’re bound to be successful. And even the most expensive setup can’t help you get there until you know how to use it.”
Don’t forget to check out their Twitter , Facebook & blog .
Jeven Dovey
Jeven is another travelling filmmaker. He travels with his wife Rachel Dovey creating cinematic masterpieces and showing you how to do the same through his Youtube channel.
His travel photography advice is:
One of the biggest things I’ve learned through traveling the world and building a following on social media is to put the camera down. As travel photographers, we always get so caught up with trying to always get the best photo possible.”
“However, I’ve found that you need to experience a culture and be present to genuinely capture the moment. Once you’ve been able to step away from the camera you’ll be able to see a place with new eyes and from this, you’ll be able to take some amazing photos.”
View this post on Instagram A post shared by Jeven Dovey (@jevendovey)
Jeven’s Twitter & website .
Andy Mumford
Andy is a Fujifilm brand ambassador and a passionate teacher of photography. He runs various workshops in countries around the globe as well as teaching through his channel.
This is what Andy told us:
“Whenever we travel to a new destination to take images it’s impossible to arrive without some form of expectation of what kind of shots we’ll get there. Sometimes you may have a particular shot in mind, or a particular feel for what you want to capture, but it’s important to not let this influence the way that you see a new place .”
“It’s easy to be so busy looking for the image that we’d planned to take before arriving there that we miss other, maybe even better, opportunities for images that happen right in front of us. While it is important to plan, it has to be balanced with an awareness that arriving in a place with strong pre-conceptions can actually influence the way we see it and prevent us from seeing all the different possibilities and opportunities for photography that exist outside of the expectations we had before we got there.”
“Over the years I’ve been travelling I’ve come to the conclusion that my favourite images from a trip are never the ones that I expected or planned to shoot before going there.”
For more info about Andy and his workshops visit his website or Facebook Page .
Chris Eyre-Walker
Born in Belgium, but often based in Sydney when he’s not travelling, Chris is a travel and adventure photographer with a passion for the outdoors. He is an Olympus ambassador and a finalist of the Banff Mountain Film Festival.
“My main advice would be to not forget to enjoy the trip too. I know it’s not exactly a photography tip, but I’ve gone on trips where entire chunks are just a very blurred memory because I was constantly holding a camera to my face.”
“Sometimes it’s also good to put the camera down, sit back, relax and enjoy the unique place you’ve travelled to and create a real memory.”
View this post on Instagram A post shared by Chris Eyre-Walker (@chriseyrewalker)
Say hi to him from us on Twitter , Facebook & his website .
Nigel Danson
Nigel is a landscape photographer from the UK who has a passion for the outdoors and in his own words “aims is to inspire with landscape photography tips and techniques”. Watch one of his down-to-earth tutorials that are bound to inspire you below.
His advice is directed at people who are looking to turn photography into a way of making a living:
“The most important thing in making a living from photography is to develop a style and stick to it, then work hard to promote your beliefs. The harder you work the more chance of success you have.”
View this post on Instagram A post shared by Nigel Danson (@nigel.danson)
You can also find him on Facebook , Twitter and of course his website .
Mitchell Kanashkevich
Mitchell is a professional travel/documentary photographer and also a Panasonic Lumix Ambassador. He has a unique style and a great ability to document people’s daily lives, which you can get a taste of by scrolling through his Instagram page.
His advice is:
“One of the most important qualities for a travel/documentary photographer is an insatiable sense of curiosity.”
“Show that you’re genuinely interested in people and they will let you into their lives. Your camera and your sense of curiosity become your passport to countless worlds.”
View this post on Instagram A post shared by Mitchell Kanashkevich (@mitchellkphotos)
Also, check out his Facebook page and website .
There you have it, travel photography advice from 7 pros
The overall tone is that becoming a successful travel photographer isn’t always done behind the camera. It’s about keeping an opening mind, taking a step back sometimes and seeing things that you would have otherwise missed.
Taking the first step, working hard and not being afraid to put yourself out there are all qualities you should aim to have if you want to achieve the dream of becoming location independent through travel photography. If you want to know more about becoming a professional travel photographer, check out this post about a typical travel photographer’s salary .
It’s within everyone, it’s within you, you just have to find it.

I’m a professional travel photographer, and I’ve been living the digital nomad lifestyle since 2016. I make money by working on client assignments, selling stock photography and helping other photographers by sharing my experiences on this website. I move around at my own pace (I hate fast-paced travel) and like to spend a few months getting to know each place I base myself in.
My writing and photos have been featured on industry leading websites such as Digital Photography School , Atlas Obscura and the world’s leading underwater photography resource The Underwater Photography Guide . I authored an eBook called “ Breaking Into Travel Photography: The complete guide to carving out a career in travel photography ” that has been published on Amazon. My stock images have also appeared in ads promoting destinations and companies that sometimes has been a surprise, even to me. But I guess that’s the nature of stock photography, you never know who will license them!
I’m always happy to connect, so feel free to reach out!

- 12 Travel Photography Tips from a Professional Travel Photographer
- Career Tips
- By Lisa Michele Burns
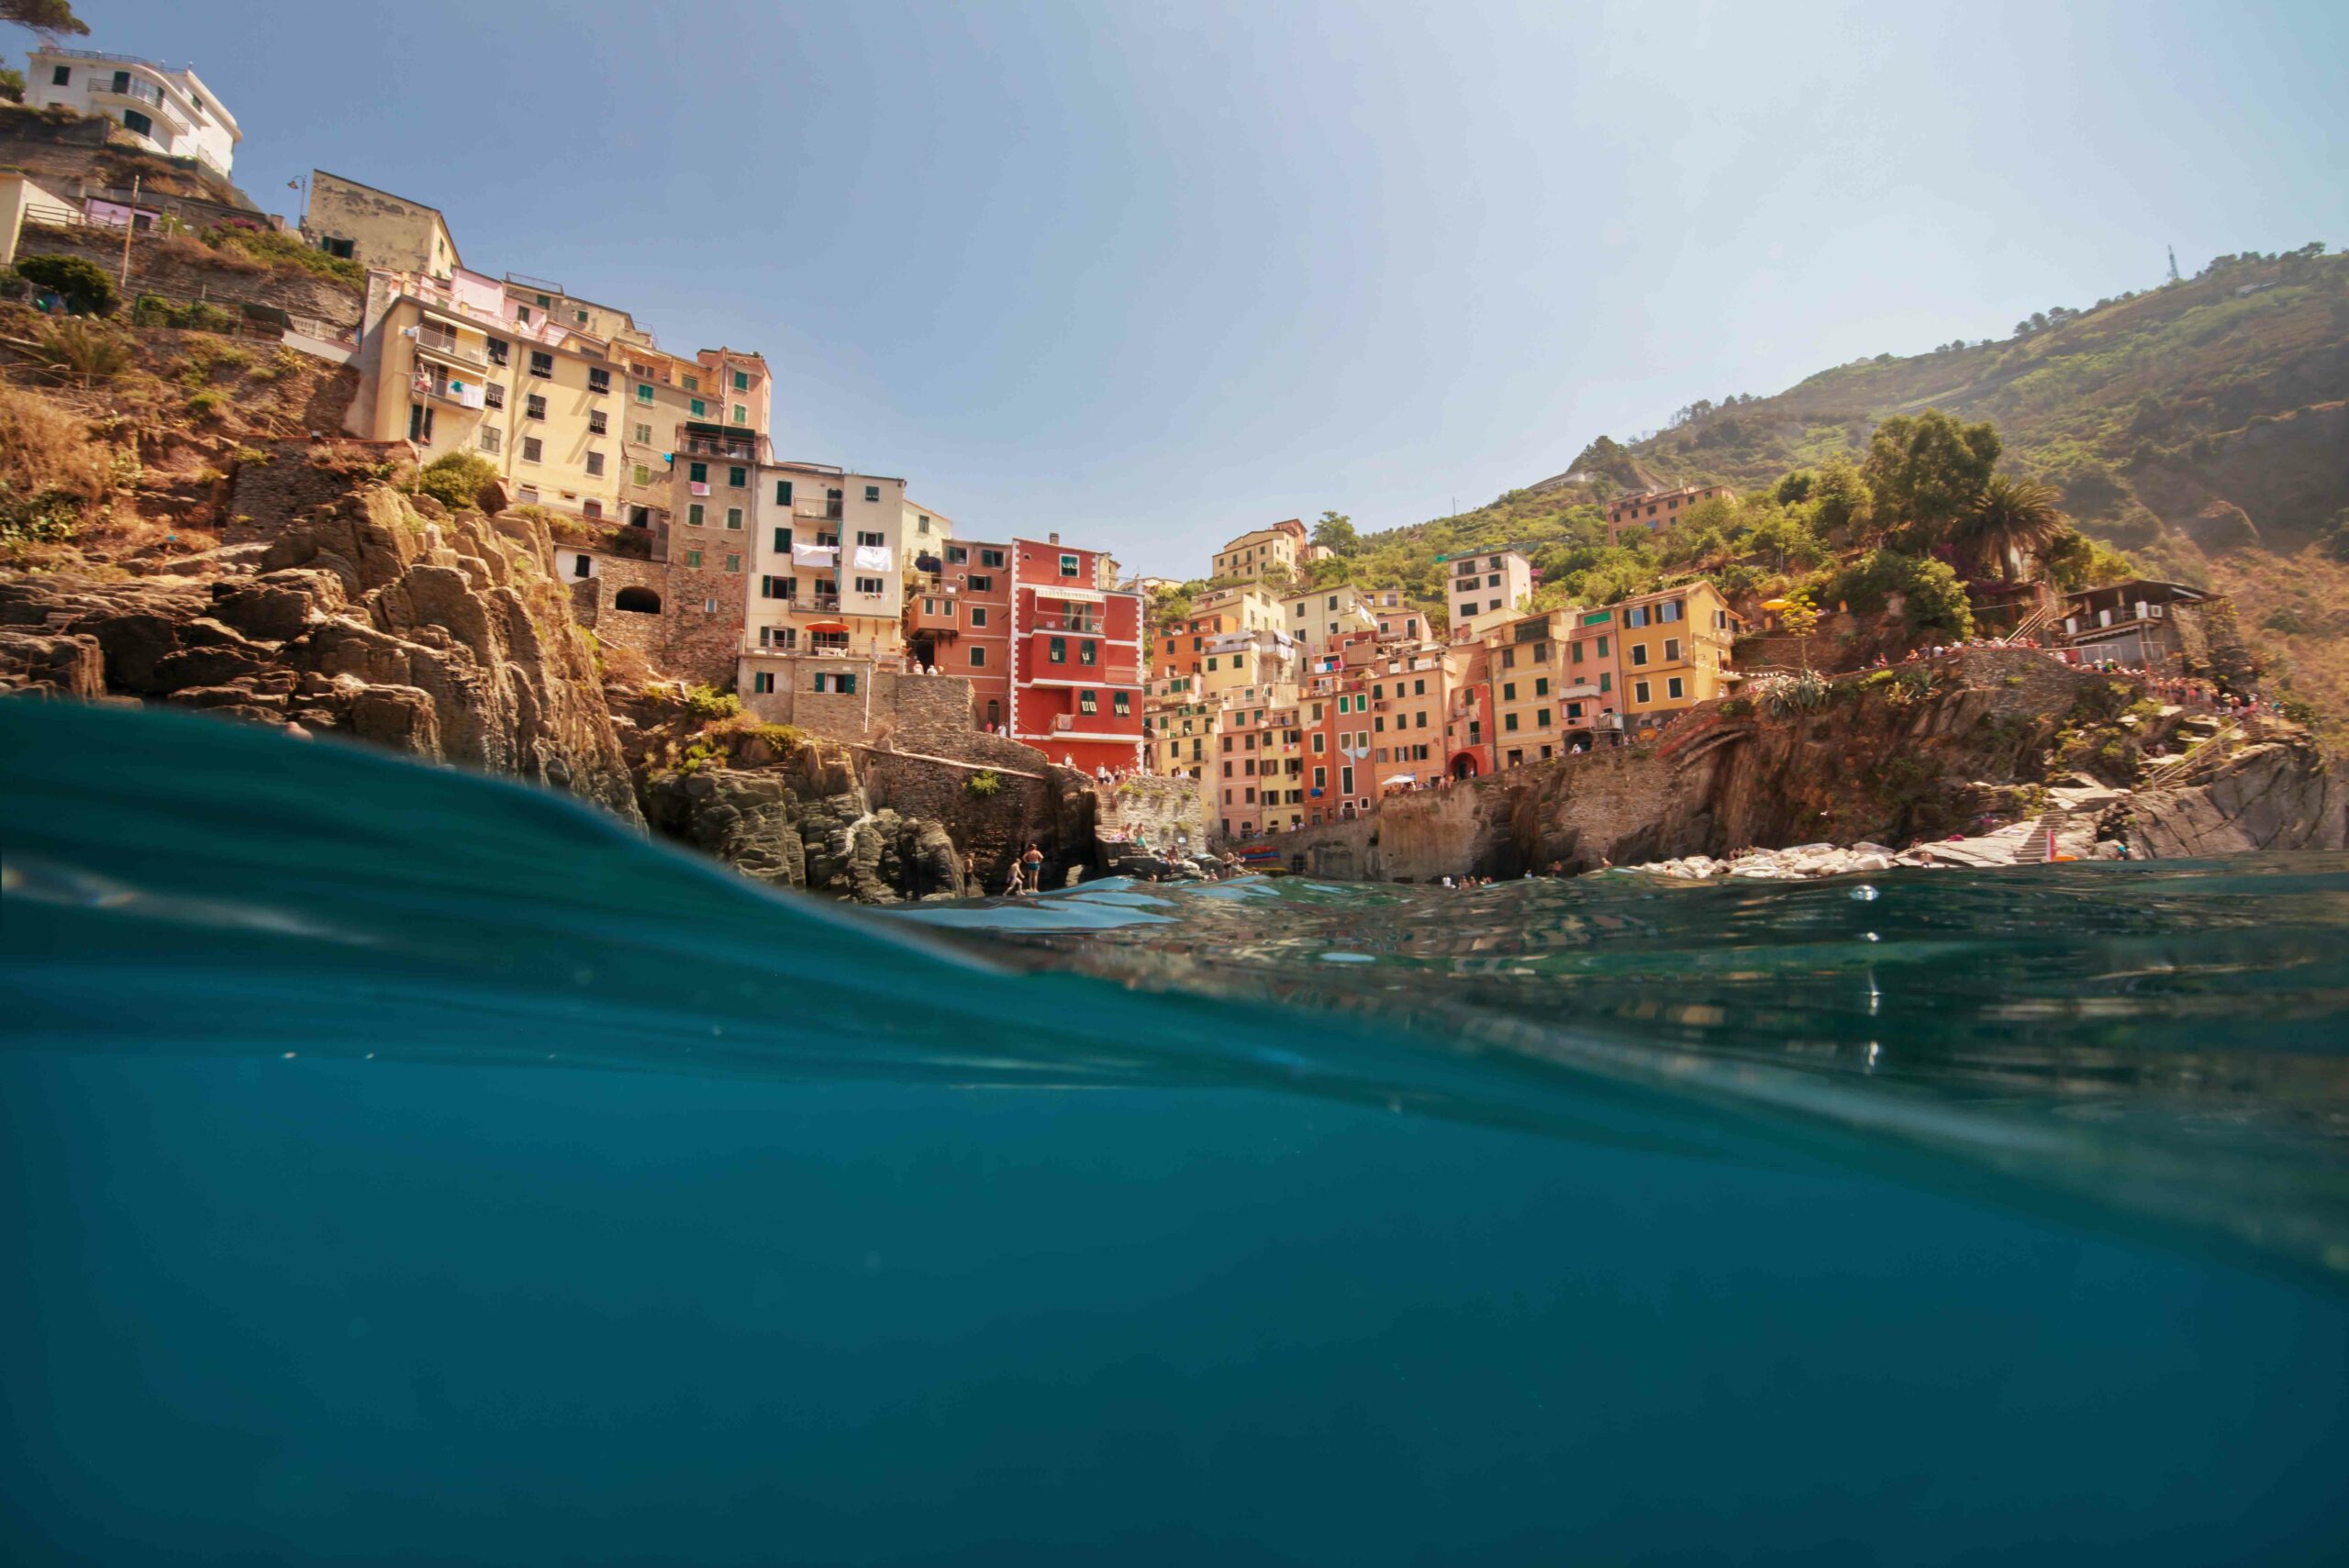
Improve your Travel Photography – Get Creative and Photograph the World
Travel photography offers a creative opportunity to document your adventures and capture the world around you. The places you visit, faces you see and cultures you experience.
As a professional travel photographer, I’ve photographed icebergs in Greenland, elephants in South Africa, remote lodges in Canada, and the temples of Japan. There are so many incredibly photogenic experiences and locations out there just waiting for us to photograph them on our travels.
If you’re looking to work as a travel photographer, building a portfolio is one of the best places to start, and what better way to do that, that on your travels? This guide below shares 12 travel photography tips that will help you capture more creative images on your next trip.
From composition to packing your camera bag, and storytelling to weather forecasting, browse the guide below and let me know in the comments where you’re travelling next!
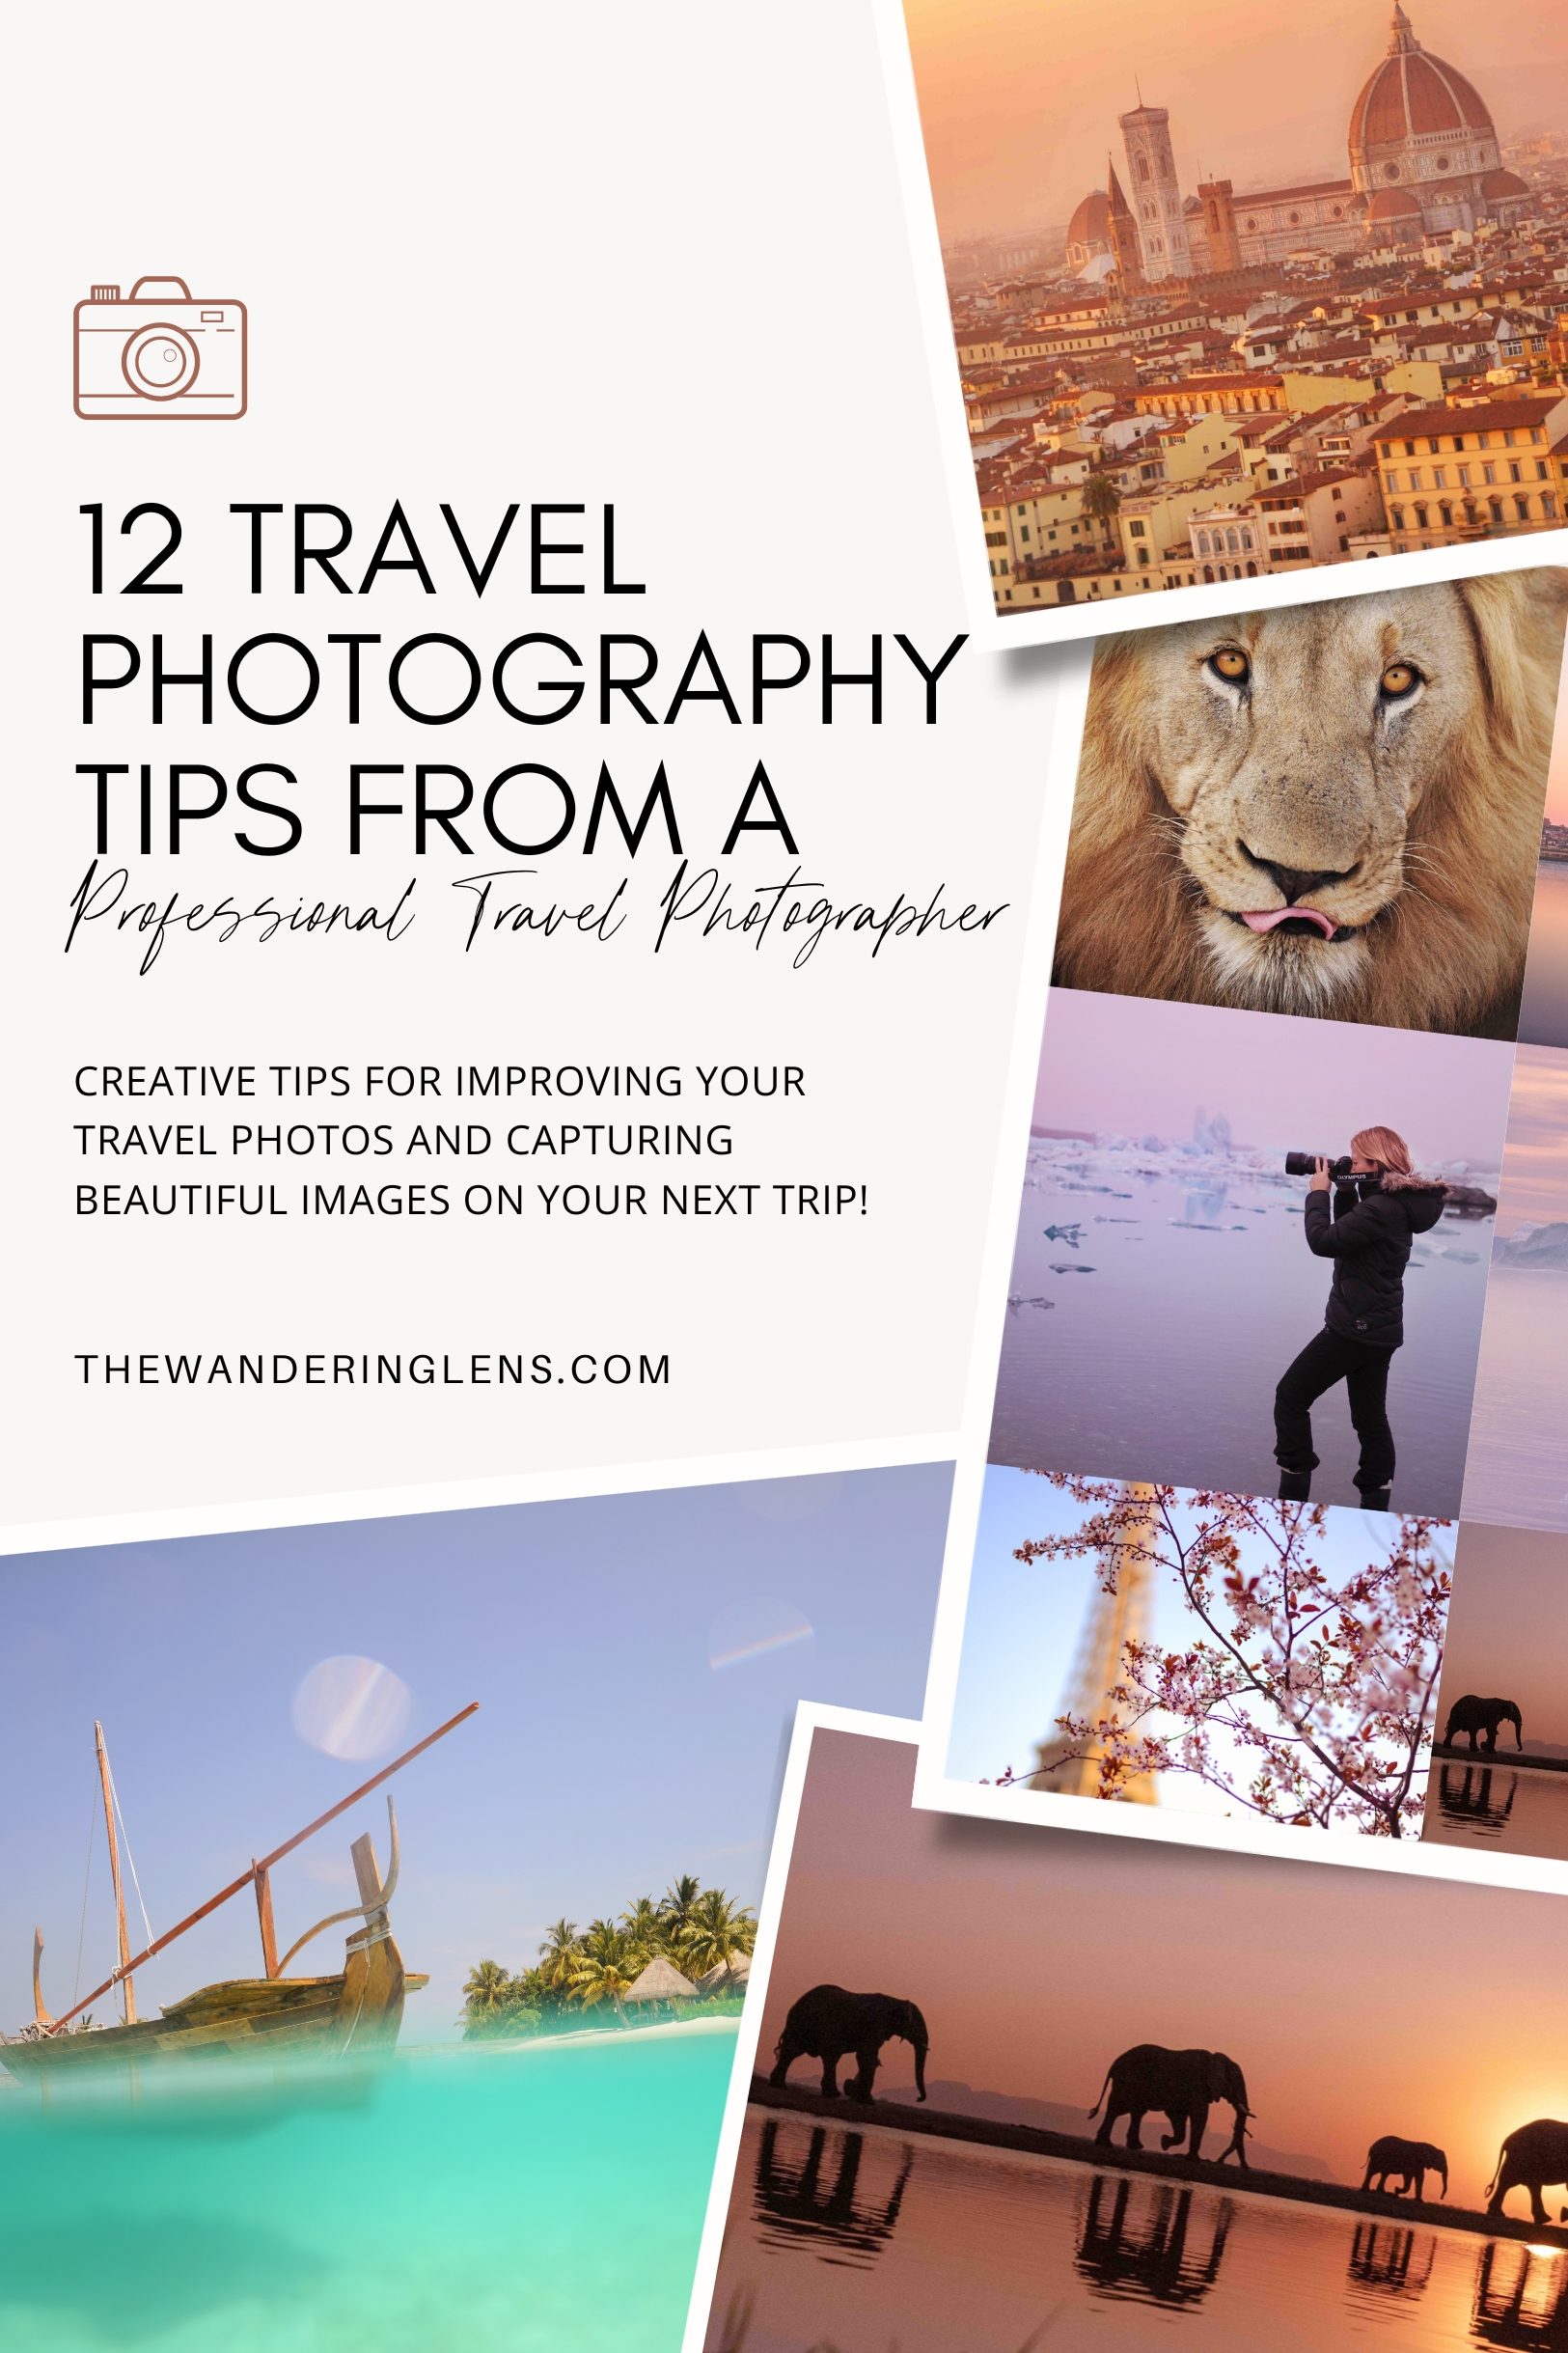
Travel Photography Tips
1. research and plan logistics.
If you’re serious about taking great photos on your next trip, be sure to research the best places to photograph in the locations you’re visiting. If you’re heading for a major city, you’ll find lots of online guides and resources available that share some photogenic locations and experiences. If you’re seeking adventure and want to photograph landscapes a little more off the beaten path, I’d suggest heading straight for Google Earth or Google Maps first. That way, you can zoom in on the areas you’re going to, browse the maps, look for natural features like lakes, waterfalls, and mountains and start to see how it may be possible to reach them.
By planning to avoid the main viewpoints and popular spots, you’ll end up with more unique images and no doubt, a far more exciting experience!
When planning the logistics, try to research the best times to photograph the location, what the weather conditions will be and how much time it takes to hike/drive/fly to the location.
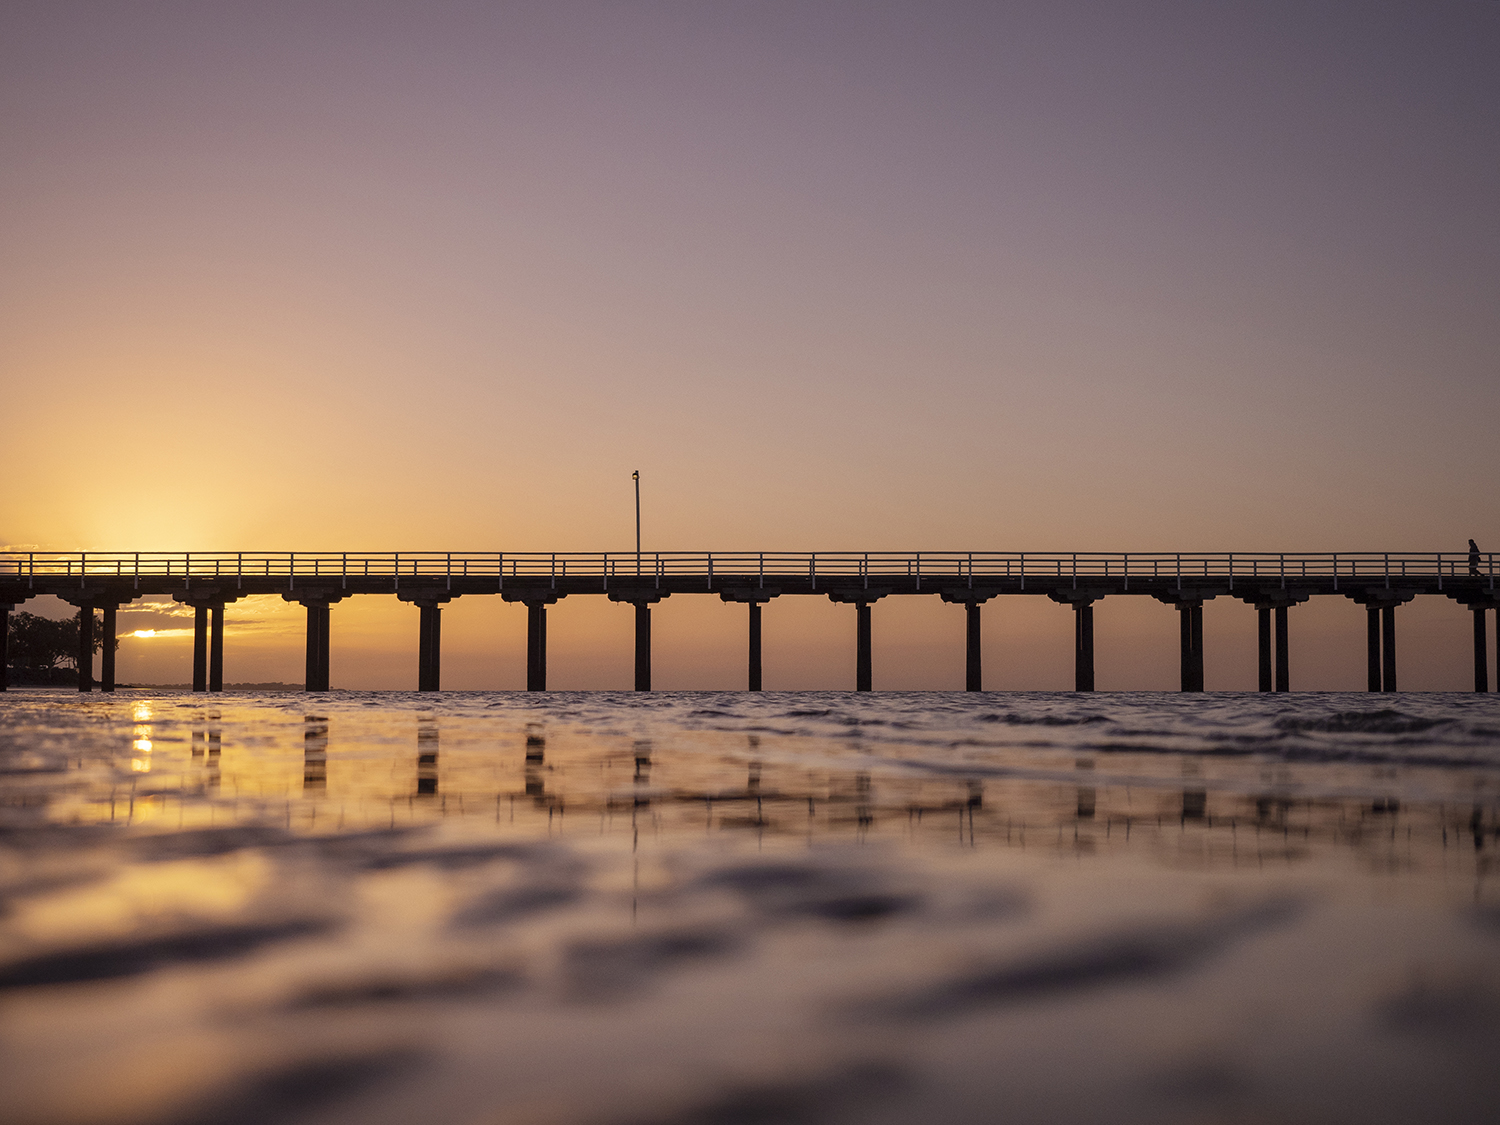
2. Check your camera bag, then recheck it
Being prepared to photograph your travels is an important step in making the journey a little smoother. There’s nothing worse than arriving somewhere, only to find you’re out of batteries, forgot to charge them, or forgot a memory card. This piece of advice comes from experience by the way! When photographing for clients or on assignments , I check my bag a bunch of times before ever leaving the house. When I photograph for fun though, it’s easy to get a little more relaxed and I’ve definitely gone to take a photo, only to find I forgot to put the memory card in my camera…oops!
If you’ll be hiking or spending a great deal of the day outdoors, packing your camera bag nice and light will mean you’ll enjoy the experience more. I travel with my OM SYSTEM cameras (read about my kit here ) which are really lightweight cameras, then opt for only 1-3 lenses based on where I’m going and what I’m aiming to photograph.
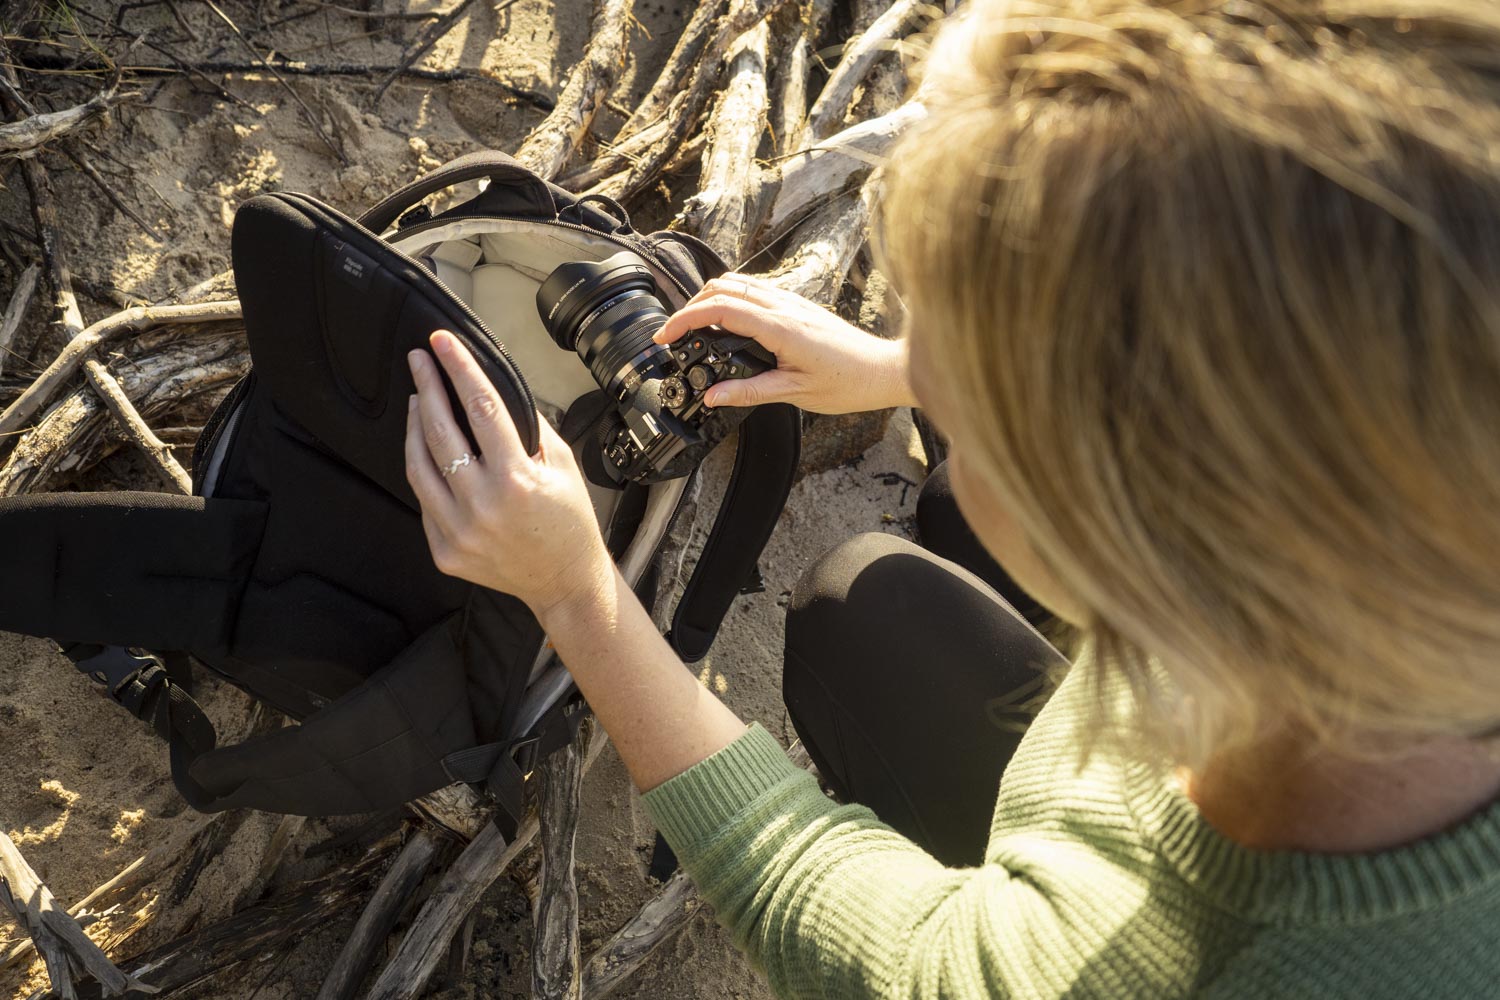
3. Seek out Sunrise and Sunset
Golden hour presents the most beautiful warm light and works wonders for landscape photography. Capturing the glowing sun before it dips below the horizon is one of my favourite things to photograph, and I always make sure I know exactly what time sunset is and arrive nearly an hour before!
Planning your day around where to be and what you’ll photograph during the golden hours of sunrise and sunset, helps you optimize how many locations you can visit and photograph on your travels. When photographing sunrise , aim for somewhere close to your accommodation, then for sunset, you can venture a little further!
Photographing sunrise and the pastel tones of dusk are what I aim for in my own landscape photography as it helps illuminate the scene in a beautiful way, and typically has less crowds or wind.

4. Think Creative + Look for Unique Angles
Once you arrive at a location, don’t just reach for your camera and snap away. Look around, assess the scene and start to get a feel for the stories you can tell with your camera. This way you’ll produce more considered photos, and discover exciting features and subjects to include within the image.
I always like to move around too, not just stand still at a marked viewing platform, but really explore the surrounding area and seek out the potential of unique angles. Don’t forget to bend down, look for ways to incorporate various elements of the scene within the image! It’s amazing how many angles open up once you take a moment to look around and observe the scene and what’s happening within it.
5. Get creative with Composition
This topic is my favourite of all within photography. Within the online courses I teach, composition is something I always enjoy sharing tips about, because it’s so incredible what you can achieve with just a simple adjustment in your creative process.
Composition is essentially, how you compose the elements of a scene, within a single image. So in a landscape photograph, a lake for example, it could be that you’ll be composing the rocks on the shore, the water and distant mountains. How you can approach that creatively, is by getting really low to photograph through the rocks so the water leads viewers towards those mountain peaks. Or you could opt to completely exclude the rocks, instead zooming into the mountains and using any visible greenery nearby to frame their shape.
Composition is where you have the chance to make your photography stand out. If you’re photographing alongside friends or other photographers, you’ll probably all end up creating something entirely different! Look for leading lines, reflections or foreground features. Need to work on your composition skills? Join The 3-Week Composition Reset to refresh your creativity and learn to ‘see’ the world in a new way – find all the details here.
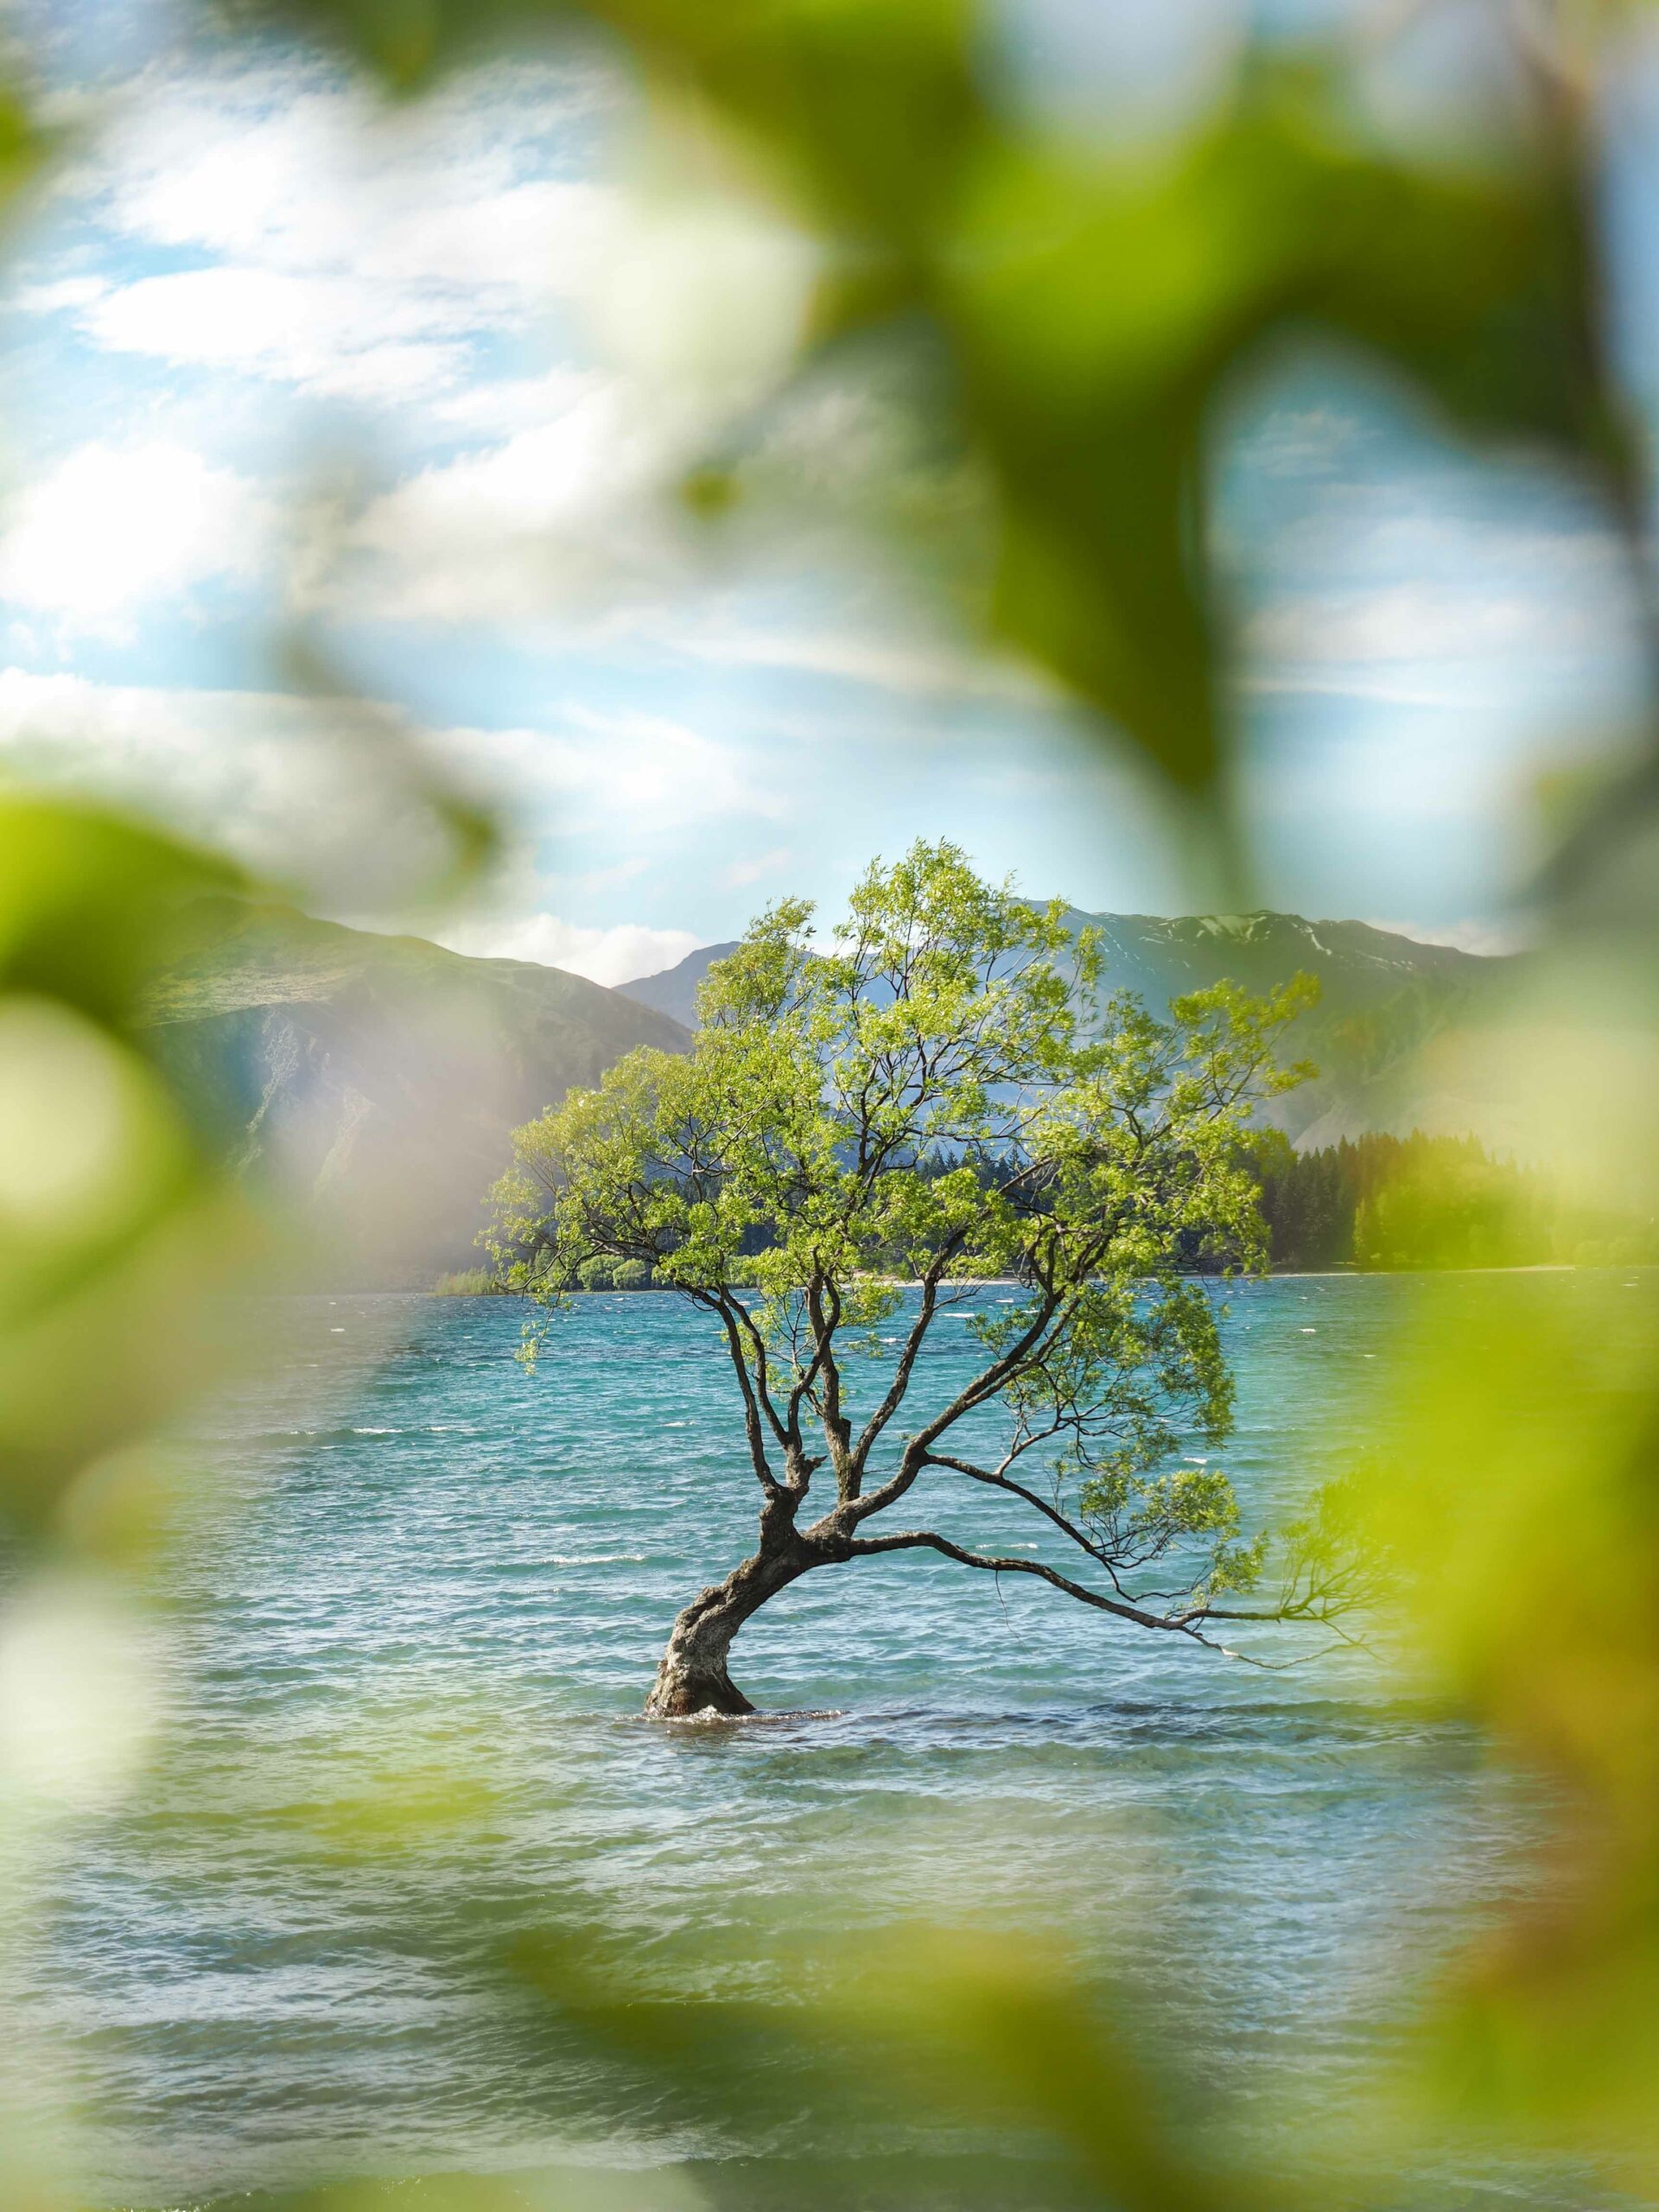
6. Document Cultures
Are you visiting somewhere with cultural experiences or local traditions? If so, research prior to visiting to know what you can and can’t photograph. Being culturally sensitive is very important as a photographer, no photo is worth invading someone’s privacy.
However, if it’s possible to document the experience or destination, try to capture images that highlight the candid moments, finer details and cultural intricacies that solely exist there. Portraits are a wonderful way to showcase people and daily life, always ask before taking someone’s photo though, and I like to try and be as quick as possible, so it doesn’t make them awkward at all – the first smile is usually the most natural!
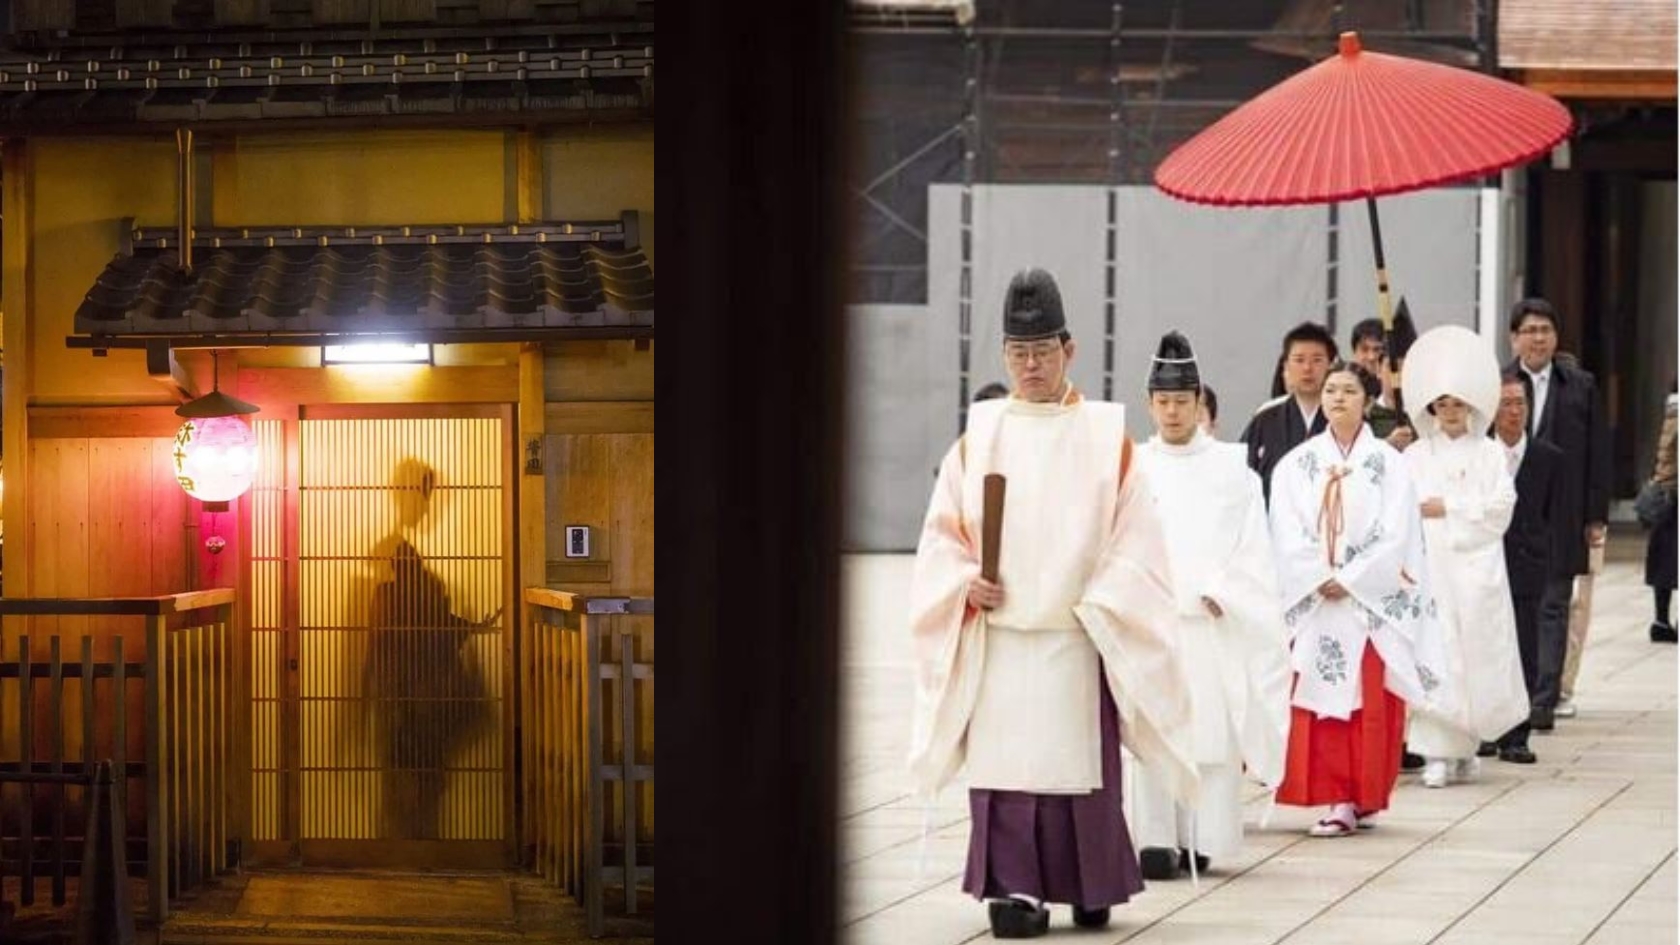
7. Create Travel Photography with Purpose
Similar to composition, noted above, creating with purpose simply means thinking before clicking that shutter button. We’ve all returned home from our travels with thousands of random photos that we’ll never look at again, but what if we stopped to consider what we’re photographing, how, and why?
Creating photographs with purpose will help to produce a collection of travel photographs that connect, showcase where you’ve been, and help to document and tell a story of your adventures.
I love to try and capture a collection of varied images, a mixture of detail shots, landscape images, portraits and patterns when I travel. Actually, I’m exaggerating, I’ve been very obsessed with photographing patterns in nature lately so a big portion of my photos have been patterns in sand, dirt, rocks, water…I should probably get back to some variety haha!
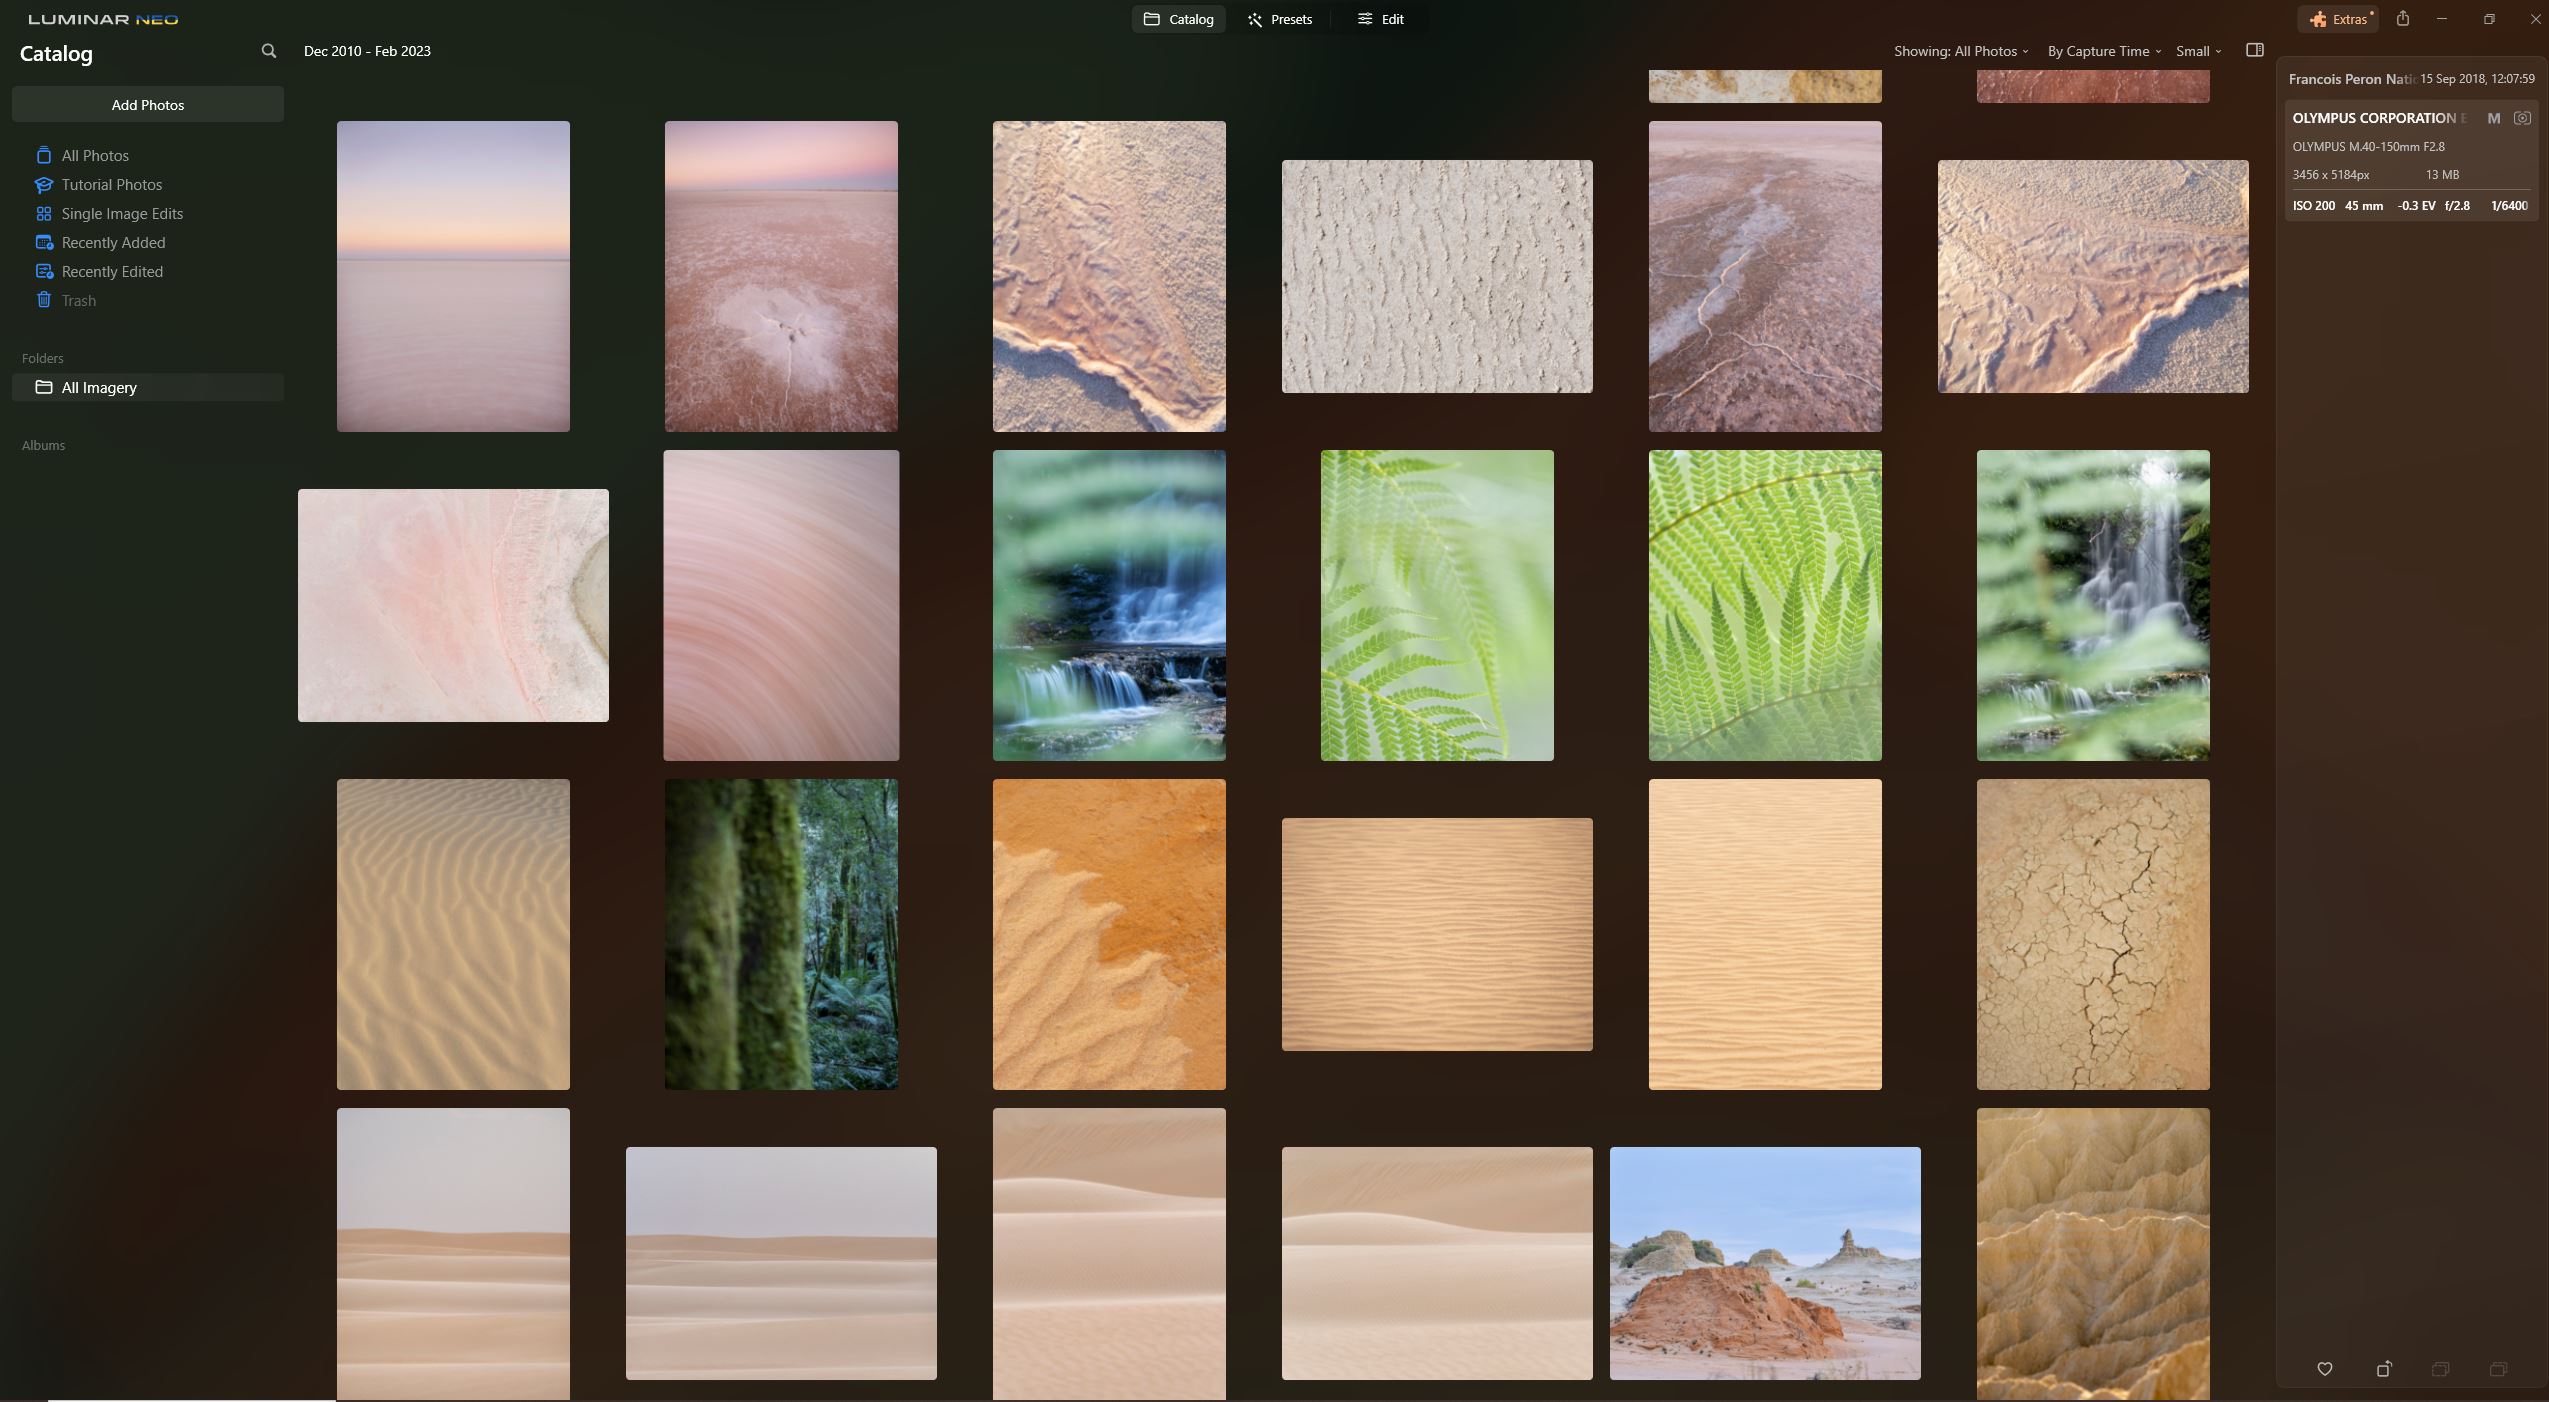
8. Stay Steady
Maintaining stability when photographing is the key to sharp, detailed images. You’ll know when stability was lacking because your images may turn out a little blurry!
You can use a tripod if you know you’ll be photographing in low light or aren’t super steady when holding a camera, however if you’re like me and don’t enjoy carrying a tripod around, there are other ways to keep steady when taking photos.
My camera, the OM SYSTEM OM-1, has in-built stability, meaning that it’ll adjust and keep steady, even if there’s slight movement on my part. Otherwise, if your camera isn’t equipped with in-built stability, you can lean on something solid, like a fence, building or table top when taking a photo.
The ‘Photographer’s Stance’ is a bit of a joke, but take a peek at people when they’re taking a photo…we all stand a little like a tripod, don’t we? This stance can actually help with stability, bracing yourself while taking the photo to stay nice and still and avoid any blur in your images.
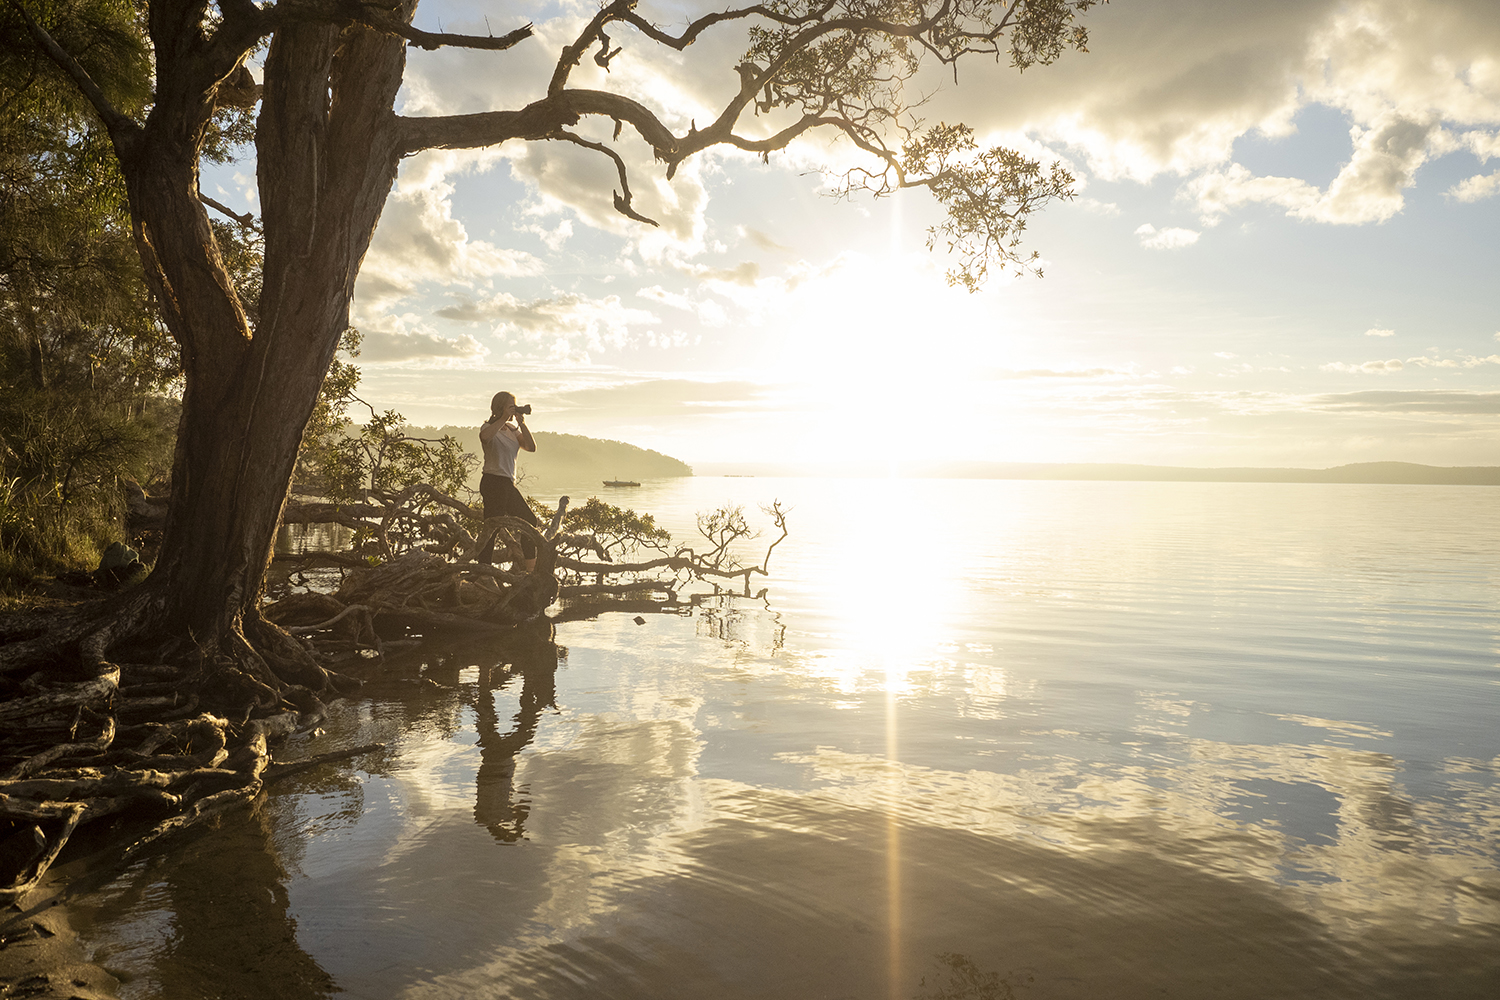
9. Experiment with Shutter Speed
This is something I’ve enjoyed a lot recently, particularly producing travel photos with a more artistic result. Shutter speed is related to the time your shutter is open, exposing available light on to the camera sensor. The longer a shutter is left open, the more light is let in.
A fast shutter results in a quick shot with less light, a slow shutter means your cameras shutter is left open longer, resulting in a long exposure image. You can actually hear the sound your camera makes when taking an image, if it’s a simply click, you’re probably shooting with a fast shutter speed, or on auto. If you hear a click…pause…then another click, it’s probably a longer exposure. Eventually you’ll learn to know exactly how long the shutter speed is and be able to quickly adjust for the result you’re seeking.
Experimenting with shutter speed is a great way to incorporate movement and light into your image. You can read a guide here about ICM Photography, and another guide here that I wrote about using Live ND with the OM SYSTEM.
10. Get comfortable with your camera settings
Travelling is a great opportunity to learn photography and get comfortable with your camera while taking travel photos. We’re usually so much more inspired to use our camera when exploring a new destination, so use this chance to press a few new buttons on your camera or flick over to manual mode and challenge yourself to learn how it works.
Controlling the ISO, shutter speed and exposure can help to produce an image that reflects the scene around you. Learn to work with light and capture it correctly so you’re exposing the highlights and shadows well.
Don’t pressure yourself to jump straight to manual mode, travel photography in particular is usually filled with capturing fast moments, and fiddling with manual mode never works (for me anyway!). I prefer to shoot in aperture priority mode, this enables me to quickly adjust the ISO and exposure, while the shutter speed is then calculated by the camera. Alternatively, if I need to capture an image in a certain way, I’ll then switch to manual and play with the shutter speed.
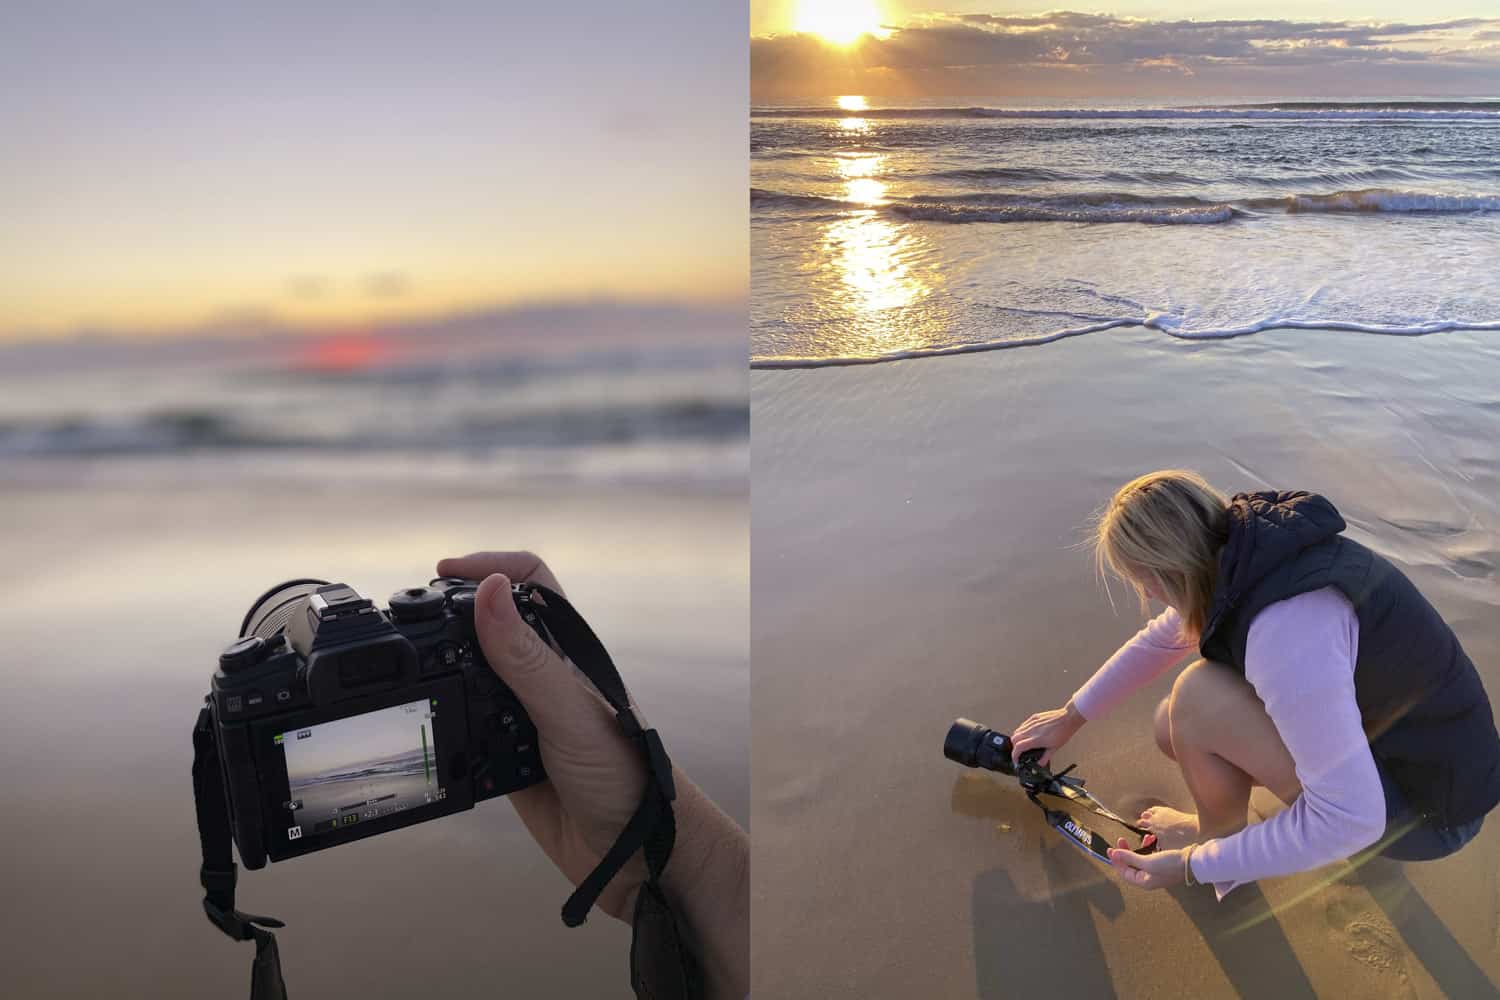
11. Edit and Enhance your Photos
While AI is presenting some interesting editing opportunities in travel photography (hello fake scenes and fantasy dream locations), enhancing your travel photos can form part of the creative process. I love saving my images from a day out, browsing through to pick out the favourites, then editing them that night while travelling.
Editing doesn’t have to make your image wildly different from the original, it can simply enhance the tones, colours and scene a little. Avoid adjusting the saturation too much as this can easily result in your travel photos looking a little too colourful.
When editing, consistency is key. If you’re looking to compile a collection of photographs from one location or destination, aim to keep the editing and tones to a cohesive style. This will also help to identify the work as yours, rather than a random collection of presets and colour combinations.
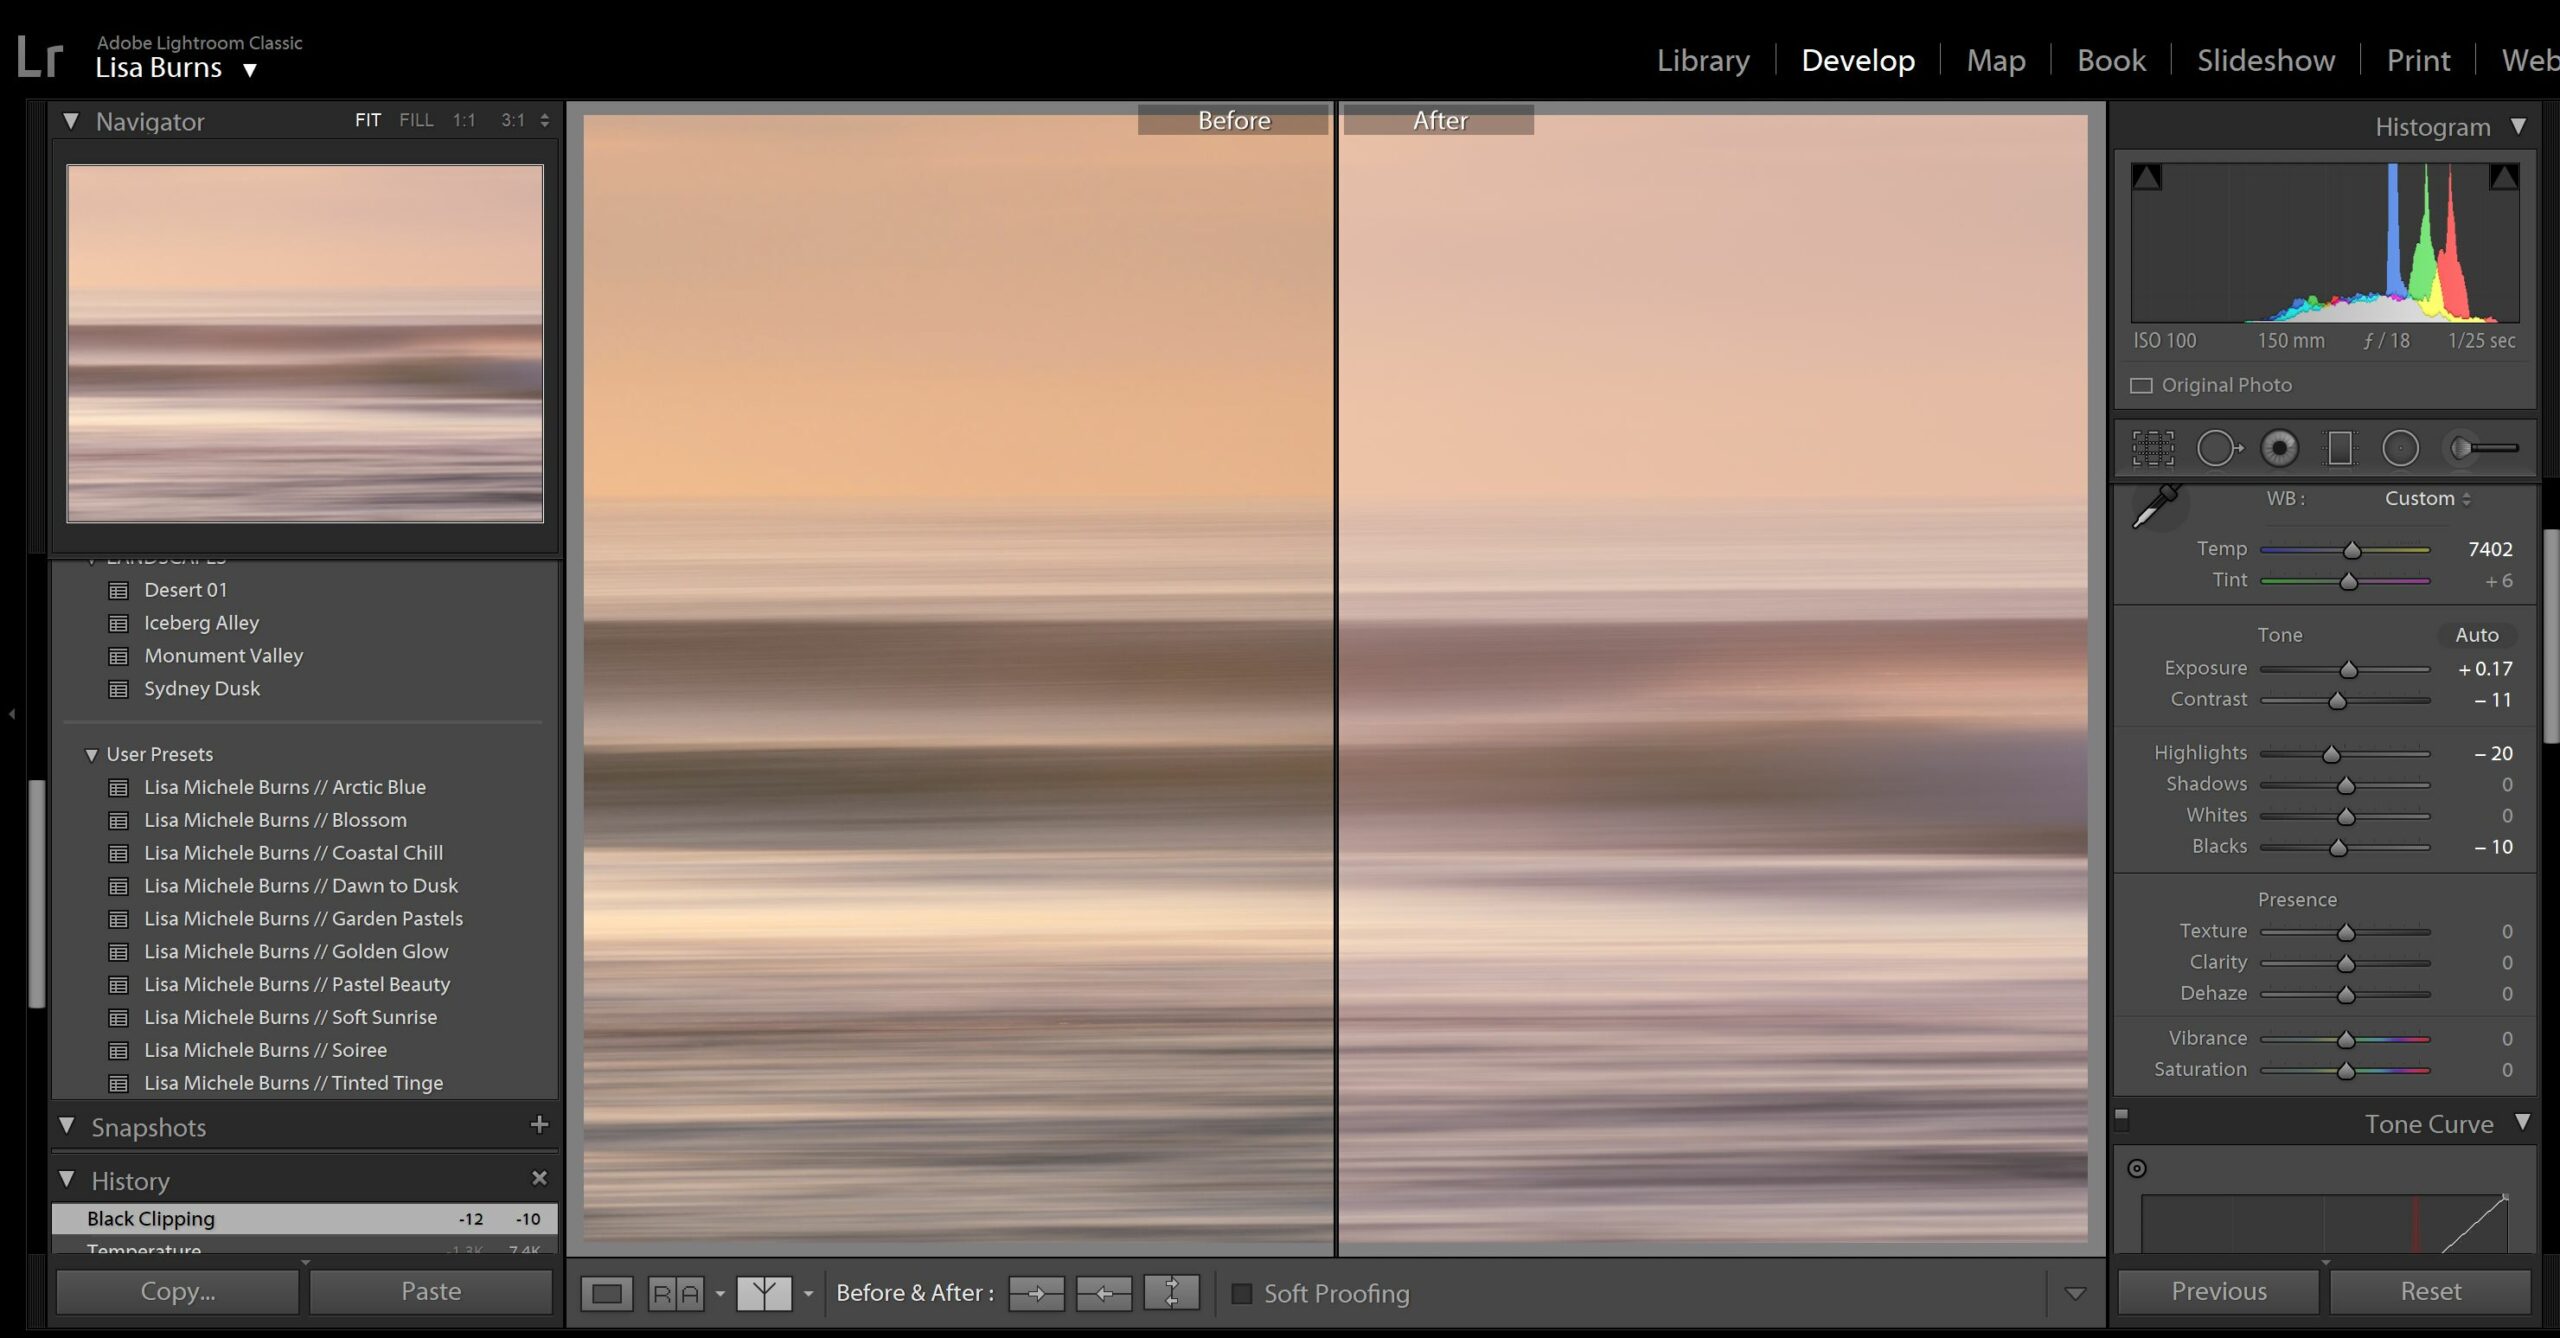
12. Become a Storyteller
Travel photography gives you the chance to create stories about the places and faces you see on your travels. When you pick up a travel magazine, the images help to tell the story alongside any written articles. They visually share why you should visit, what you can see, or creatively highlight the beautiful features of a scene or subject.
If you’re keen to work as a travel photographer, telling stories with your work will provide opportunities to approach publications and pitch article, or photo feature ideas. Producing a collection of images that connect together to create a visual narrative, will go a long way when sharing your work with editors or tourism professionals.
You can read more about the ‘ Art of Storytelling here ’, or if you’re looking to work professionally as a travel photographer, The Freelance Travel Photographer Course guides you through all the steps required to develop a professional portfolio, network, find work and create longevity with your career in the travel industry. You can start online anytime, with no time pressure as the entire course is designed to be self-paced!

The Benefits of Travel Photography
Travel photography is such a rewarding way to see the world. By taking photos when we travel, we’re staying present, practicing mindfulness and peering deeper into the world around us. With all creative pursuits, practice always helps so I’d encourage you to keep your camera out, and capture as many photos as you can, being considerate of which compositions work best, and creative techniques you can use to enhance the outcome of your travel photos.
Related Travel Photography Articles on The Wandering Lens –
How to Become a Professional Travel Photographer
The Benefits of Working Freelance as a Travel Photographer
Photography Tips Archive – Camera Settings Advice + Creative Techniques
7 Travel Photography Jobs to take you around the World
Want to learn with The Wandering Lens? Explore the self-study courses and discover your potential in travel photography!
Are you craving a creative career, struggle to know where to start as a photographer and need a little guidance.
These creative courses have been written for you and bring together over 17+years of experience and lessons from working in the industry. I want to see others share their talents and get published, sell prints, find clients – to have the confidence to achieve whatever it is you want to within the field of photography.
My three comprehensive photography courses are now available for self-study enrolments and upon signing up, I’ll be in touch with instant access to get you set up and logged into the learning portal! You’ll receive access to every workbook within the course program and can work your way through in whichever order you chose.
Which of the following sounds like you most?
#1 You want to find work as a freelance travel photographer? The Freelance Travel Photographer Course is open for enrolments! Learn more here.
#2 You need a creative boost and want to transform your photography? Start with The 3-Week Composition Reset and work through composition and creative challenges.
#3 You’re keen to start a business selling prints? The Print Store Launch Pad will guide you through the entire process from curation and logistics to marketing + sales.
Take a peek at the course options below, if you’d like to discuss which one will suit you, send me an email via [email protected] and we can chat!
Hello! I’m the founder and photographer behind The Wandering Lens. With 17+yrs experience as a professional travel and landscape photographer, all advice found on this site is from my personal experience on the road. I hope it’s useful for your own travels and would love to hear in the comments about your trips and experiences around the world.
Enjoyed reading? Share the article!
- Leave a comment
Keep Reading...
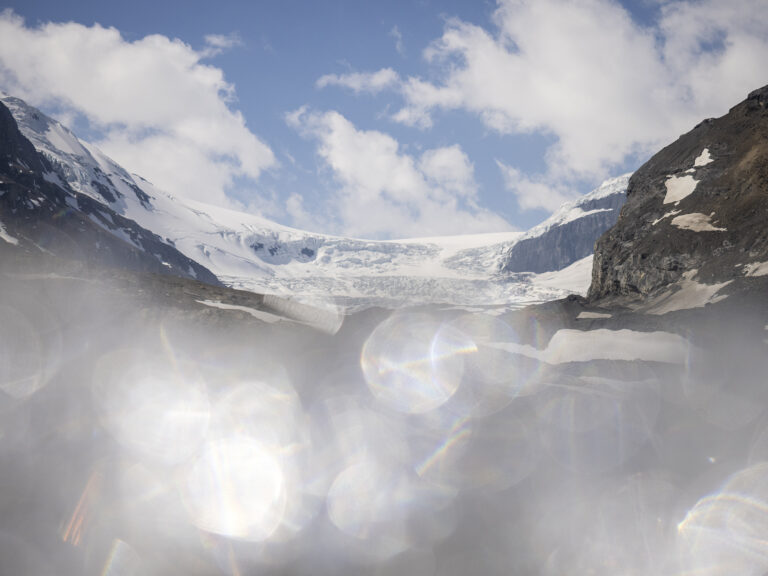
Columbia Icefields – Hiking on the Athabasca Glacier with IceWalks
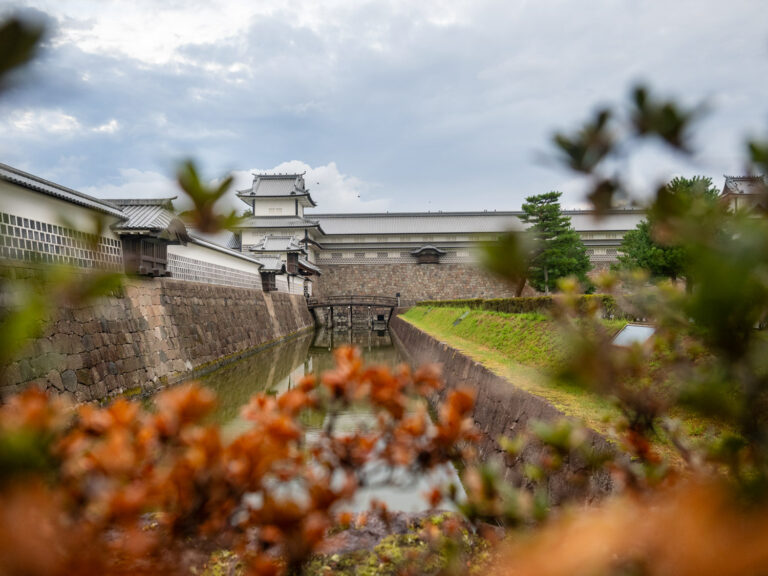
A Photographer’s Guide to Kanazawa, Japan

Mastering Light: A Quick Guide to Golden Hour Photography
Leave a comment cancel comment, looking for something….
An Interview with Travel Photographer Drew Hopper
We’re sitting down with Drew Hopper, a young Australian photographer who has become well known for his vibrant, atmospheric landscape photography work. Based in New South Wales, Drew Hopper has recently returned from a three month photography adventure in Southeast Asia, visiting Thailand, Cambodia, Laos and Vietnam and is expanding his work into the travel photography genre.
In this interview we’ll be talking with Drew about his travel experiences in Southeast Asia, learning how to prepare and pack for an extended photography trip, and getting some great tips and advice from him on how to capture memorable travel photos.
1. Tell us about how your photography journey began.
It’s difficult to look back and pin point the beginning of my photographic journey, but I guess the passion for the natural world was discovered from a young age when I was traveling around Australia with my family in a motorhome. I have always loved traveling to new locations, however I had no idea that this lifestyle would transpire into a career in photography. As a kid I spent countless hours outdoors, I was never sat in front of the television and isolated from the world. When I reached my mid teenage years my parents bought me my first DSLR camera as a birthday gift, so I guess that’s when the journey began. Nature inspired me to be creative with my natural surroundings. Where I live was the ultimate photographer’s playground, not only did I have access to a beautiful stretch of coastline, I also had the lush forests and countryside at my doorstep that kept my passion alive to learn photography and give back what I was fortunate enough to experience in my childhood.
2. You recently got back from a trip to Southeast Asia — tell us about where you went and how you planned your itinerary. Looking back, is there anything you would change about your trip?
Yes, I returned in Mid December 2013 from an incredible 3-month backpacking adventure with my girlfriend Jess, through Thailand, Cambodia, Laos and Vietnam. The itinerary wasn’t exactly planned but we had a few sights and things we wanted to see, but had no idea what it would turn into the adventure that it did. Most of our planning was based around two cultural festivals. A couple of our friends had just returned from backpacking SE Asia, so we picked their brains and built a rough itinerary from their travels, however ours needed to be different in order to make it to the festivals. There is the usual backpacker route, which is more, or less what we did except we did it in reverse to correspond with the Loy Krathong and Yee Peng festivities in Thailand. Lonely Planet books also came in handy for researching specific attractions and avoiding the crowds, however it wasn’t always the best method because many other travelers also carry the books with the same intentions, so we left the books at home and figured it out ourselves.
3. Can you tell us about the gear you use for your travel photography? What is typically in your camera bag while traveling? It wasn’t easy deciding what to pack and what to leave at home, but I knew it wasn’t going to be easy being my first overseas trip. I spent hours researching online how I could minimalize my photo kit so that it was lightweight for the airline baggage restrictions without forgetting the necessities. I took away with me the Canon 5DMKII , 16-35mm f/2.8L , 24-70mm f/2.8L , Canon 70-200mm f/2.8L and Sigma 35mm f/1.4 lens. I also carry 3 genuine Canon batteries, cable release, polarised filter and lightweight Roadtrip series travel tripod by MeFoto .
The most used lens would have been the Sigma 35mm f/1.4 ; this was the perfect walkabout setup. The wide angle was used a lot for architecture and landscapes but for lowlight scenes the f/2.8 wasn’t quite quick enough, so that is when the trusty 35mm found itself on camera 80% of the time. I probably could have left the telephoto at home, but it also came to good use when photographing people when I wanted to observe rather than shove a lens in front of someone’s face and make them look and feel uncomfortable.
4. What about other bits and pieces you packed to take away with you that you recommend other budding photographers/travelers pack?
When traveling to a different country it always pays to do your research before on what power sources they have and what type of adapters you’ll need. Although most supermarkets and corner stores will be able set you up with the right types I made sure I had correct fittings. By packing a 4-way powerboard with surge protector. I was able to plug in my laptop, phone charger, camera charger and iPad all at the same time. Most cheap hotels don’t supply many wall sockets so being able to plug and charge multiple devices was extremely handy and time saving.
Another piece of equipment I never leave the house with is a microfiber cloth, perfect for wiping away fingerprints and dust from the lens. The cloth is also great for protecting any filters that end up floating around loose in your bag. I generally take this along with a rocket blower for blowing dust off the camera sensor.
Memory cards are also crucial, without them your time spent will be a depressing one however you can buy cheap cards in Asia, but its always good have at least 2x 16gb ready. To protect my memory cards I use a 2x hard waterproof/shock proof cases that are easily recognisable in my camera bag with fluorescent markings, which is ideal when shooting at night.
A portable hard drive is essential for making backups of all your images while traveling. I couldn’t imagine anything worse than having your laptop stolen and losing your entire image archive. 1TB would be the minimum amount, and I had another 1TB drive in my Macbook with a 500GB as well. I filled both of the terabyte drives and kept the 500GB free for processing on my laptop without losing performance.
5. Are there any unique challenges and hazards as a travel photographer when it comes to your gear? For instance, keeping your batteries charged in remote locations and preventing theft and damage.
I was worried about how and where I could charge batteries while on the road but this was never an issue. I always had a base where I could charge and clean my equipment, usually at our hotel or in a café. Making sure your insurance plan covers your valuables is a huge priority. If you cannot afford the insurance then you definitely can’t afford to travel in my opinion. Theft was never an issue, however I traveled with a Packsafe bag system to keep my bag secure whenever the location felt dodgy. I only used it twice and both times I could have gotten away without out, but it pays to be safe than sorry.
7. Can you share a few of your favorite travel photos and tell us about the steps that went into them, from getting to the locations to photographing and eventually processing the shots?
Festival of Light, otherwise known as Yee Peng Lantern Festival, is an unforgettable spiritual event held all over Thailand. Yee Peng takes place on the full moon of the second month, as the twelfth month in the Thai Lunar Calendar corresponds to the second month in the traditional calendar of the old northern Lanna Kingdom. The festival features millions of illuminated lanterns being launched off into the night sky to create an almost ‘milky way’ effect gracefully floating off into the distance. No words, images or stories will ever do this incredible festival justice; you really need to be there amongst the magic to truly appreciate just how amazing it is. I finally got to go and see what this incredible celebration is all about in November 2013, and can easily say that it was the most uplifting thing I have ever witnessed.
After months of preparation and excitement we were only a few hours off seeing our dream festival. We managed to find a taxi service and as you can imagine it was chaos trying to get transport to the venue on time. Fortunately we arrived early enough and found a spot amongst the thousands of other people who also arrived early. We waited 2 hours from when we got to the gate for the mass release of lanterns.
I can still clearly remember the enormous cheer of happiness and good luck as thousands of lanterns took to the night sky, gently floating up but moving very quickly with the slight breeze. The contrast of warm light radiating from above, and all the emotional faces looking up into the milky way of lanterns was so beautiful. Many smiles, tears and lots of laughter transpired the evening into a massive communal celebration, people sharing the same experience on the same level, simply unbelievable.
Photographing the magic as well as experiencing it was tricky to balance both. I found myself shooting more than celebrating, but I did find the time to release some lanterns with my girlfriend. I shot the entire event with my Canon 16-35mm f/2.8 L wide angle, I wanted to include as much of the celebration as possible without missing a second of it. It was considerably dark even with the thousands of lanterns in the sky, so I needed a higher ISO of 1600, and a wide aperture of f/2.8 in order to use a quick enough shutter speed to capture the moving lanterns, my exposure was 1/40s which was only just fast enough to freeze the lanterns. Post-processing this image was fairly simple; nothing fancy or technical was done to achieve the final result. Basic RAW conversion adjustments, contrast, hues and removal of fringing, before moving into Photoshop CS5 to adjust levels, curves, dodge/burn, resize and sharpen for web. The natural beauty of this evening did not require much editing, I like the natural ambience created by with lanterns drifting off into the night sky.
One of the many memorable moments from Siem Reap, was being part of this Cambodian family being blessed by a Buddhist Monk inside Angkor Thom in the Kingdom of Cambodia. I can still feel the energy and emotion felt by both the Monk and the family as he poured holy water over their bodies to cleanse the soul. I walked away quite emotional after having experiencing such an incredible raw moment. In my opinion this is one of my strongest images from my Southeast Asia trip, it captures the beauty of the Cambodian culture in an artistic and creative way, just the type of images I was hoping to capture on my backpacking travels through Asia.
The use of my Sigma 35mm f/1.4 prime lens was the perfect choice, wide enough to capture the family and monk in frame together so that the image was put into context. By using a shallow DOF of f/1.4, I was able to compensate enough light to reach my sensor while maintaining a quicker shutter speed. Another advantage of using a wide aperture was being able to separate my subject from the background. The family was unaware that I was photographing their ceremony; at least until the little girl decided she wanted to make peace signs at the camera.
Fortunately, I was able to take a few shots before she blew my cover, however the family was very grateful that I documented this for them and they really appreciated seeing the shots I afterwards. Post-processing was very basic, this image did not require much editing. A few tweaks with curves, levels, contrast, hue/saturation and slight vignette were made in Lightroom 4 before converting and opening in Photoshop. I applied some dodge/burn to highlight the center of frame where the family were positioned and added some clarity to the water being poured over their heads, while keeping the highlights in the background relatively untouched apart from a small adjustment in white balance to add warmth to the overall atmosphere.
In this photo, an elderly woman is burning incense inside the smokey Thien Hau Pagoda, in the heart of Ho Chi Minh City (Saigon), Vietnam Southeast Asia. Built by the Cantonese Congregation in the early 19th century, it is dedicated to the deity Thien Hau and always has a mix of local worshippers praying and tourists photographing, beneath giant incense coils suspended from the ceiling above. I could only handle being inside for half an hour before the dense smoke enveloped my lungs and forced me to leave.
Finding this location was fairly simple, I did some research online and mapped it out on Google Maps just to make sure it was achievable. On arriving to the front entrance we were greeted by a small elderly Vietnamese woman selling incense sticks, tissue paper and other bits and pieces. The incense is purchased to burn inside the temple, however we read online that it’s much cheaper to buy the incense and paper inside, so this is what we did. Walking into this temple felt like walking into a fireplace, except it was an incredibly beautiful scented fireplace. I scouted the area for compositions, and having already done a bit of research I knew morning was the best time for the right lighting. Sunlight spilled down through the opening in the roof and filtered through the smoke that lifted for the ceiling. It was an awe inspiring sight, it sent me a little trigger happy, firing continuous bursts trying to capture every little detail as the smoke gracefully danced before my eyes.
I shot at a longer focal length than I had originally planned, basically to keep my distance from smoke as I was finding it difficult to breathe, let alone focus or see what I was doing. Post-processing this image was a little difficult; I wasn’t entirely sure which way I wanted to take it. I originally thought that I’d end up going monochrome, but that changed after importing into Lightroom and noticing the cyan tinge around the highlights created from the dark blue wall in the background. Clarity was increased by 30% for more definition in the smoke, and vignette was added around the image to draw the viewer into the center of frame.
8. Your travel photography portfolio includes quite a lot of portraiture. Walk us through your process for creating a great travel portrait?
I’m still very new to photographing people, however it’s safe to say that there are essential characteristics that most photos share. Composition and light are the two key elements I’m always chasing. When I am out walking the streets with my camera, I am constantly scanning my surrounds, always pre-visualizing the next shot. Almost all my travel portraits have been spontaneous moments, most of the time my subject won’t even know I have taken their photo. I find this approach works well capturing the daily lifestyle and culture of local people in their natural environment, but I also like to take things a little more intimately and move in closer to my subject. This is when communication skills came into play, being able to speak some of the language was helpful, however I wasn’t traveling long enough to learn much of the local language for it to be beneficial for me. I was able to say hello, ask how their day was and say thank you, which was usually all I needed to say to gain their trust. As soon as the subject felt at ease with my presence, I was able to freely begin photographing them without any interaction; this was usually when my best portraits came about.
9. It’s easy to spend all your time behind a camera while traveling — how do you manage to balance your work as a photographer with spending time actually experiencing the locations you visit?
I like to call myself a ‘digital nomad’; all my time usually consists around scouting locations, shooting, processing and marketing myself online. It sounds like a dream life to most people, but it’s not all fun and games especially when you are a struggling artist trying to make a career out of it. The upside of the trip we went on was that it wasn’t work related, I was not hired or contracted to work for any companies, and it was purely a freelance photo holiday with my girlfriend. This gave us plenty of time to do the stuff we wanted to do together as a couple and I managed to find time to photograph along the way. I knew it was going to consume me on a photographic level, which it definitely did. I was told many times by Jess, to slow down and enjoy the moment. I’m actually thankful for those words because I did find that I was pushing myself way too hard to get the photos I was pre-visualizing in my mind. Our time in Asia as a couple was a beautiful 3 months spent meeting new people, visiting amazing places, eating amazing food and learning. I learnt that it’s important to build time into the schedule for relaxation away from what consumes you.
10. What do you think makes for a good travel photograph and what tips would you offer to amateur travel photographers trying to improve their photography skills.
There are many elements and different techniques that can make or break a good travel photograph. Having not photographed the travel genre before, I was open to all the opportunities that were placed before me. One of the toughest things I found when trying to capture local people was putting the subject into context with the location so that the image told a story. Taking intimate close-up portraits of someone’s face is always going to be interesting but it doesn’t always give the viewer much sense of location. By shooting with my 35mm lens I was able to capture people in their natural environment, going about their daily lifestyle in harmony. Being contextual would be my biggest tip that I learned right from the beginning of our trip. Another valuable lesson I picked up on while traveling and photographing the local people was their personalities and how they differed from their natural surroundings. People seemed most comfortable when their environment was familiar to them and when they were doing something familiar. This usually involved waking up early in the morning when people were working. Most people worked early to avoid the heat of the day. As soon as they were preoccupied they looked comfortable which made for natural looking portraits.
11.Traveling to exotic locations is the glamorous side of travel photography. Tell us a bit about the business and marketing side — once you’re back from your travels, how do you spend your time?
I would say that 50% of my time is spent at the desk on my computer processing and networking my business online. I rarely get out with my camera these days to photograph new material because I’ve got such a large archive from Asia, so this keeps me busy for the most part. Advertising and marketing my work to a global market would consume the other 20% of my time in front of the computer and the other 30% goes into updating my website content, adding new images to the site, replying to emails, equipment upkeep and location scouting.
12. What lies ahead for you and your work as a photographer?
It’s difficult to say what the future has installed for me, but I have many ambitious goals and dreams, which keep the fire alive. I’ve already started planning the next overseas adventure, so that is one of the priorities to work towards so that I can further develop my skills as a traveling photographer. I’d eventually love to exhibit my travel images somewhere, potentially stating up my own fine art photography gallery and workspace. Photo workshops are also in the pipeline, so this is something to stay tuned for on my website.
13. Where can we find more of your work, and do you sell prints?
Yes, my website is always being updated with new content and prints are available for almost all my photos posted on the site. If you need any information please don’t hesitate to email me, you can find my email on my contact page on the website. I also post a lot of work on my Facebook page and also 500px, Google Plus and DeviantART. You can visit each profile by following the links below:
Website Facebook Twitter Google Plus 500px DeviantART

Three Pro Photographers Share Gear Tips for Shooting on the Go
O n a flight to Denver last week, I did the unexpected: I actually talked with the person next to me. Sitting on the tarmac with an unknown delay, we riffed back and forth on bad reasons why the plane wasn’t taking off. The conversation segued to work and eventually life more broadly, even though I knew I would never see the guy again. One part of our chat still stands out.
After learning that I was a professional adventure photographer, he began peppering me with questions about what was in my travel bag. It quickly became clear that he knew his stuff, so I shared some of the most important lessons I’ve learned over the years, like how to not ruin expensive gear while shooting in the elements.
All of a sudden, the stranger across the aisle chimed in, asking a question about international travel with cameras — and just like that we opened Pandora’s box. Through many conversations similar to this one, I’ve come to realize there is a growing cohort of people interested in travel photography outside of iPhones. Amateurs looking for tips to travel light, shoot on the go and keep their photo gear safe. Hopefully this story can be a resource for anyone looking to level up their game.
About The Panel
Instead of sharing just my personal (and biased) perspective, I figured it would be more useful to collect advice from some of the best and most experienced photographers I know. So, I reached out to three of my mentors, Johnie Gall, Adam Wells and Taylor Burk, who brought me into the photo world, helped me get my first jobs, grow my skills and hone my craft.
Adam Wells is a commercial lifestyle photographer and filmmaker based in San Francisco, California. He has shot projects around the world, from remote jungles in Japan to the open ocean of Alaska’s Bering Sea. He focuses on travel, outdoors, food & drink and sustainability stories, and has worked for brands big and small, including HBO, Rivian, Starbucks and National Geographic.
Taylor Burk is an adventure and travel photographer based in Vancouver, British Columbia. He also has worked all over the world, from the Gear Bear Rainforest to the deserts of Jordan to the mountains in Patagonia. He focuses on landscapes, sports and lifestyle imagery, including work with Red Bull, Chevrolet, The North Face and National Geographic, among others.
Johnie Gall is a commercial and editorial photographer based in Ojai, California. Like the two others, she has tackled assignments in far off places around the globe, but recently has focused closer to home, around the western U.S. Her biggest curiosities center on science, adventure and climate change, including projects with Patagonia, Backcountry and the Rodale Institute.
Picking the Right Bag
It may sound simple and trite, but the first piece of advice I usually give is about finding the right camera bag. Something that fits your needs, the requirements of the job, and ideally, the standards of a modern day carry-on. There is nothing worse than checking your camera gear to a dream destination, only to find a shattered lens inside (yes, it’s happened) — or even worse, a bag lost entirely.
Wells’ go-to is the 45L Travel Backpack by Peak Design , which he says maxes out the carry-on size limit while handling intense travel with versatility and comfort. Burk agrees, saying he almost exclusively uses the same backpack, with his only exception on longer backpacking trips. “If I’m going far into the backcountry, I use a bigger pack and wrap my camera gear with spare clothes or in a padded dry bag.”
Gall’s favorite is the smaller version of the same Peak Design pack , which she says is easier for her to carry and fits under airplane seats. “If I’m not traveling and just on a single day shoot, I use a leather ONA camera bag — it’s classic, rugged, lasts forever and heirloom quality.” With any bag, Burk’s biggest piece of advice is to always insure your gear, because you never know what will happen.
Peak Design 45L Travel Backpack
Peak design 30l travel backpack, ona bowery camera bag, the light-and-fast kit.
The most frequent question I get from amateur shooters, especially those who speak the love language of ISO and aperture, is about the camera and lens combination I trust the most. If I’m traveling light on a one-man show, what do I bring? Does it change for locations, jobs or types of jobs?
Gall’s advice is to not overthink the brand and instead focus on the quality of the lens. “I’ve shot with all the major camera brands and what I’ve learned is that you’ll most likely end up with a great picture if you have decent glass.” On run-and-gun jobs her go-to is a Fujifilm XT5 with a 18-55mm f/2.8 lens because it is small, light and the color is incredible. Sometimes she’ll add a Yashica t4 35mm film camera for behind the scenes shots and a DJI Mini 3 Pro to complete the story from the air. “In the water, I sometimes just use a GoPro 11 . GoPro has come a long way and is sharp right out of the camera.”
Fujifilm XT5
Dji mini 3 pro.
Wells recommends what many of us insiders call the workhorse — a Canon R5 mirrorless camera with an RF 24-70mm f2.8 lens . This pair will get you the majority of the shots that clients are looking for, and is reliable day in and day out. “In an ideal world I mix in other lenses for unique perspectives, but nothing beats the versatility and simplicity of this combo for me.”
Canon R5 Mirrorless Camera
Rf 24-70mm f2.8 lens.
Burk isn’t as much of a minimalist, saying “When it comes to gear, I try to bring as much as possible, within reason. I try to use every lens with me to capture the same subject, creating unique perspectives.” He often carries the holy trinity — 16-35mm, 24-70mm and 70-200mm — a 2x extender, and a 50mm prime, for compression and sharpness. He suggests the Packup App when organizing all your gear before a trip, to make sure you have everything. “It almost always catches something I’ve missed — redundancy is key.”
International Travel & Protecting Camera Gear
Shooting for commercial clients gets harder the farther you get from home. The always present balance of weight versus flexibility is magnified with complex travel, going further off the beaten path, charging batteries, weather and other elements and border crossings with different regulations. These factors play into the decisions of what gear to bring — and are often learned the hard way.
As a hard and fast rule, Wells will bring a 1510 Pelican Case when flying internationally. “It’s bomb proof, fits in overhead bins, and to be honest, I use it a lot as a stool when I’m tired. It goes everywhere with me and because of it I’ve never had an issue with keeping gear safe.” The case allows him to shoot a mixture of digital and analog cameras, as well as other tools like fill flashes and drones. “The case keeps all the gear organized, protected, and dry. I keep a silica gel pack in there too, to help with moisture.”
1510 Pelican Case
Silica gel pack.
The little things often make a big difference sometimes. Burk suggests colored tape to hide name brands, making them look cheaper and not as eye-catching, reducing the chances your camera gear gets stolen. “For film, I always hand check at airport security. I place everything in a mesh bag and sometimes even leave a little candy as a thank you for not ruining my photos.” However, Gall says not all airports will allow you to hand check your film. As a backup for moments like this, she brings a Domke filmguard bag .
Domke Film Guard Bag
The further you go into the backcountry, the more likely you are to deal with adverse weather conditions. Gall suggests bringing just the necessities when shooting in the elements, to reduce the risk of damaging extra gear. “Salt water will destroy a camera quickly, so I keep a microfiber towel with me to immediately wipe my gear down. Anything waterproof gets a fresh water dunk as quickly as possible.”
Creative Tips For Travel Photos
No matter what gear you have, the most important thing is the story you’re telling, says Burk. “I don’t think the camera brand matters as much as most amateurs think. It’s how you’re conveying what’s in front of you. Try focusing on something unique, honing in on it, and capturing it in a way that makes the viewer feel like they are right there next to you.”
To do that, Wells says, look for symmetry, movement and small gestures. “Try dragging the shutter on a passing motorcycle or wait until a bird flies into the corner of the frame. It’s those details that push beyond good composition and bring an image to life. Once you master manual control, it’s just a matter of how playful you can be.”
Even for professional photographers, it’s important to stay humble. Gall says that there are so many incredible photographers out there, it’s nearly impossible to get a “better” shot than what’s already been created. “However, no one will see something quite the same way you do, so take a moment to really look around and notice what someone else might not. Think like a writer or filmmaker and notice characters, settings, moments of humor or emotion. If all else fails, create layers in a photo by shooting through flowers or tall grasses, or shooting through windows or door frames to create some mystery.”
More Like This
This article was featured in the InsideHook newsletter. Sign up now .
The post Three Pro Photographers Share Gear Tips for Shooting on the Go appeared first on InsideHook .

COMMENTS
Step 7: Sell Your Travel Images in a Physical Format. You might be the kind of travel photographer who is not into the digital world. There is still a market for making money and a living from travel photography. One way to do this is to create prints of your images and sell them through specific art websites.
Step 3 - Learn Travel Photography. Step 4 - Get Inspired By Other Travel Photographers. Step 5 - Develop Your Own Style. Step 6 - Produce Content, Build An Effective Portfolio. Step 7 - Participate in Travel Photography Internships. Step 8 - Create a Logo. Step 9 - Build a Website.
Whether you've always wanted to be one of those photographers who only ever shoots on full manual mode or you've been hoping to add sports photography to your travel routine, now's the time to start working on those skills. ... I've tried to cover travel photography from nose to tail in this blog, but I'm sure I left a few things out ...
1. Go the extra mile. Life as a travel photographer often means getting out of bed (if there is a bed) when it's dark and cold. I've gone out taking photos while wiped out by illness or after getting no sleep on the wooden floor of a hut. There have been long trudges through snow, sand and swamp, and exhausting journeys on dusty tracks.
Here are seven steps you can follow to help you become a travel photographer: 1. Establish goals. A helpful first step toward becoming a travel photographer is to set goals that help you create a business model you can sustain. Try asking yourself questions about why you've chosen this career and what steps you plan to take to achieve your goals.
You're going to have to spend at least 30 minutes every day uploading and interacting with your followers if you want to become a travel photographer. More if you can. Instagram is your online portfolio these days. So put effort into it and make it look professional (no selfies or pictures of your breakfast!).
Read below to find information on the following steps to starting a career as a travel photographer: - Setting Goals. - Learn Photography. - Create a Niche Style. - Build a Portfolio. - Create a Website. - Finding Clients. - Getting Published. - Build Your Social Media Presence.
Depends on the place but I always do my research and do google image searches, look at online resources like 500px, other travel photographer sites, travel magazines, and ask colleagues. I'm looking for cool buildings and scenes, unique interiors, unique vantage points and ways to get to them. Once you get to your location, scout it out.
1. Plan ahead. "Do your research and get familiar with your own equipment before you travel…Get ahead of the game, pre-visualise and make a plan. When I go to a place that I'm not familiar ...
You can always partner up with existing writers that you find and say, "Hey, I'd love to supplement your articles with my imagery.". Another way is to build up an online portfolio and have your own blog. It is really helpful because a lot of travel photography involves writing as well.
10: Seek out interesting places and situations. One of the great pleasures of travel photography is the travel itself. It's a job that can take you around the world, meeting people you'd rarely meet in any other walk of life, witnessing scenes and having adventures that are unforgettable.
Pack the essential photo equipment. Don't forget to pack the charger for your camera, and an extra battery! Also, you'll probably need an adapter if you're traveling abroad, so don't forget that, either. It's also a good idea to always bring extra memory cards.
6. Don't Overbook Yourself. Such as with traveling in general, you don't want to overbook yourself as a travel photographer. Give yourself extra time in locations where you know you want to get great shots, and always account for lighting fluctuations, weather situations, and the timing of sunrise and sunset. 7.
A simple 4-step process on how to become a travel photographer. I decided to put together a blueprint or guide to help people who want to get involved in travel photography but do not know where to start. I used a similar approach when I first started and it has proven successful over the years. First and foremost, please do not start your ...
Stay updated on latest trends in travel photography, attend workshops or webinars, connect with fellow photographers - there are countless ways to keep growing as a travel photographer. Remember: The key is not to become complacent. There's always something new to learn, some technique to master. As they say, the only constant in life is ...
1.I've always wanted to be a travel photographer and take pictures of exotic places.. 2.None of us were sure which direction to go in, so we got out the map.. 3.Since I was here five years ago. Delhi has changed so much that it's practically unrecognizable.. 4.Once we got to the station, I quickly looked through the timetable to see when the next train was.
Build Additional Skills: As a freelance photographer, you'll be in charge of much more than just taking photos - you'll need to manage finances, records, meetings, itineraries, and much more. As you progress in the field, you'll find that you're not only better equipped at shooting but managing life in general.
As travel photographers, we always get so caught up with trying to always get the best photo possible." ... I'm a professional travel photographer, and I've been living the digital nomad lifestyle since 2016. ... Hi there! I'm Charlie Gardiner. I am a travel photographer, full-time digital nomad, and photography gear geek. I want to help ...
9. Experiment with Shutter Speed. This is something I've enjoyed a lot recently, particularly producing travel photos with a more artistic result. Shutter speed is related to the time your shutter is open, exposing available light on to the camera sensor. The longer a shutter is left open, the more light is let in.
Being a travel photographer is much more than taking photos. Here are the skills that you need as a travel photographer, and they are not all photogrpahy related. ... 2 Interested in travel. I always say that you take better photos of things if you are interested in them. I love taking photos of buildings, nice places, and buildings in nice ...
In this interview we'll be talking with Drew about his travel experiences in Southeast Asia, learning how to prepare and pack for an extended photography trip, and getting some great tips and advice from him on how to capture memorable travel photos. 1. Tell us about how your photography journey began. It's difficult to look back and pin ...
I've always wanted to be a travel .....(photograph) and take picture of exotic places. ... I've got a cousin at university who is studying.....(tour) and hopes to open a hotel. 6. As we got closer to the Amazonian village, the.....(inhabit) came out to meet us. ... I've always wanted to be a travel .....photographer.....(photograph) and take ...
Gall's advice is to not overthink the brand and instead focus on the quality of the lens. "I've shot with all the major camera brands and what I've learned is that you'll most likely end ...